Magic Cake
This post may contain affiliate links. Please read my disclosure policy.
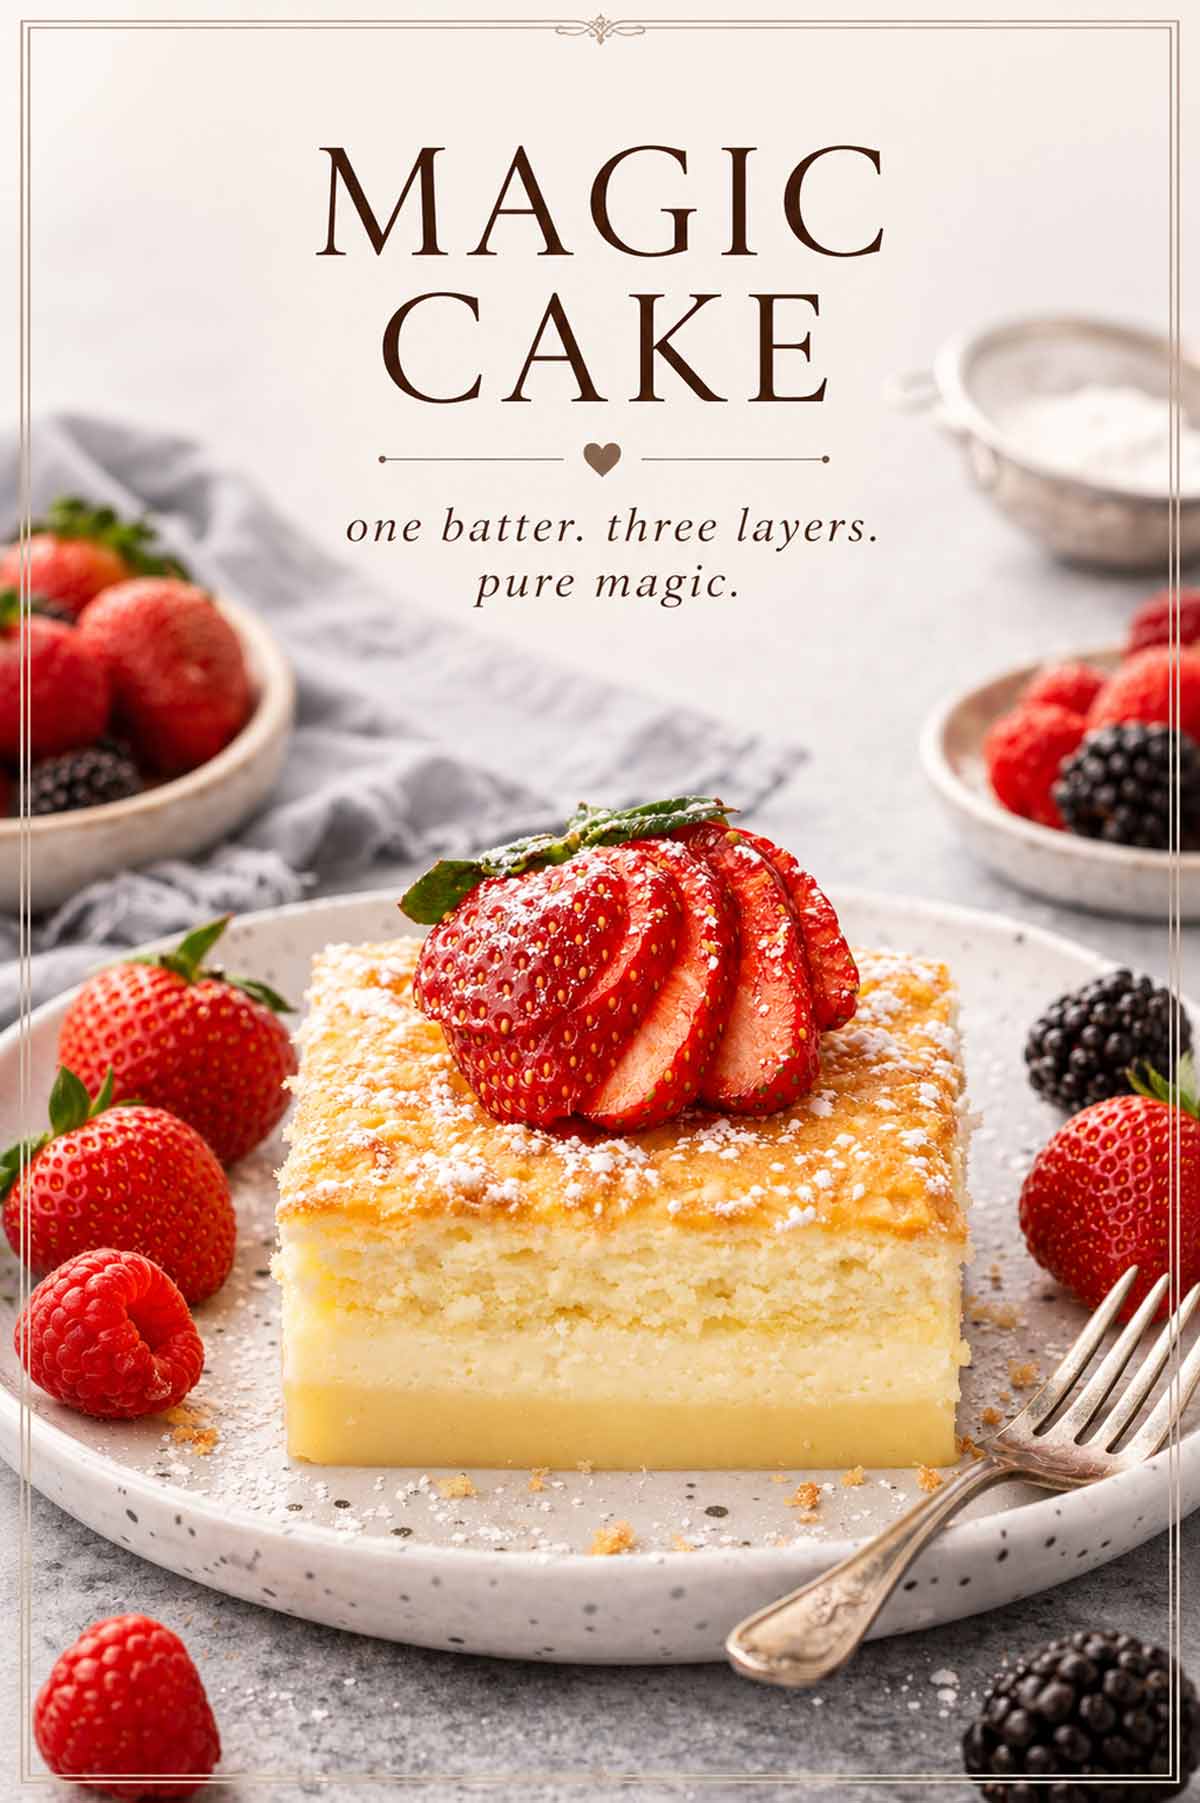
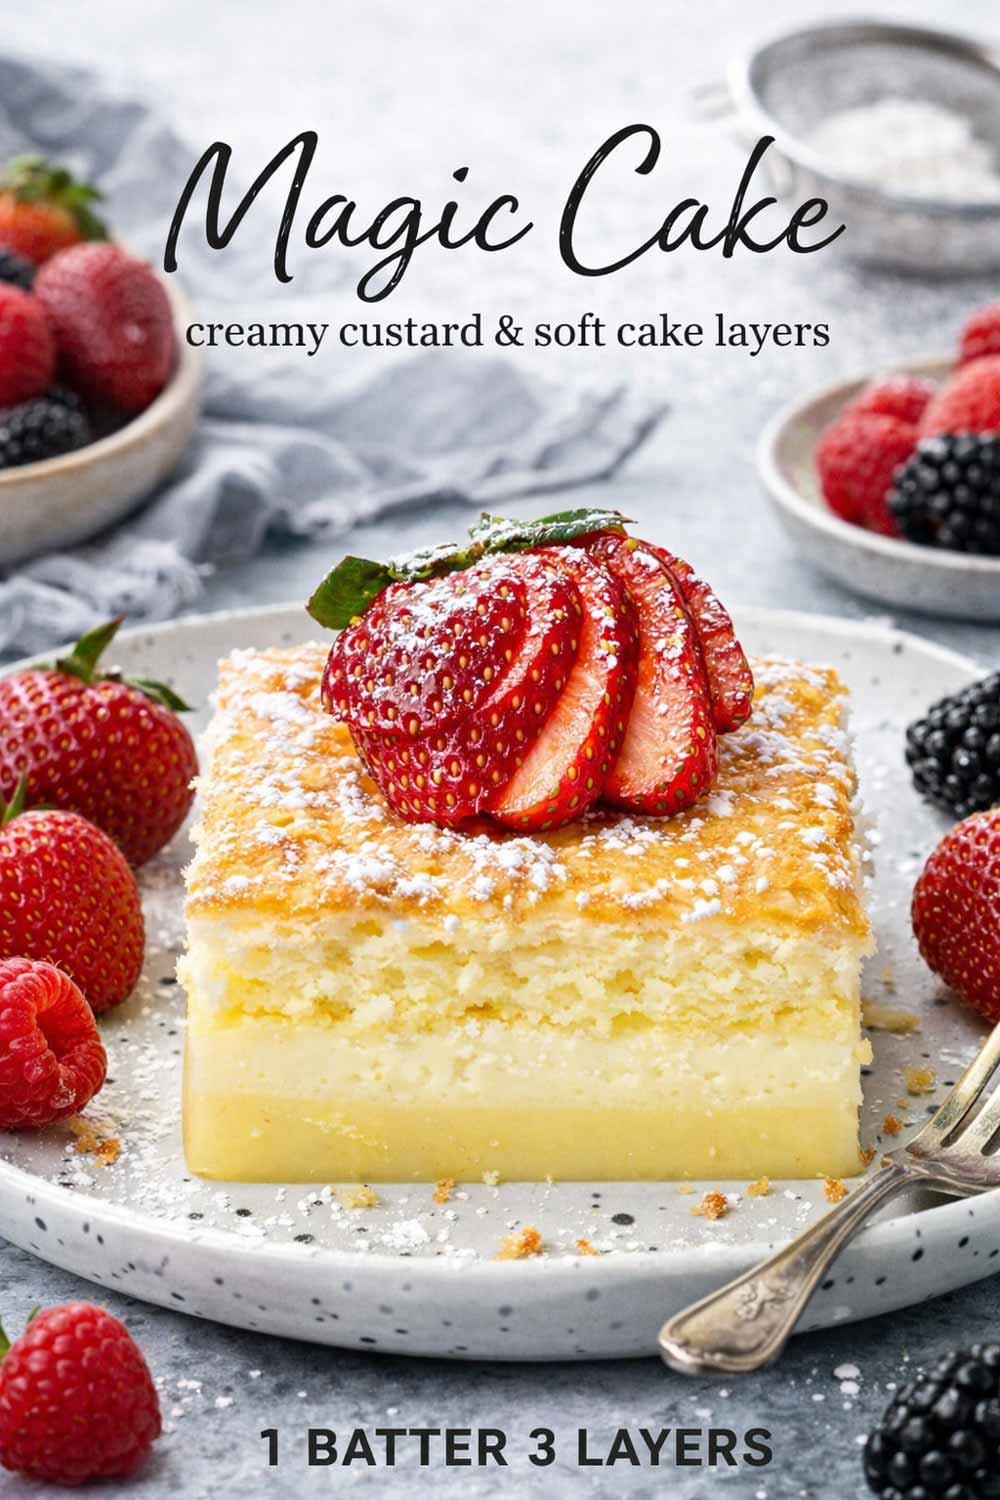
1 batter. 3 layers. Zero explanation for how it works. I first introduced this Magic Cake recipe to the internet in 2013 and I am still not completely over it.
The Original Magic Cake Recipe
I first shared Magic Cake on JoCooks in 2013 and it went viral before viral was even a word people used casually. Hundreds of thousands of shares, comments from people all over the world, home bakers who could not believe what came out of their oven. I still get messages about it today.
The recipe comes from Romania, where it is called prăjitură inteligentă, which translates to intelligent cake or smart cake. I grew up knowing this cake. When I shared it in English it was the first time most people had ever seen it, and the reaction was everything.
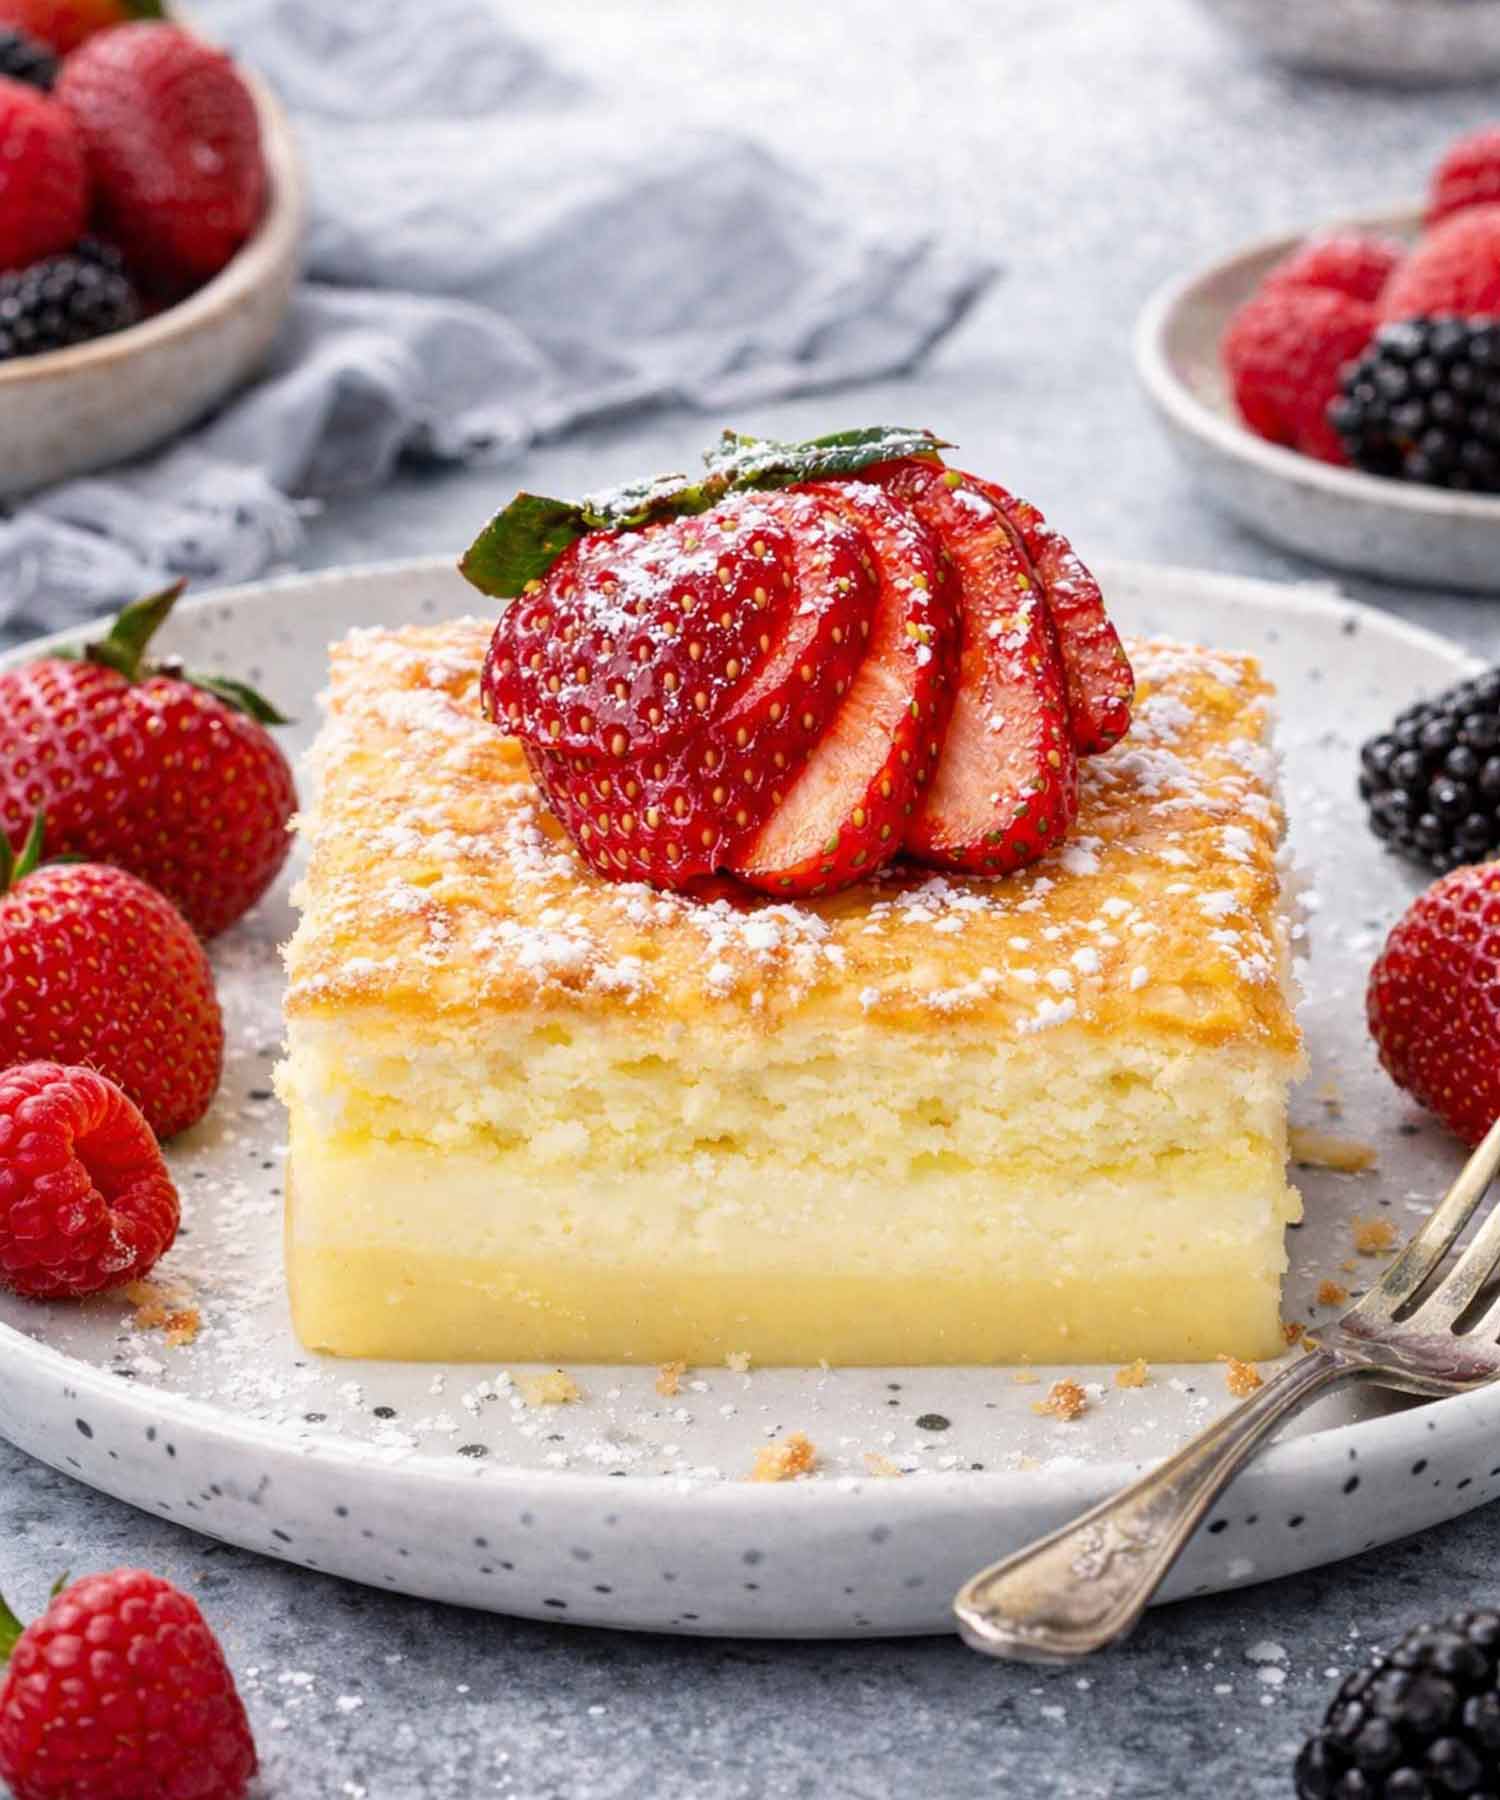
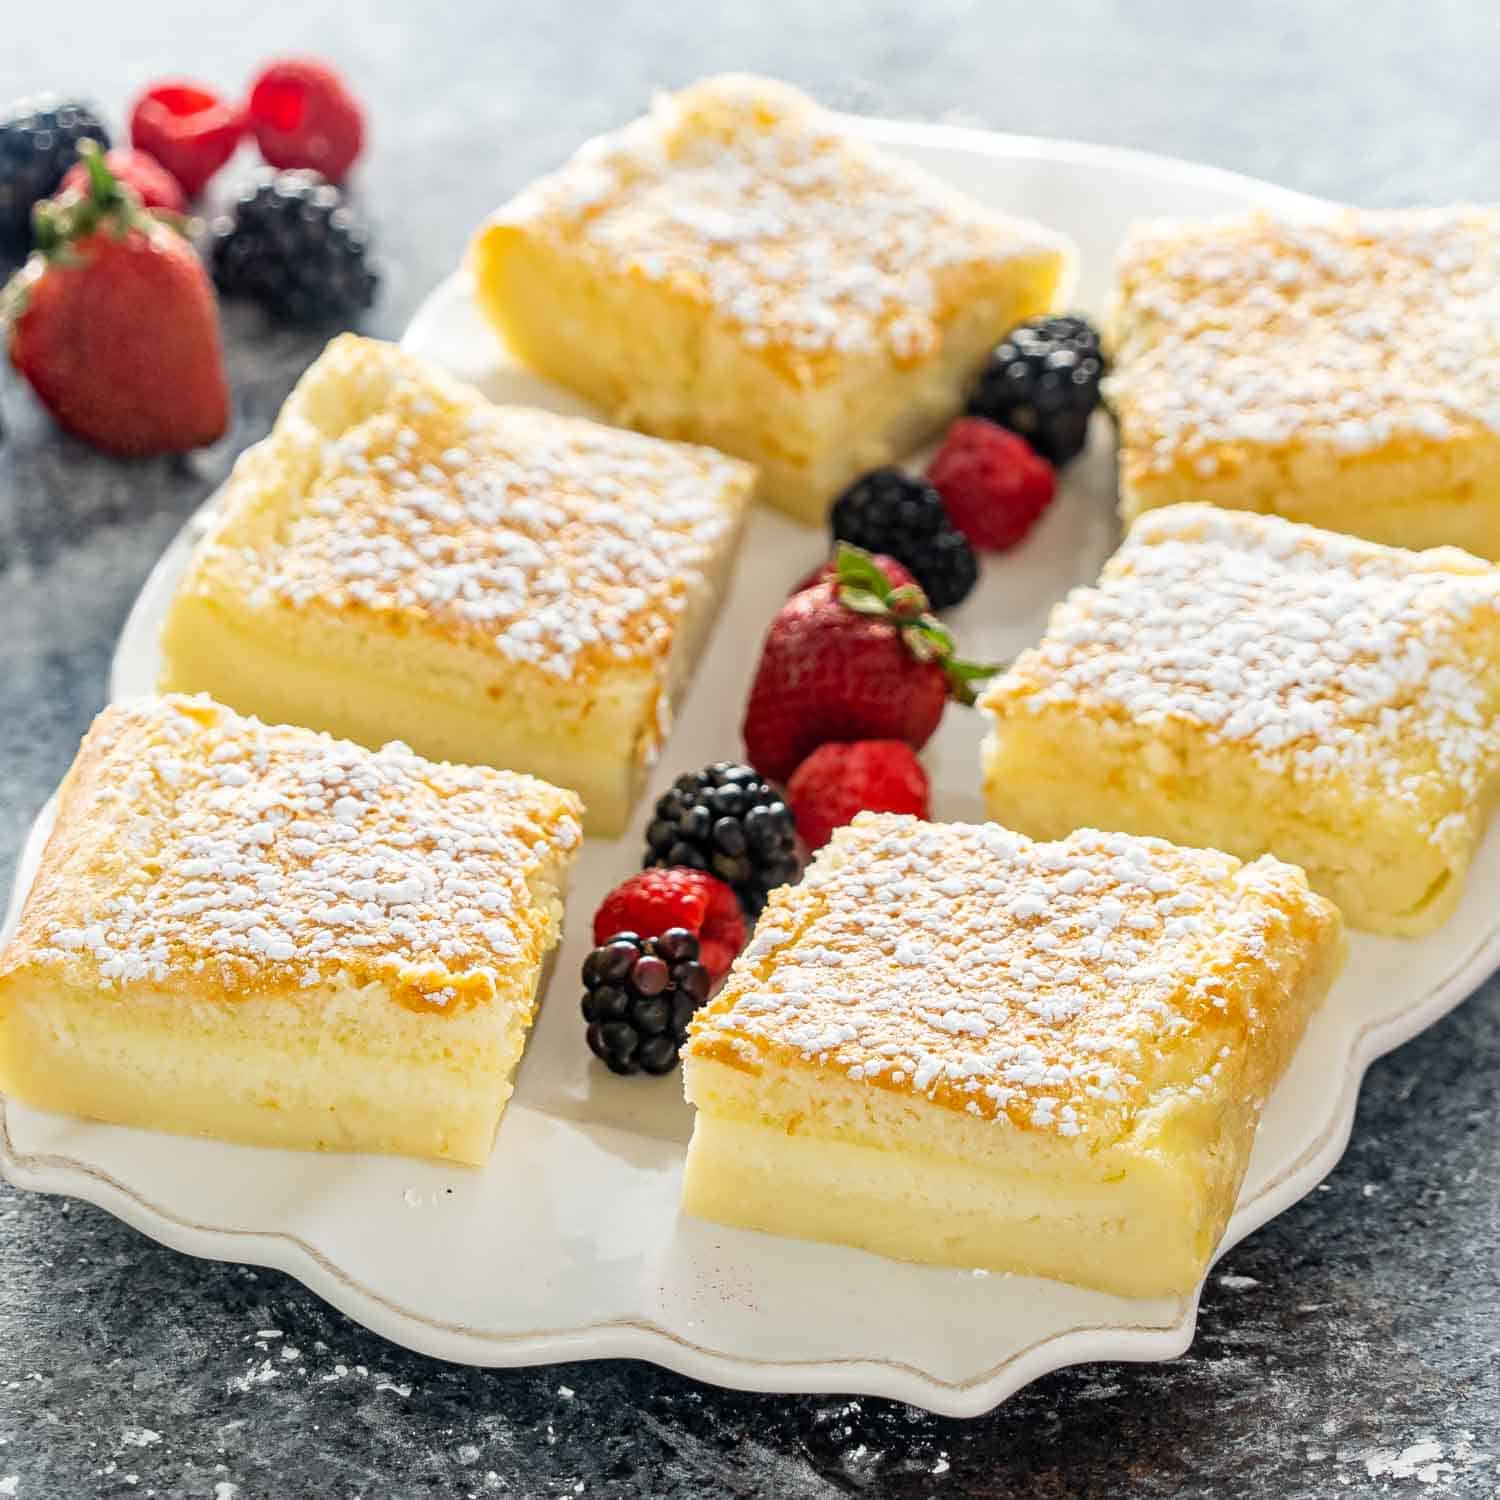
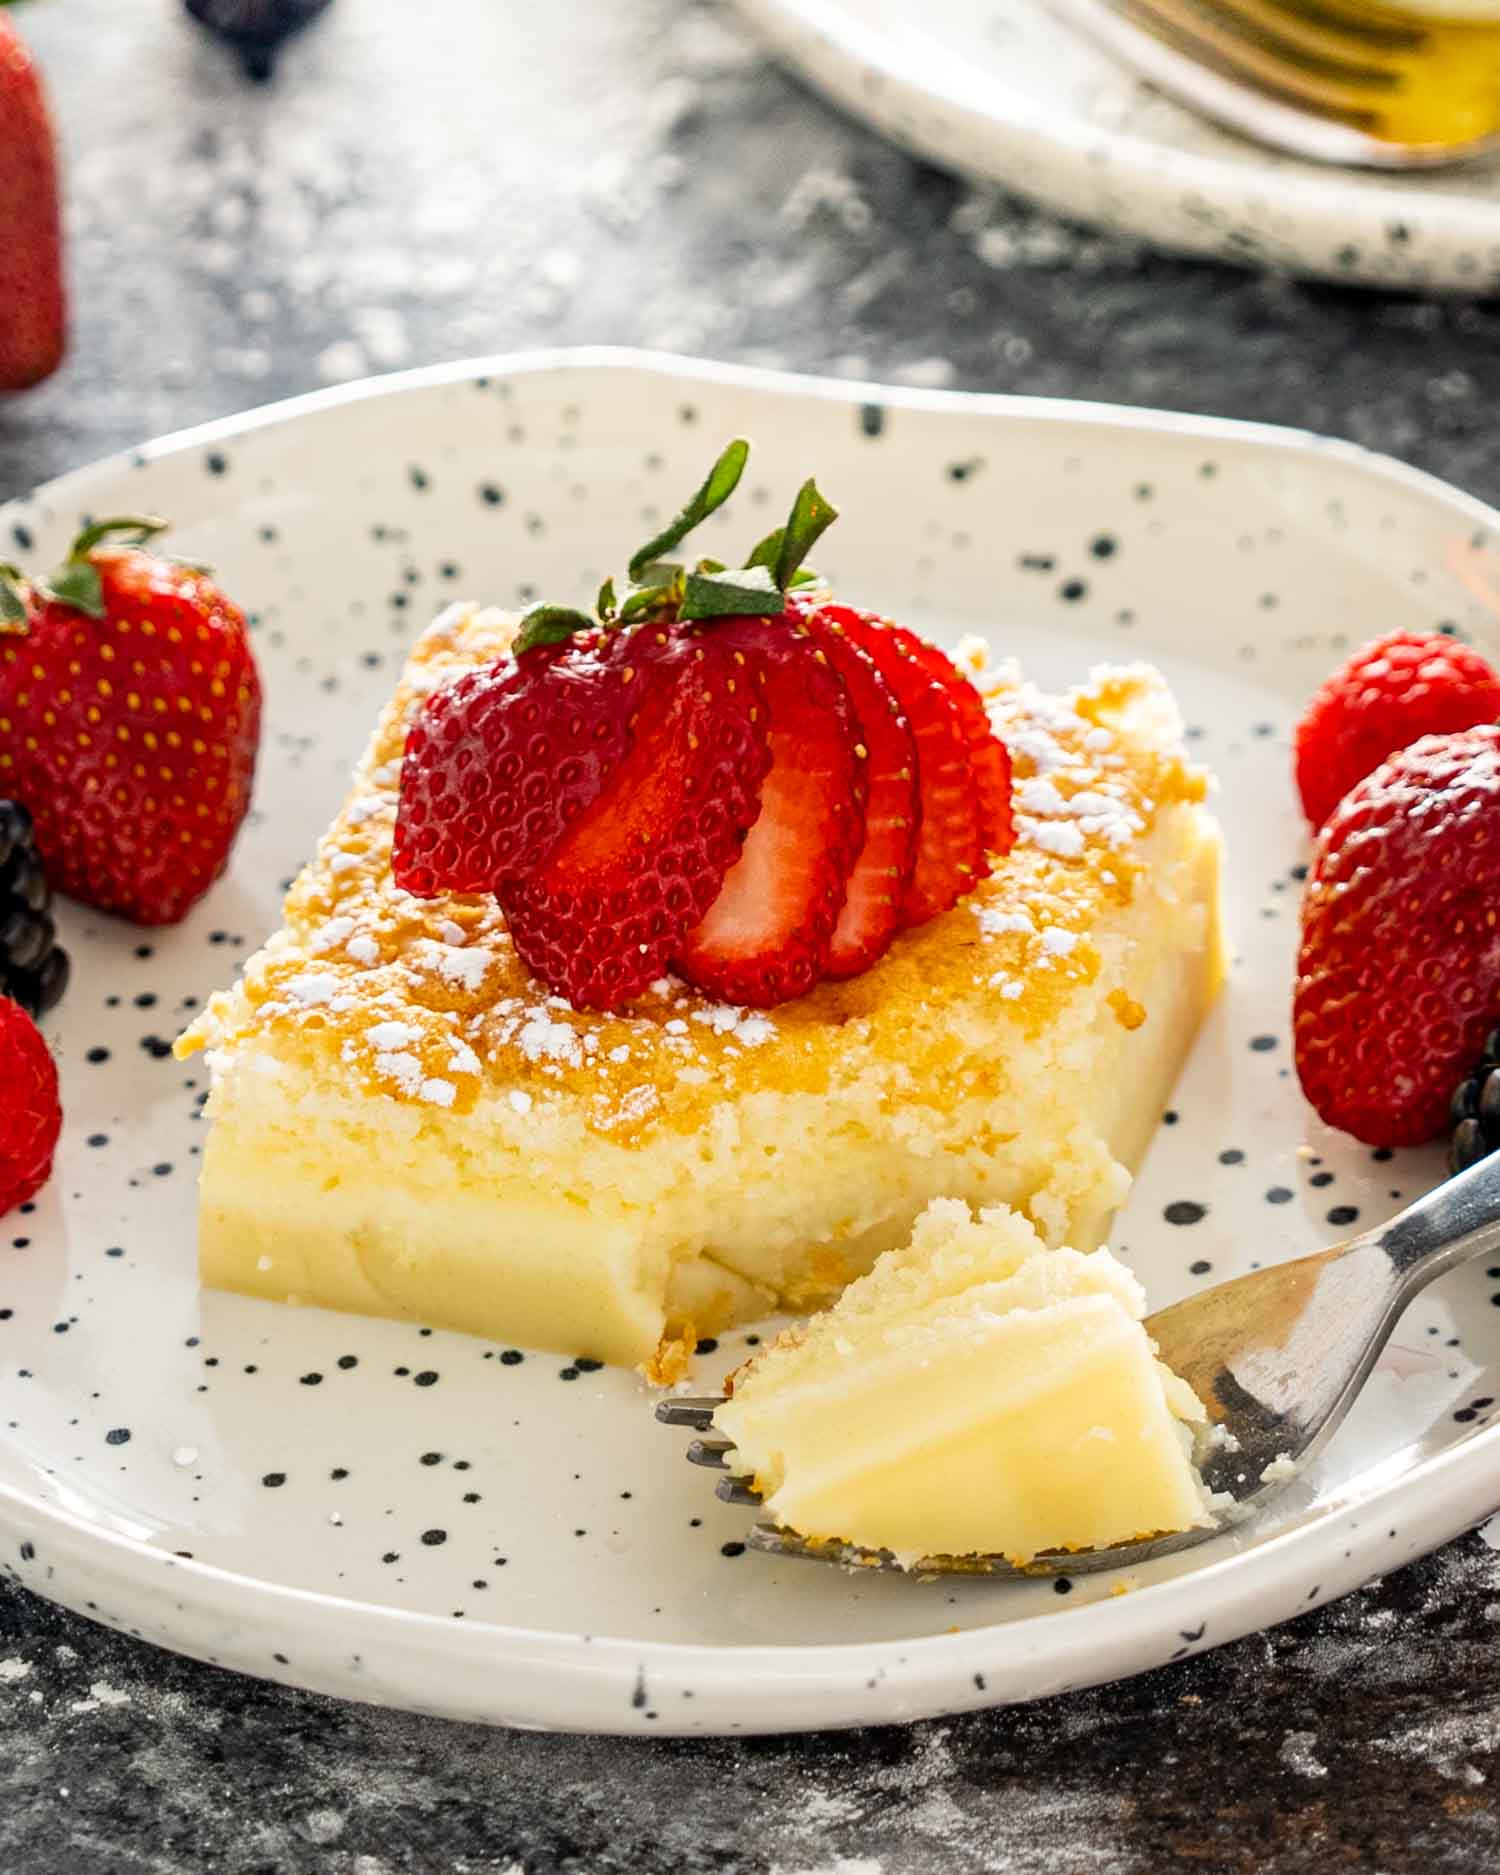
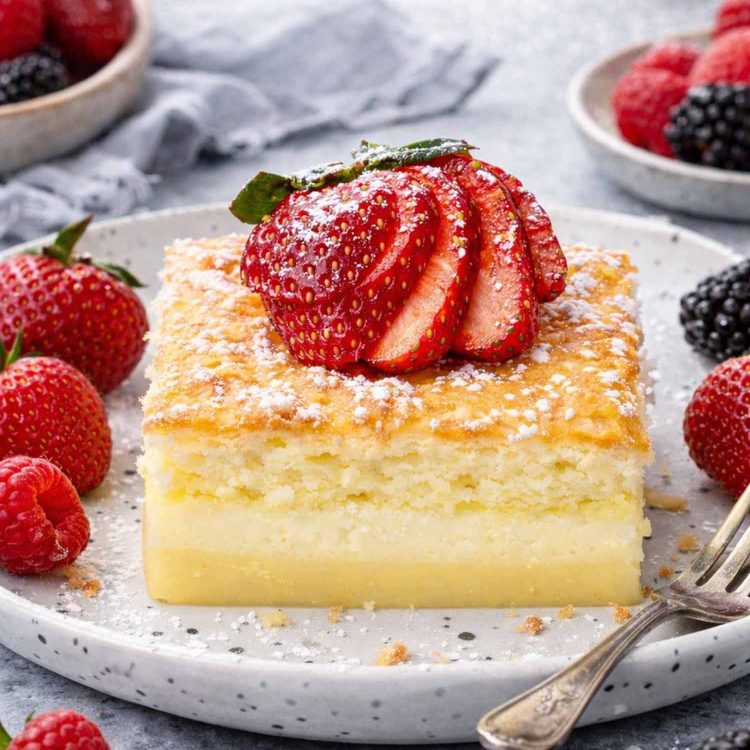
The concept is this: you make one thin, almost watery batter, pour it into a pan, and bake it. When it comes out it has separated into 3 completely distinct layers on its own. A dense base, a creamy custard middle, and a light sponge top. You did not create 3 batters. You did not do anything special. The cake figured it out.
Over 680 people have rated this recipe. I have made it hundreds of times. And I am still going to explain exactly why it works, because I have seen too many comments from people whose cake did not separate and I know exactly why it did not.
Other Flavors of Magic Cake
Over the years I have made Magic Cake in every flavor I could think of. The original vanilla version is still the one I make most but the Chocolate Magic Cake, Lemon Magic Cake, Butterscotch Magic Cake, and Pumpkin Magic Cake have all found their own devoted fans. The technique is identical for every version. Once you understand how the layers form you can take this cake anywhere you want.

How the 3 Layers Actually Form
This is the part nobody else explains properly so we are going to do it right.
The batter is made with egg yolks, sugar, butter, flour, and milk. When the egg whites are beaten to stiff peaks and folded in incompletely, meaning you still see white streaks, something interesting happens in the oven.
The batter is thin and the components have very different densities. The heavier flour and yolk mixture sinks to the bottom. The lighter egg white foam floats to the top. The middle layer forms from the components that are neither heavy enough to sink nor light enough to float, a mixture of beaten yolks, sugar, and milk that sets into a creamy custard as it bakes.
The 3 layers that result are not magic. They are physics. But they feel like magic every single time.
- Dense base: The heaviest components sink and set into a firm, slightly dense bottom layer. Similar to a shortbread in texture but not crumbly in any way.
- Custard middle: The most prized layer. Rich, creamy, and wobbles slightly when cold. This is what people come back for.
- Sponge Top: The egg white foam rises and sets into a light, airy sponge. Golden on top, soft underneath.
Key Ingredients You Need
- Eggs, separated. 4 large eggs at room temperature. Room temperature is not optional, cold egg whites do not whip to stiff peaks properly and the whole layer separation depends on those stiff peaks. Pull them out of the fridge an hour before you bake.
- Lukewarm milk. 2 cups, warmed to around 100°F. Not hot, not cold. Cold milk shocks the batter and affects how the layers separate. Warm it gently on the stove or in the microwave for 30 seconds.
- Butter, melted and slightly cooled. 8 tablespoons of unsalted butter. Melt it and let it cool slightly before adding it to the egg yolks. Hot butter will cook the yolks and we will end up with something unpleasant.
- All purpose flour. Three quarters of a cup. Measured by spooning into the cup and leveling off, not scooping. Too much flour makes the base layer too thick and dense and the layers will not separate cleanly.
- Sugar. Three quarters of a cup of white granulated sugar. It goes into the egg yolks and helps create the custard middle layer.
The Most Important Thing In This Recipe
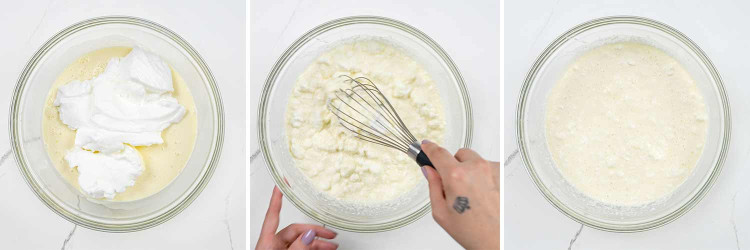
Do not fully mix the egg whites into the batter. Fold them in until about 90 percent combined and stop. You should still see white streaks floating at the top of the batter when you pour it into the pan. Those streaks become the sponge top layer. If you mix them in completely the batter will be uniform and the layers will not separate. This is the single step that determines whether the cake works or not.
Preheat the oven to 325°F and grease an 8×8 inch baking pan. Line it with parchment paper if you want clean edges when you cut it.
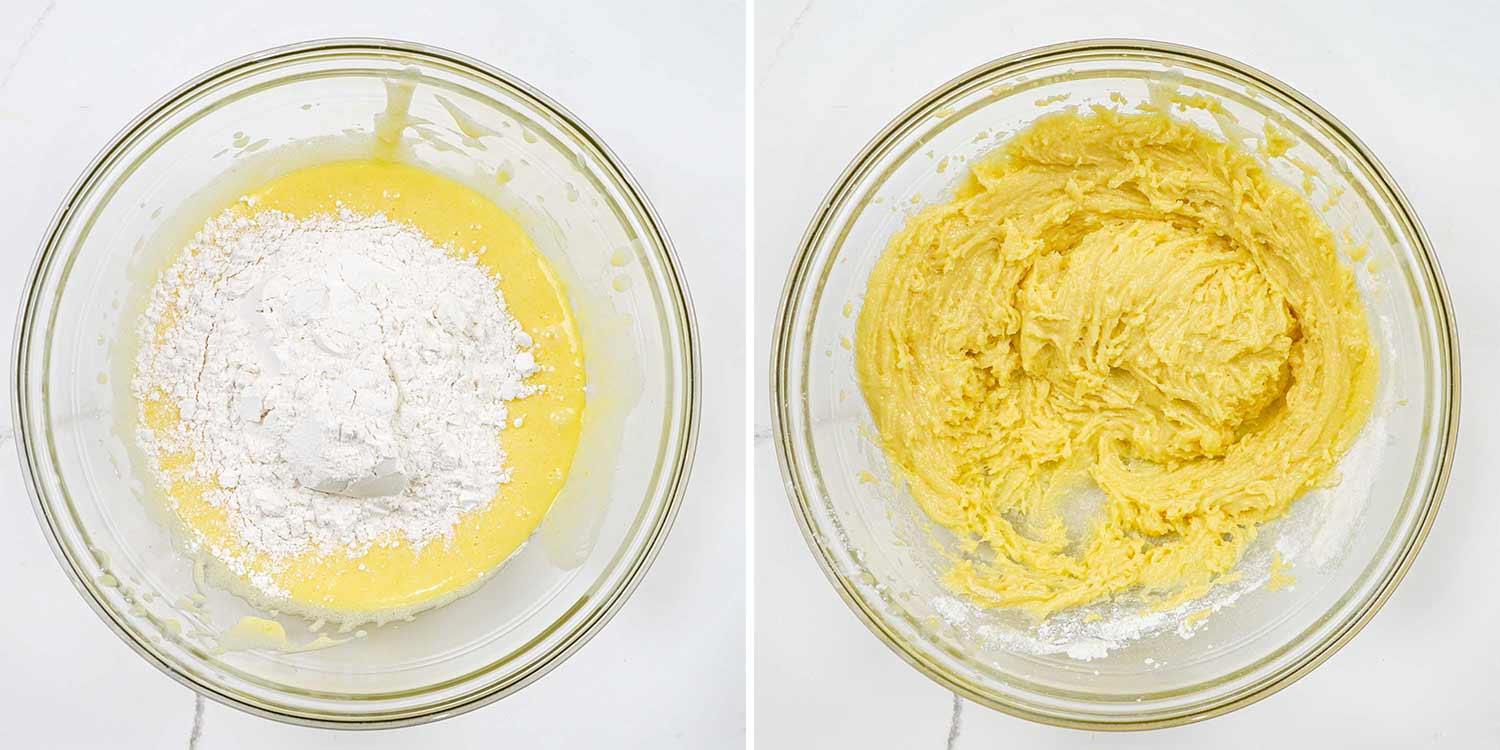
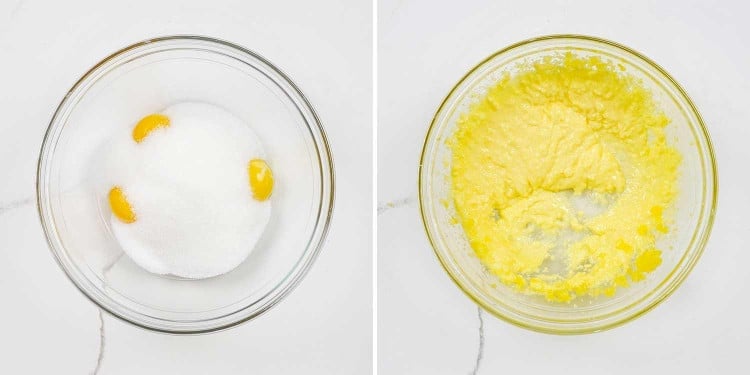
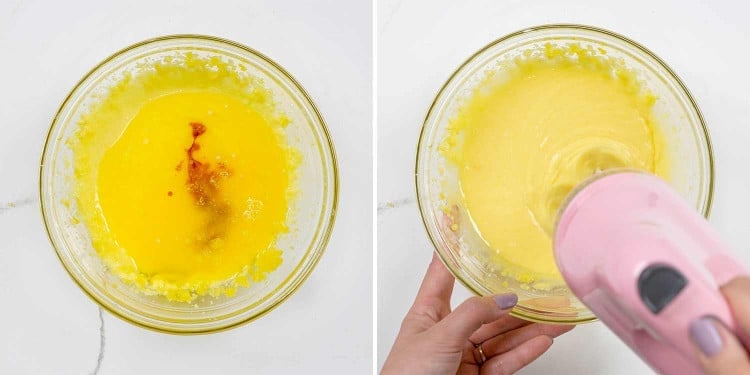
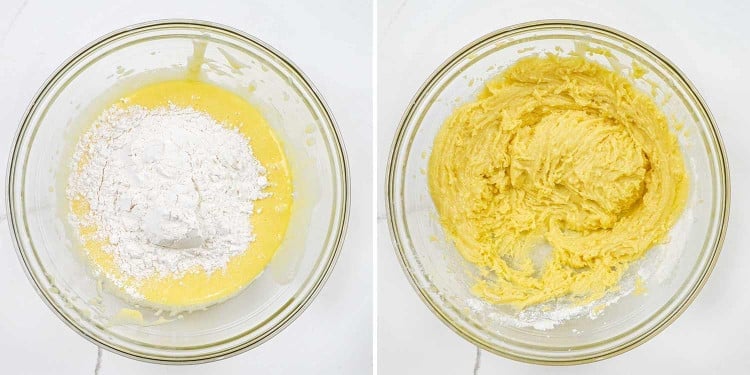
Separate the eggs. Beat the egg yolks with the sugar until light, pale, and fluffy. Add the melted cooled butter and vanilla extract and beat for another minute. Add the flour and mix until smooth.
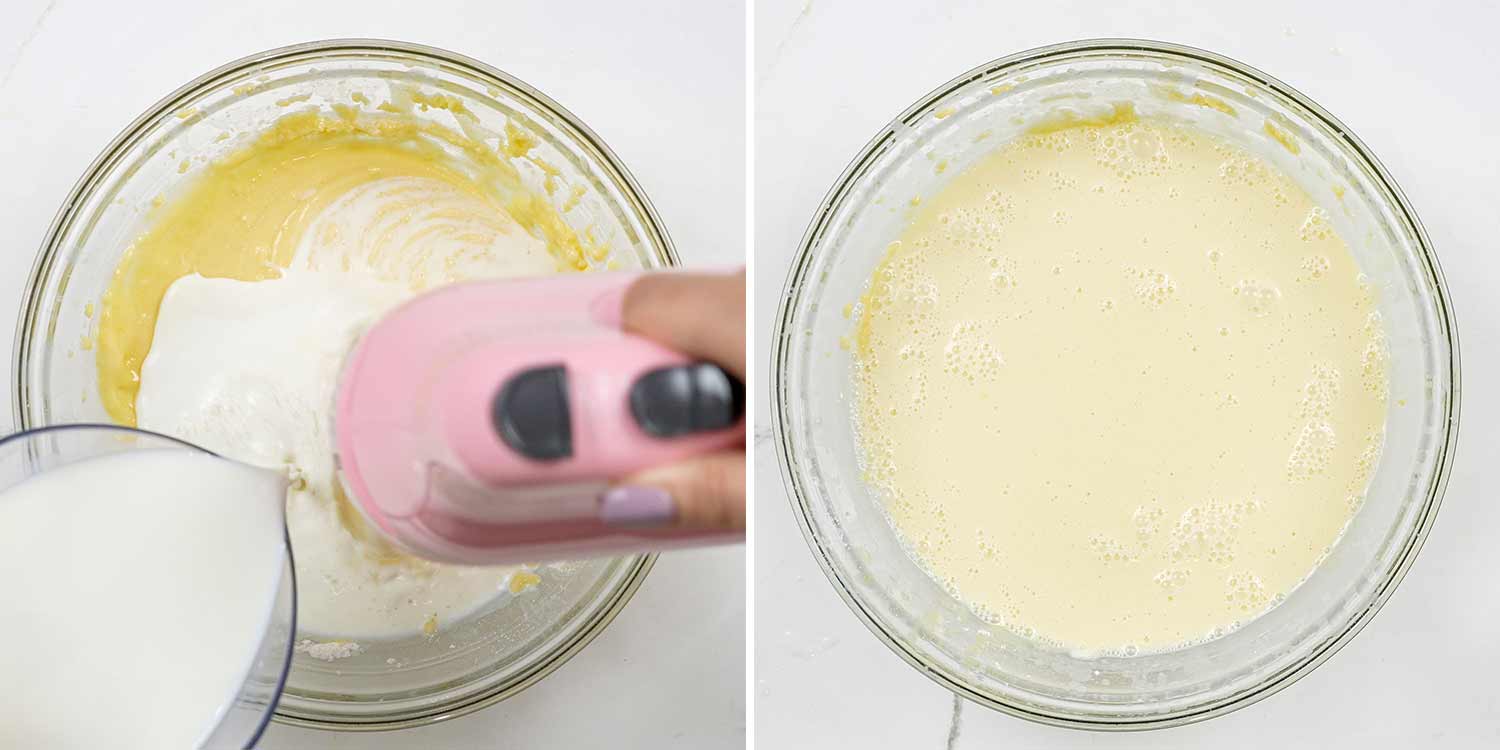
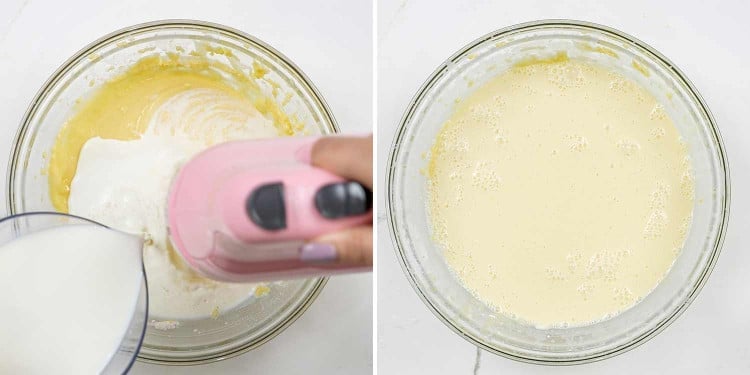
Slowly pour in the lukewarm milk while beating continuously. The batter will be very thin. This is correct. Do not worry. Trust the cake.
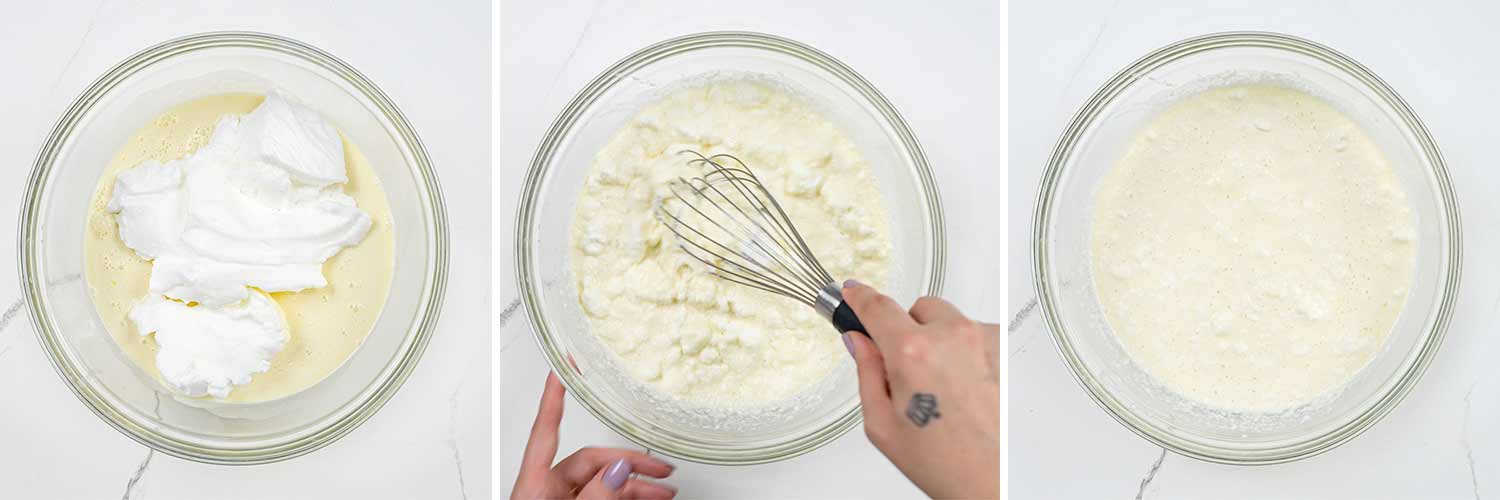
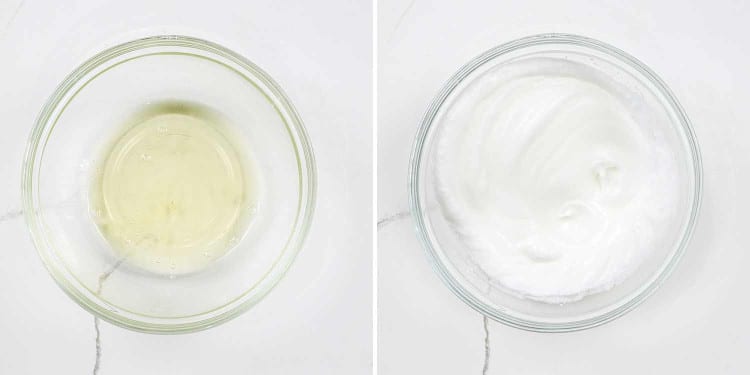
In a clean bowl with clean beaters, whip the egg whites to stiff peaks. They should hold their shape when you lift the beater and not slide around. If they are not getting there, add a pinch of cream of tartar and keep going.
Fold the egg whites into the batter gently with a rubber spatula. 3 or 5 large folds. Stop when you still see white streaks. Pour immediately into the prepared pan.
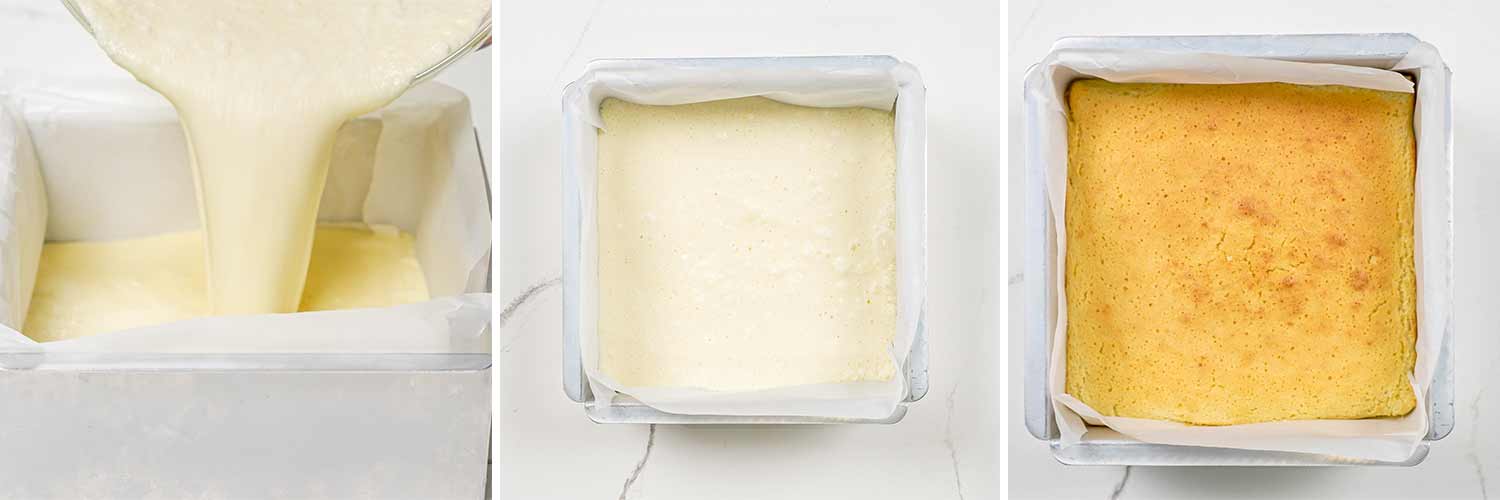
Bake for 40 to 70 minutes. Yes that is a wide range and yes it is accurate. Every oven is different. Start checking at 40 minutes. The cake is done when the top is lightly golden and the center jiggles very slightly but feels firm when you press it gently. It should not slosh.
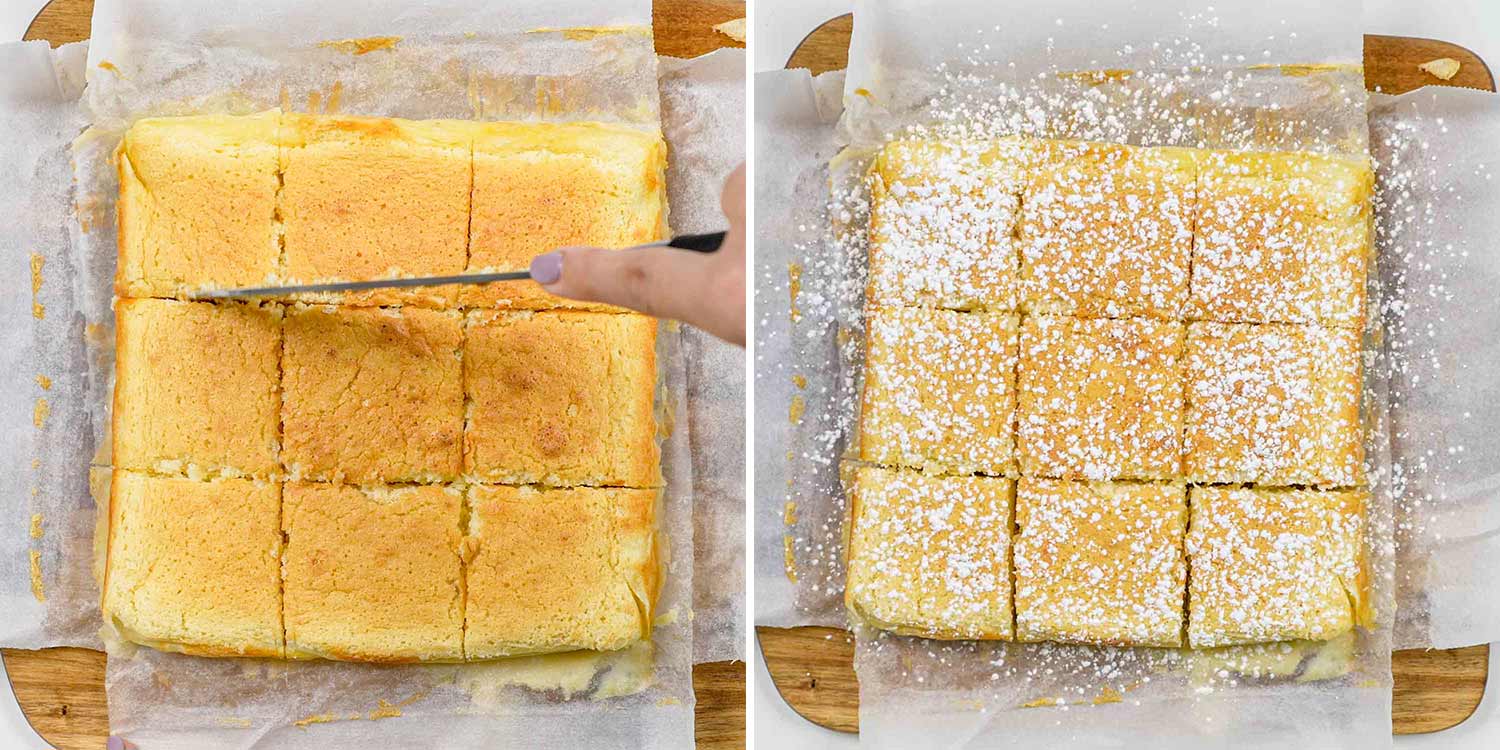
Cool completely in the pan before cutting. Completely. The layers need time to set and the custard in particular needs to firm up as it cools. Cutting it warm will give you a collapsed custard layer and a sad cake. Dust with powdered sugar and cut into squares.
Why Your Magic Cake Did Not Separate Into Layers
This is the question I have been asked more than any other in 12 years of making this cake. Here are every reason it happens and exactly how to fix it.
- The egg whites were mixed in too thoroughly: This is the number one cause. If the egg whites are fully incorporated the batter is uniform and has no density differences to separate into layers. You need to see white streaks in the batter when it goes into the pan. Fold gently, stop early, pour immediately.
- The egg whites did not reach stiff peaks: Soft or medium peaks do not have enough structure to float and form the top sponge layer. Beat until the whites hold a firm peak that does not droop. Make sure the bowl and beaters are completely clean and dry.
- The milk was too cold or too hot: Cold milk causes the butter to solidify in clumps in the batter which disrupts the layer formation. Hot milk starts cooking the egg yolks. Lukewarm, around 100°F, is the right temperature. Warm to the touch but comfortable on the wrist.
- The oven temperature was too high: 325°F is low for a reason. A hotter oven sets the batter too quickly before the layers have time to separate. If your oven runs hot use an oven thermometer to check the actual temperature. Many ovens run 25 to 50 degrees hotter than the dial suggests.
- The cake was underbaked or cut too soon: An underbaked cake will have a liquid center rather than a custard layer. Make sure the top is golden and the center is firm but with a slight jiggle. Then cool completely in the pan before cutting. The custard layer sets as it cools. Cutting it warm collapses everything.
Storing Magic Cake
Store covered in the refrigerator for up to 4 days. The cake actually tastes better on day two once the custard layer has fully set overnight. Do not freeze, the custard layer does not survive the freezer and the texture becomes grainy and separated when thawed.
Before You Begin! If you make this, please leave a review and rating letting us know how you liked this recipe! This helps our business thrive & continue providing free recipes.
Magic Cake
Video
Ingredients
- 4 eggs (at room temperature)
- ¾ cup sugar
- 8 tablespoons butter (unsalted and melted )
- 1 teaspoon vanilla extract
- ¾ cup all-purpose flour
- 2 cups milk (lukewarm)
- powdered sugar (for dusting)
Before You Begin! If you make this, please leave a review and rating letting us know how you liked this recipe! This helps our business thrive & continue providing free recipes.
Instructions
- Preheat oven to 325°F (160°C). Grease a 8 inch x 8 inch baking dish or line it with parchment paper so that it's easier to get the cake out.
- Separate the eggs and beat the egg yolks with the sugar until light and fluffy.

- Add butter and vanilla extract and continue beating for another minute or two until well incorporated.
- Add the flour and mix until the batter is smooth and well combined.
- Slowly start adding the milk and beat until everything is well mixed together.
- Add the egg whites to a mixer and mix until stiff peaks form.
- Gently fold the beaten egg whites into the batter until well combined. Another variation to folding in the egg whites would be to whisk them in to the cake batter, this is a lot faster and easier. Make sure you don't fold the egg whites in completely, you still want to see some of the white bits floating at the top.

- Pour batter into baking dish and transfer it to the preheated oven. Bake for 40 to 70 minutes or until the top is lightly golden. The baking time could vary greatly depending on the oven, so take a peek at around 40 minutes and see how it looks.
- Sprinkle some powdered sugar after cake has cooled. Cut it into squares and serve.


Equipment
Notes
- Do not fully mix in the egg whites. Fold them in until about 90 percent combined and stop. You should still see white streaks in the batter when it goes into the pan. Those streaks become the sponge top layer. If the egg whites are fully mixed in the batter is uniform and the layers will not form. This is the single step that determines whether the cake works or not. Fold gently, stop early, pour immediately.
- Use room temperature eggs and lukewarm milk. Cold egg whites will not whip to stiff peaks, which means no sponge layer. Cold milk causes the butter to solidify in the batter and disrupts the layer separation. Pull the eggs out an hour before baking and warm the milk to around 100°F before adding it. Both matter more than most people expect.
- Cool completely before cutting. The custard middle layer sets as the cake cools. Cutting it warm collapses the custard into a soft mess and the 3 layers disappear into each other. Give it a full hour at room temperature or refrigerate for 30 minutes. The cake is so much better cold anyway. The wait is worth it.
- The bake time varies widely. Anywhere from 40 to 70 minutes depending on the oven. Start checking at 40 minutes. The cake is done when the top is lightly golden and the center has only a very slight jiggle when the pan is shaken gently. It should feel firm to the touch, not liquid underneath. If in doubt, give it another 5 minutes and check again.
Nutrition Information
Notice: Nutrition is auto-calculated for your convenience. Where relevant, we recommend using your own nutrition calculations.
Frequently Asked Questions
Can we use dairy free milk?
Yes. Oat milk, almond milk, and soy milk all work. The custard layer may be slightly less rich but the layers will still form. Make sure whatever milk you use is warmed to lukewarm before adding it to the batter.
Can we use gluten free flour?
A 1:1 gluten free flour blend works well here. The texture of the base layer will be slightly different but the three layers will still form. Do not use almond flour or coconut flour as a direct substitute, the ratios are completely different.
Why does the batter look so thin?
Because it is supposed to be. The thin batter is what allows the layers to separate by density. A thick batter would set before anything had time to move. Trust the process and pour it in as is.
Can we make this in a round pan?
Yes. A 9 inch round pan works well. The layers will form the same way. The bake time may vary slightly so start checking at 40 minutes.
