Crescent Rolls
This post may contain affiliate links. Please read my disclosure policy.
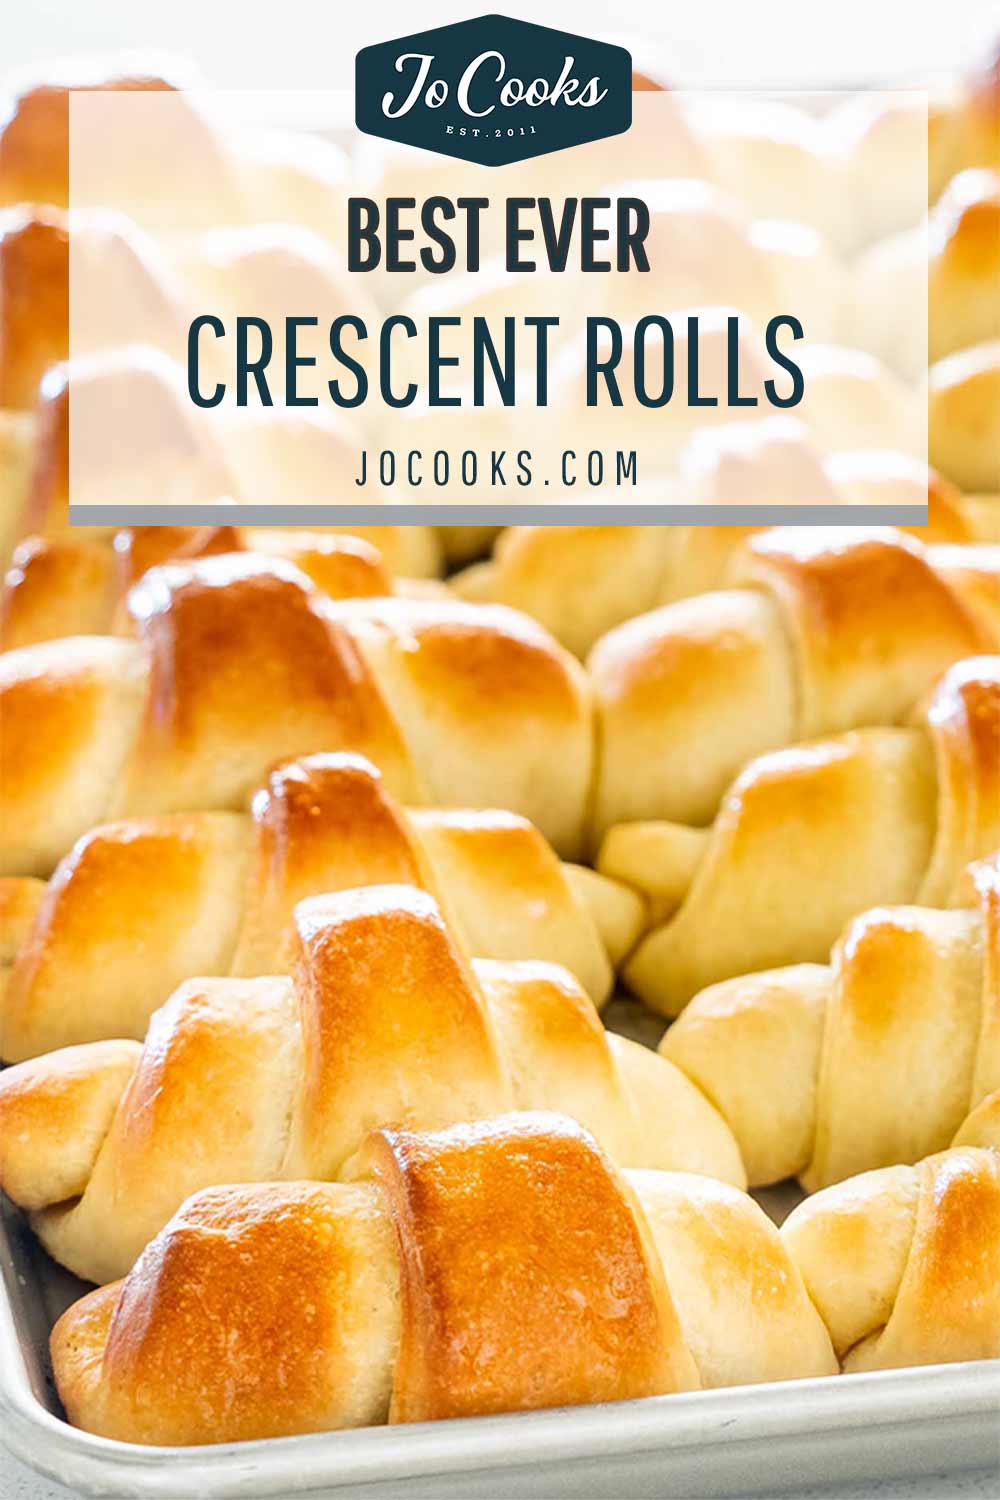
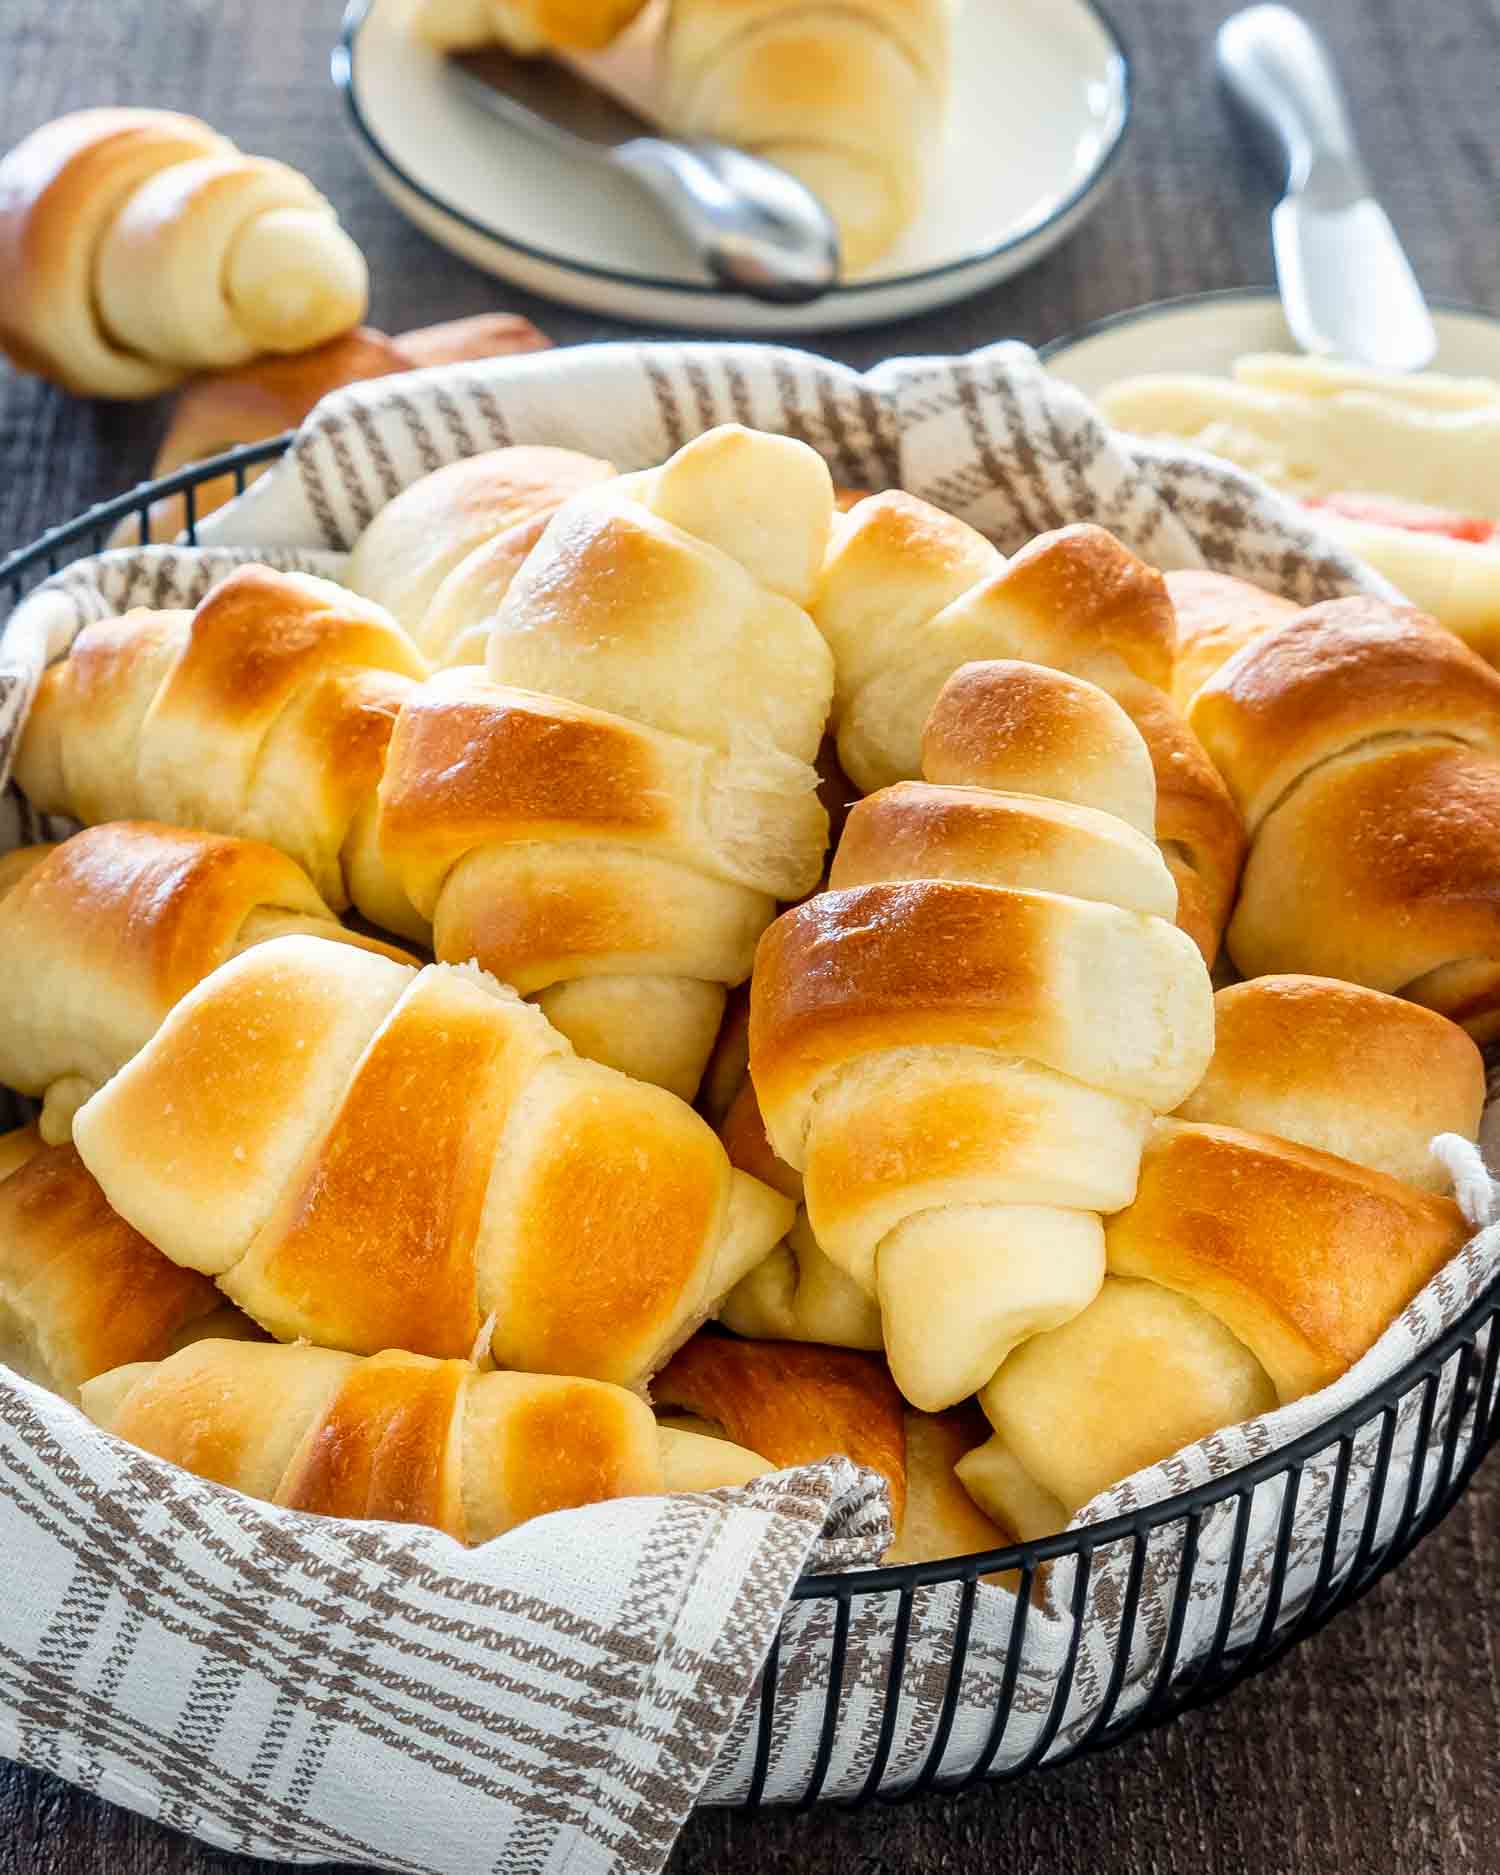
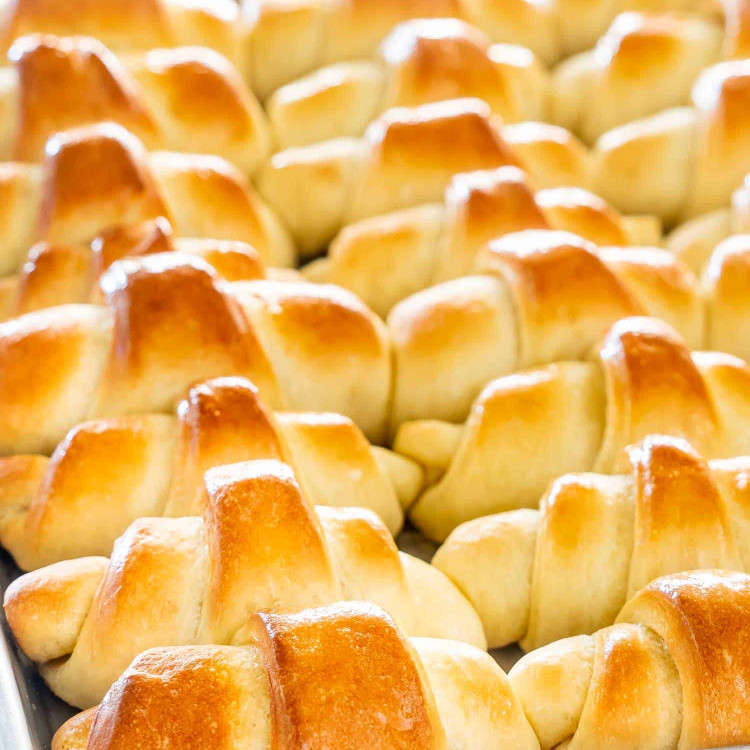
These Crescent Rolls are really the perfect dinner rolls. Soft, buttery, amazing flavor yet incredibly simple to make. There’s nothing better than fresh hot dinner rolls right out of your oven.
The Best Homemade Crescent Rolls Recipe
I’m a sucker for hot bread, hot buns, anything fresh coming out of the oven. I cannot resist a hot dinner roll, the smell alone drives me crazy. Does anyone else feel the same way, I can’t be the only one!
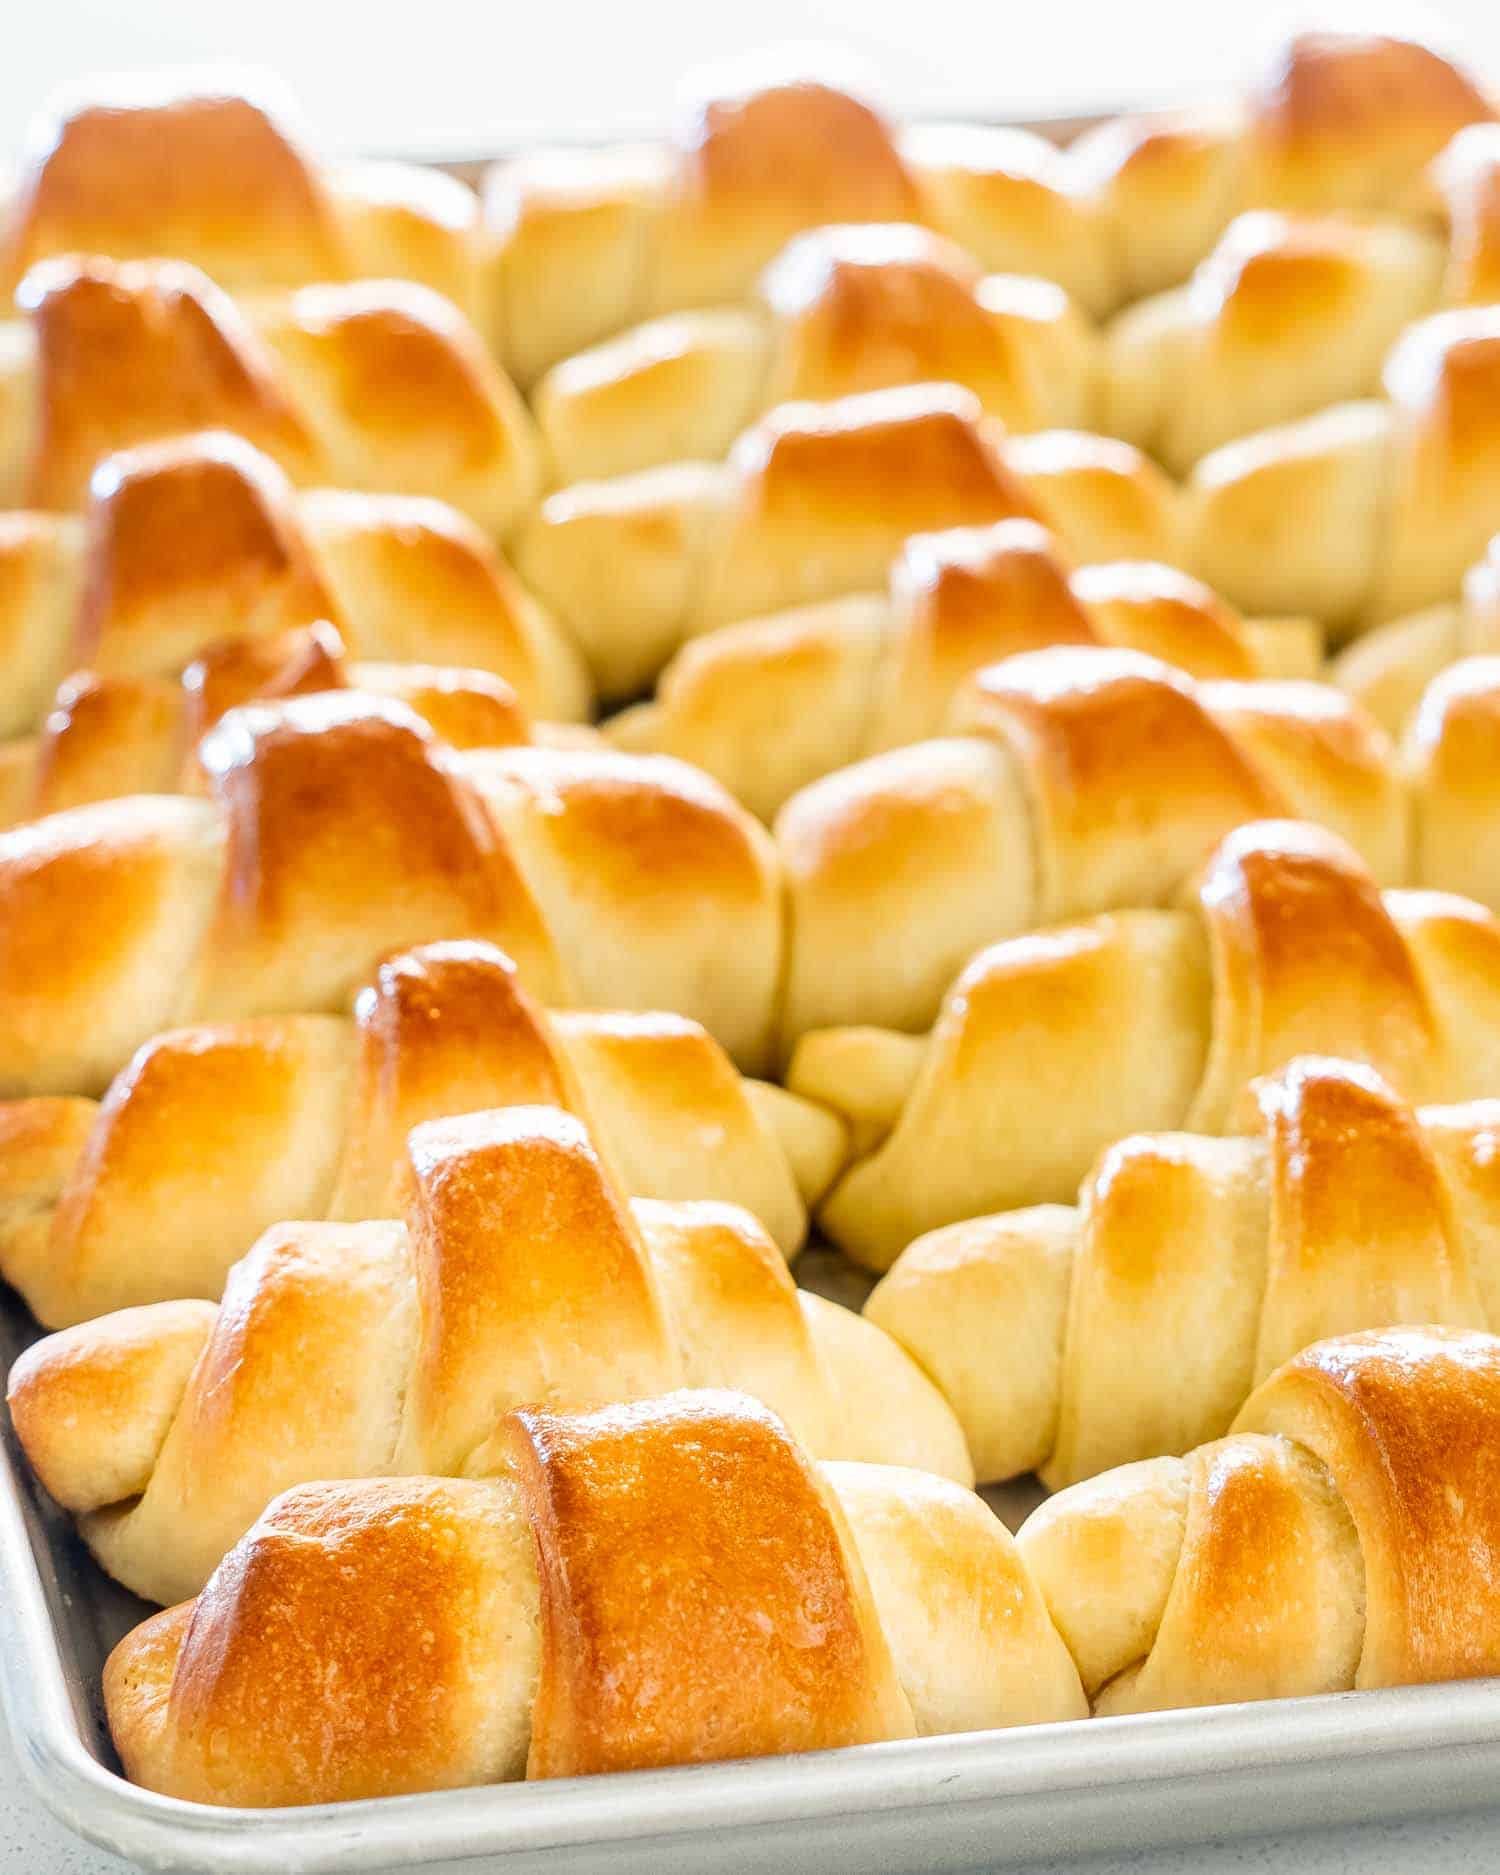
But let’s talk about these rolls because they are so flakey, buttery, soft, and luscious, they are the perfect side to serve alongside nearly any dinner you can think of. You can soak up any rich sauce, any tasty soup, and even transform it into some little satisfying sandwiches.
Why You’ll Love These Crescent Rolls
- Easy To Follow Recipe! It’s a really simple, fool proof recipe with lots of process pictures and video!
- The Perfect Crescent Rolls! The dough is really buttery, soft and flakey, you can’t go wrong with it.
- Perfect Side! You’ll love these crescent rolls with your dinner, they’re great for soaking up any rich sauce our soups. Your family and friends will love these!
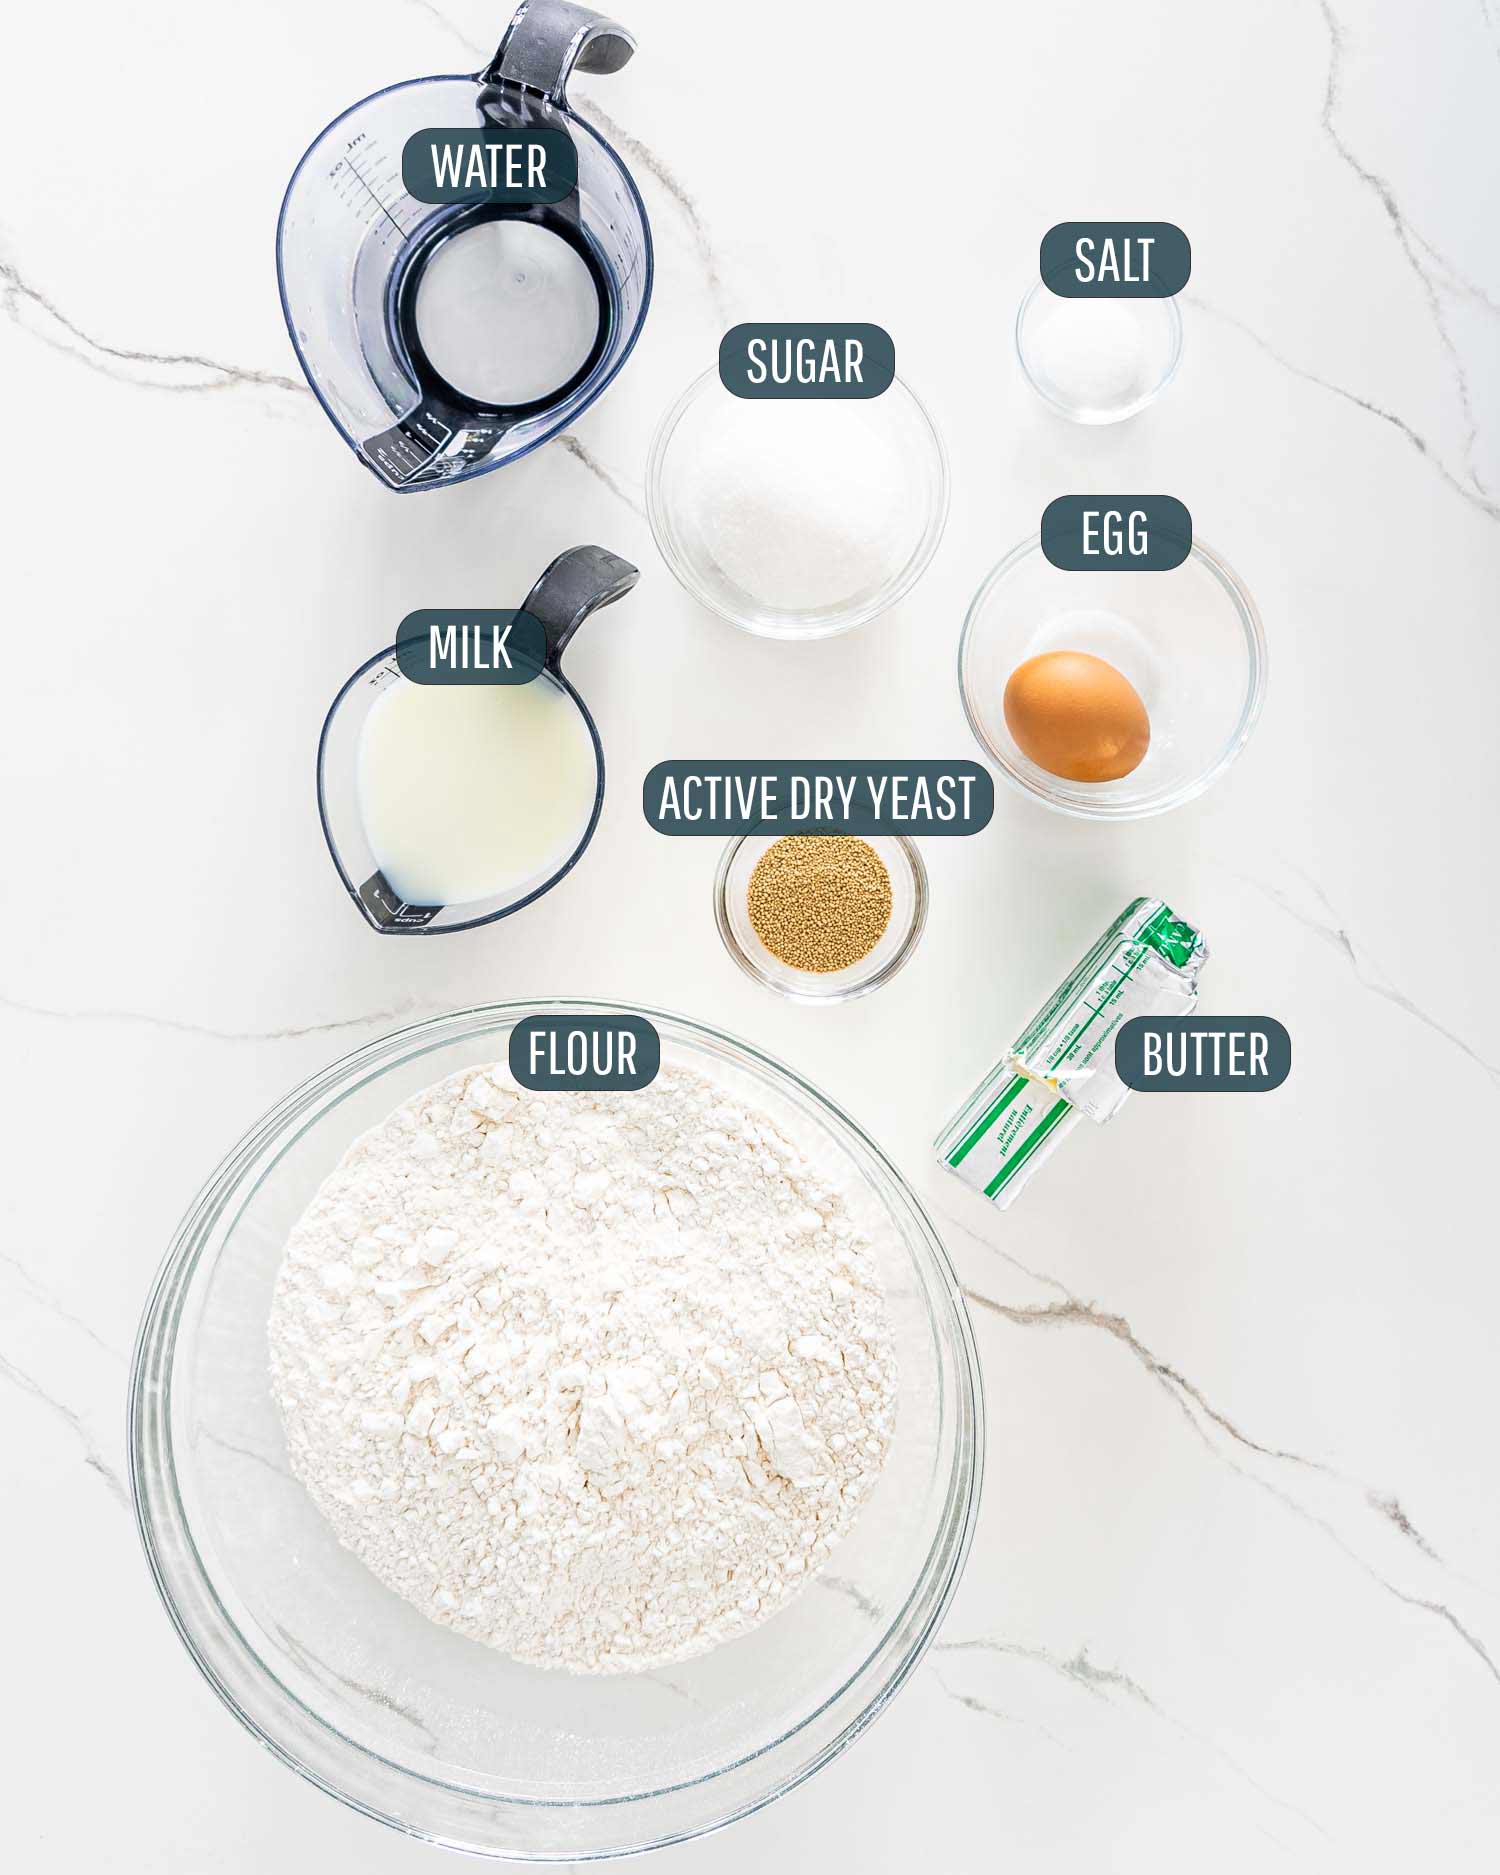
- Yeast – You’ll need active dry yeast. You can also use instant yeast, the difference is that active dry yeast needs to be activated first, whereas instant yeast does not.
- Salt – Salt is so important for any baked goods, without it, your rolls won’t have any taste!
- Warm Water – It’s super important to make sure your water is lukewarm. The best temperature of the water should be anywhere from 95°F to 105°F for this. You don’t really want anything warmer, as it will kill the yeast.
- Milk – Any fat percentage you’d like.
- Sugar – Sugar is important when making bread, it’s what makes it soft and tender by absorbing some of the water and slowing down the formation of gluten strands. Sugar is what feeds the yeast.
- Butter – I always use unsalted butter, especially in breads, because we already add salt, so this way I can control how much salt is added to my bread. Did you know that small quantities of butter is added to breads because it results in a higher rise and a crisper crust!
- Eggs – One large egg is all we need.
- Flour – All purpose works perfectly fine. If you’d like to make these rolls gluten free be sure to add 1½ teaspoons of xanthan gum alongside your gluten free flour.
Activate The Yeast
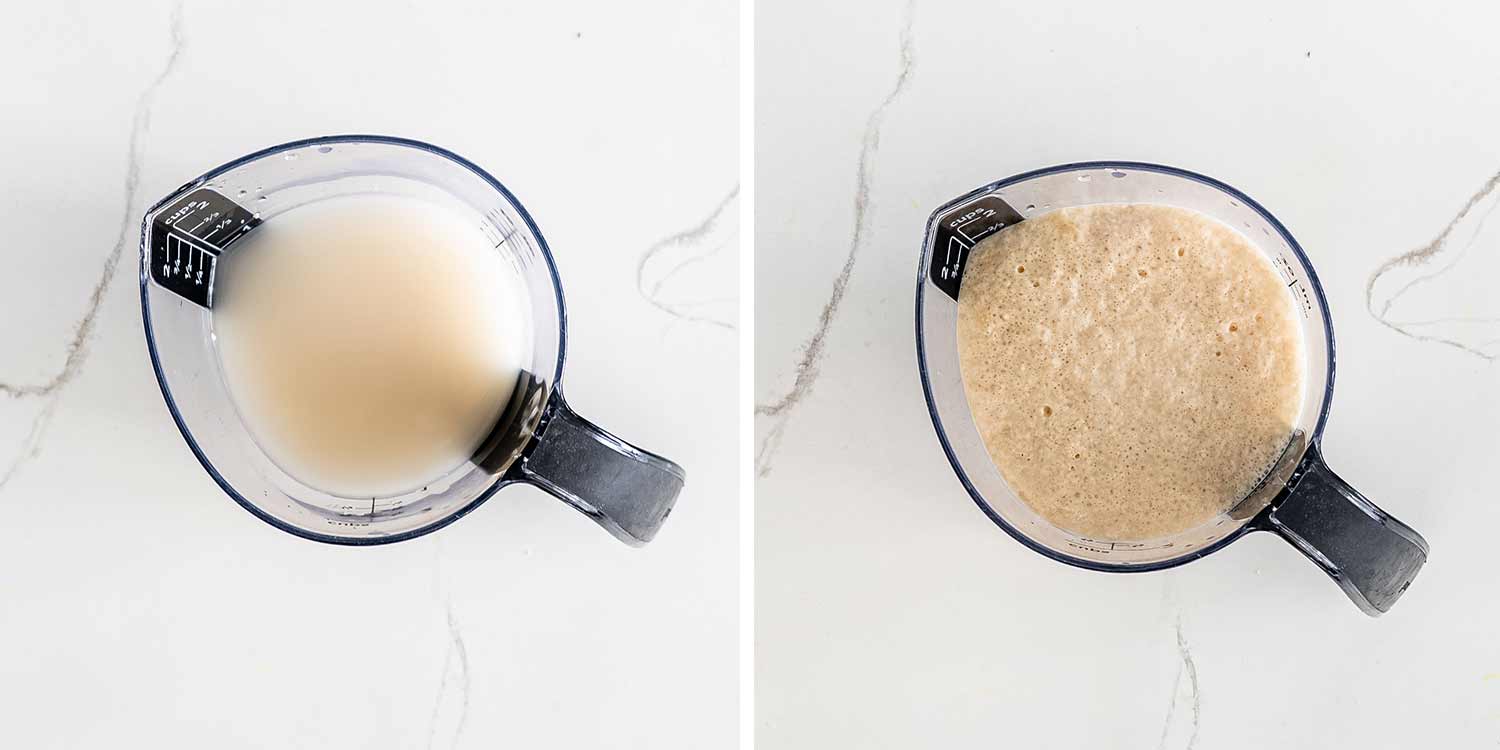
To make any type of yeast bread you have to bloom the yeast properly before you can even begin your dough. To do this, start by whisking the active dry yeast, sugar, and warm water together in a bowl. Then let it sit for 10 minutes undisturbed until the yeast foams up. The water must be warm for this step or the yeast will not activate.
Don’t move forward with the recipe if your yeast doesn’t foam up. This means that your yeast is dead and you need to buy new yeast.
Combine The Wet Ingredients
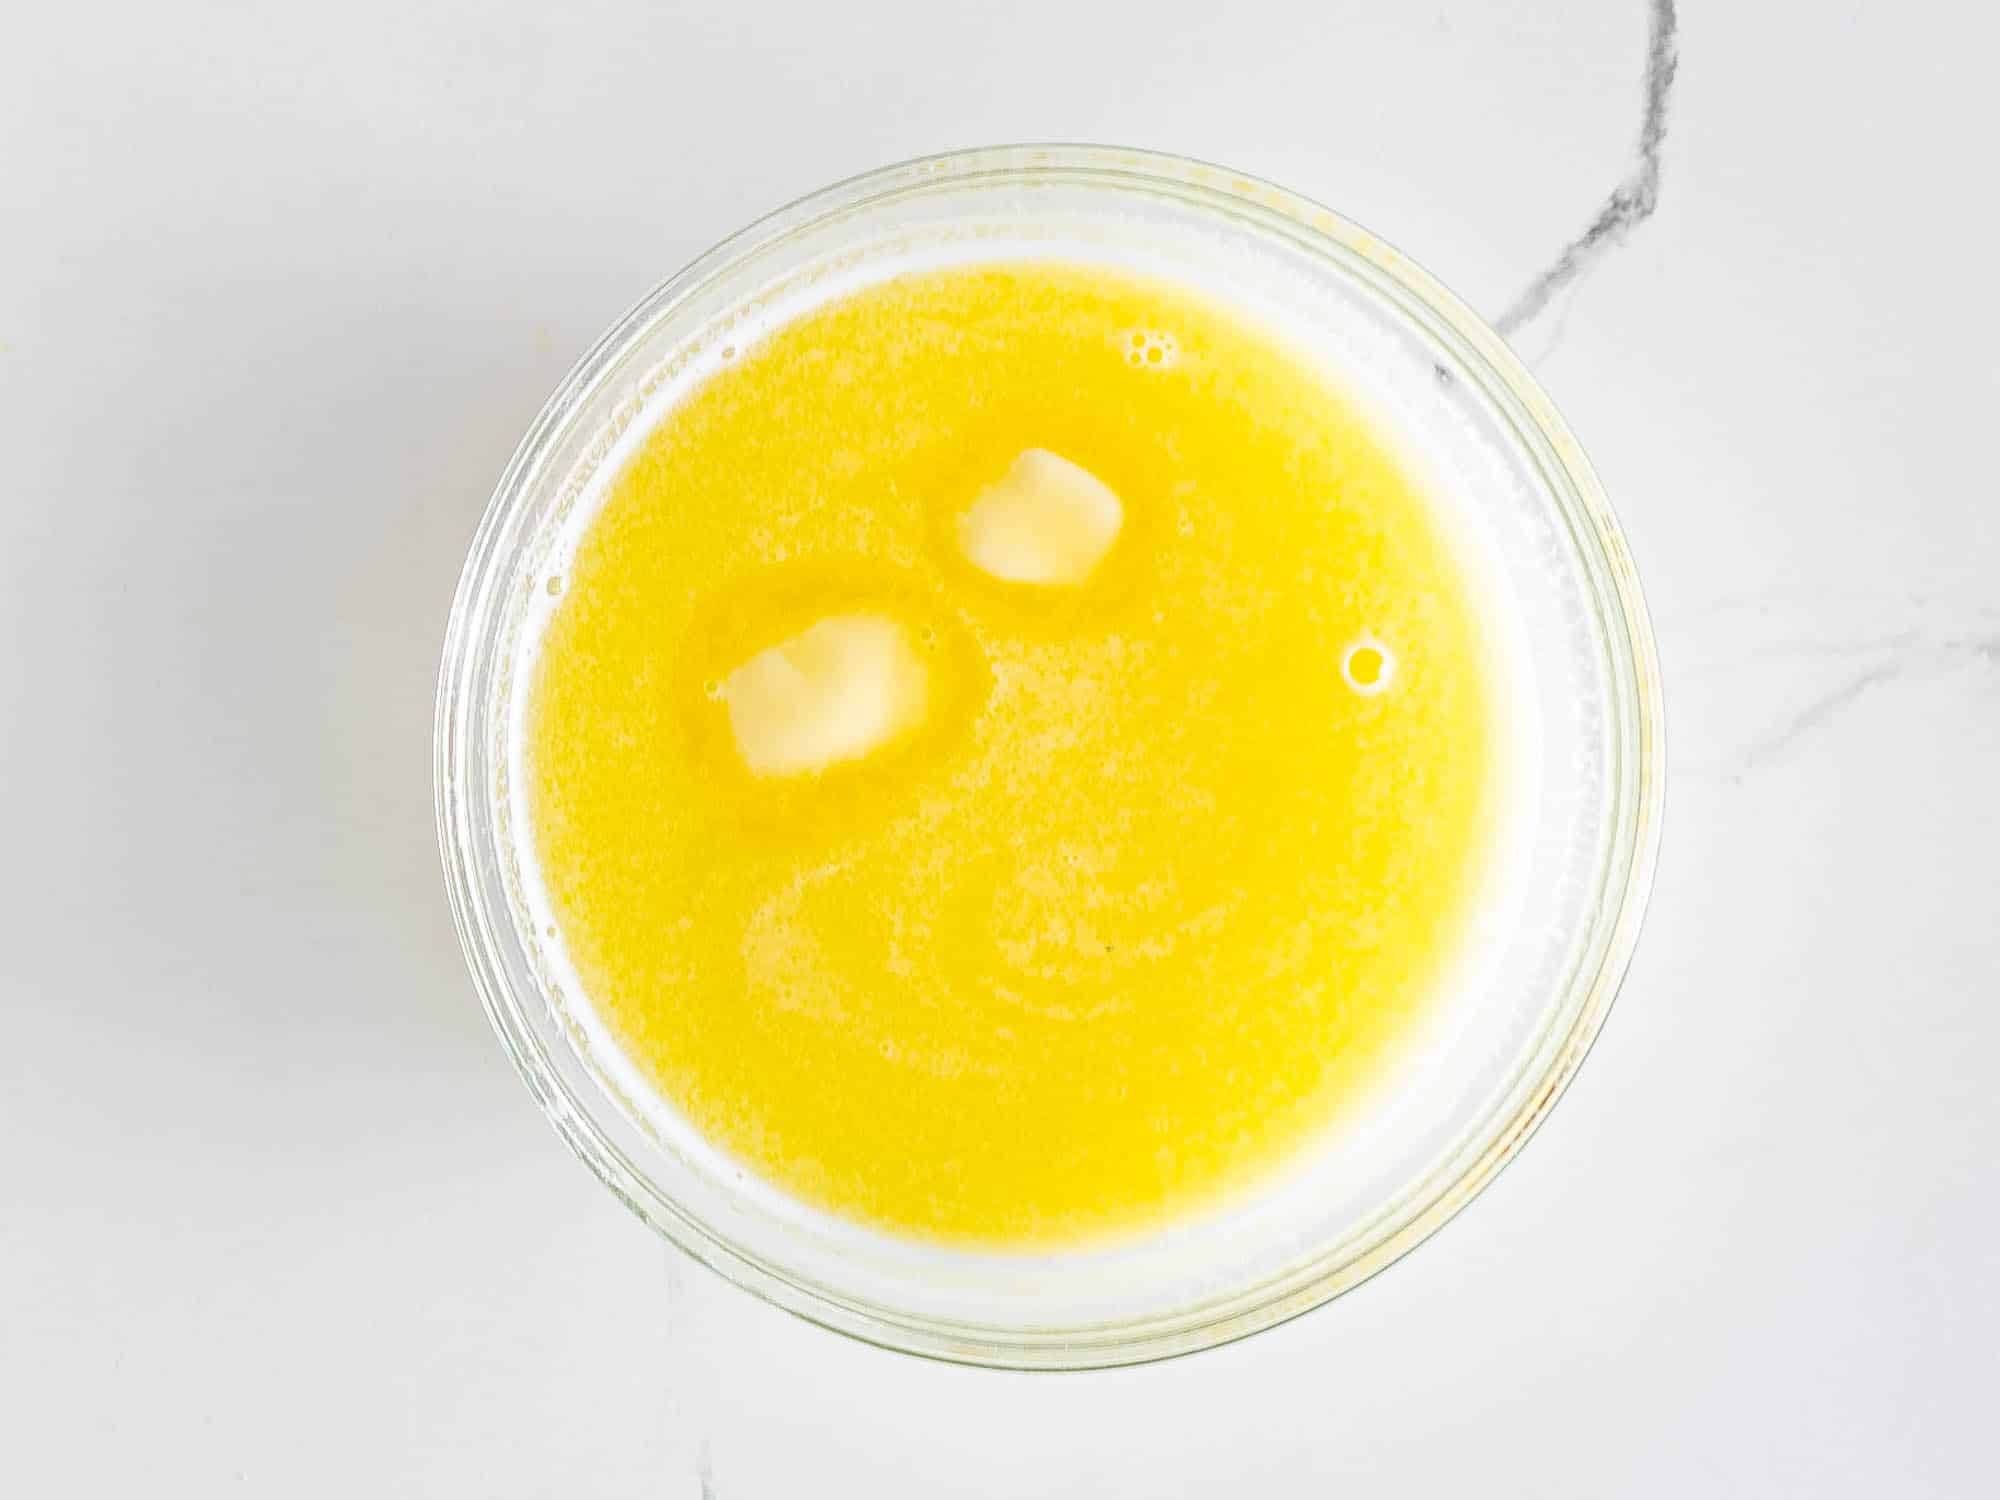
Before moving on with making the dough, you’ll want to combine ¼ cup of butter, milk and sugar in a microwave safe bowl. Stir it well, and microwave it for about a minute until the butter melts. If your microwave has a melting butter feature, use that, it’s safer. Trust me, I’ve had butter explode in my microwave many times.
Once the butter is melted, just let it cool a bit, until it’s warm to the touch, then you can whisk in the egg.
Make The Dough
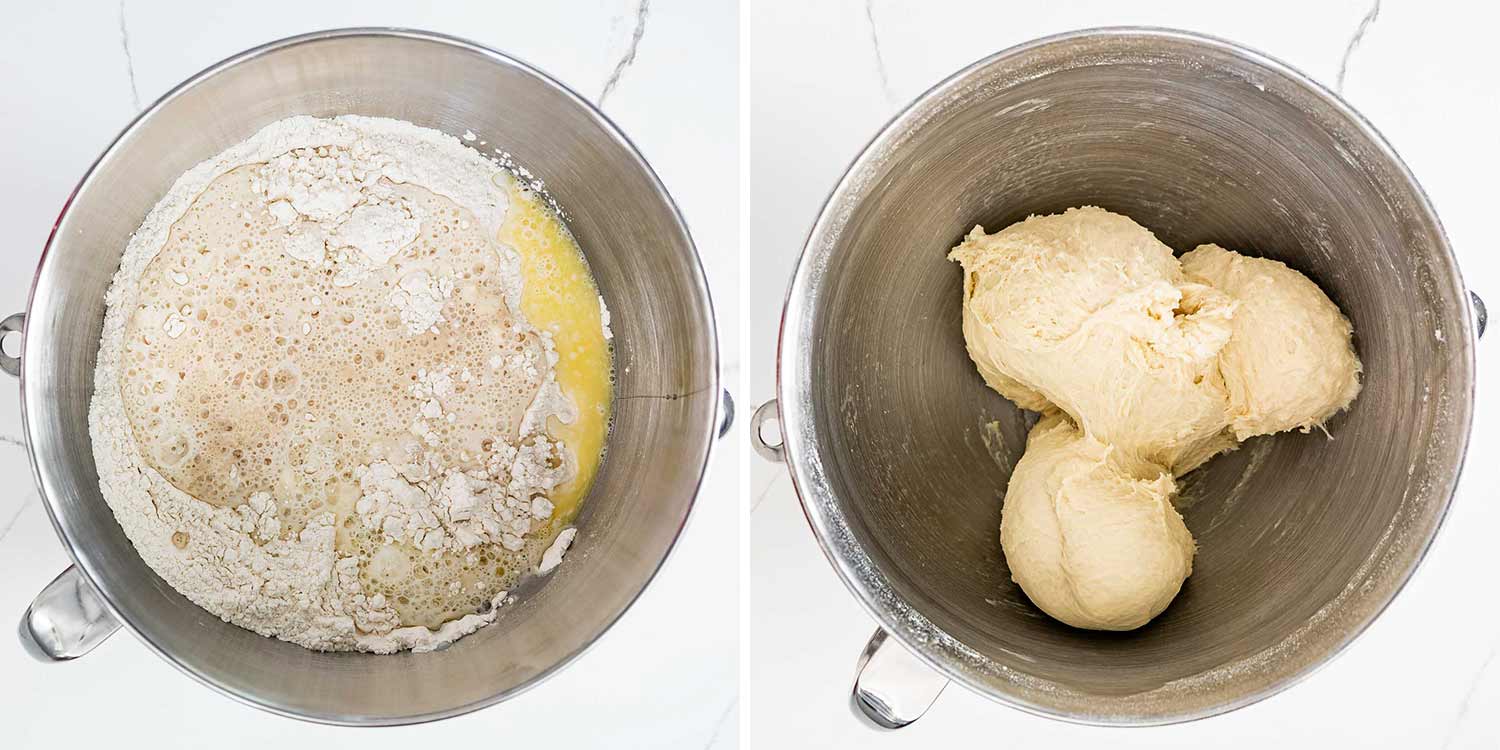
Now that our wet ingredients are ready, we need to get the dry ingredients ready as well. The recipe calls for 4 to 5 cups of flour. Always start with 4 cups and go from there. I only used 4, but I live in a very dry climate, so if you live somewhere where it’s really humid, you’ll need more flour. So transfer 4 cups of flour right to the bowl of your mixer, then stir in the salt.
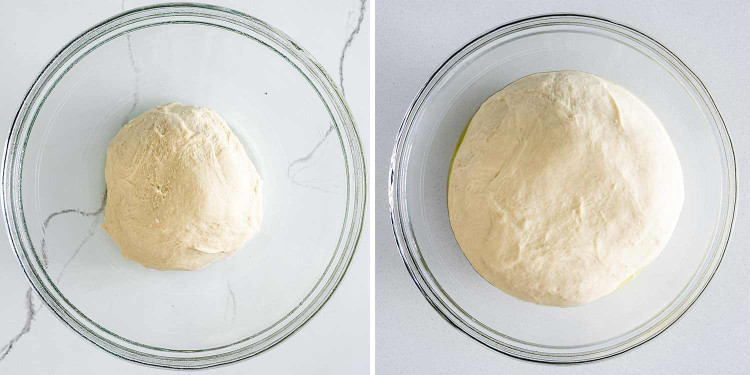
Next, you’ll want to pour that butter mixture right in, and using the dough hook, mix for about 5 minutes. The dough is ready when it comes clean from the sides of the bowl as you can see in the picture above. If the dough is too sticky, add more flour, starting with ¼ cup of flour at a time.
Allow The Dough To Rise

Once the dough is ready, you’ll need to place it in a well oiled large bowl then cover it with plastic wrap. You’ll need to let the dough rest for about 1 to 2 hours, until doubled in size.
If your oven has a proof function, use that and place the dough in the oven, it works really great because it provides a warm, draft free environment for your dough to rise which is ideal. If it doesn’t, I still like to use the oven. I simply turn on the oven to the lowest temperature setting, usually it’s around 150°F, then turn off the oven and place the bowl in there.
The time required for the dough to double in size really depends on your yeast, and your environment.
Prep The Dough
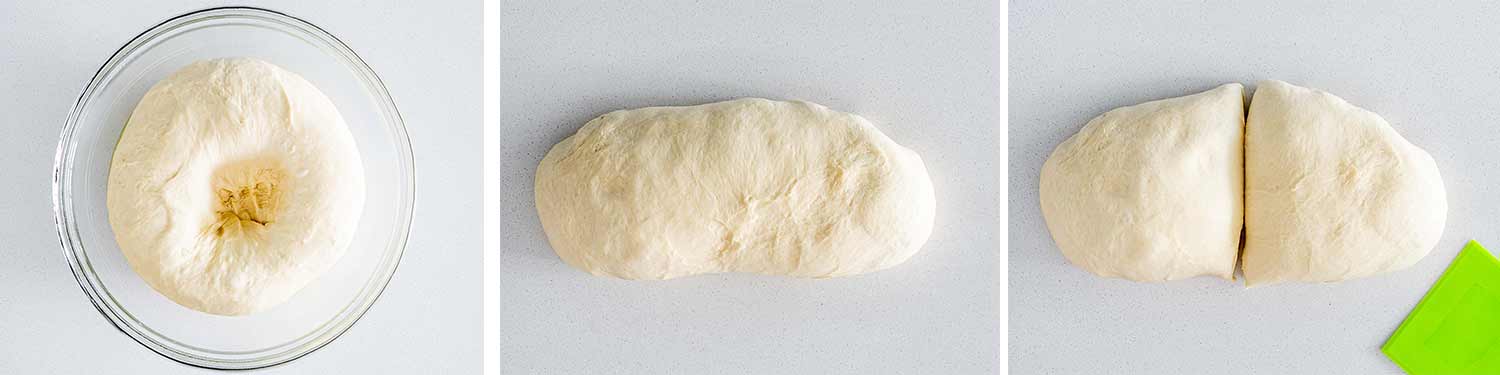
Now that our dough is nice and ready, you’ll want to punch it down to let the air out. Shape the dough into a log and then you’ll want to cut that into 2 pieces.
Form Into Crescents
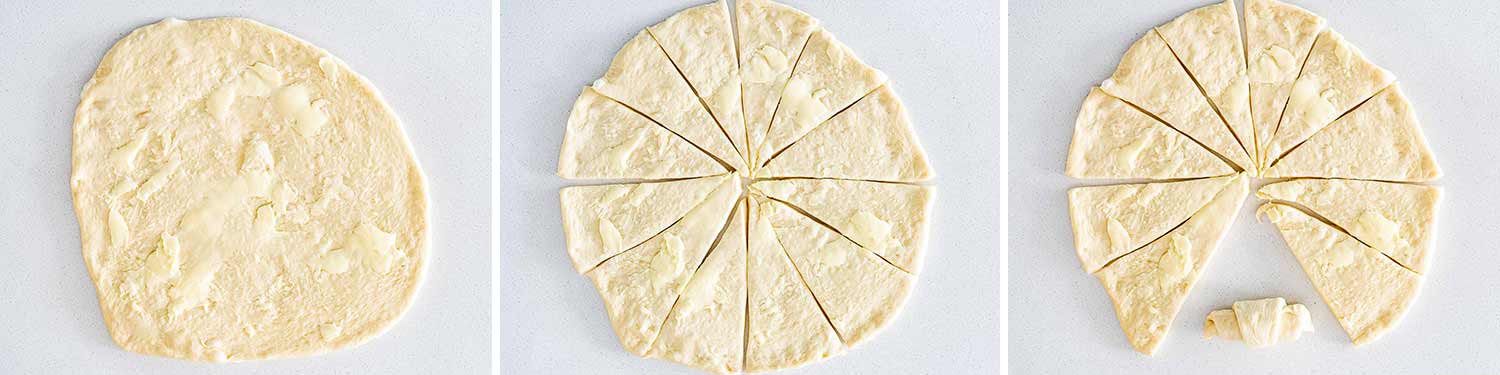
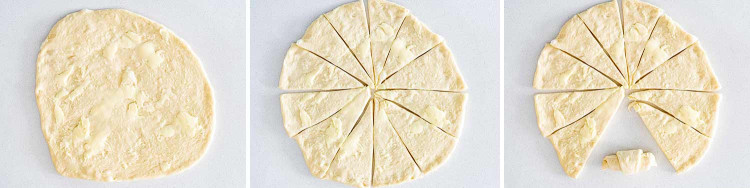
Next, you’ll need to roll each piece of dough into a circle that’s about 14″ in diameter. Spread about 2 tablespoons of butter on each circle, so your butter should be nice and soft so it’s easily spreadable.
Now, using a pizza cutter or a knife, cut the circle into quarters first, then each quarter into thirds. You should end up with 12 wedges in total. All that’s left to do is to roll each wedge to form into a crescent shape. Place the rolls onto a buttered baking sheet. All 24 rolls should fit.
Allow Crescent Rolls To Rise And Bake
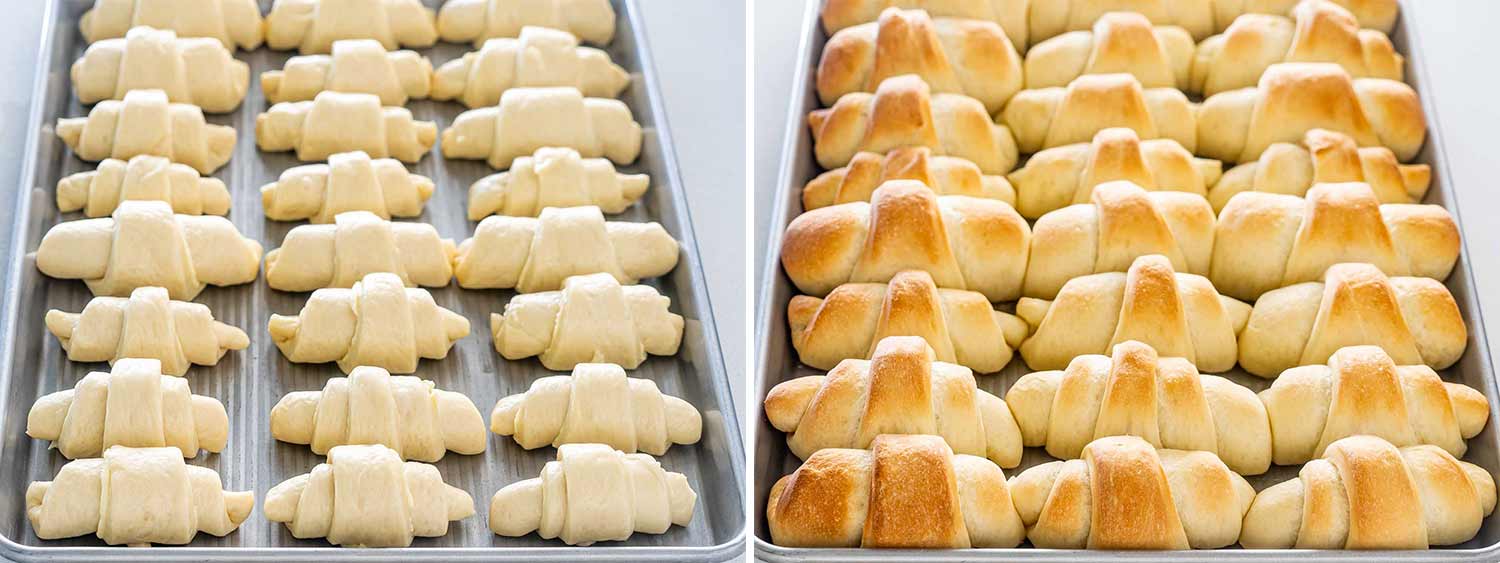
All the hard work is done now. All we have left to do is to preheat the oven to 350°F and while the oven is warming up the rolls will continue to rise a bit. You don’t really have to let them double, because they will continue to rise in the oven.
Once the oven is ready, just pop them in the oven and bake for about 20 to 25 minutes or until golden brown.
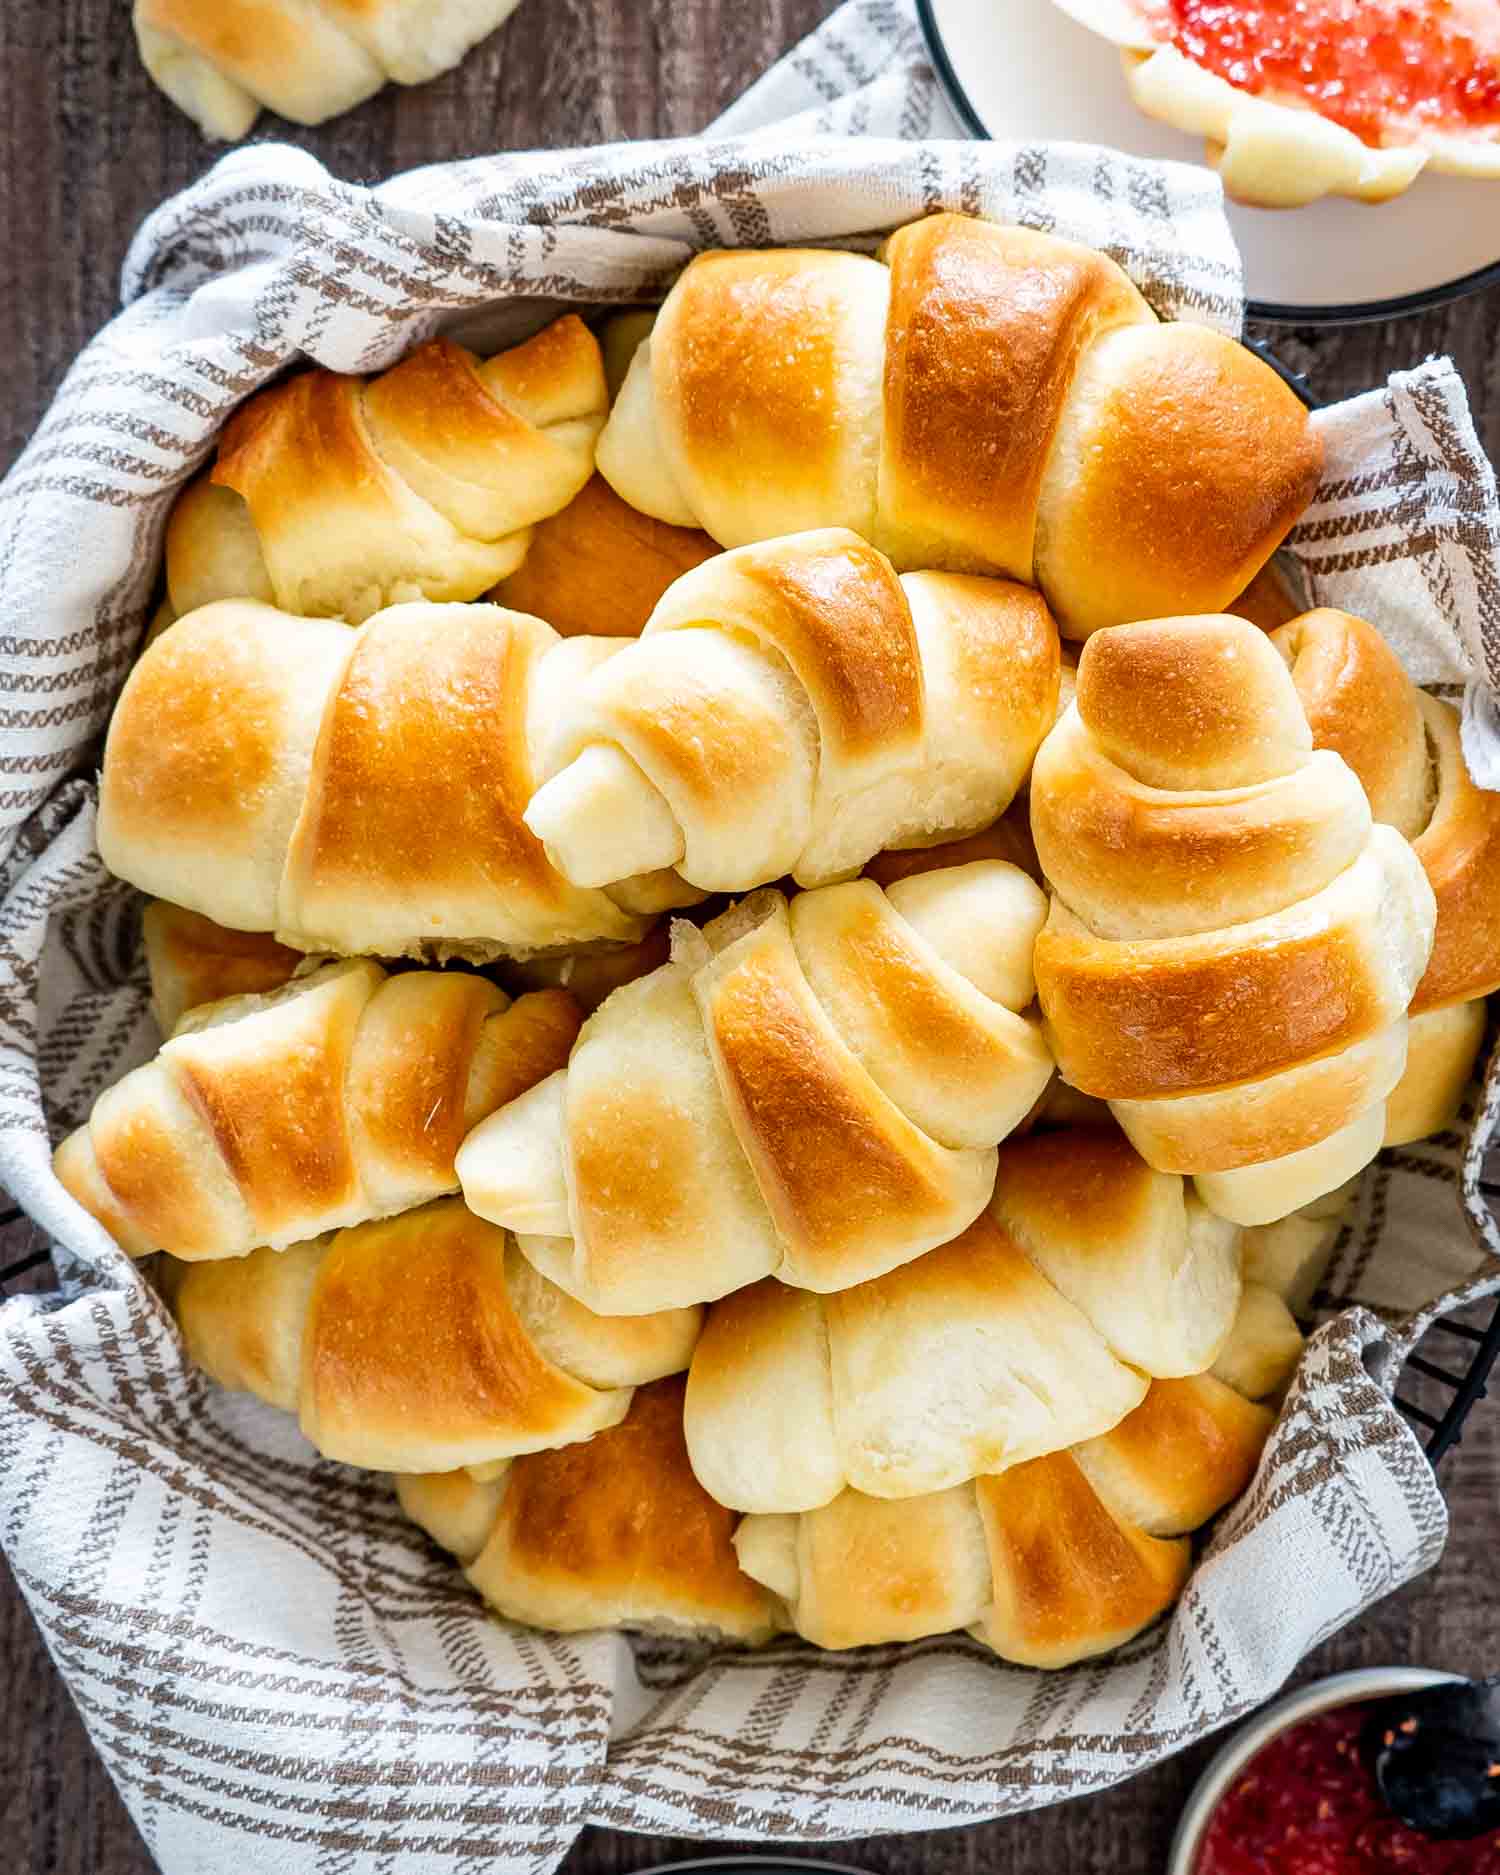
Brush The Rolls With Butter And Serve
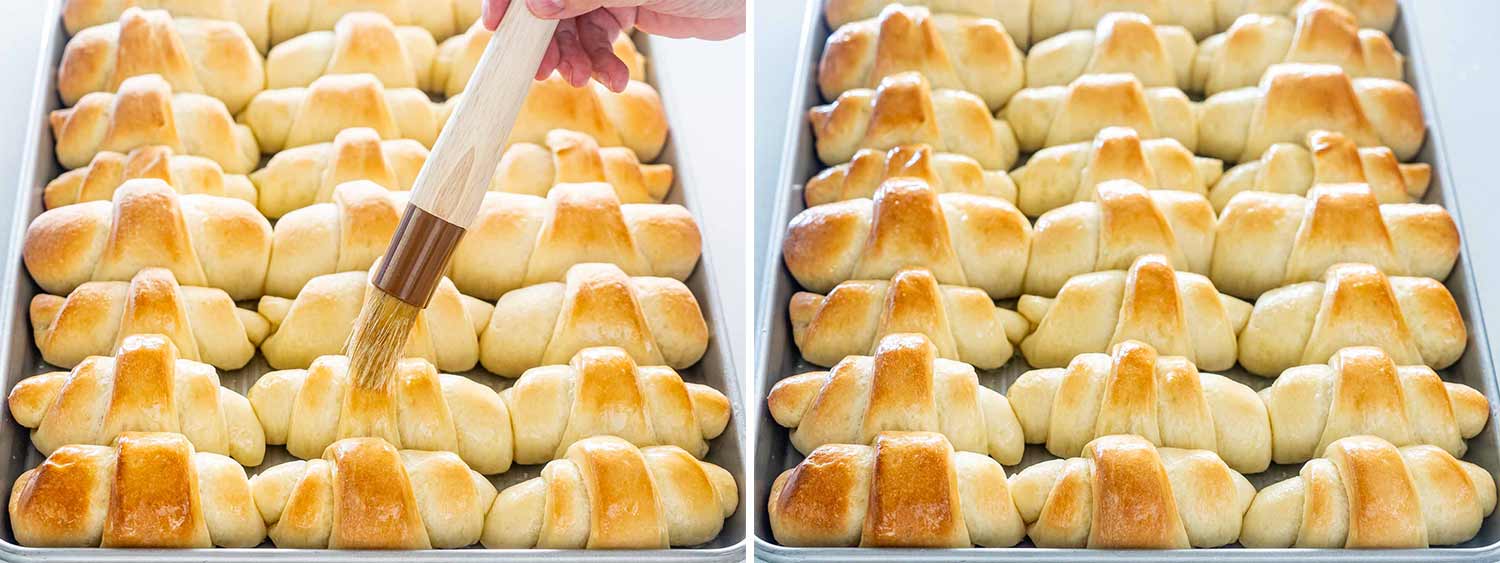
Our rolls are now all baked, all we have left to do is to brush the crescent rolls with remaining butter, you should still have about ¼ cup left. Brush them while they’re nice and warm, then go ahead and enjoy one, they’re so good!
The Oven Is The Best Place For Dough To Rise
Your oven is a great tool for baking recipes like these crescent rolls that require allowing the dough to double in size. Preheating your oven to its lowest temperature setting, or using the proof setting, will ensure that your oven is nice and warm at a good consistent temperature for your little rolls in the making. It will also protect it from any breezes floating through the kitchen and will ensure your rolls turn out just like mine!
Can I Use Instant Yeast?
Absolutely! It will even make your job easier since no activating the yeast is required. That is basically the only difference between instant yeast and active dry yeast, whether activating is required or not. Simply add the yeast to the rest of the ingredients and mix, it’s that easy.
Yes, you still need to add the milk and water, since that is most of your wet ingredients.

Expert Tips
- Check the date on your yeast. The main reason that dough doesn’t rise is due to using yeast that is old or has expired yeast. So if your yeast does not bloom and foam up it means that it is dead and the recipe will not work.
- Warm water is a must. If your water is too cold or too hot the yeast won’t activate. The water needs to be just warm to bloom the yeast properly.
- Use room temperature butter and eggs. It helps the dough to emulsify and come together. I always suggest taking the butter and eggs out of the fridge a couple of hours before making any bread recipe.
- Don’t overwork your dough. Don’t knead your dough after it’s doubled in size. If you knead it again you will push the air out of the risen dough and the crescent rolls will be tough.
Storage
You can store these crescent rolls right on the counter wrapped in foil or plastic wrap for up to 5 days. You can also freeze them easily, just place them separately on a baking sheet and freeze before transferring to a freezer bag or airtight container. They will last for up to 6 months and can be thawed right on the counter when ready to eat.
Other Delicious Rolls To Try
- Hawaiian Rolls
- Texas Roadhouse Rolls
- Classic Dinner Rolls
- Parker House Rolls
- Honey Rolls
- Homemade Slider Buns
Before You Begin! If you make this, please leave a review and rating letting us know how you liked this recipe! This helps our business thrive & continue providing free recipes.
Crescent Rolls
Video
Ingredients
- 1 cup water (lukewarm)
- 1 tablespoon active dry yeast
- ¾ cup milk
- ¼ cup sugar
- ¾ cup butter (unsalted)
- 1 large egg
- 4 cups all-purpose flour (up to 5 cups)
- ½ tablespoon salt
Before You Begin! If you make this, please leave a review and rating letting us know how you liked this recipe! This helps our business thrive & continue providing free recipes.
Instructions
- Activate your yeast first by combing the water and yeast together in a small bowl. Stir the yeast a little bit and let it sit until it foams about 10 to 15 minutes. If your yeast doesn’t activate, do not proceed.

- In a microwave safe bowl combine the milk, sugar and ¼ cup of the butter and microwave for about a minute until the butter melts. Whisk it a bit, so that the butter melts completely. Let the milk cool a bit, so that it's just warm to touch. Whisk in the egg.

- In the bowl of your mixer, start with 4 cups of flour, add salt and mix. Add the milk mixture, yeast mixture and the egg to the flour. Using the dough hook mix for a couple minutes. The dough is ready when it comes clean from the sides of the bowl. If the dough is too sticky add more flour, starting with about ¼ cup at a time until the dough comes clean from the sides of the bowl while mixing. Mine only required 4 cups, that's why start with 4 cups and go from there.
- Place the dough in an oiled bowl, cover it up with a clean damp kitchen towel or plastic wrap and let it rest until it doubles in size.
- Once the dough is ready, punch it down to let the air out. Cut it in 2 pieces.

- Roll each piece into a circle about 14" in diameter. Spread the top with remaining butter. For both pieces you shouldn't need more than a couple tablespoons for each circle. Using the pizza cutter cut the circle into quarters first, then each quarter into thirds, for 12 pieces in total. Roll up each piece to form a crescent. Repeat with other piece of dough. Place the rolls onto a buttered pan. Repeat with other piece of dough. Place the rolls onto a buttered pan.
- Preheat oven to 350°F.
- Let the rolls rest until the edges touch, they should almost double in size. Transfer the baking sheet to the oven and bake for 20-25 minutes or until golden brown.

- Melt remaining butter (should have about ¼ cup of butter left) and brush the rolls while still warm.


Notes
- Check the date on your yeast. The main reason that dough doesn’t rise is due to using yeast that is old or has expired yeast. So if your yeast does not bloom and foam up it means that it is dead and the recipe will not work.
- Warm water is a must. If your water is too cold or too hot the yeast won’t activate. The water needs to be just warm to bloom the yeast properly.
- Use room temperature butter and eggs. It helps the dough to emulsify and come together. I always suggest taking the butter and eggs out of the fridge a couple of hours before making any bread recipe.
- Don’t overwork your dough. Don’t knead your dough after it’s doubled in size. If you knead it again you will push the air out of the risen dough and the crescent rolls will be tough.
- You can store these crescent rolls right on the counter wrapped in foil or plastic wrap for up to 5 days. You can also freeze them easily, just place them separately on a baking sheet and freeze before transferring to a freezer bag or airtight container. They will last for up to 6 months and can be thawed right on the counter when ready to eat.
Nutrition Information
Notice: Nutrition is auto-calculated for your convenience. Where relevant, we recommend using your own nutrition calculations.
