Instant Pot Easter Eggs
This post may contain affiliate links. Please read my disclosure policy.
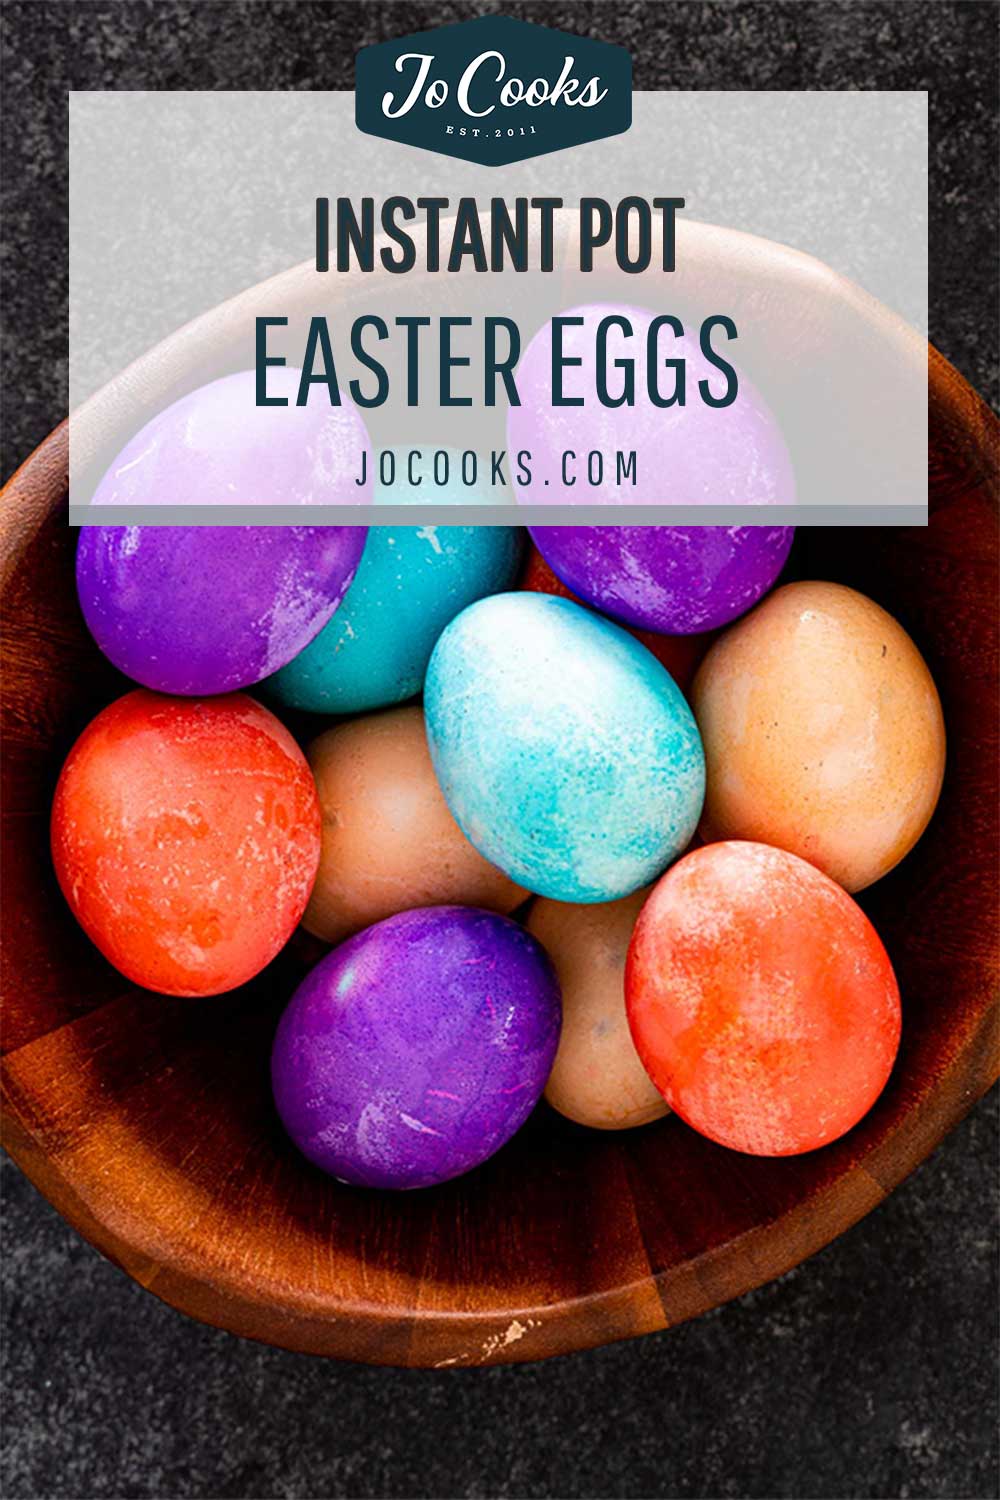
These Instant Pot Easter Eggs take less than 25 minutes to get ready from start to finish, so you can have them easy-to-peel, deliciously boiled and ready to serve for your Easter celebration.
Instant Pot Easter Eggs
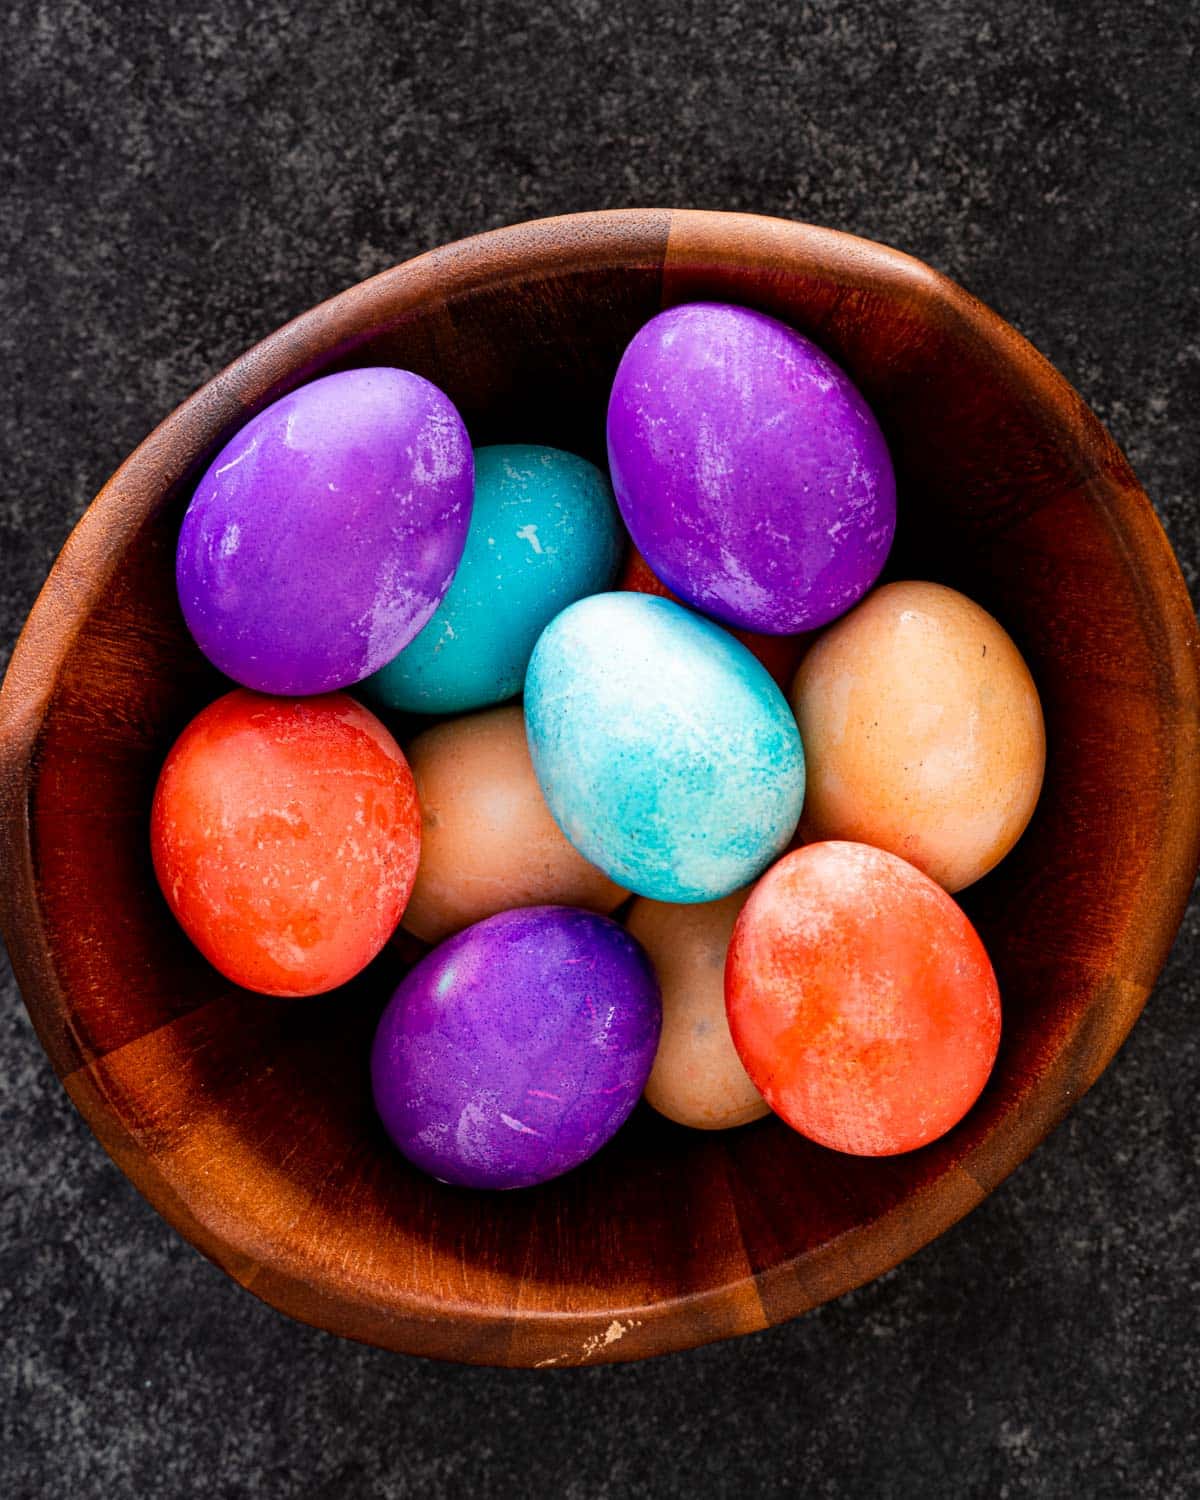
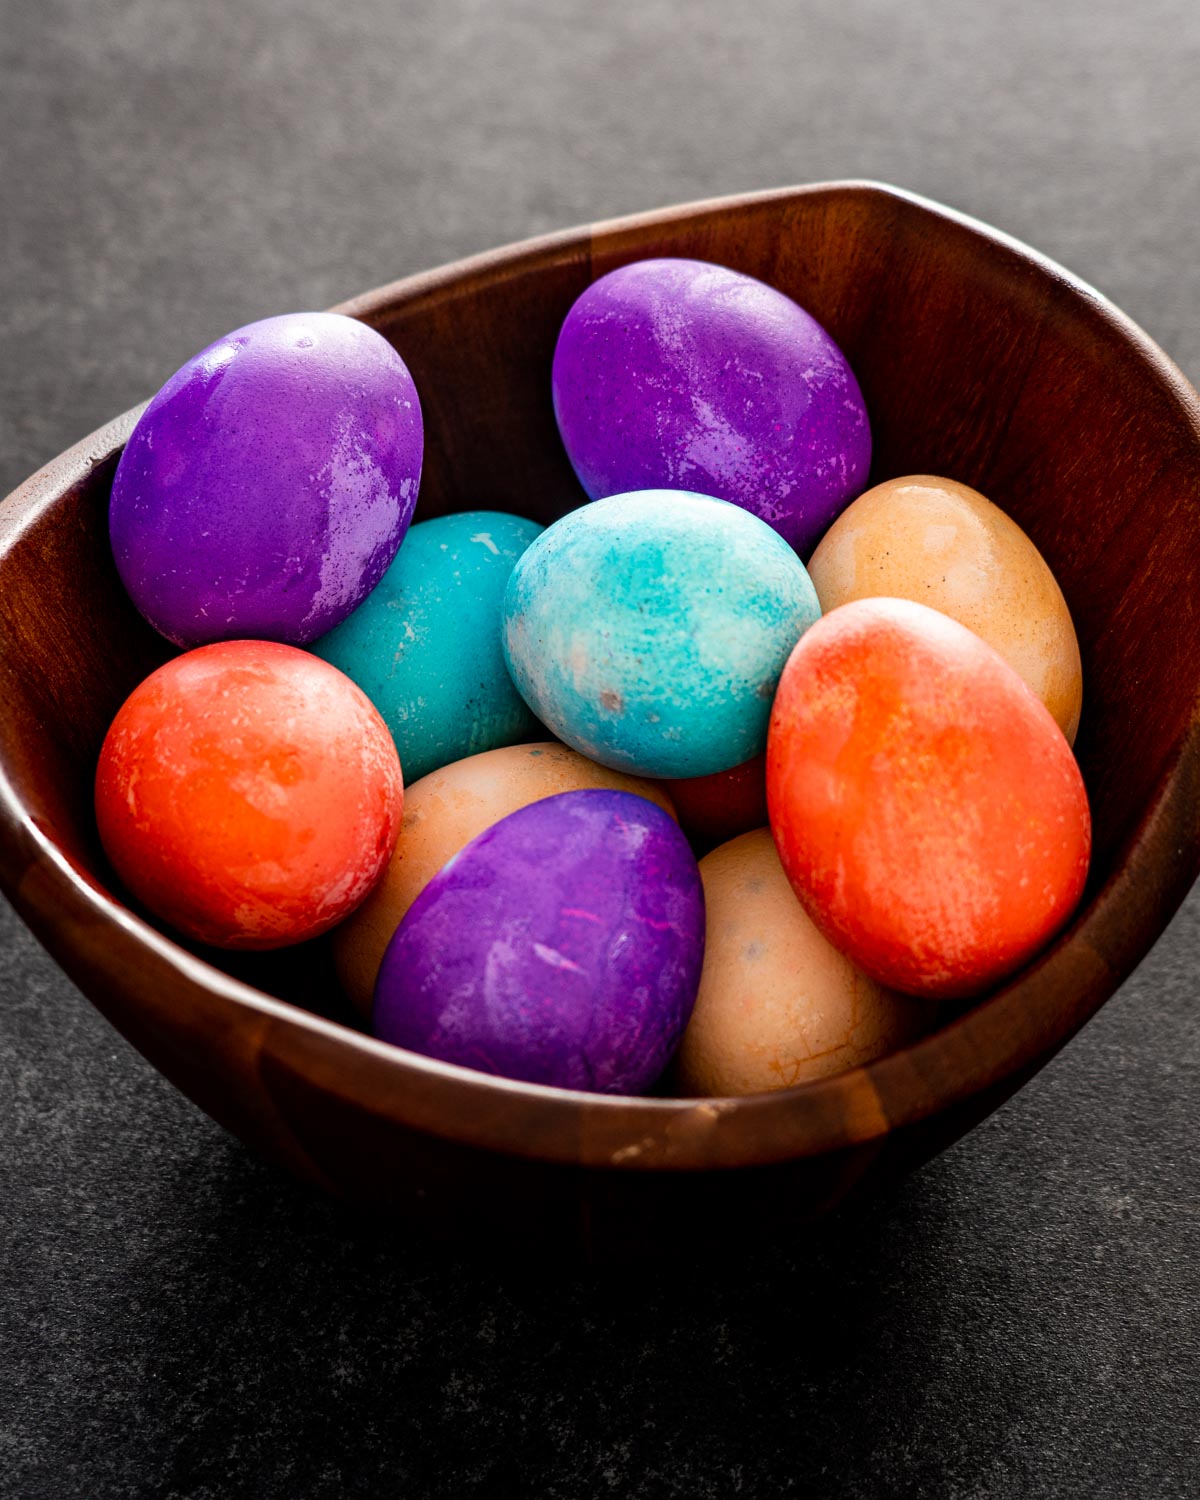
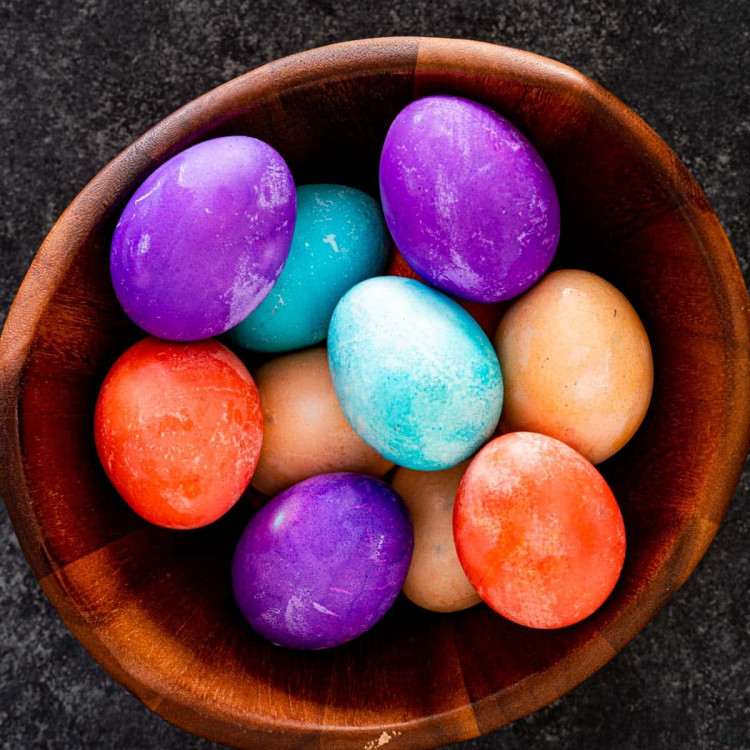
These beautiful, dyed Easter eggs are surprisingly easy to make right in your Instant Pot! With this method you end up with perfectly hard boiled eggs, cooked and dyed at the same time. It really couldn’t get any easier.
This easy recipe takes away the guessing game around how much to leave your eggs to boil. The only things you will actually require are the Instant Pot, water, 4 Mason Jars, some pretty food coloring and a batch of eggs to work with. So, let’s begin!
Ingredient Notes
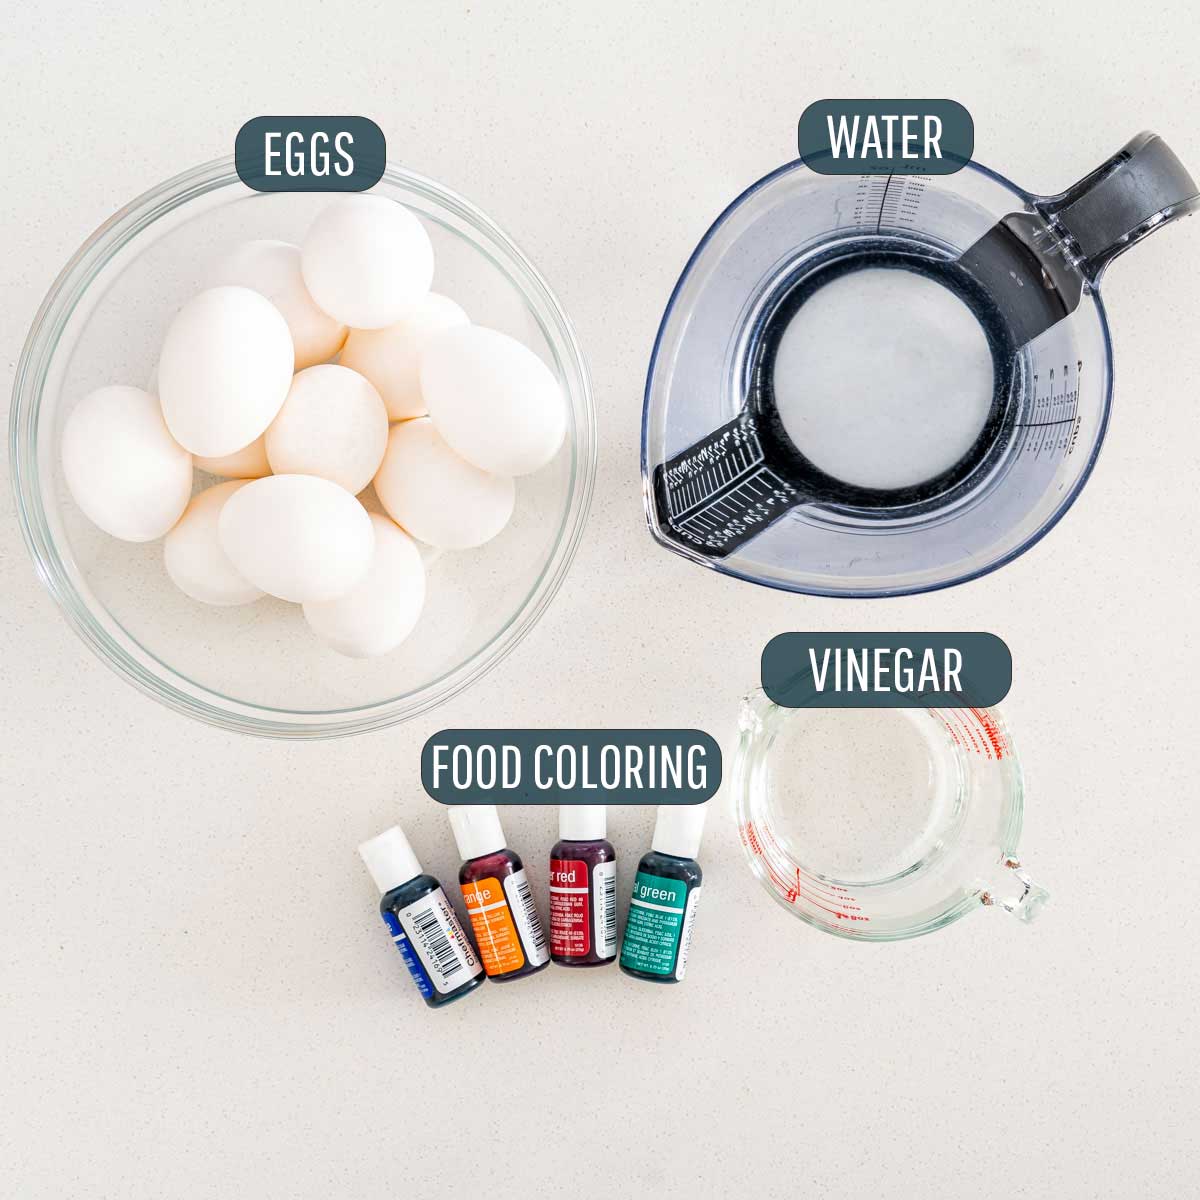
- Vinegar – You need white regular vinegar to get bright vibrant colors.
- Mason Jars – I recommend 4 16oz glass Mason Jars to use for coloring the eggs.
- Eggs – raw, fresh white eggs are needed and the size can be anywhere from small to large.
- Food Coloring – I use a gel type of food coloring to get that nice vibrant tint on the egg shells.
How to Make Easter Eggs in your Instant Pot
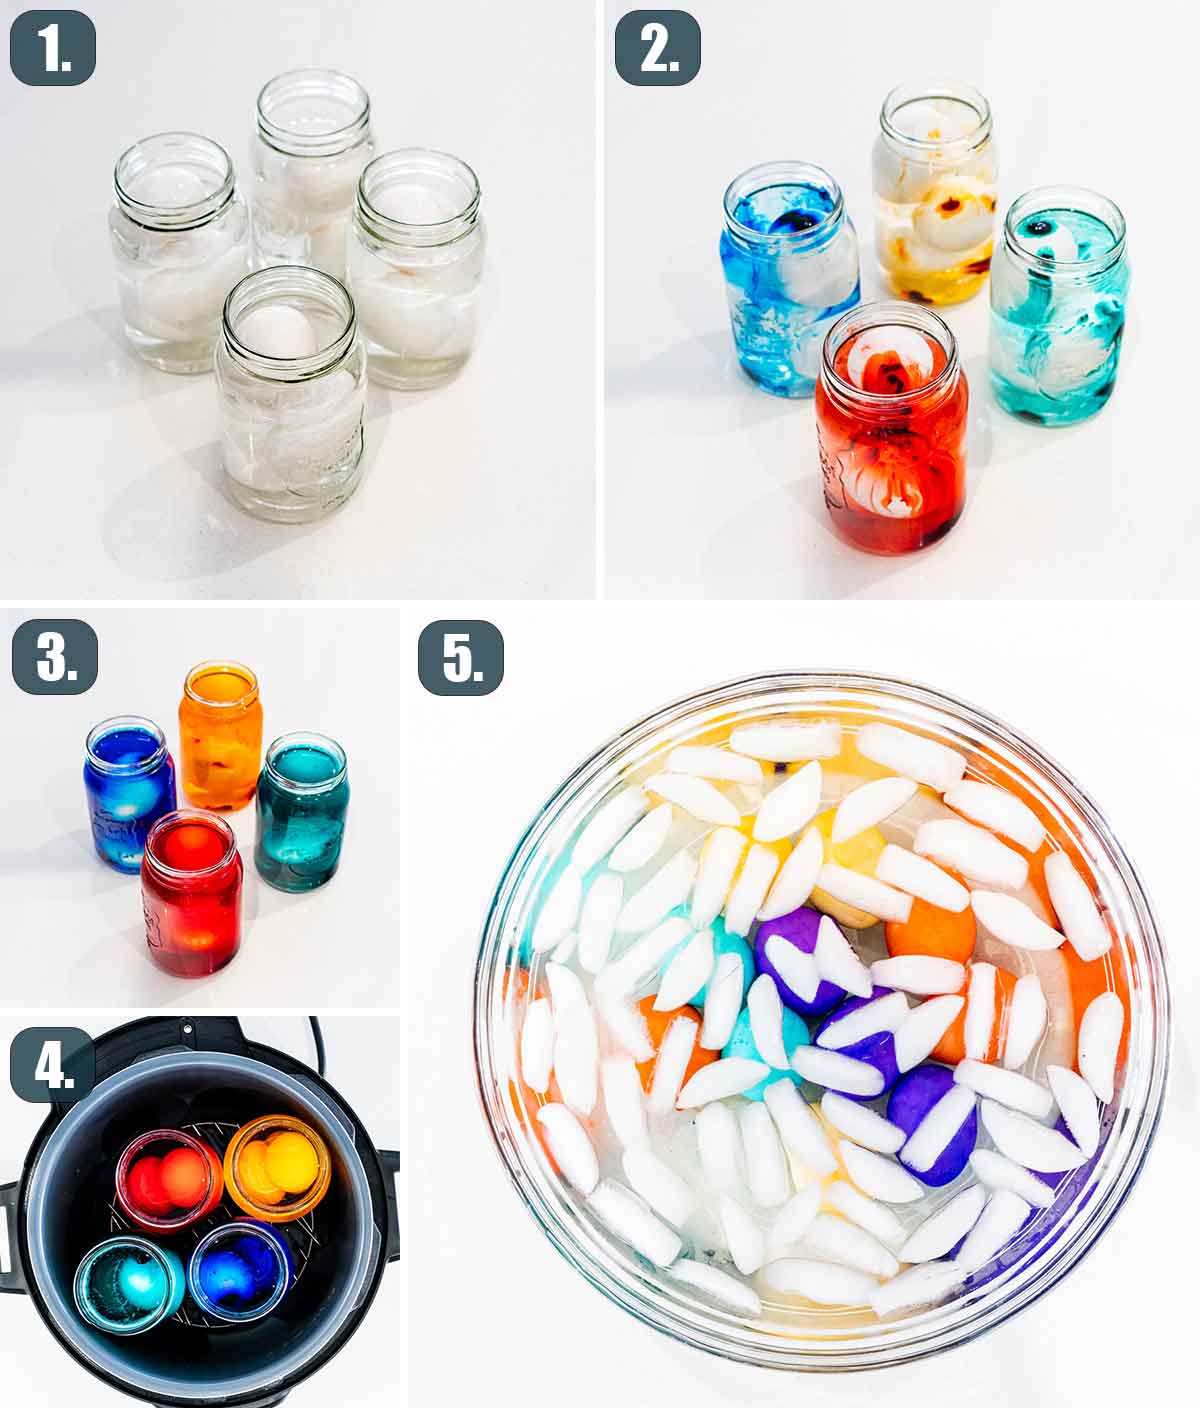
- Prep: Pour 2 cups of water in the instant pot liner. Place the trivet inside.
- Prepare Eggs: Place 3 eggs in each mason jar. You’ll need 4 jars that will fit together in your Instant Pot. Pour about ½ cup of water in each jar, or enough to reach the top of the eggs. Add 2 tbsp of vinegar to each mason jar and combine different food coloring in each one. Next, place the mason jars into the Instant Pot. Secure the lid onto the pot and make sure to turn the vent at the top of it to the “Sealing” Position.
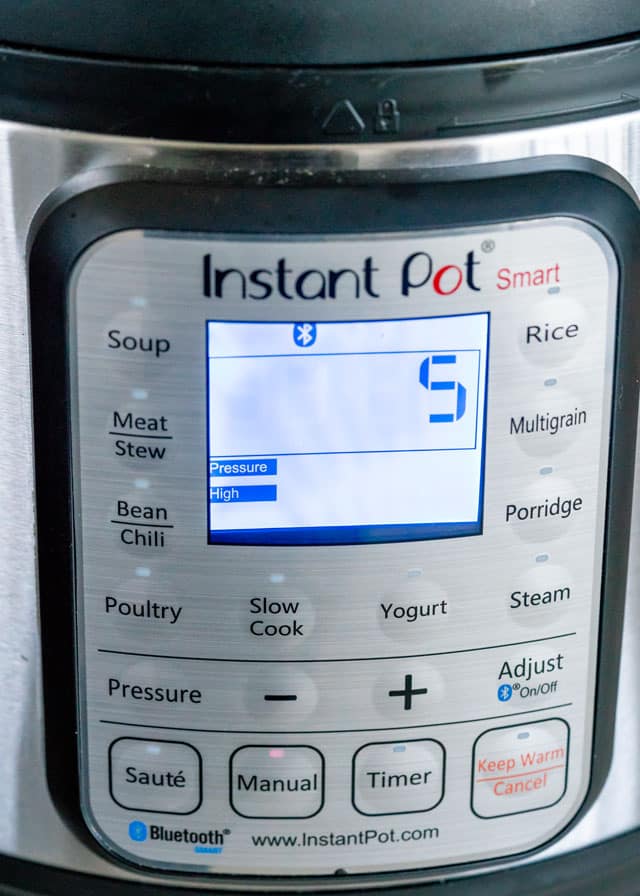
- Cook: Press the “Manual” button on the Instant Pot then the “-” sign to lower the time to 5 minutes.
- Pressure Release: Once the Instant Pot cycle is complete, wait 5 minutes for natural release then use quick release, change the valve to “Venting” position and place a towel over the valve so steam doesn’t get everywhere. Carefully unlock and remove the lid from the pot.
- Shock: Use tongs to carefully remove the eggs from the jars, place the eggs in a bowl with ice water and let them sit for 5 minutes. Doing this stops the eggs from cooking further. After 5 minutes they are ready for you to serve!
Frequently Asked Questions
How Long Can I Keep My Hard Boiled Eggs In The Fridge.
Remember that the boiling process can create hairline fractures in the egg shell, which exposes the egg inside to outside air and bacteria. This means a hard boiled egg will not stay fresh as long as a raw egg. Hard boiled eggs will stay fresh for about 1 week in the fridge and must be refrigerated within 2 hours of cooking.
Why Did My Eggs Explode In The Instant Pot?
Eggs do explode sometimes when cooked at high pressure over five minutes. The egg yolk can over cook too as evinced by the notorious green rim on the yolk. Still perfectly useful for salads but for this recipe, be mindful to not cook the eggs for more than the 5 minutes mentioned.
Can I Use Liquid Food Coloring vs. Gel?
Absolutely. You’ll just need to use more in each jar, about 20 drops of liquid food coloring per jar.

Expert Tips
- Make sure to use white shelled eggs. White shelled eggs are easier to dye than brown eggs, but brown eggs will work as well, especially if you’re going for darker colors.
- If you like your eggs softer, more of a runny yolk instead, you could start at just 3 minutes on high pressure.
- To prevent your eggs from getting that green ring around the yolk, it is important to place them in the ice cold water immediately as you take them out.
- Make sure there is lots of ice for the cold water bath. The eggs will be quite hot, you want the water to stay ice cold for the entire time the eggs are being shocked.
- To get a shiny glow after your eggs have been dyed, dab a few drops of oil or butter onto a cotton cloth or paper towel and gently rub onto each egg. It will bring a more vibrant shine to them.
Storage
Hard boiled eggs are best to be kept in the fridge for up 1 week to enjoy them fresh. I like to keep them with the shell on until right before I use them in order to maintain that freshness for longer.
More Great Recipes To Try
Before You Begin! If you make this, please leave a review and rating letting us know how you liked this recipe! This helps our business thrive & continue providing free recipes.
Instant Pot Easter Eggs
Ingredients
- 4 cups water (or more if needed)
- ½ cup white vinegar
- 20 drops food coloring (different colors, I used gel)
- 12 large white eggs (uncooked)
Before You Begin! If you make this, please leave a review and rating letting us know how you liked this recipe! This helps our business thrive & continue providing free recipes.
Instructions
- Prep the Instant Pot: Pour 2 cups of water in the instant pot liner. Place the trivet inside.
- Prepare Eggs: Place 3 eggs in each mason jar. You'll need 4 jars that will fit together in your Instant Pot. Pour about ½ cup of water in each jar, or enough to reach the top of the eggs. Add 2 tbsp of vinegar to each mason jar and combine different food coloring in each one. Next, place the mason jars into the Instant Pot. Secure the lid onto the pot and make sure to turn the vent at the top of it to the “Sealing” Position.
- Cook: Press the “Manual” button on the Instant Pot then the “-” sign to lower the time to 5 minutes.
- Pressure Release: Once the Instant Pot cycle is complete, wait 5 minutes for natural release then use quick release, change the valve to "Venting" position and place a towel over the valve so steam doesn’t get everywhere. Carefully unlock and remove the lid from the pot.
- Shock: Use tongs to carefully remove the eggs from the jars, place the eggs in a bowl with ice water and let them sit for 5 minutes. Doing this stops the eggs from cooking further. After 5 minutes they are ready for you to serve!
Notes
- If using liquid food coloring, you’ll need 20 drops in each jar. Gel food coloring only needs about 5 drops in each jar.
- Make sure to use white shelled eggs. White shelled eggs are easier to dye than brown eggs, but brown eggs will work as well, especially if you’re going for darker colors.
- If you like your eggs softer, more of a runny yolk instead, you could start at just 3 minutes on high pressure.
- To prevent your eggs from getting that green ring around the yolk, it is important to place them in the ice cold water immediately as you take them out.
- Make sure there is lots of ice for the cold water bath. The eggs will be quite hot, you want the water to stay ice cold for the entire time the eggs are being shocked.
- To get a shiny glow after your eggs have been dyed, dab a few drops of oil or butter onto a cotton cloth or paper towel and gently rub onto each egg. It will bring a more vibrant shine to them.
- Hard boiled eggs are best to be kept in the fridge for up 1 week to enjoy them fresh. I like to keep them with the shell on until right before I use them in order to maintain that freshness for longer.
Nutrition Information
Notice: Nutrition is auto-calculated for your convenience. Where relevant, we recommend using your own nutrition calculations.
