Jelly Donuts
This post may contain affiliate links. Please read my disclosure policy.
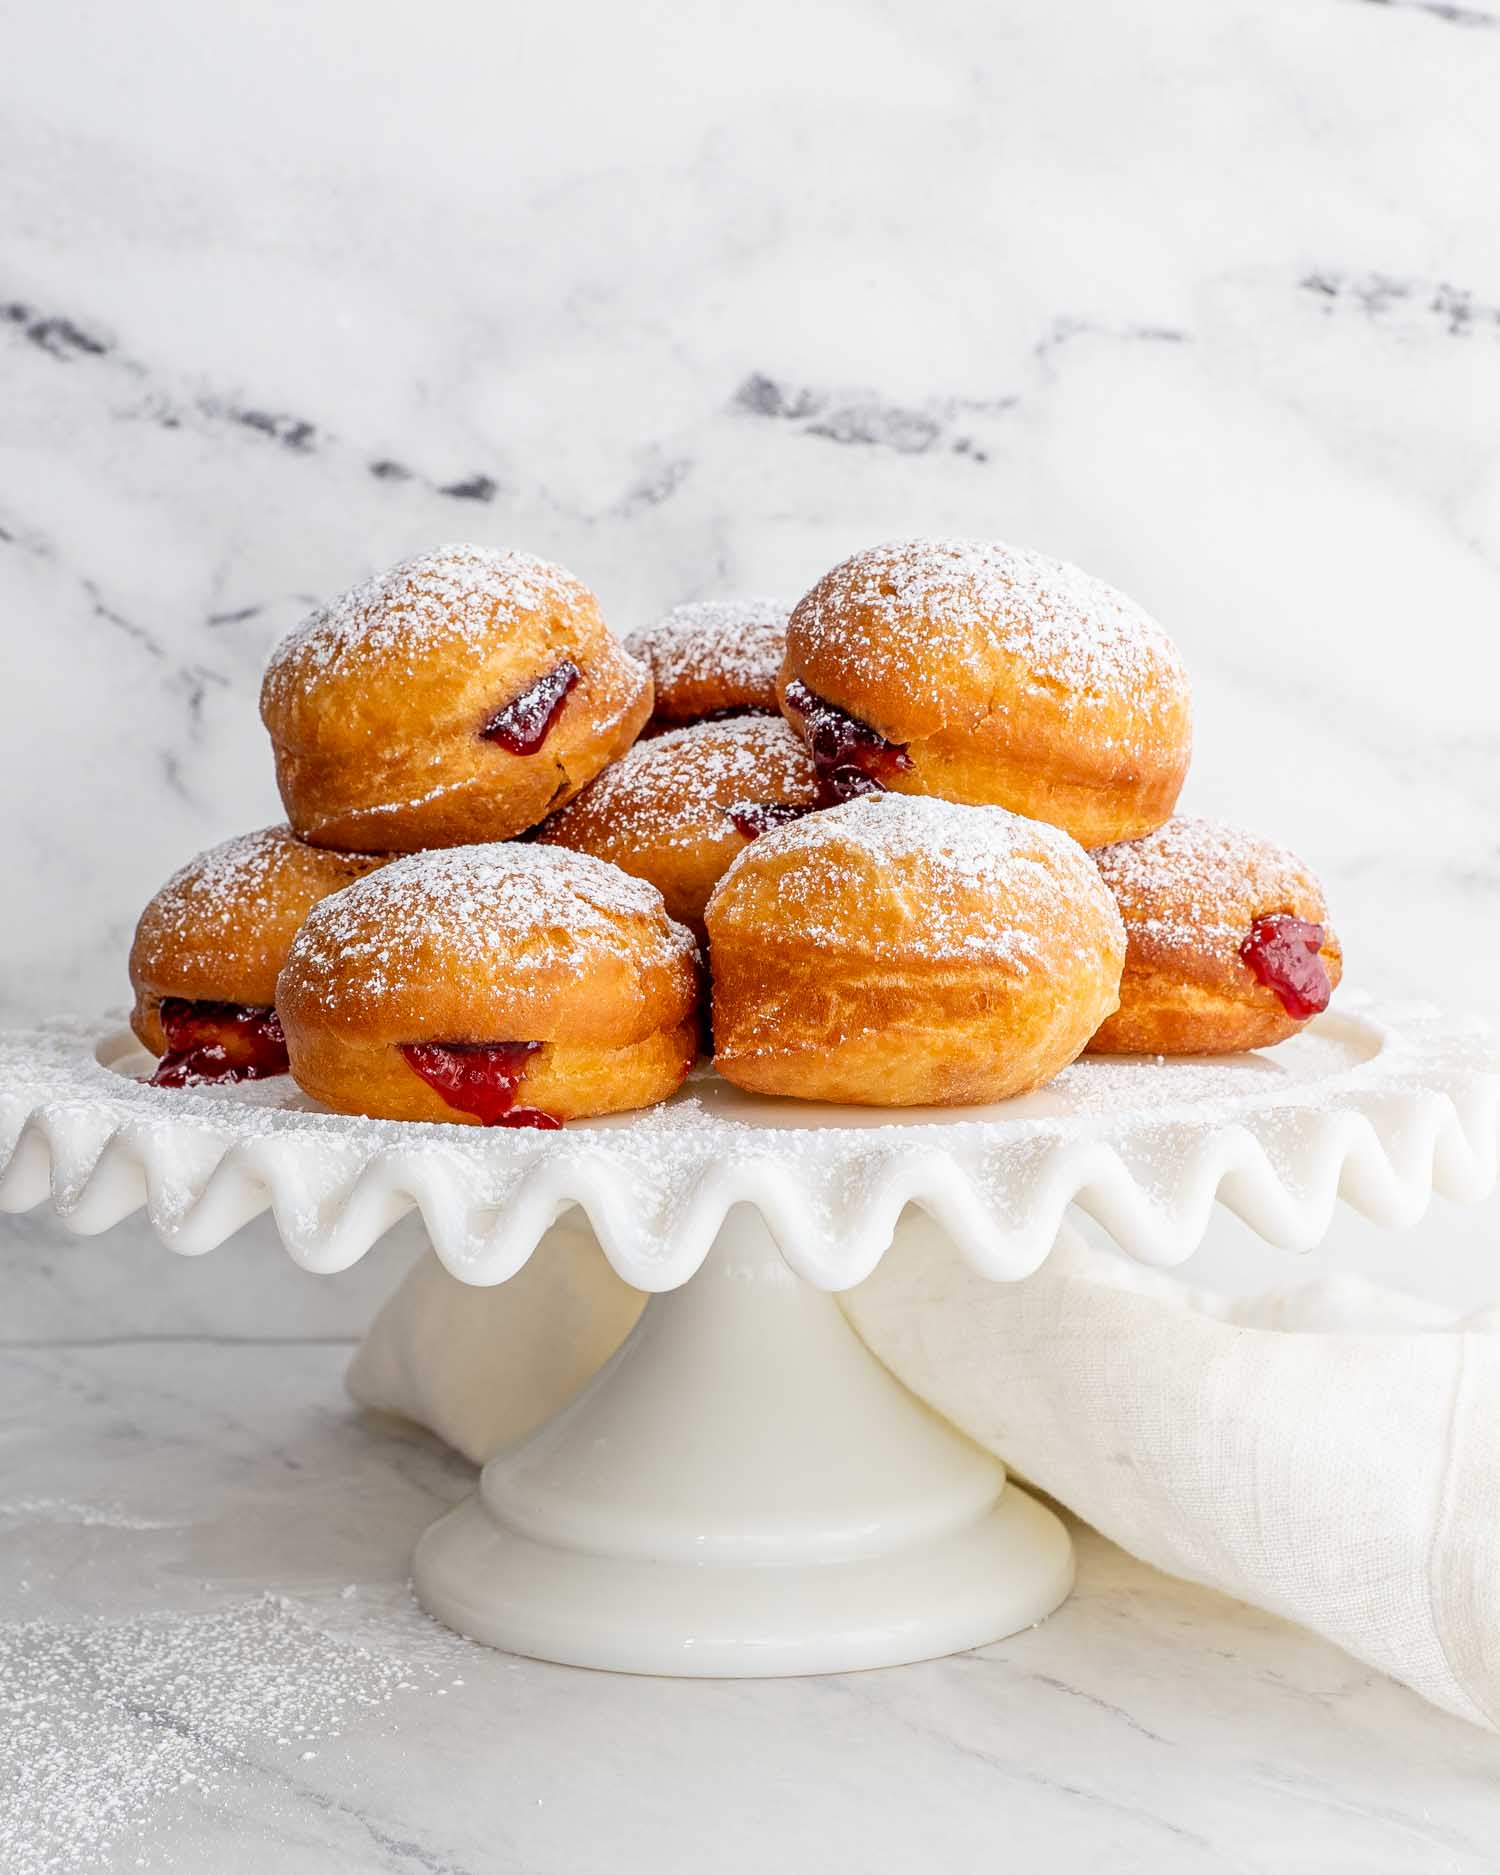
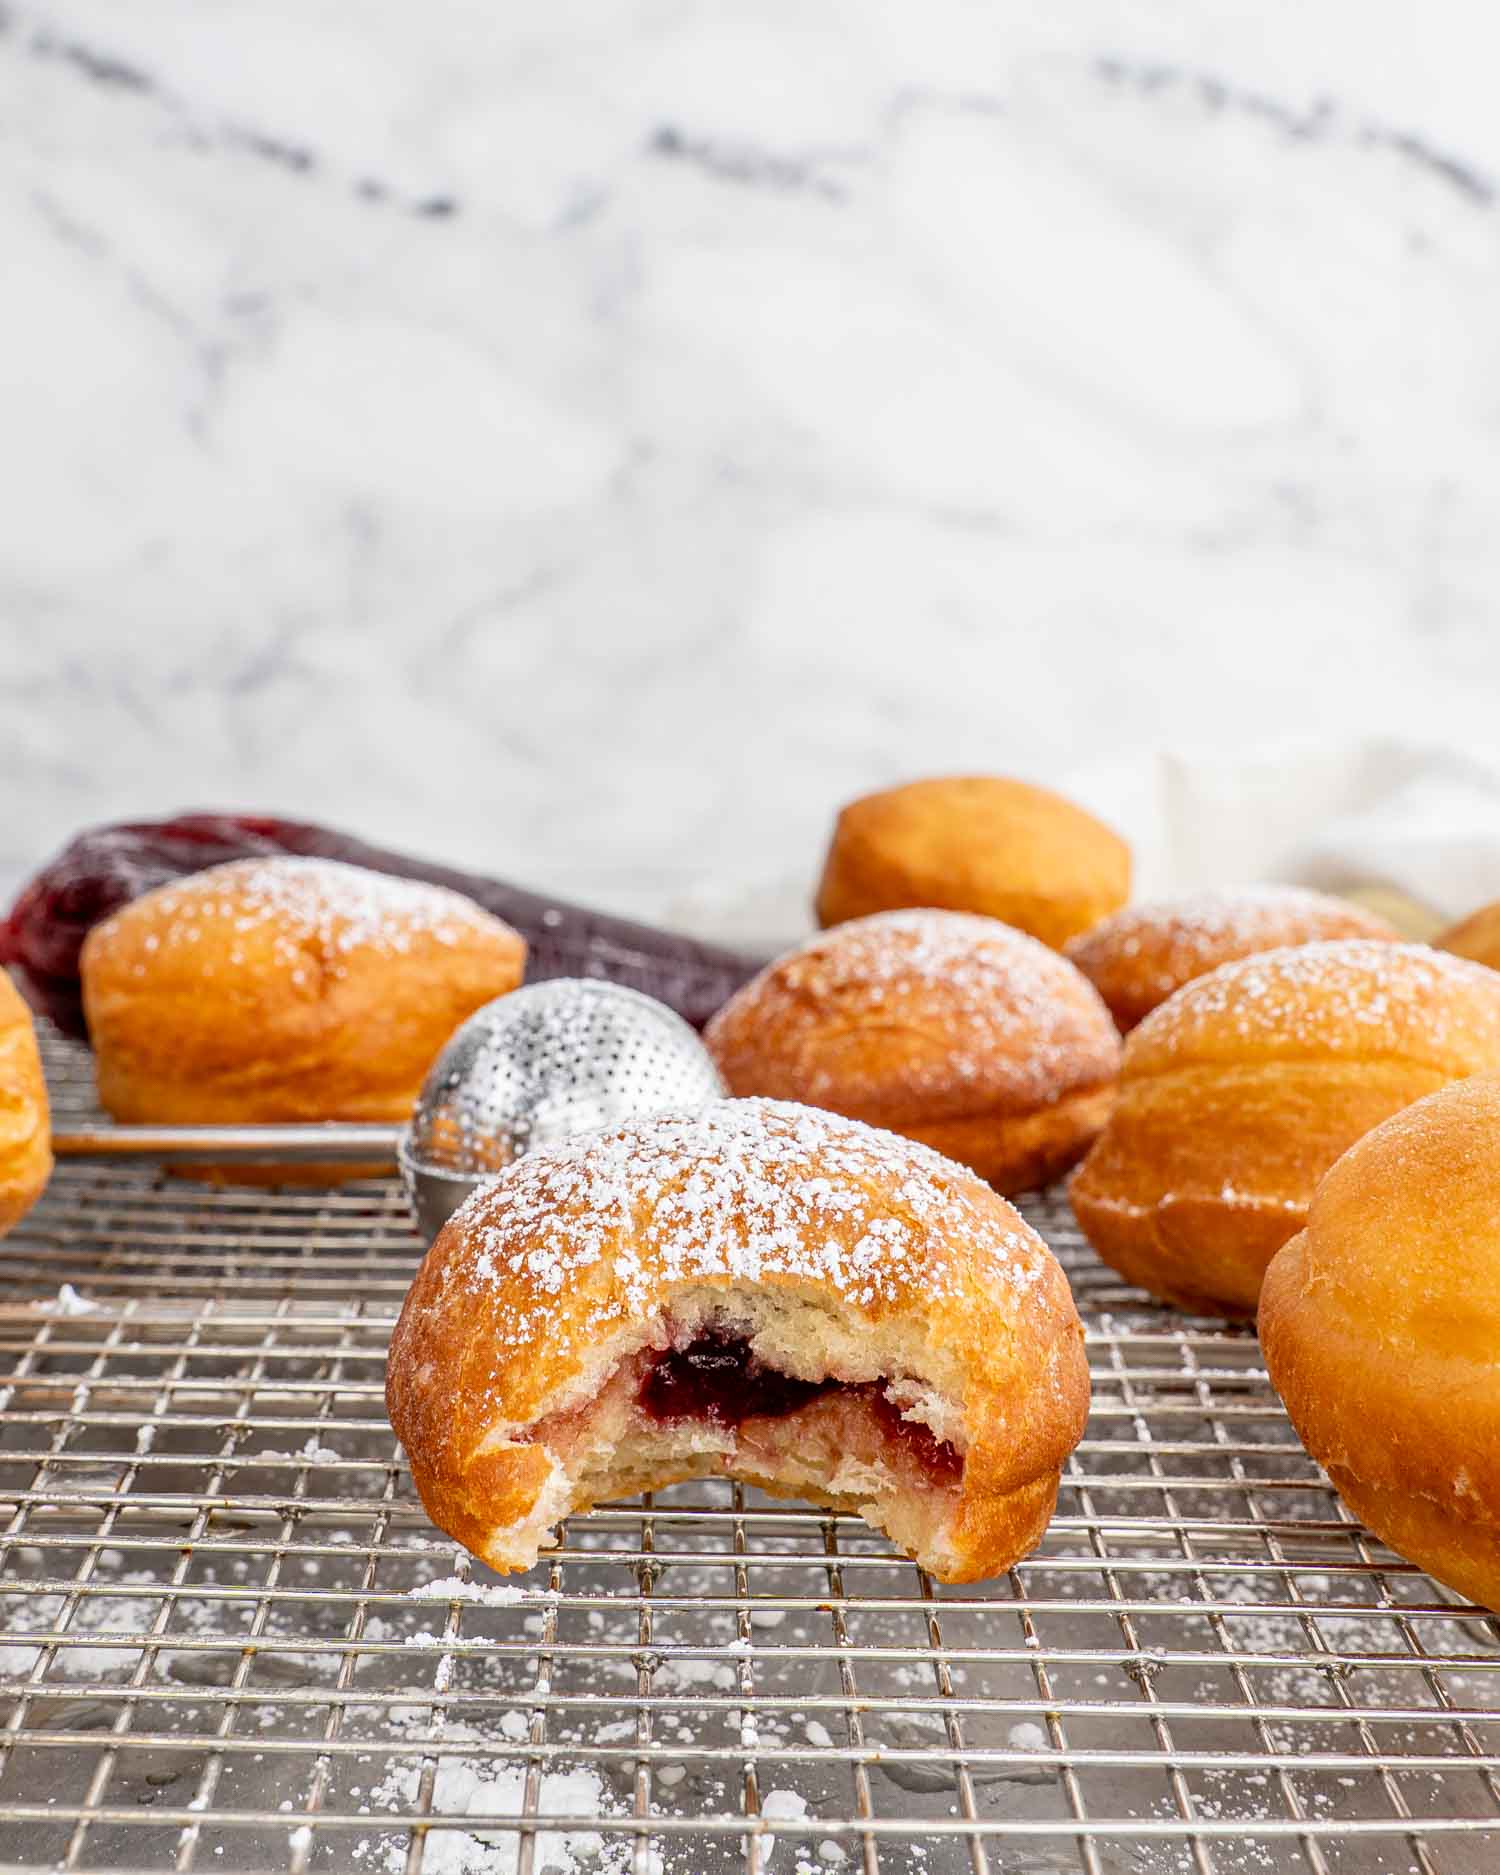
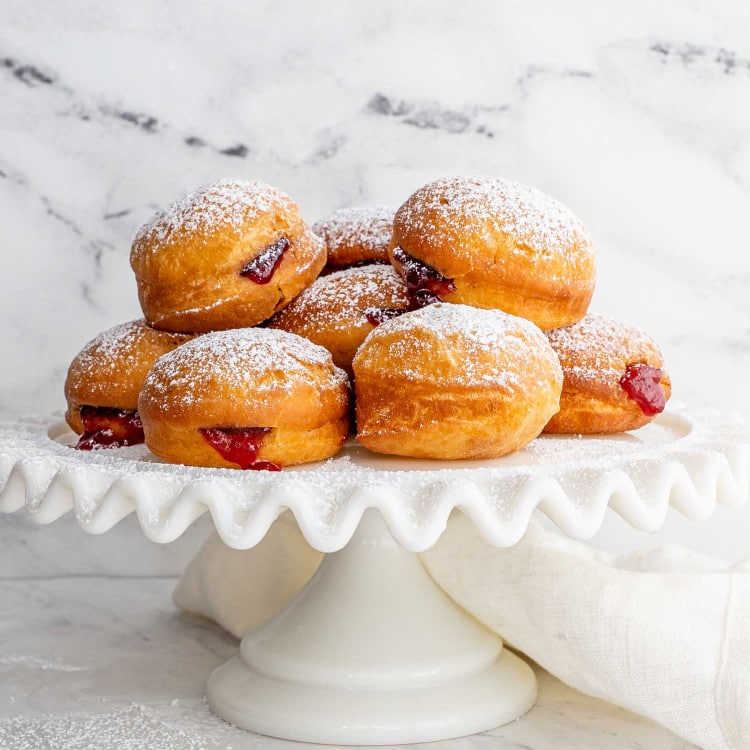
Kick off your day with this easy Jelly Donuts recipe – it’s a simple way to make your mornings delicious and fun. Imagine biting into a warm, fluffy donut, its golden crust giving way to a generous filling of your favorite jelly – cherry, raspberry, or even apricot, each donut becomes a canvas for your culinary creativity and a sure way to delight everyone at your table.
The Best Jelly Donuts
I’m absolutely thrilled to share this Jelly Donuts recipe with you. As a big fan of donuts, I can’t get enough of the simple pleasure they bring, especially when they’re homemade. Surprisingly easy to make, these donuts are soft, fluffy, and filled with the sweet surprise of your favorite jelly.
They’re the perfect balance of comfort and indulgence, making them a wonderful treat for any day of the week. Trust me, once you see how straightforward and fun it is to create these delightful goodies at home, you’ll be as hooked on making them as I am!
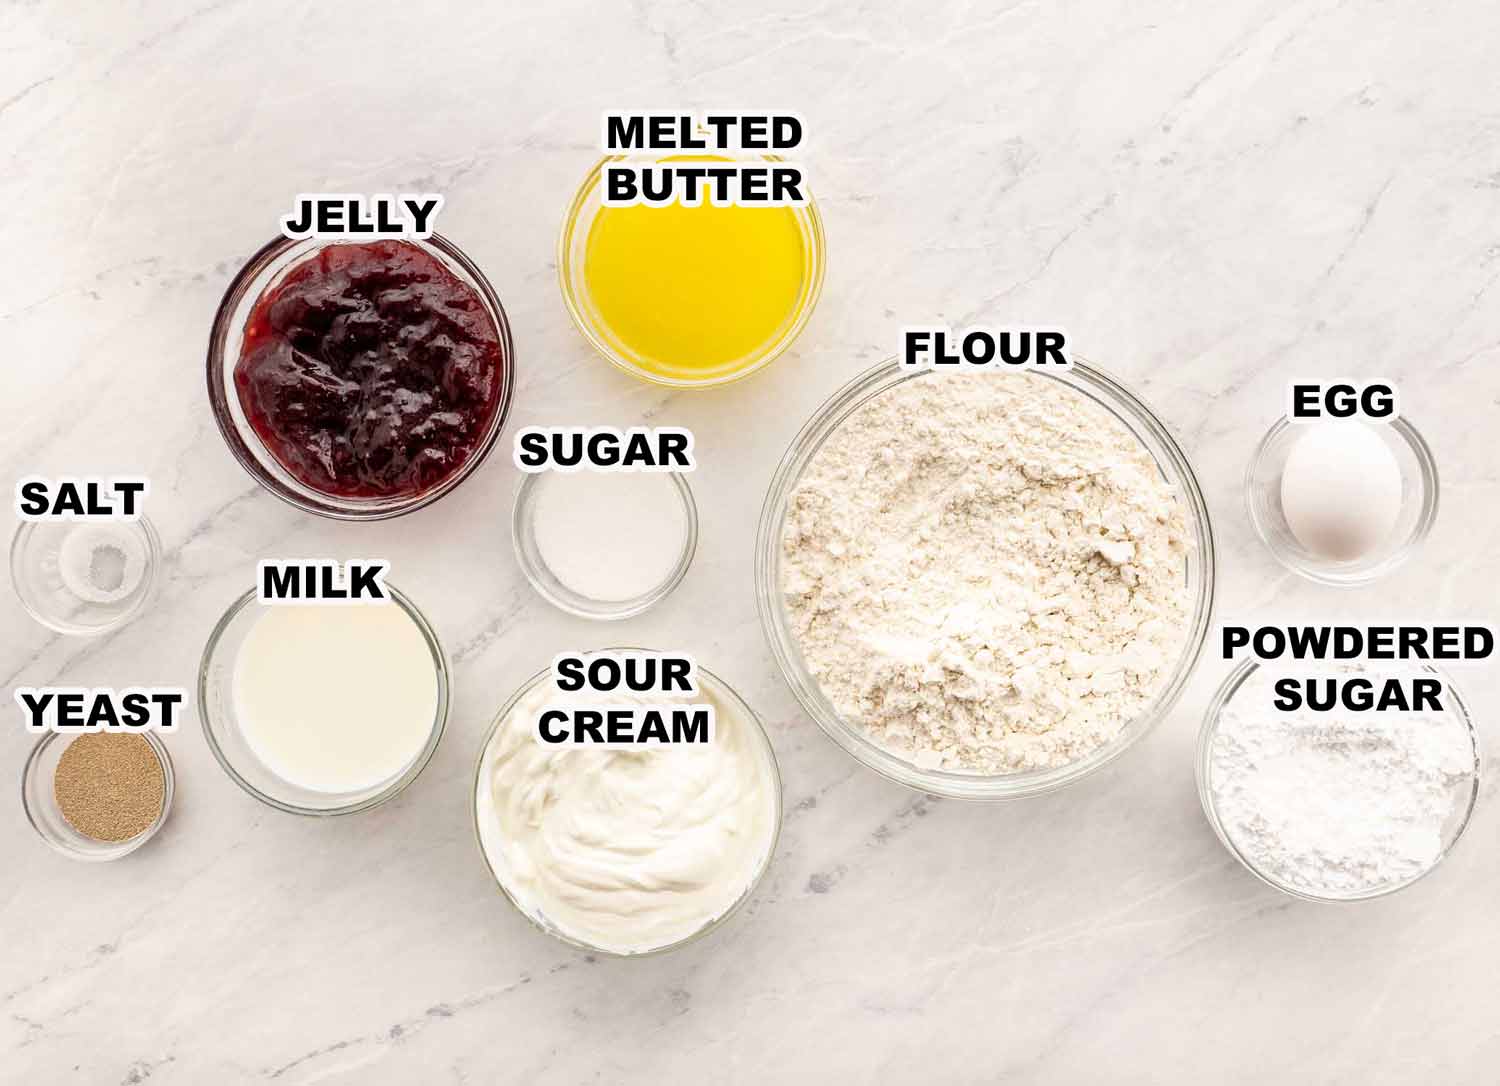
- Active Dry Yeast: This makes the dough rise, giving your donuts a fluffy texture. Instant yeast is a good substitute. If you’re using instant yeast, there’s no need to activate it.
- Sugar: Sweetens the dough and activates the yeast. You can swap it with honey or maple syrup.
- Milk: Enriches and tenderizes the dough. Almond milk or soy milk can act as dairy-free alternatives.
- All-Purpose Flour: Provides structure to your donuts. It gives your donuts their structure. If required, choose a gluten-free all-purpose flour blend as a substitute.
- Salt: This enhances the flavors in your dough. Feel free to omit it if you’re watching your sodium intake.
- Egg: It binds the ingredients and adds richness. For a vegan option, use a flax egg.
- Sour Cream: It adds moisture and richness to the donuts. Greek yogurt or a dairy-free sour cream can be used in its place.
- Unsalted Butter: It flavors and tenderizes the dough. Use margarine or plant-based butter as a non-dairy alternative.
- Vegetable Oil: You’ll use this for frying to give the donuts a crispy exterior. Canola or peanut oil are good substitutes.
- Jelly: It’s the sweet filling for your donuts. Feel free to choose any flavor you like or use jam or preserves instead.
- Powdered Sugar: Dusts over the donuts for a sweet finish. You can also make a simple glaze with milk and confectioner’s sugar.
These jelly donuts are surprisingly easy and so much fun to whip up. You’re going to love how simple yet delicious they are. Let’s get started:
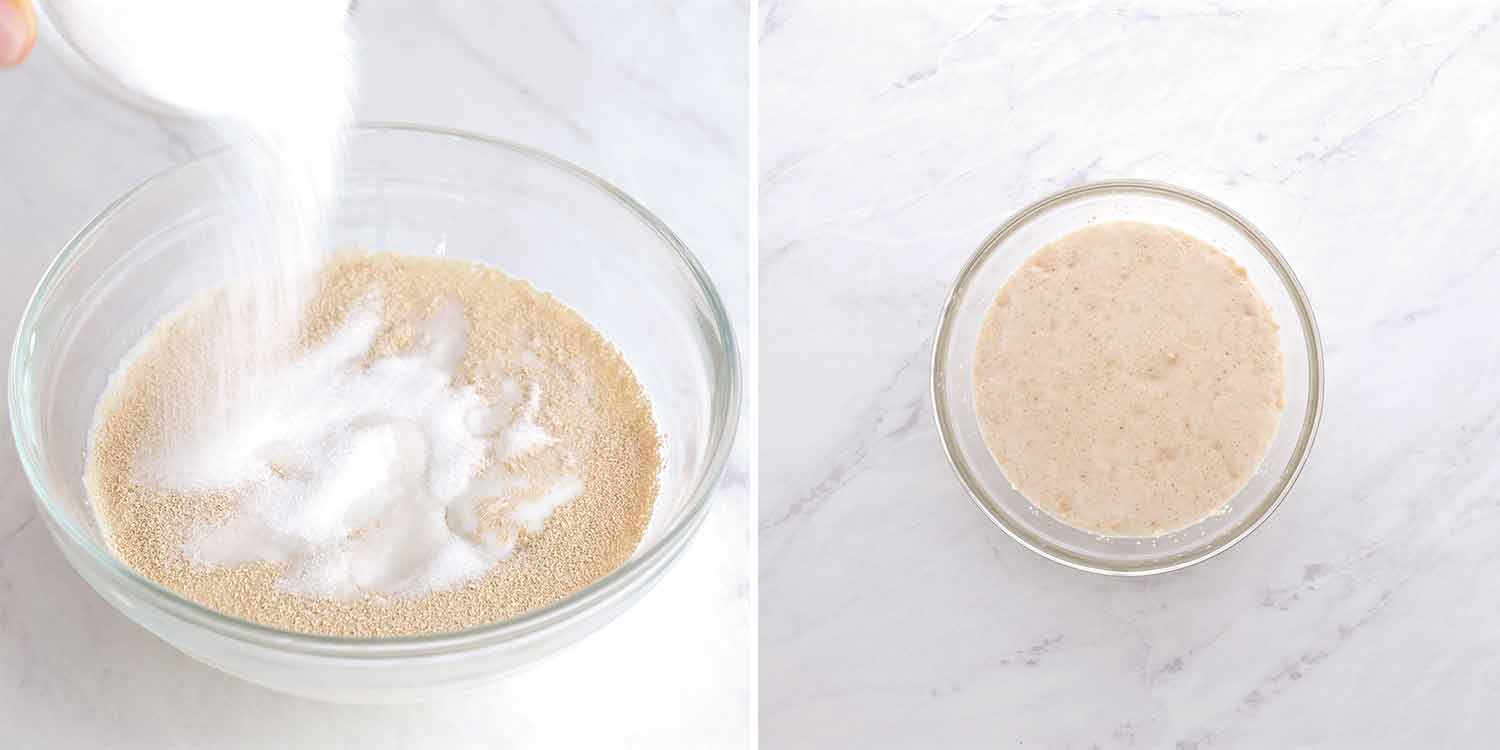
First things first, let’s wake up that yeast. Just mix your active dry yeast with a bit of sugar and lukewarm milk in a small bowl. Give it about 15 minutes, and you’ll see it start to froth – that’s when you know it’s ready to party in your dough!
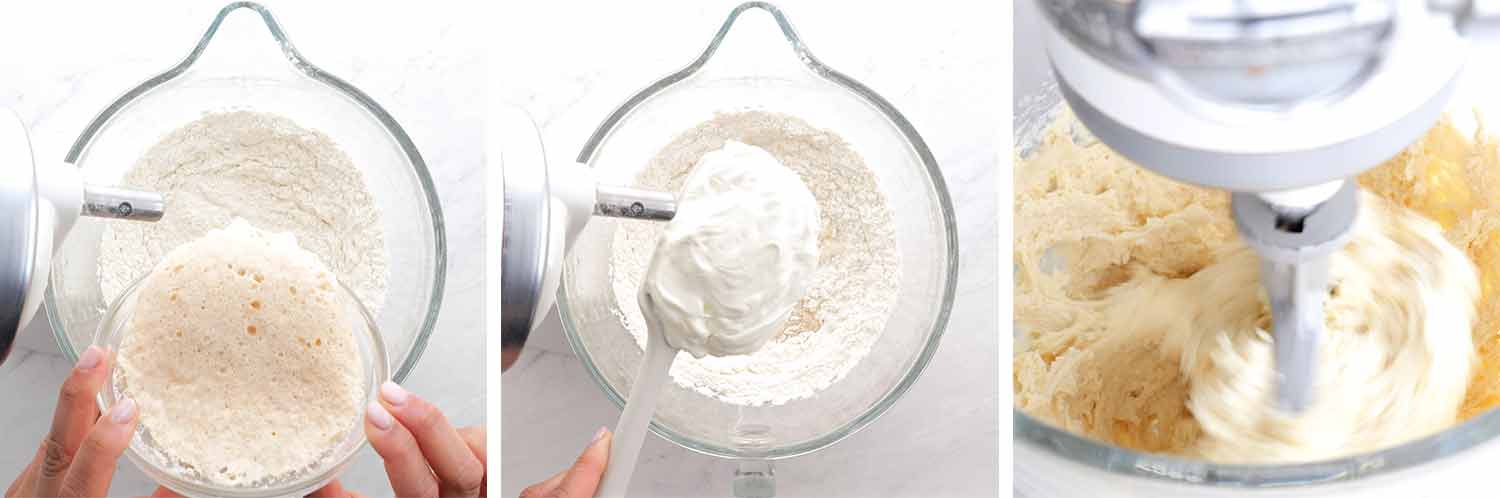
Next, grab a big bowl or the bowl of your mixer. Toss in your flour and salt, give them a quick stir, and then add in your bubbly yeast mixture. Now, crack in the egg, add your sour cream and melted butter, and mix it all up. You want everything to be nicely incorporated, so it forms a smooth dough.
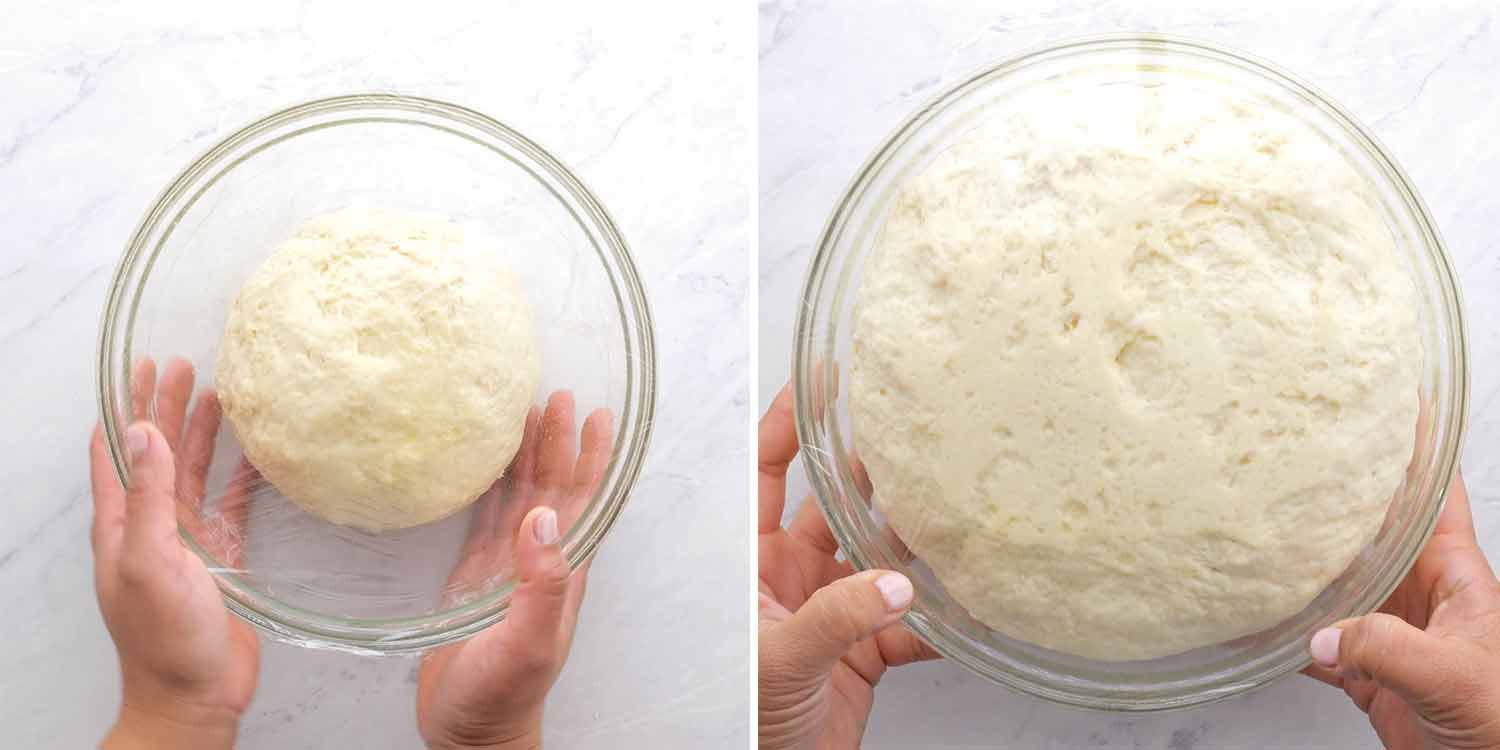
Pop the dough into a bowl, cover it with a towel, and let it hang out until it doubles in size. This is a good time to grab a coffee or catch up on some reading.
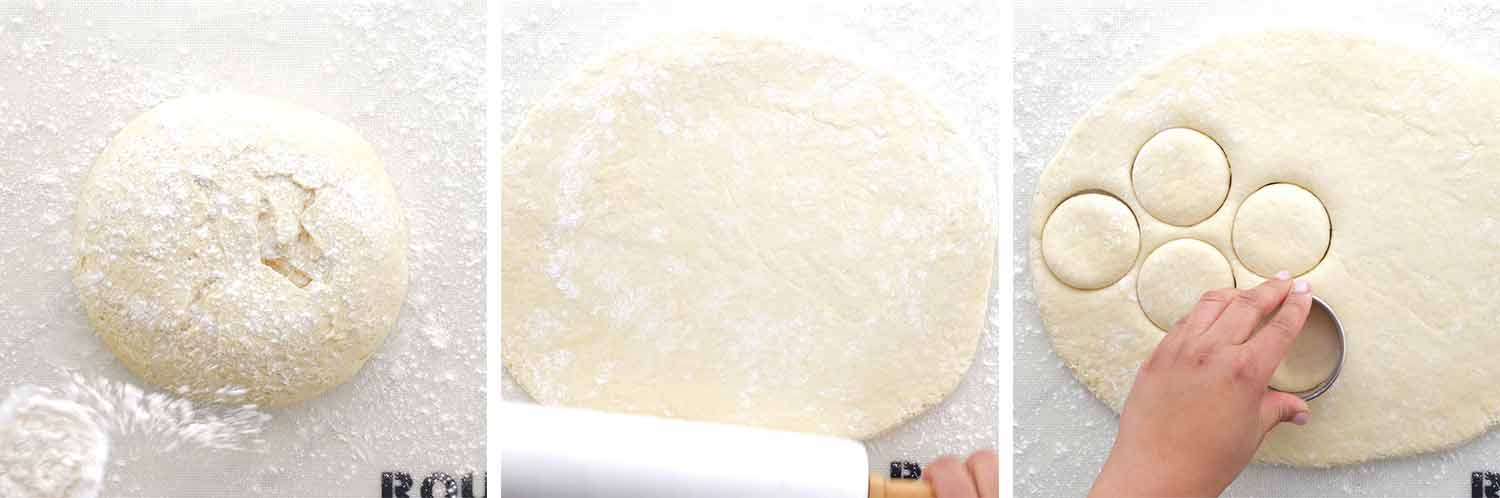
Once your dough has risen, it’s time to shape those donuts. Roll the dough out on a floured surface and cut out rounds using a 3 inch cookie cutter or just a glass. Feel free to get the kids involved here – they’ll love it!
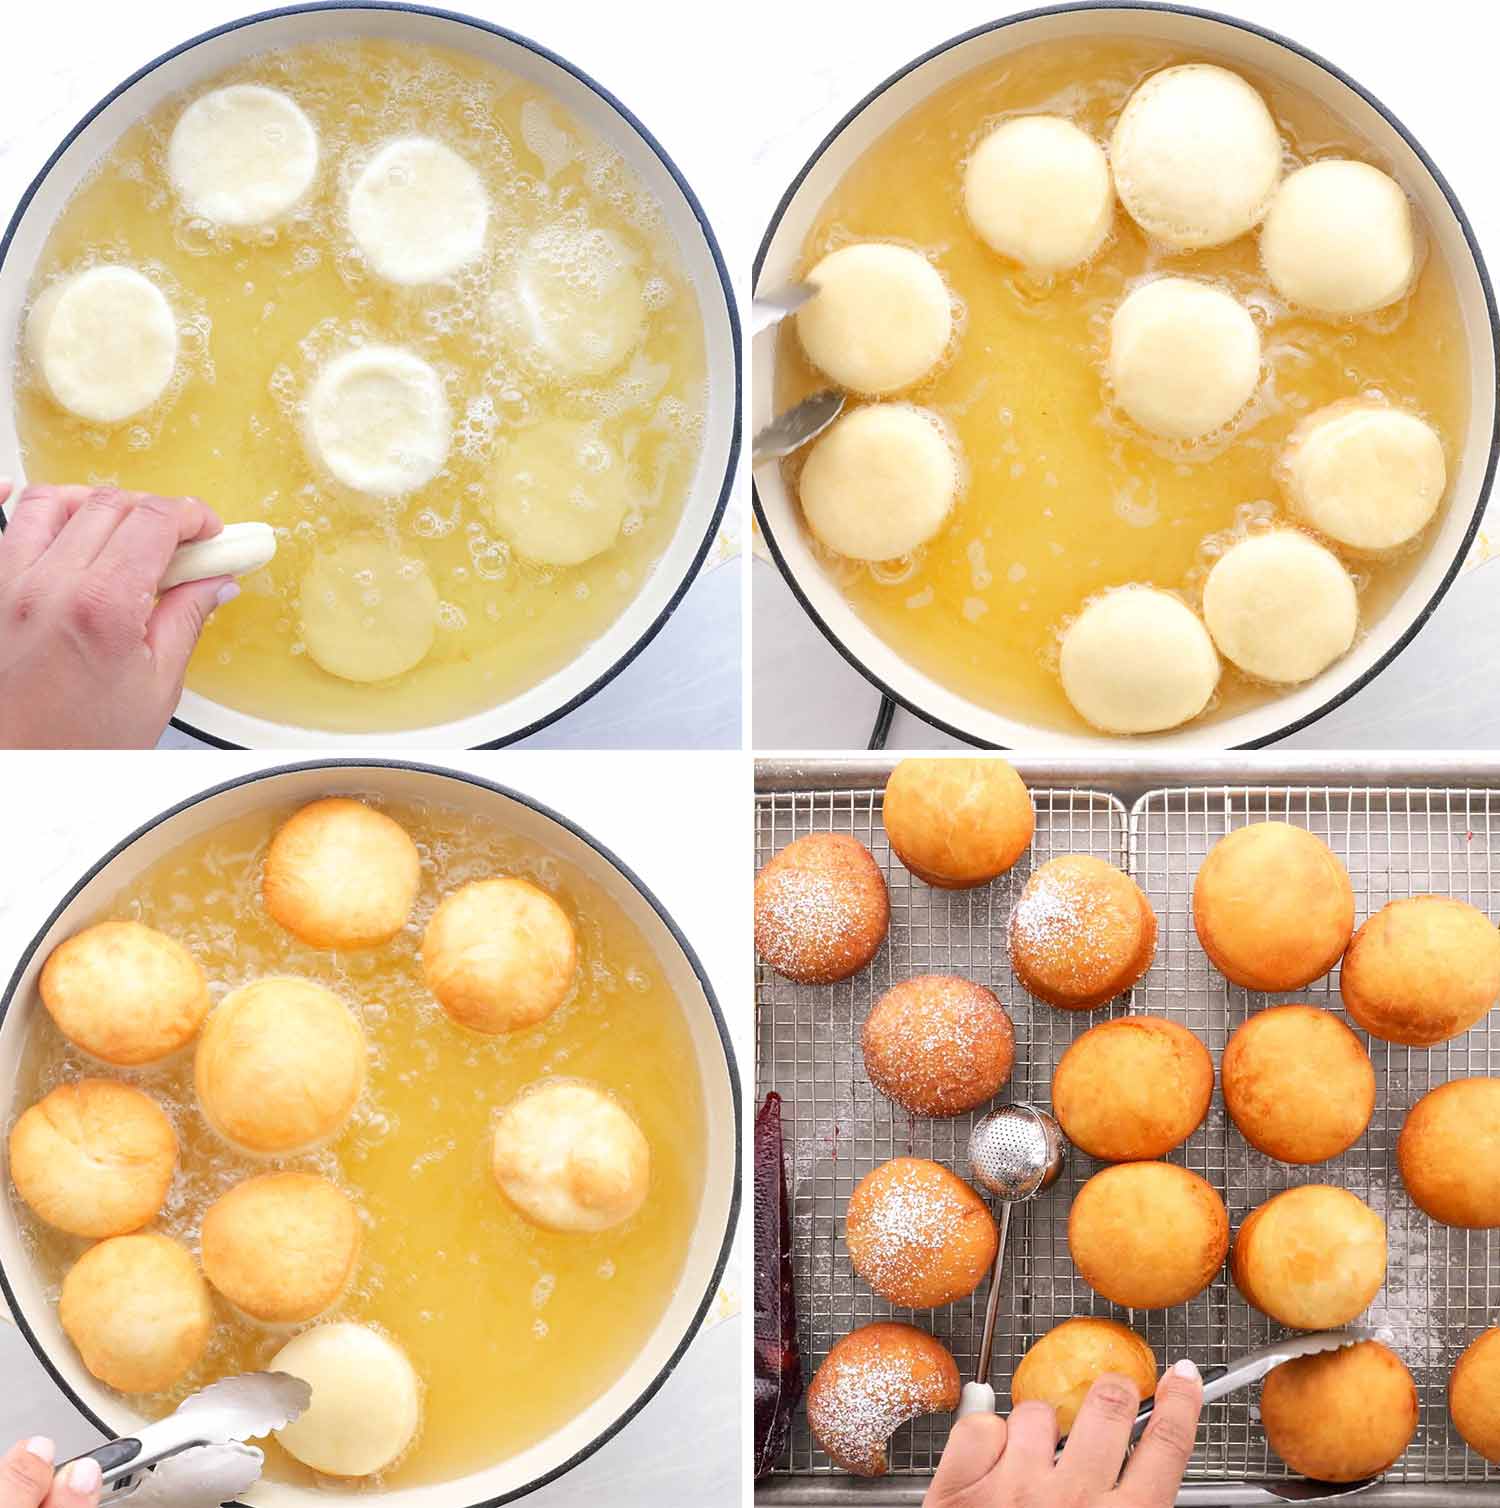
Alright, now let’s get to frying. You’ll want to heat your oil to the ideal temperature of 350°F (175°C) – a cooking thermometer can be super handy here. Keep the heat at medium, and carefully place the donuts in the oil. Fry them until they turn a beautiful golden brown, which usually takes just a couple of minutes per side. Then, take them out and let them cool on a wire rack.
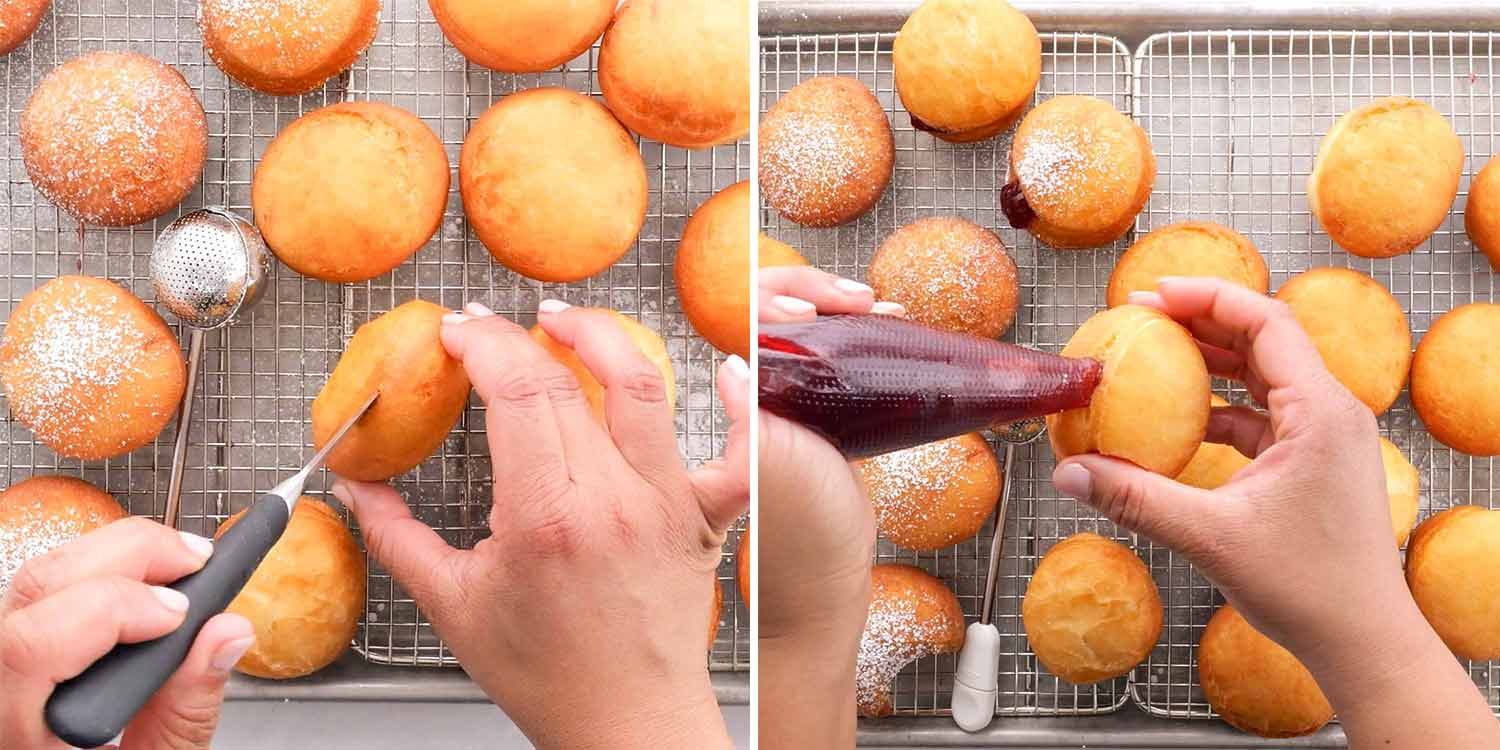
After letting them cool, take a sharp knife and gently make a small cut on the side of each donut for the filling. Equip a piping bag with a small, round tip – about ¼ inch (6mm) works great. Fill this bag with your favorite jelly, be it cherry, strawberry, or any flavor that tickles your fancy. Carefully insert the tip into the cut you made in each donut, and pipe in the jelly. This method ensures a neat and even distribution of the jelly, making every bite a perfectly sweet and delightful experience!
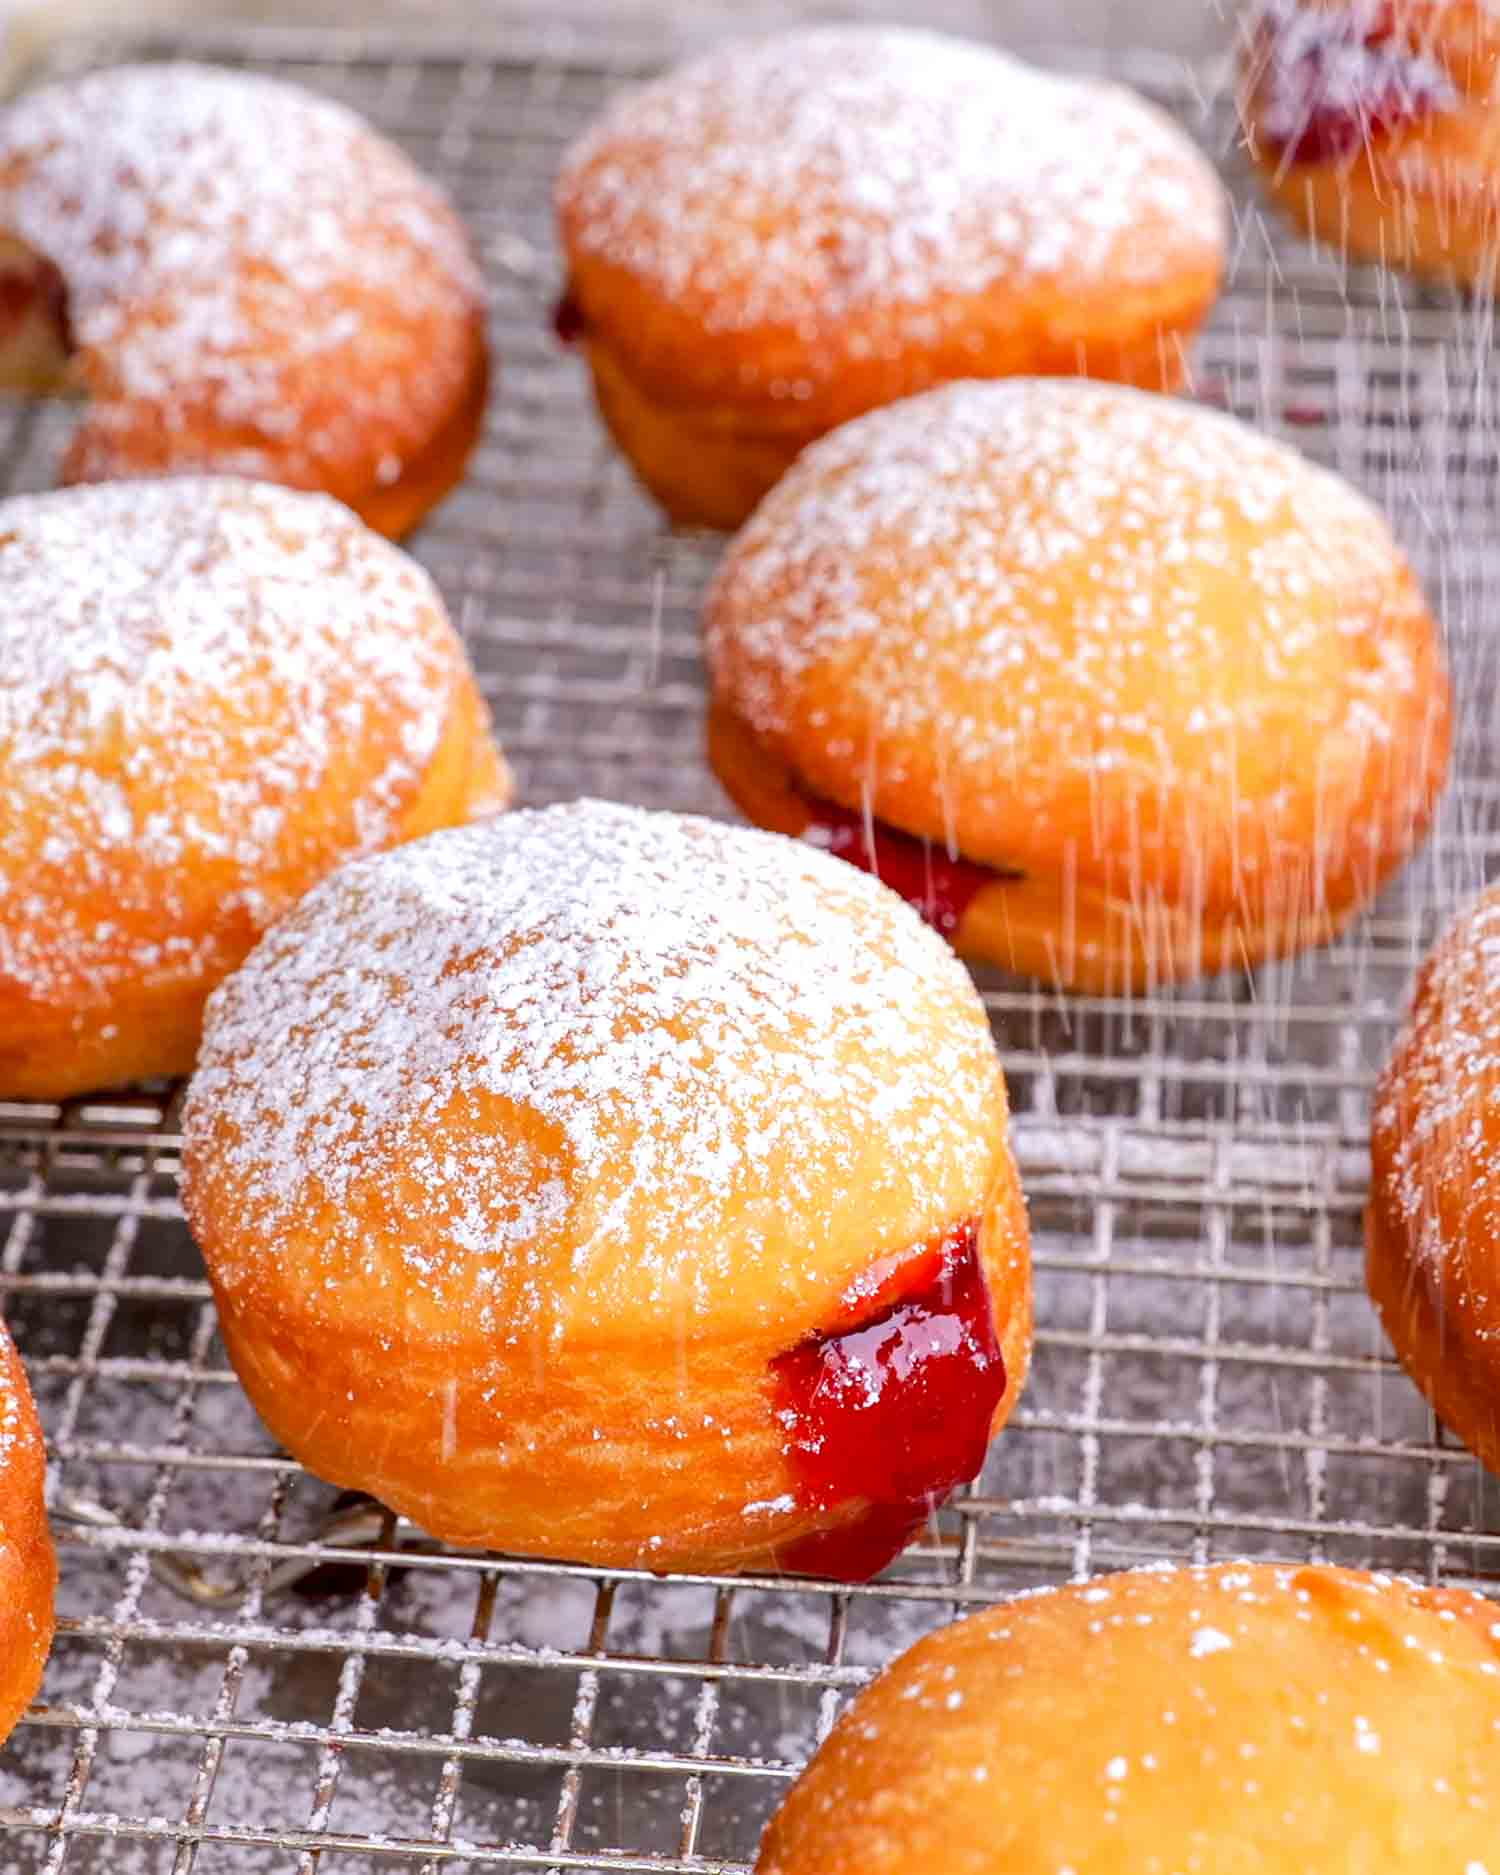
Last but not least, give those beauties a dusting of powdered sugar. It adds that perfect sweet finish.
Frequently Asked Questions
Can I bake these donuts instead of frying them?
Absolutely! If you prefer baking, place the shaped dough on a baking sheet, let them rise a bit, and then bake in a preheated oven at 350°F (175°C) until golden. They will have a different texture compared to fried, but they’ll still be delicious.
What type of jelly is best for filling the donuts?
You can use any type of jelly or jam you prefer. Traditional choices include raspberry, strawberry, or blackberry, but feel free to experiment with flavors like apricot, cherry, blueberry, or even lemon curd for a tangy twist.
How do I know when the oil is at the right temperature for frying?
The ideal frying temperature is 350°F (175°C). You can use a cooking thermometer to check this. If you don’t have one, test the oil by dropping a small piece of dough into it – if it sizzles and turns golden in about a minute, the oil is ready.
Can I make the dough ahead of time?
Yes, you can prepare the dough the night before and let it rise slowly in the refrigerator. The next day, let it come to room temperature for about 30 minutes before rolling and cutting.
Expert Tips
- Dough Consistency: The dough should be soft and slightly sticky. If it’s too sticky to handle, add flour a tablespoon at a time until manageable, but be cautious not to add too much as it can make the donuts tough.
- Yeast Activation: Ensure your milk is lukewarm, not hot, to activate the yeast without killing it. The ideal temperature is about 110°F (45°C). If the yeast doesn’t foam, it may be inactive, and you’ll need to start over with a new batch.
- Even Frying: To prevent donuts from absorbing too much oil and becoming greasy, maintain a consistent oil temperature of 350°F (175°C) during frying. Use a thermometer and adjust the heat as necessary.
- Filling Technique: When filling the donuts with jelly, don’t overfill to avoid bursting or leakage. Gently squeeze the piping bag until you feel the donut expand slightly.
- Freshness is Key: Fry the donuts in smaller batches and serve them fresh for the best flavor and texture. If you need to store them, keep them unglazed in an airtight container and dust with powdered sugar or fill with jelly just before serving.
Storage
To keep your homemade Jelly Donuts fresh and tasty, store them in an airtight container at room temperature, where they’ll stay good for up to 2 days. If you’re not planning to eat them right away, wait to fill and sugar them until just before serving, as the jelly and sugar can make the donuts soggy.
You can also freeze these donuts. First, let them cool completely after frying. Then, wrap each donut individually in plastic wrap and put them in a freezer bag. They’ll last in the freezer for about 2 months. When you’re ready to enjoy them, just thaw at room temperature, warm them up a bit in the oven, and then add the filling and sugar.

Discover More Delicious Donuts
- Apple Cider Donuts
- Glazed Donuts
- Paczki (Polish Donuts)
- Malasadas
- Beignets
- Krispy Kreme Donuts (Copycat)
- Mandazi Recipe – Spiced East African Donuts
Before You Begin! If you make this, please leave a review and rating letting us know how you liked this recipe! This helps our business thrive & continue providing free recipes.
Jelly Donuts
Video
Ingredients
- 2¼ teaspoons active dry yeast (1 packet)
- 2 tablespoons sugar
- ⅔ cup milk (lukewarm)
- 3½ cups all-purpose flour (up to 4 cups)
- ¼ teaspoon salt
- 1 large egg
- 1 cup sour cream
- 5 tablespoons unsalted butter (melted)
- vegetable oil (for frying)
- jelly (use your favorite, for filling the donuts)
- powdered sugar
Before You Begin! If you make this, please leave a review and rating letting us know how you liked this recipe! This helps our business thrive & continue providing free recipes.
Instructions
- In a small bowl, mix the yeast, sugar, and lukewarm milk. Let it sit for about 15 minutes until the yeast dissolves and starts to froth up. This is a good sign your yeast is active!
- In your mixer bowl, combine the flour and salt. Then add the yeast mixture, egg, sour cream, and melted butter. Use the paddle attachment to mix for a few of minutes until well incorporated and comes clean from the sides of the bowl.
- Place the dough in a bowl, cover it with a towel or plastic wrap, and let it rest until it doubles in size.
- Gently punch down the dough to release any air bubbles. On a lightly floured surface, roll out the dough. You want to aim for about ½ inch thickness. Using a 3 inch round donut cutter or a glass, cut out your donut shapes.
- Heat vegetable oil in a Dutch oven to 350°F (175°C). Fry the donuts until they're golden and crispy, then let them cool on a wire rack.
- Take a sharp knife and gently make a small cut on the side of each donut for the filling. Equip a piping bag with a small, round tip – about ¼ inch (6mm) works great. Fill this bag with your favorite jelly and carefully insert the tip into the cut you made in each donut, and pipe in the jelly.
- Dust the donuts with powdered sugar and serve.
Equipment
Notes
- Yeast Check: Ensure your yeast is fresh and active for the dough to rise properly. If the yeast mixture doesn’t froth up, it may be inactive, and you should start over with a new batch.
- Dough Thickness: When rolling out your dough, aim for about ½ inch thickness. This ensures the donuts will puff up just right when fried.
- Oil Temperature: Maintain the frying oil at 350°F (175°C) for the best results. This temperature allows the donuts to cook evenly without absorbing too much oil.
- Filling Tips: Use a piping bag with a small tip for filling the donuts. Be careful not to overfill to prevent the jelly from leaking out.
- Serving and Storage: These donuts are best enjoyed fresh. However, you can store unfilled donuts in an airtight container for up to 2 days and fill them just before serving. Unfilled donuts can also be frozen for up to 2 months.
- Customize Your Fillings: Feel free to experiment with different jelly flavors or even custards and creams for a variety of delicious fillings.
Nutrition Information
Notice: Nutrition is auto-calculated for your convenience. Where relevant, we recommend using your own nutrition calculations.
