Mongolian Chicken
This post may contain affiliate links. Please read my disclosure policy.
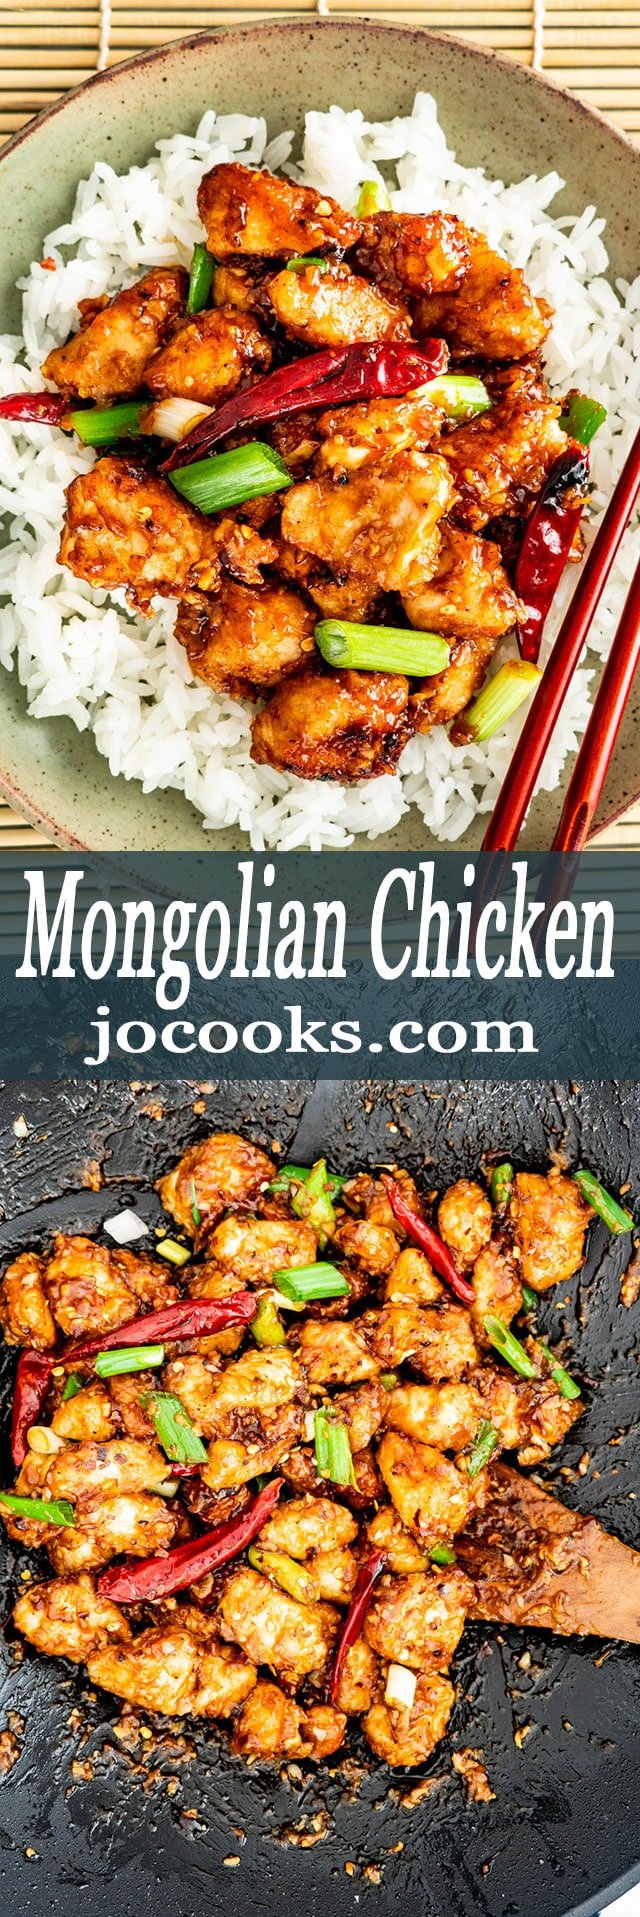
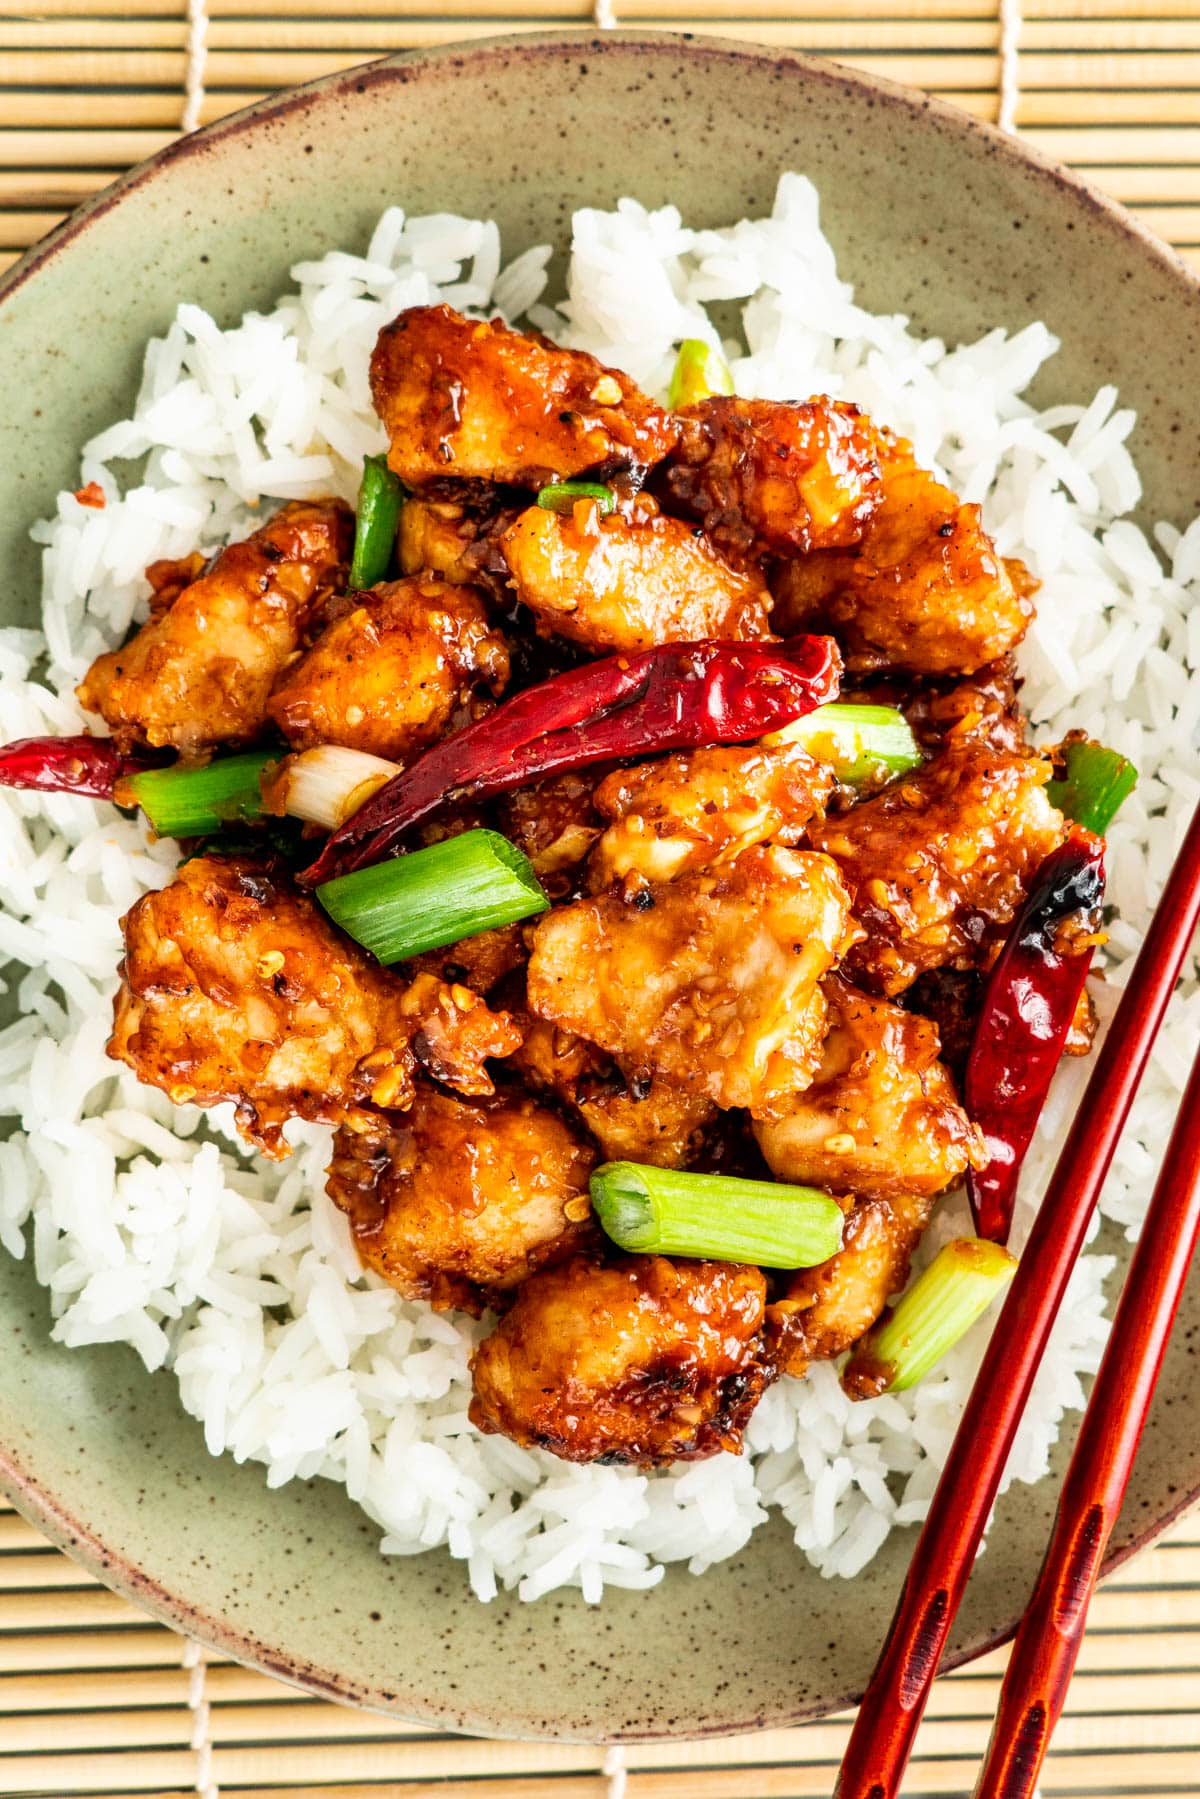
This easy Mongolian Chicken is ready in only 30 minutes, so skip the take-out and enjoy this delicious crispy chicken with a sweet and savory sauce right at home. Quick, simple, utterly delicious and every bite is packed with tons of flavor.
Although the name of this dish is Mongolian Chicken, none of the ingredients or method of preparation are really Mongolian. Mongolian simply implies that this is an exotic dish. Nonetheless, this dish is so good, you won’t be disappointed if you try it.
Usually it’s made with beef but I wanted to make this dish with chicken so chicken it is. Also I used skinless boneless chicken breast but chicken thighs can be used as well. This is a hassle free, low effort, no fail recipe that yields an incredibly delicious and comforting chicken dish with a super yummy sauce.
What Is Mongolian Chicken
The popular dish is Mongolian Beef which really isn’t Mongolian but a Chinese-American dish popular in restaurants. It consists of slices of beef, typically flanks steak, then stir-fried with vegetables in a savory brown sauce. It’s a favorite here which is why I also make it with chicken. This recipe is a little bit different than its beef counterpart but still just as mouthwateringly yummy.
This chicken recipe is crispy, salty, sweet and spicy. It has it all. So for those of you preferring chicken over beef, let’s get to it!
Ingredient Notes
For Mongolian Chicken
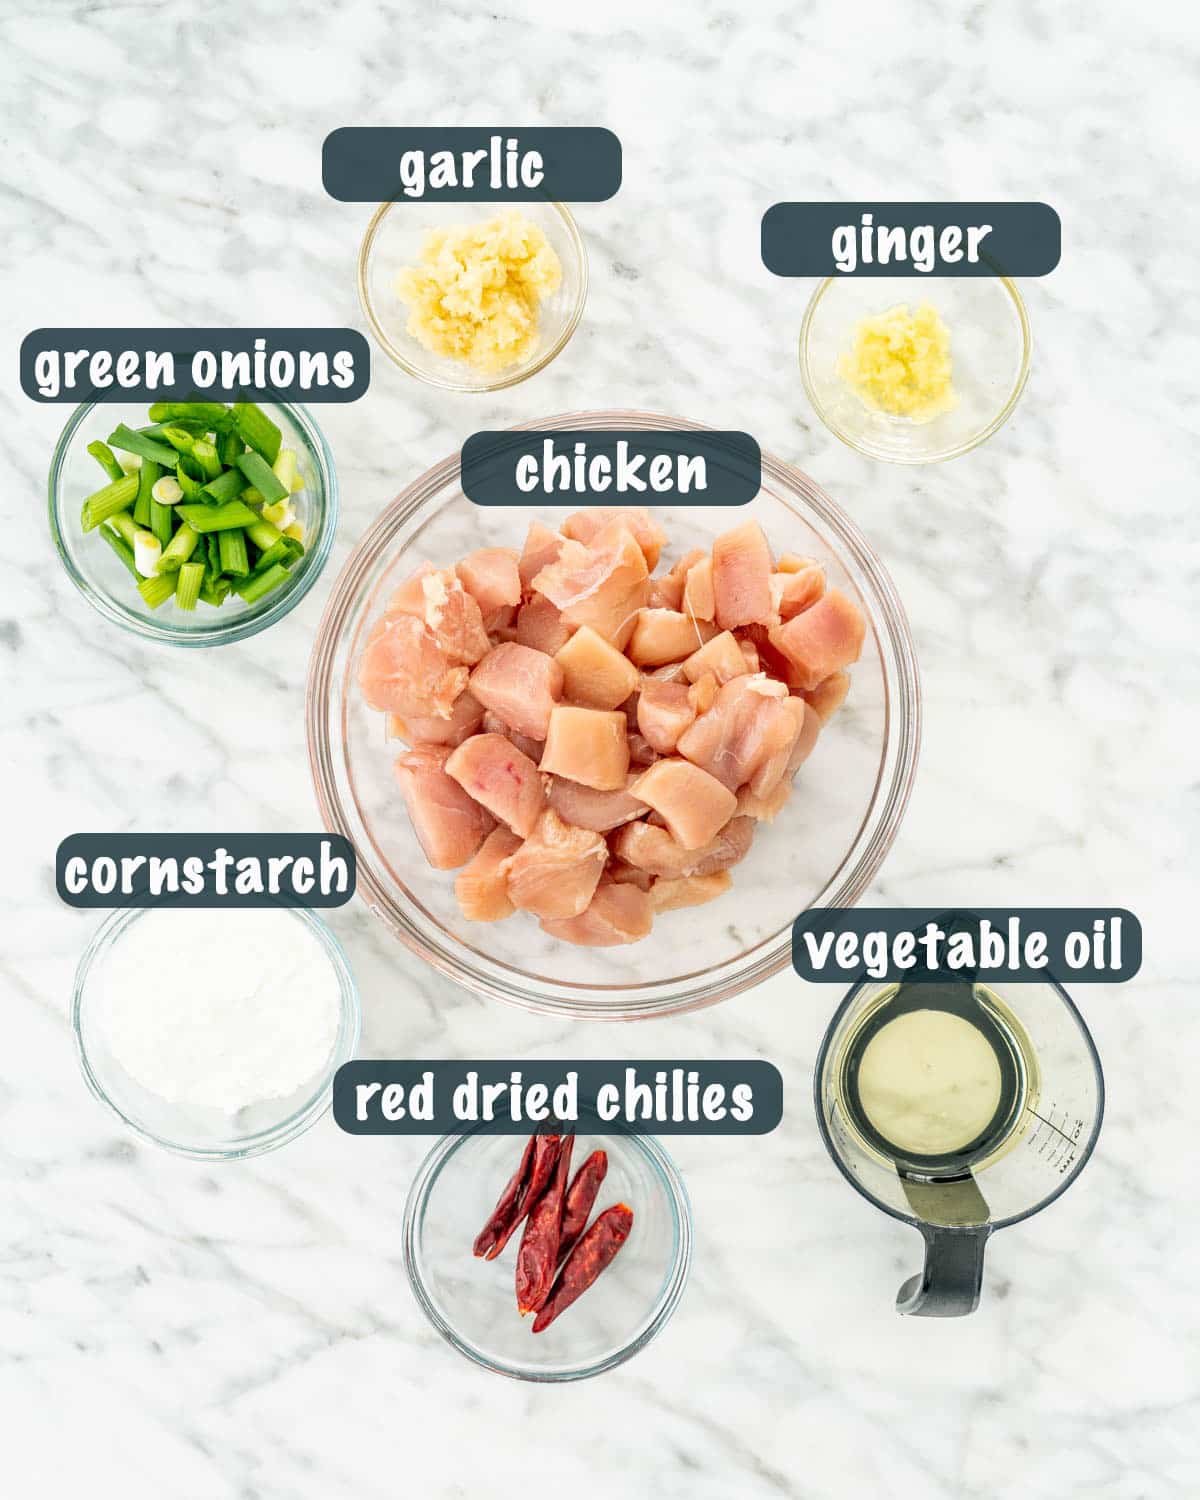
- Chicken – I’ve made this chicken dish with both boneless skinless chicken breasts and chicken thighs. It’s great either way, all depends on if you love white meat or dark meat.
- Cornstarch – this will help crisp up the chicken while frying.
- Red Dried Chilies – these pack a little bit of heat, not as much as you’d think.
- Garlic and Ginger – this is where a lot of the flavor comes from.
- Green Onions – for a little freshness.
- Vegetable Oil – for frying.
For Mongolian Chicken Sauce
- Soy Sauce – I always buy the low sodium kind, and because even low sodium soy sauce is quite salty, it’s not necessary to add any additional salt to this dish.
- Brown Sugar – this is where the sweetness comes from in this dish. You need this brown sugar to balance out the flavors.
- Cornstarch – this is used to thicken the sauce.
- Chicken Broth – again I prefer to use a low sodium or no sodium added chicken broth.

How to make Mongolian chicken
There are three main parts to making this dish, fry the chicken, make the sauce then just toss everything together. It’s fairly simple and quick.
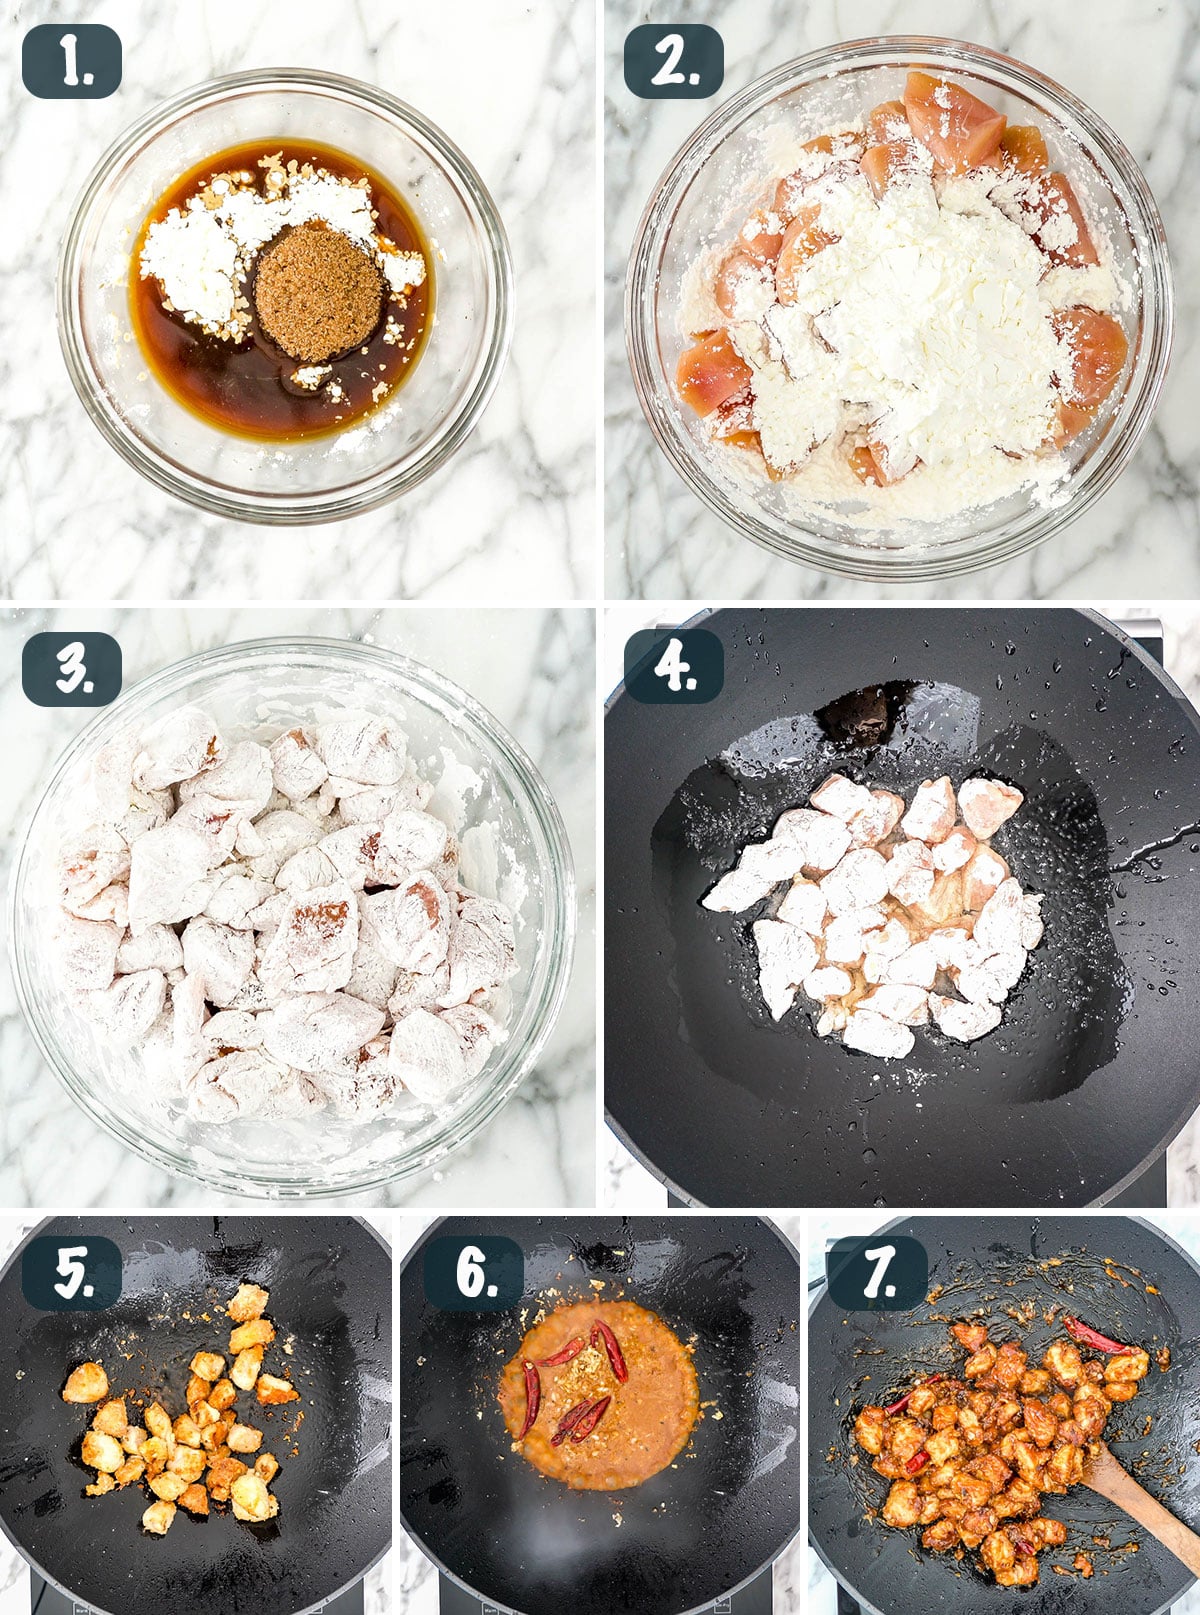
- Make sauce: Whisk all the sauce ingredients together in a medium bowl. Set aside.
- Prepare the chicken: Toss the chicken with the cornstarch, ensuring each chicken pieces is covered in cornstarch.
- Fry the chicken: Heat the vegetable oil in a pan or wok. Fry the chicken pieces in batches until they are completely cooked through and slightly brown and crispy.
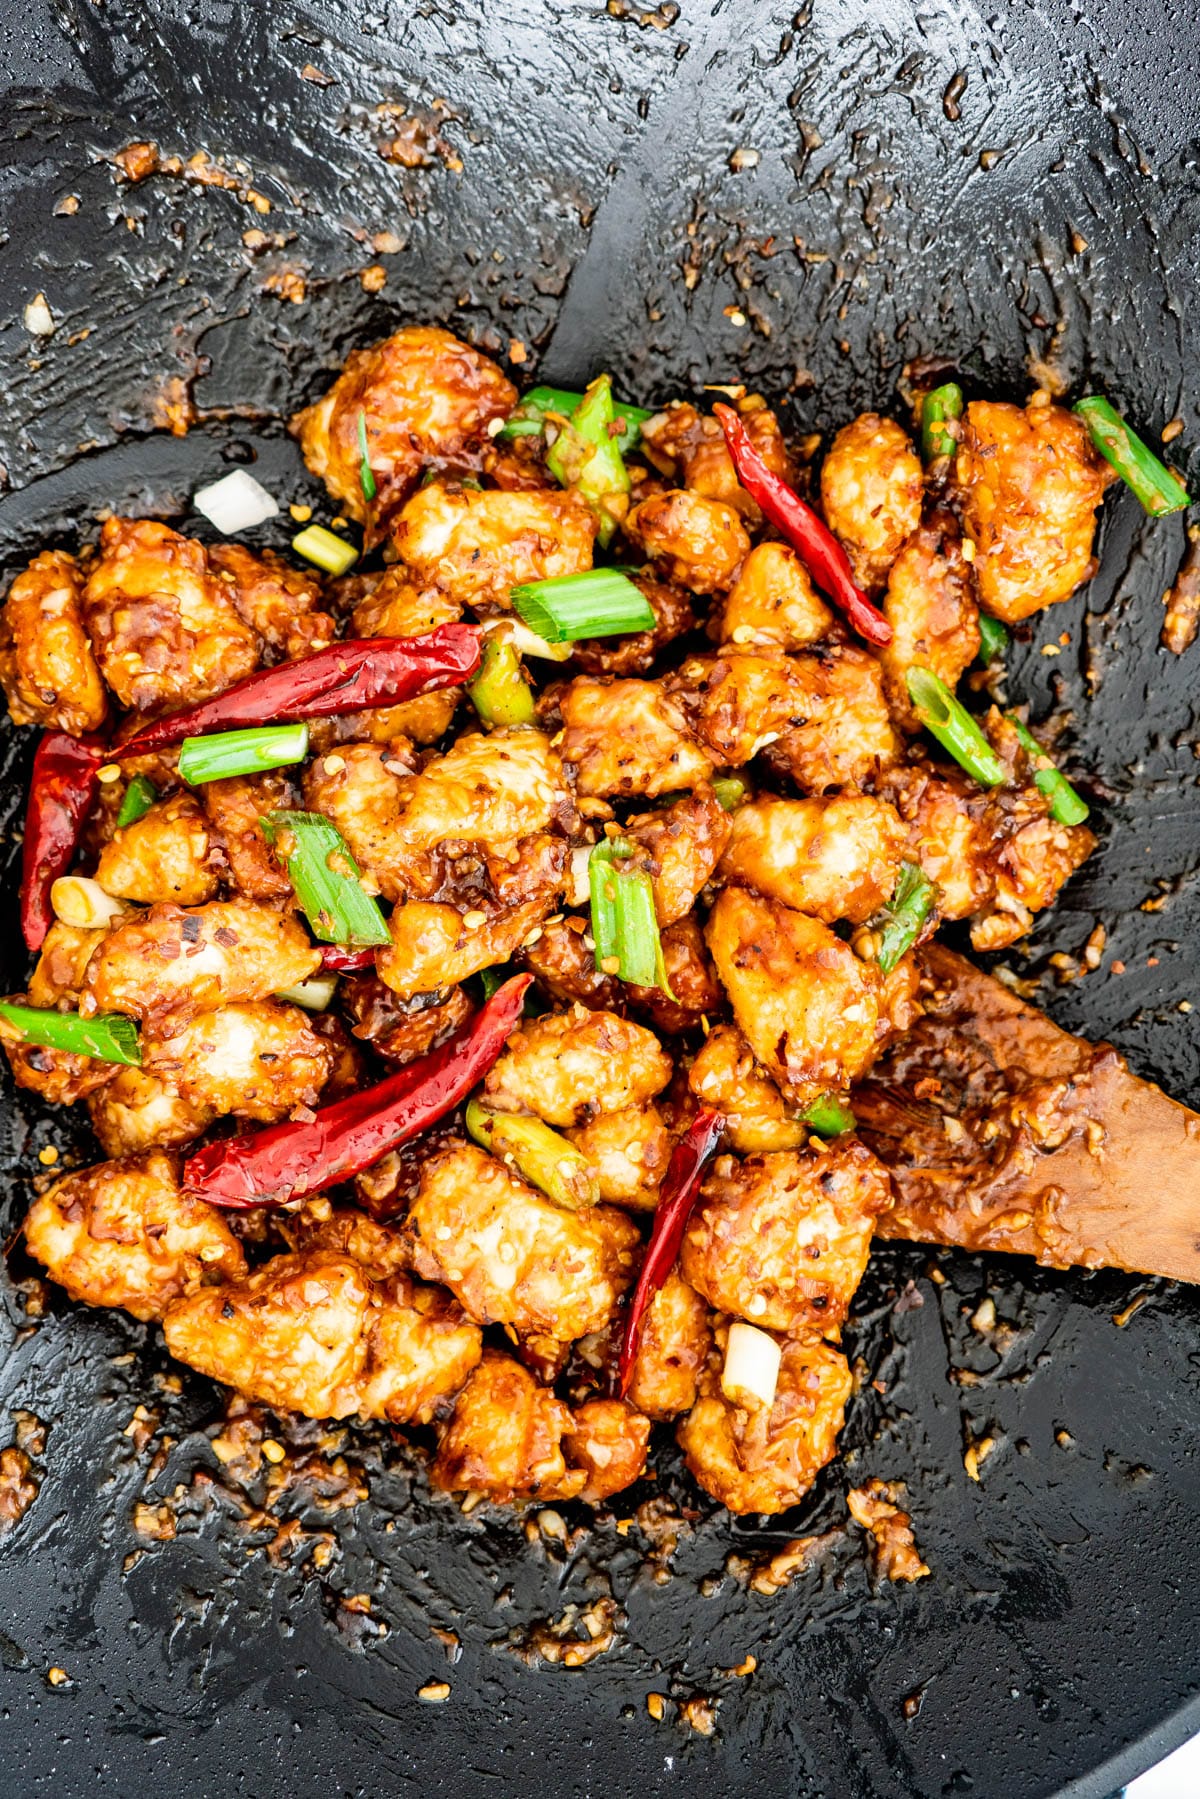
- Finish the dish: Drain the oil from the wok leaving 1 tbsp in the wok, if necessary. Add garlic, ginger, red chiles to the wok and saute for 30 seconds. Add in the prepared sauce and bring to a simmer, stirring constantly until the brown sugar has dissolved completely. Add in the chicken and green onions then toss everything together for 15 seconds.
How to serve
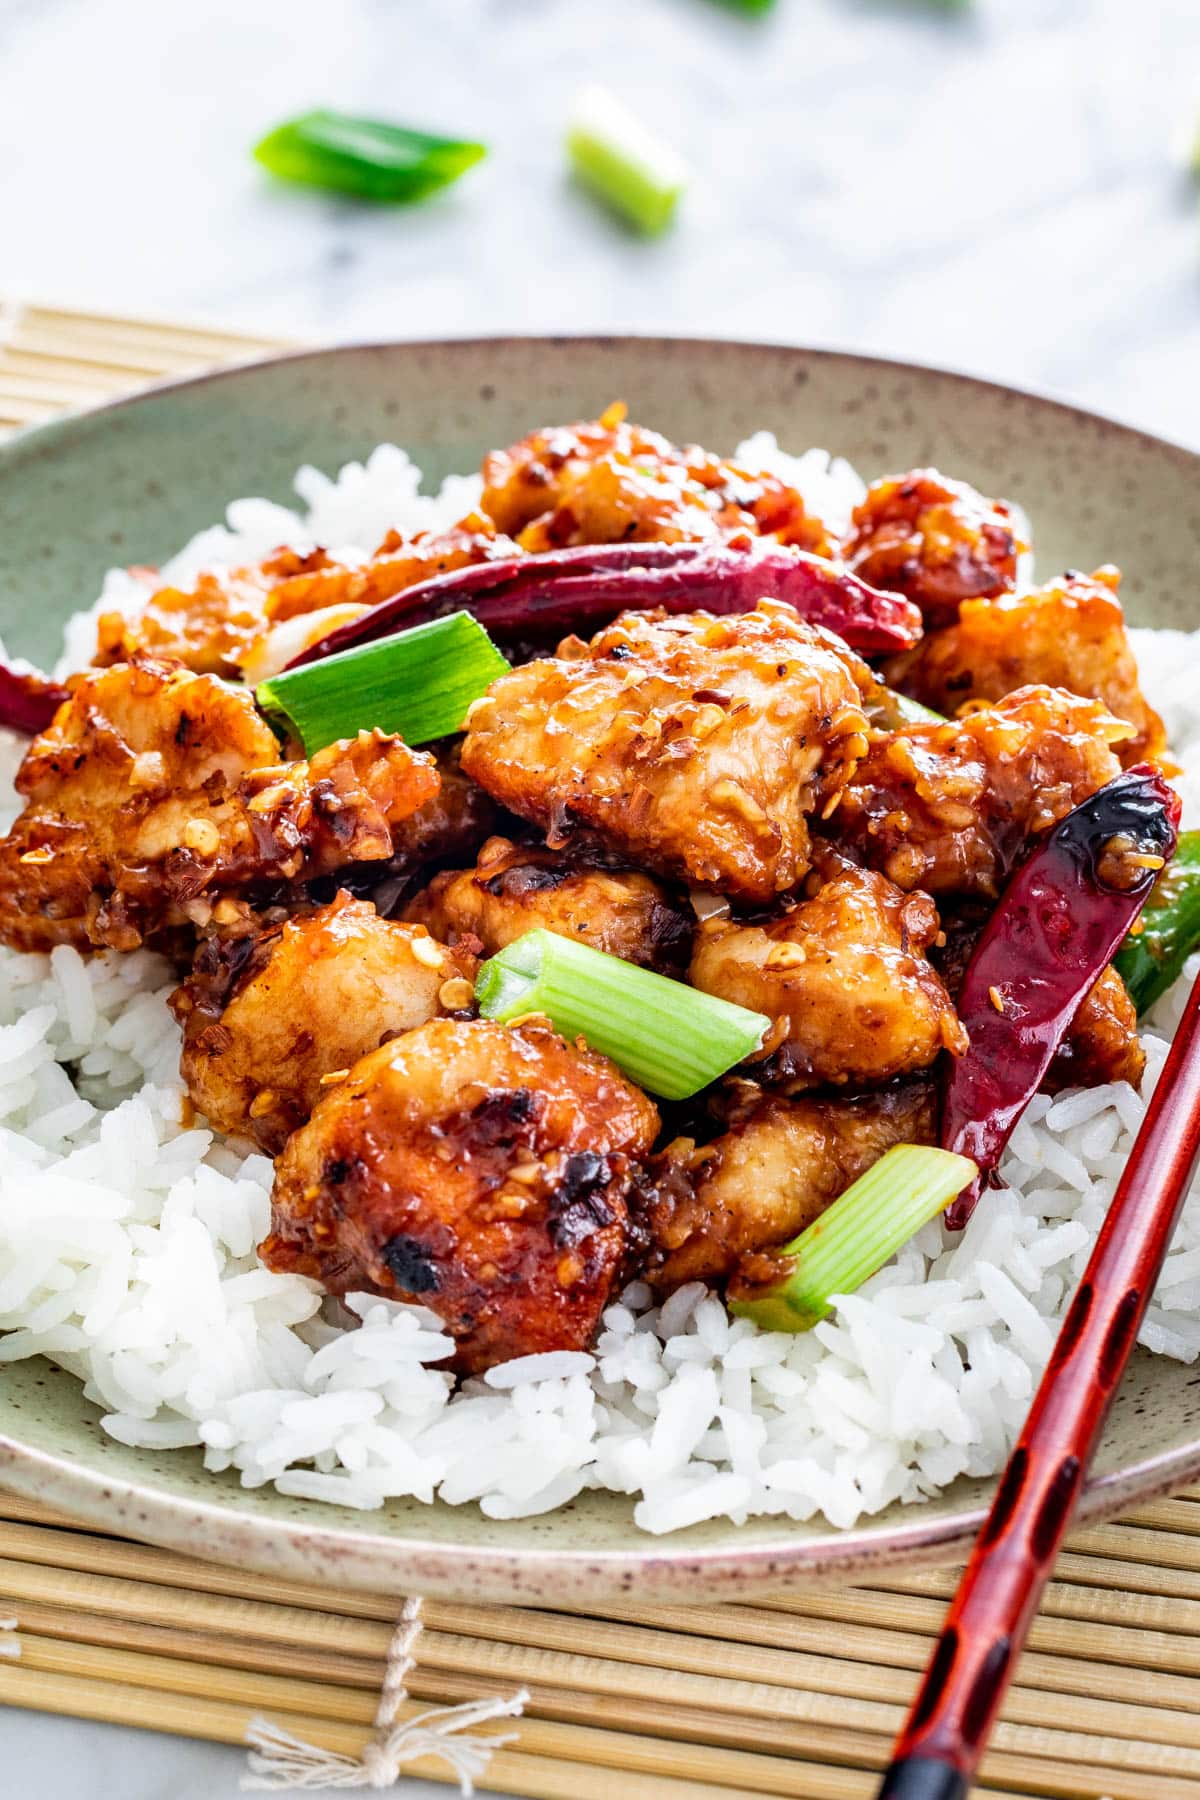
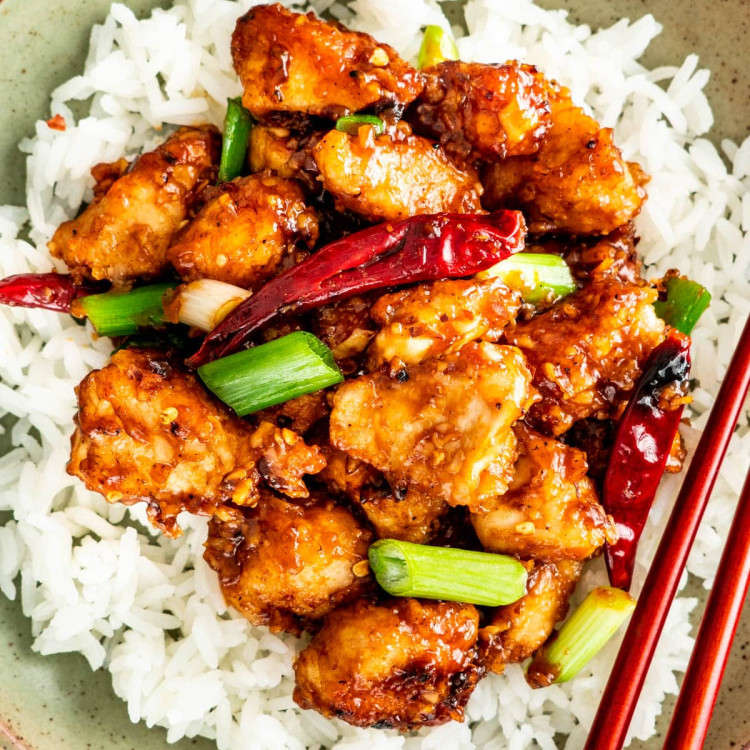
My favorite way to serve this is over cooked rice such as Jasmine rice or Basmati rice. You could also serve it over noodles.
Some tips
- Feel free to experiment with this dish. Try adding different veggies, such as zucchini, broccoli, mushrooms or peppers.
- Try oven frying this chicken instead of frying it. Bake it at 475 F degrees for 8 minutes on the top rack. Flip the chicken pieces and broil on low for another 3 minutes or until golden brown. Keep an eye on it as it could burn quickly.
- There’s no need to marinate this chicken. The sauce provides all the sweet and salty flavors we need.
Leftovers
Store leftovers in an airtight container in the refrigerator for up to 3 days. I usually just reheat in the microwave for a couple minutes before serving.
Freezing
You can freeze this by storing it in an airtight container or freezer bags, once it has fully cooled. Store it in the freezer for up to 2 months. To thaw, take it out of the freezer the night before and place it in the refrigerator. The next day when ready to serve, either heat it up in the microwave and add it to a skillet/wok and stir-fry until heated through.
More Asian recipes to try:
- Orange Chicken
- Kung Pao Chicken
- Chow Mein
- Chicken Lo Mein
- Mongolian Beef
- Bourbon Chicken
- Sesame Garlic Chicken
- Chicken Teriyaki
Before You Begin! If you make this, please leave a review and rating letting us know how you liked this recipe! This helps our business thrive & continue providing free recipes.
Mongolian Chicken
Video
Ingredients
Mongolian Sauce
- ½ cup chicken broth (low sodium or no sodium added)
- 2 tablespoon cornstarch
- 2 tablespoon brown sugar
- 3 tablespoon soy sauce (low sodium)
Mongolian Chicken
- 1 pound breast (boneless and skinless, chicken thighs can be used as well, cut into 1-inch cubes)
- ½ cup cornstarch
- 4 cloves garlic (minced)
- 1 teaspoon ginger (minced)
- 6 red chilies (dried)
- 3 green onions (sliced)
- ⅓ cup vegetable oil (for frying)
Before You Begin! If you make this, please leave a review and rating letting us know how you liked this recipe! This helps our business thrive & continue providing free recipes.
Instructions
- Make sauce: Whisk all the sauce ingredients together in a medium bowl. Set aside.
- Prepare the chicken: Toss the chicken with the cornstarch, ensuring each chicken pieces is covered in cornstarch.
- Fry the chicken: Heat the vegetable oil in a pan or wok. Fry the chicken pieces in batches until they are completely cooked through and slightly brown and crispy.
- Finish the dish: Drain the oil from the wok leaving 1 tbsp in the wok, if necessary. Add garlic, ginger, red chiles to the wok and saute for 30 seconds. Add in the prepared sauce and bring to a simmer, stirring constantly until the brown sugar has dissolved completely. If you find the sauce is too thick add a bit more chicken broth or water. Add in the chicken and green onions then toss everything together for 15 seconds.
- Serve over rice or noodles.
Notes
- Leftovers: Store leftovers in an airtight container in the refrigerator for up to 3 days. I usually just reheat in the microwave for a couple minutes before serving.
- Freezing: You can freeze this by storing it in an airtight container or freezer bags, once it has fully cooled. Store it in the freezer for up to 2 months. To thaw, take it out of the freezer the night before and place it in the refrigerator. The next day when ready to serve, either heat it up in the microwave and add it to a skillet/wok and stir-fry until heated through.
- Nutrition: Nutritional information does not include rice or noodles.
Nutrition Information
Notice: Nutrition is auto-calculated for your convenience. Where relevant, we recommend using your own nutrition calculations.
Originally shared Dec 8, 2012. Updated with better pictures, video and better instructions.
