No Bake Oreo Cake Pops
This post may contain affiliate links. Please read my disclosure policy.
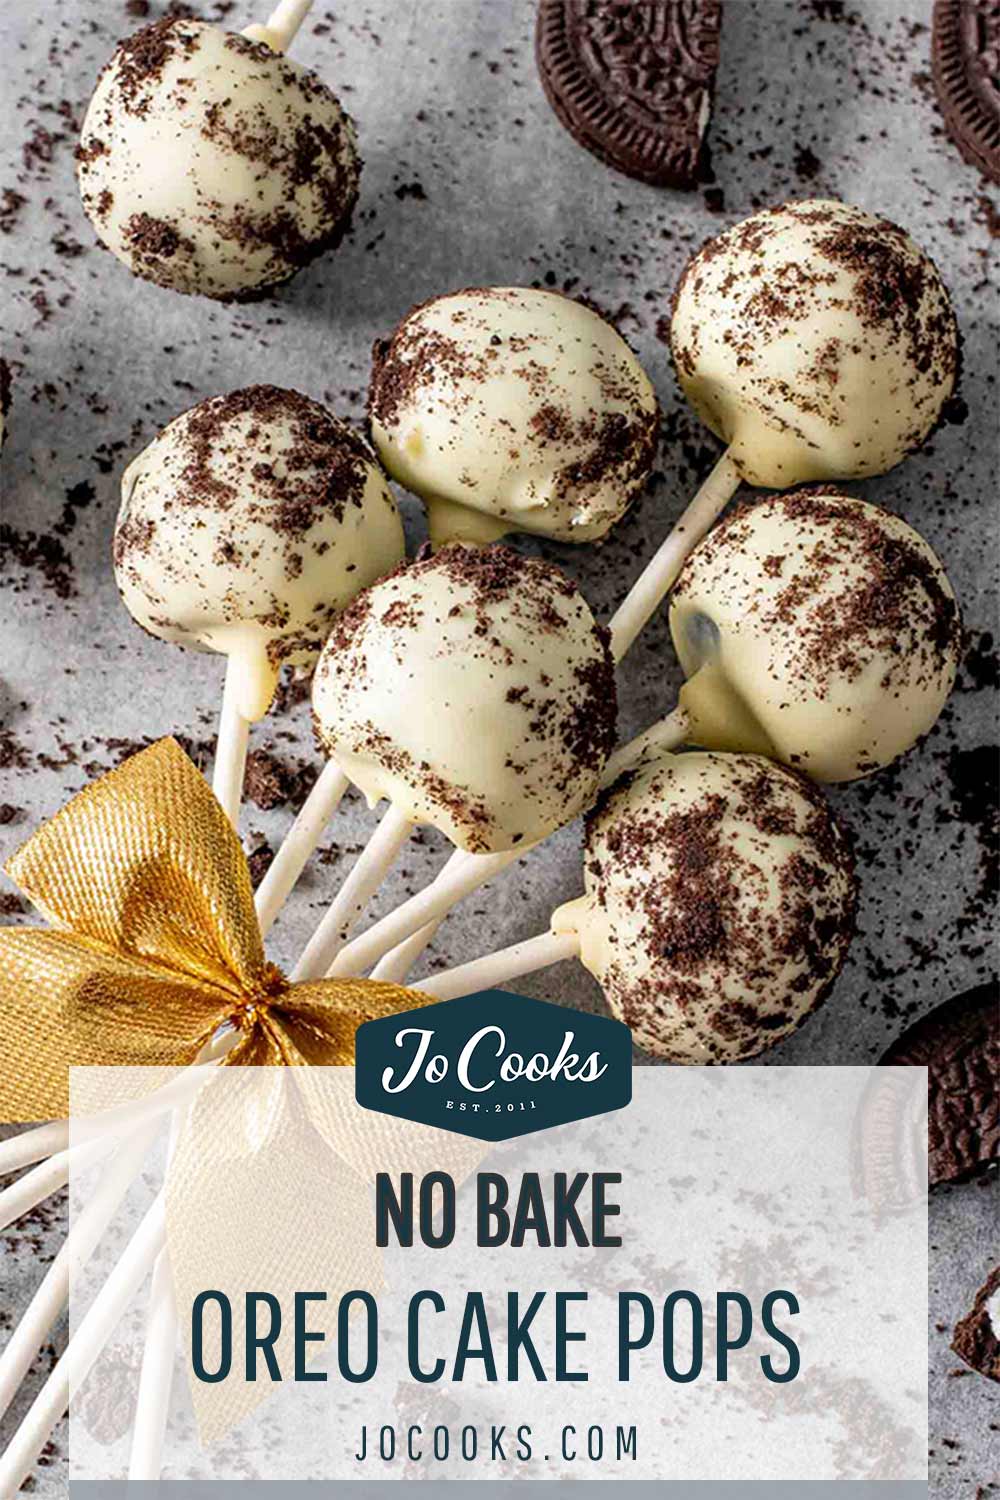
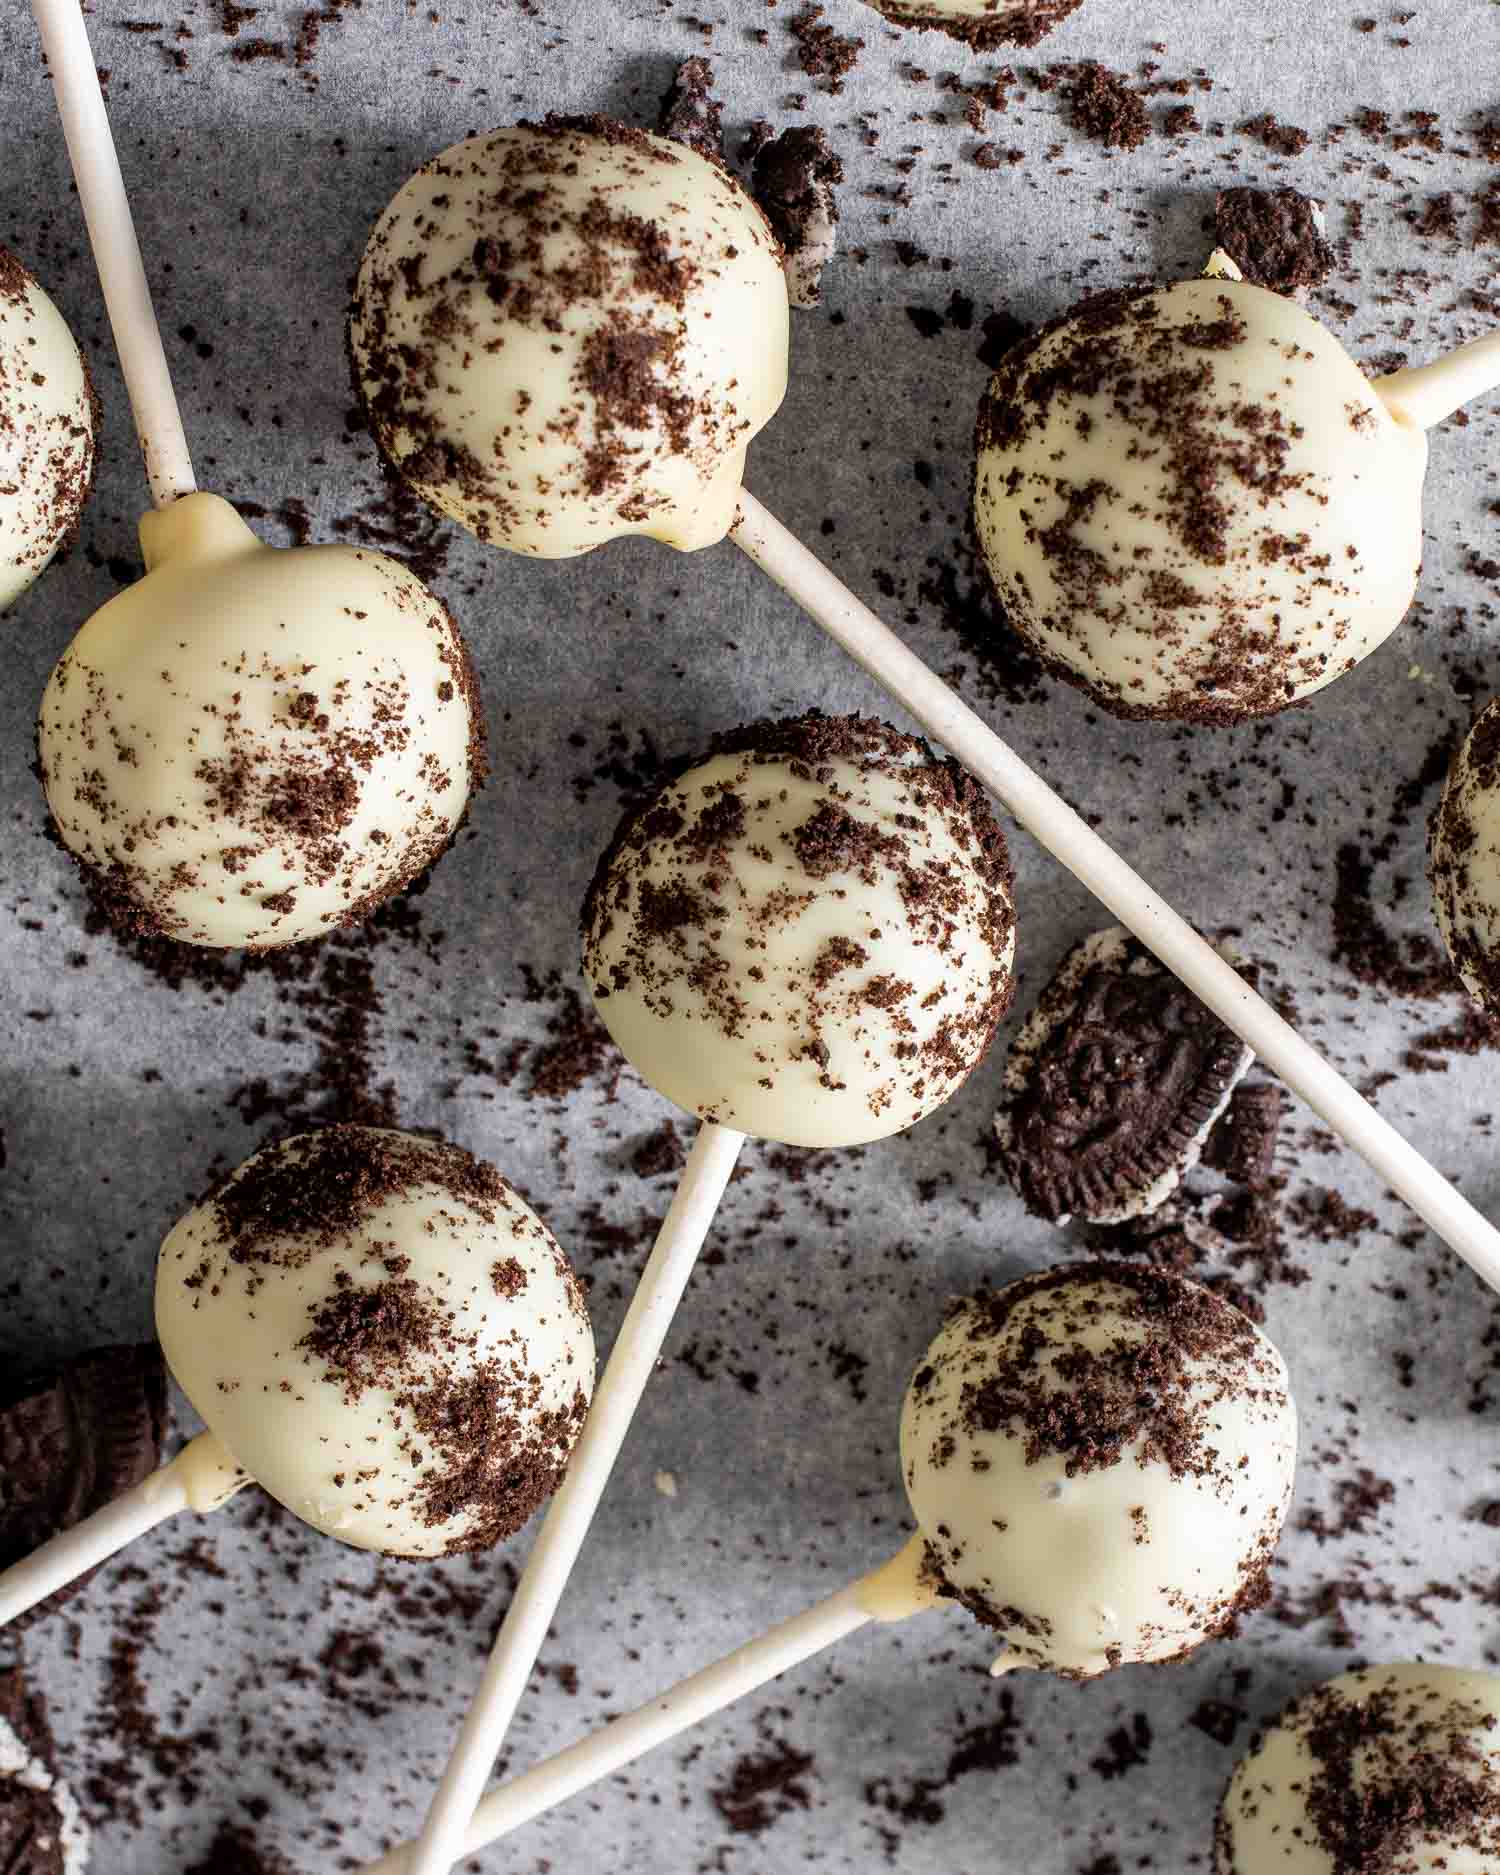
These bite-size 3-ingredient No Bake Oreo Cake Pops are a totally yummy guilty pleasure! Made with America’s favorite sandwich cookies, cream cheese, melted chocolate, and sprinkles, these chocolatey sweet treats are irresistibly good and super fun to make with kids!

Easy 3 Ingredient No Bake Oreo Cake Pops Recipe
Who doesn’t love a quick and easy dessert that will impress both kids and adults alike? These no-bake Oreo cake pops are just the thing for when you want to create a scrumptious treat without even turning on the oven. Combining the rich flavor of Oreo cookies with the smooth creaminess of cream cheese, these cake pops will have everyone reaching for seconds. They’re perfect for parties, get-togethers, or simply enjoying a cozy evening at home with your loved ones.
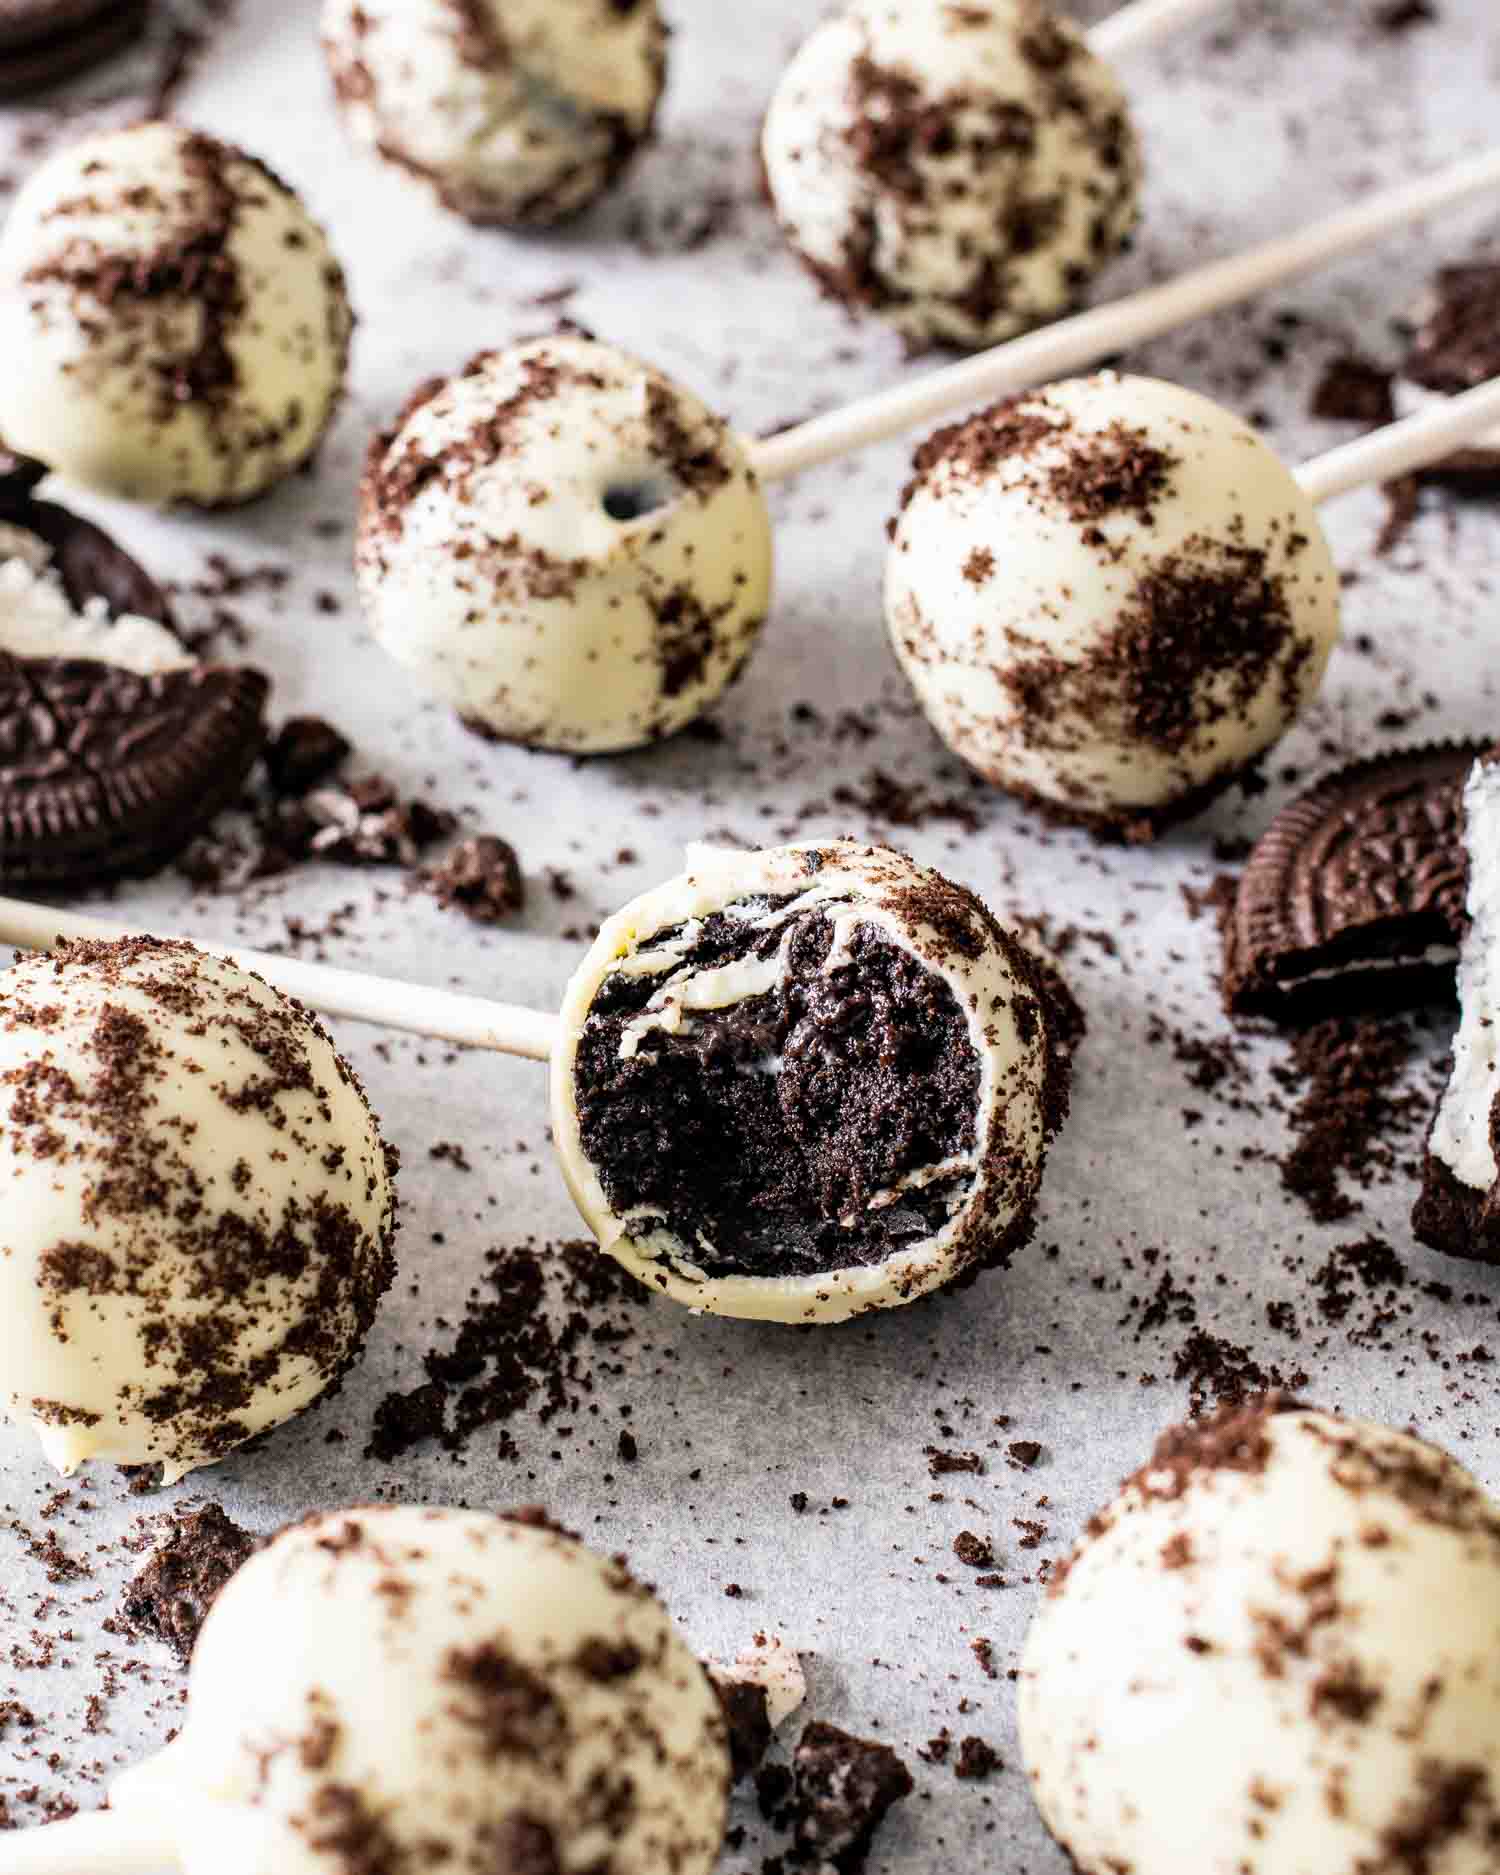
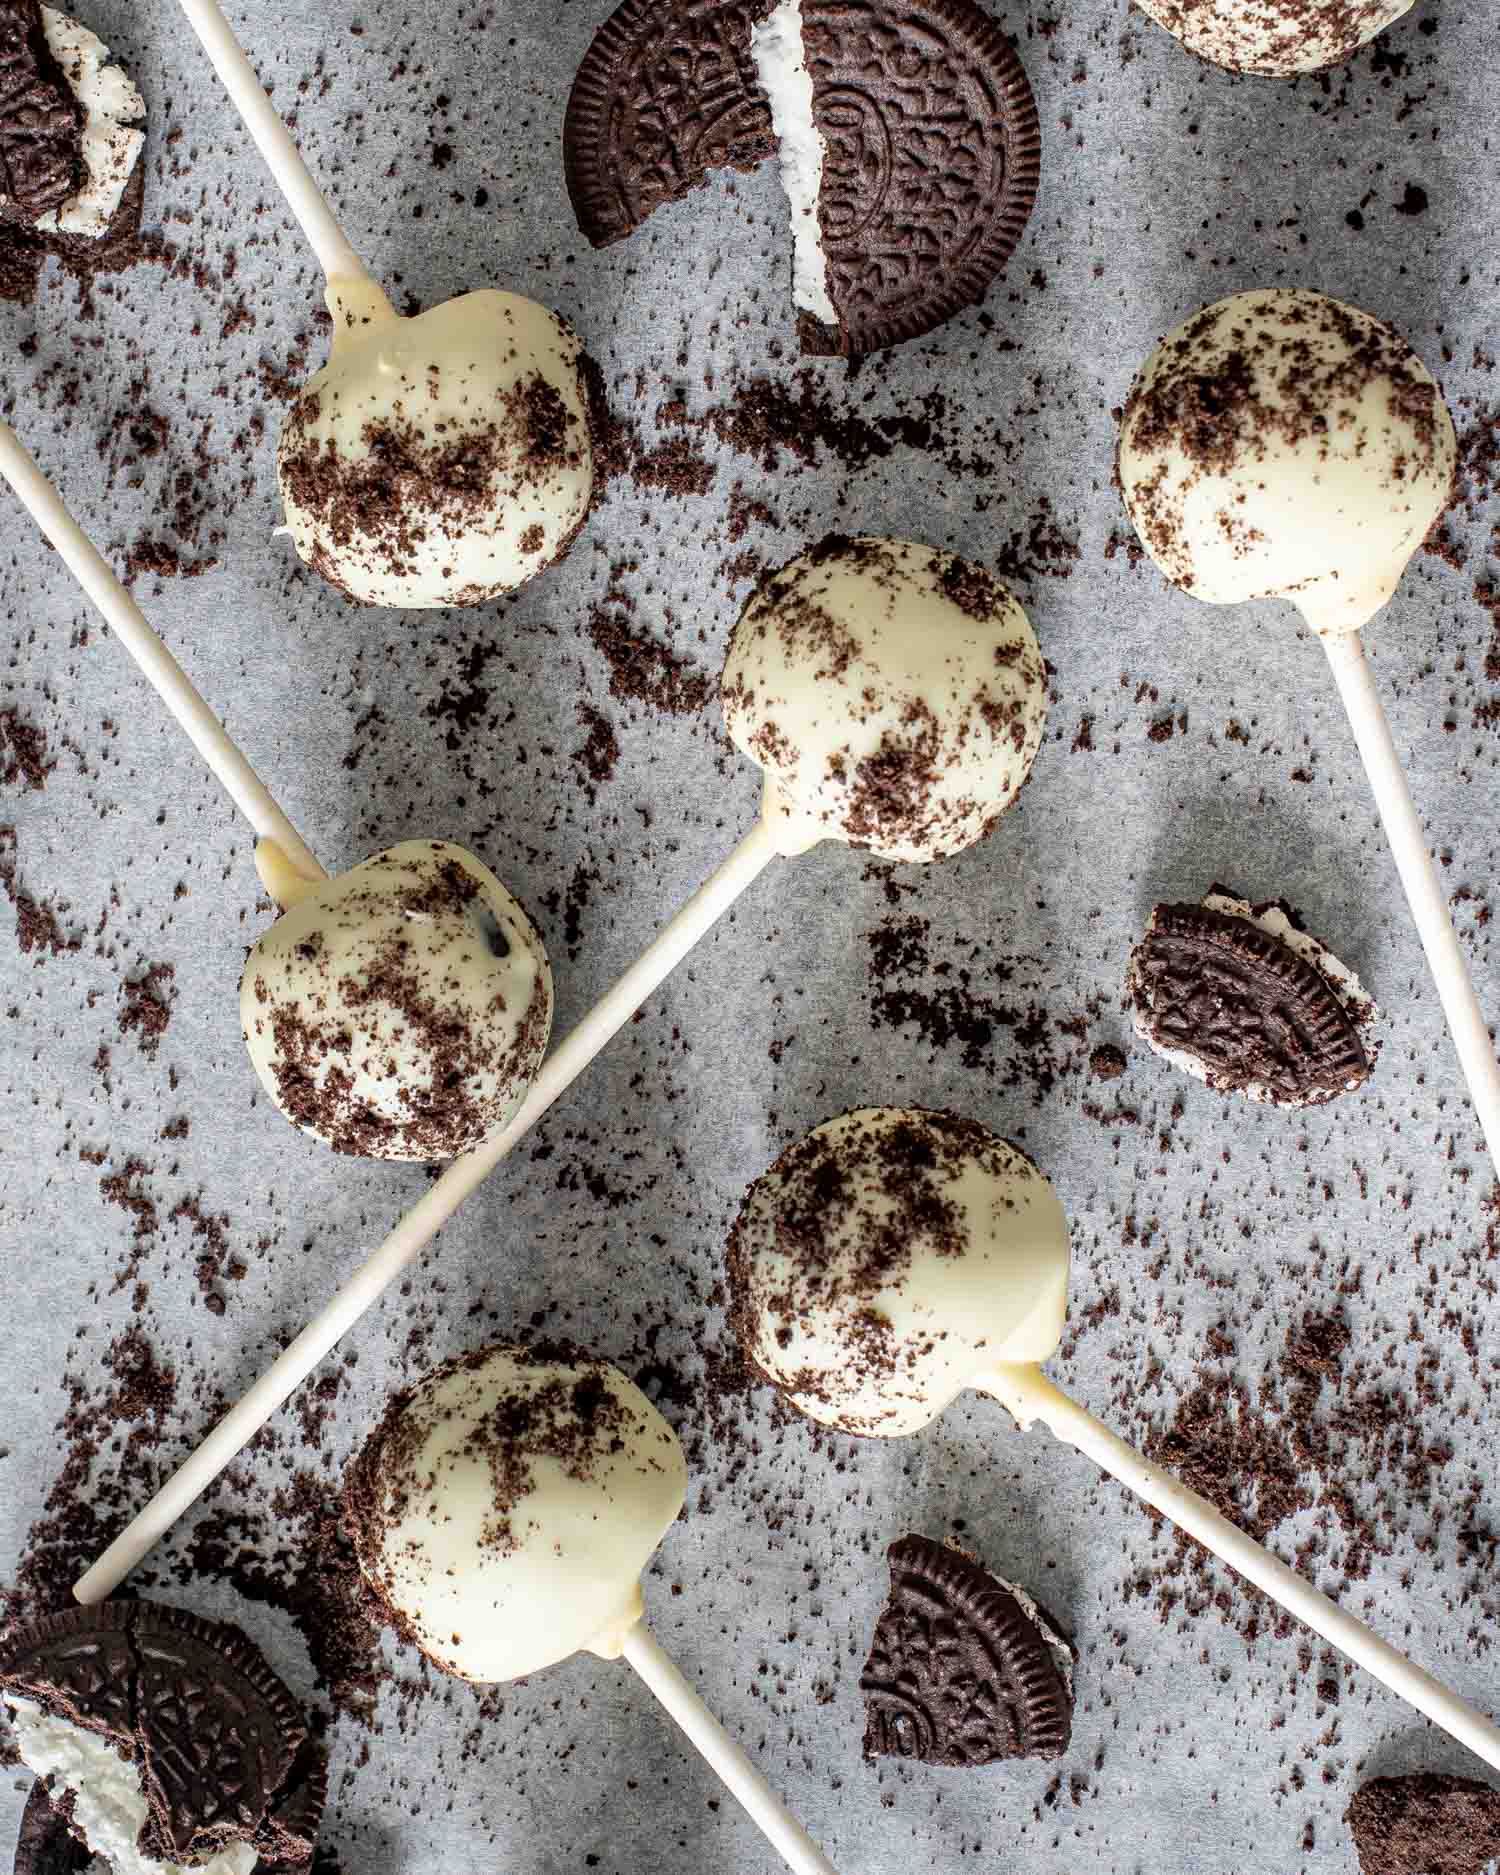
Each chocolatey bite delivers a soft, creamy center with a satisfying crunch from bits of Oreo crumbles and yummy chocolate coating. And this 3-ingredient recipe is literally just crushed Oreos and cream cheese mixed together and then rolled into balls. Then the balls are popped onto a lollipop stick, dipped into chocolate, and decorated with Oreo cookie crumbs or even sprinkles! Can it get any easier!?! I don’t even think my No Bake Nutella Cheesecake is this easy!
Why You’ll Love These No Bake Oreo Cake Pops
- Perfect Kid Recipe! This simple 3-ingredient recipe is a fantastic no bake dessert that kids of all ages will love to help make! It’s foolproof and there is almost no cleanup.
- Crunchy Creamy Chocolatey! Crushed Oreo cookies and cream cheese balls on a lollipop stick dipped in rich chocolate makes for a sinfully good bite-size chocolate dessert.
- Versatile Dessert! You can give these homemade cake pops to coworkers, friends, and family! These Oreo pops are a great treat for any occasion and perfect for a kid’s birthday celebration.
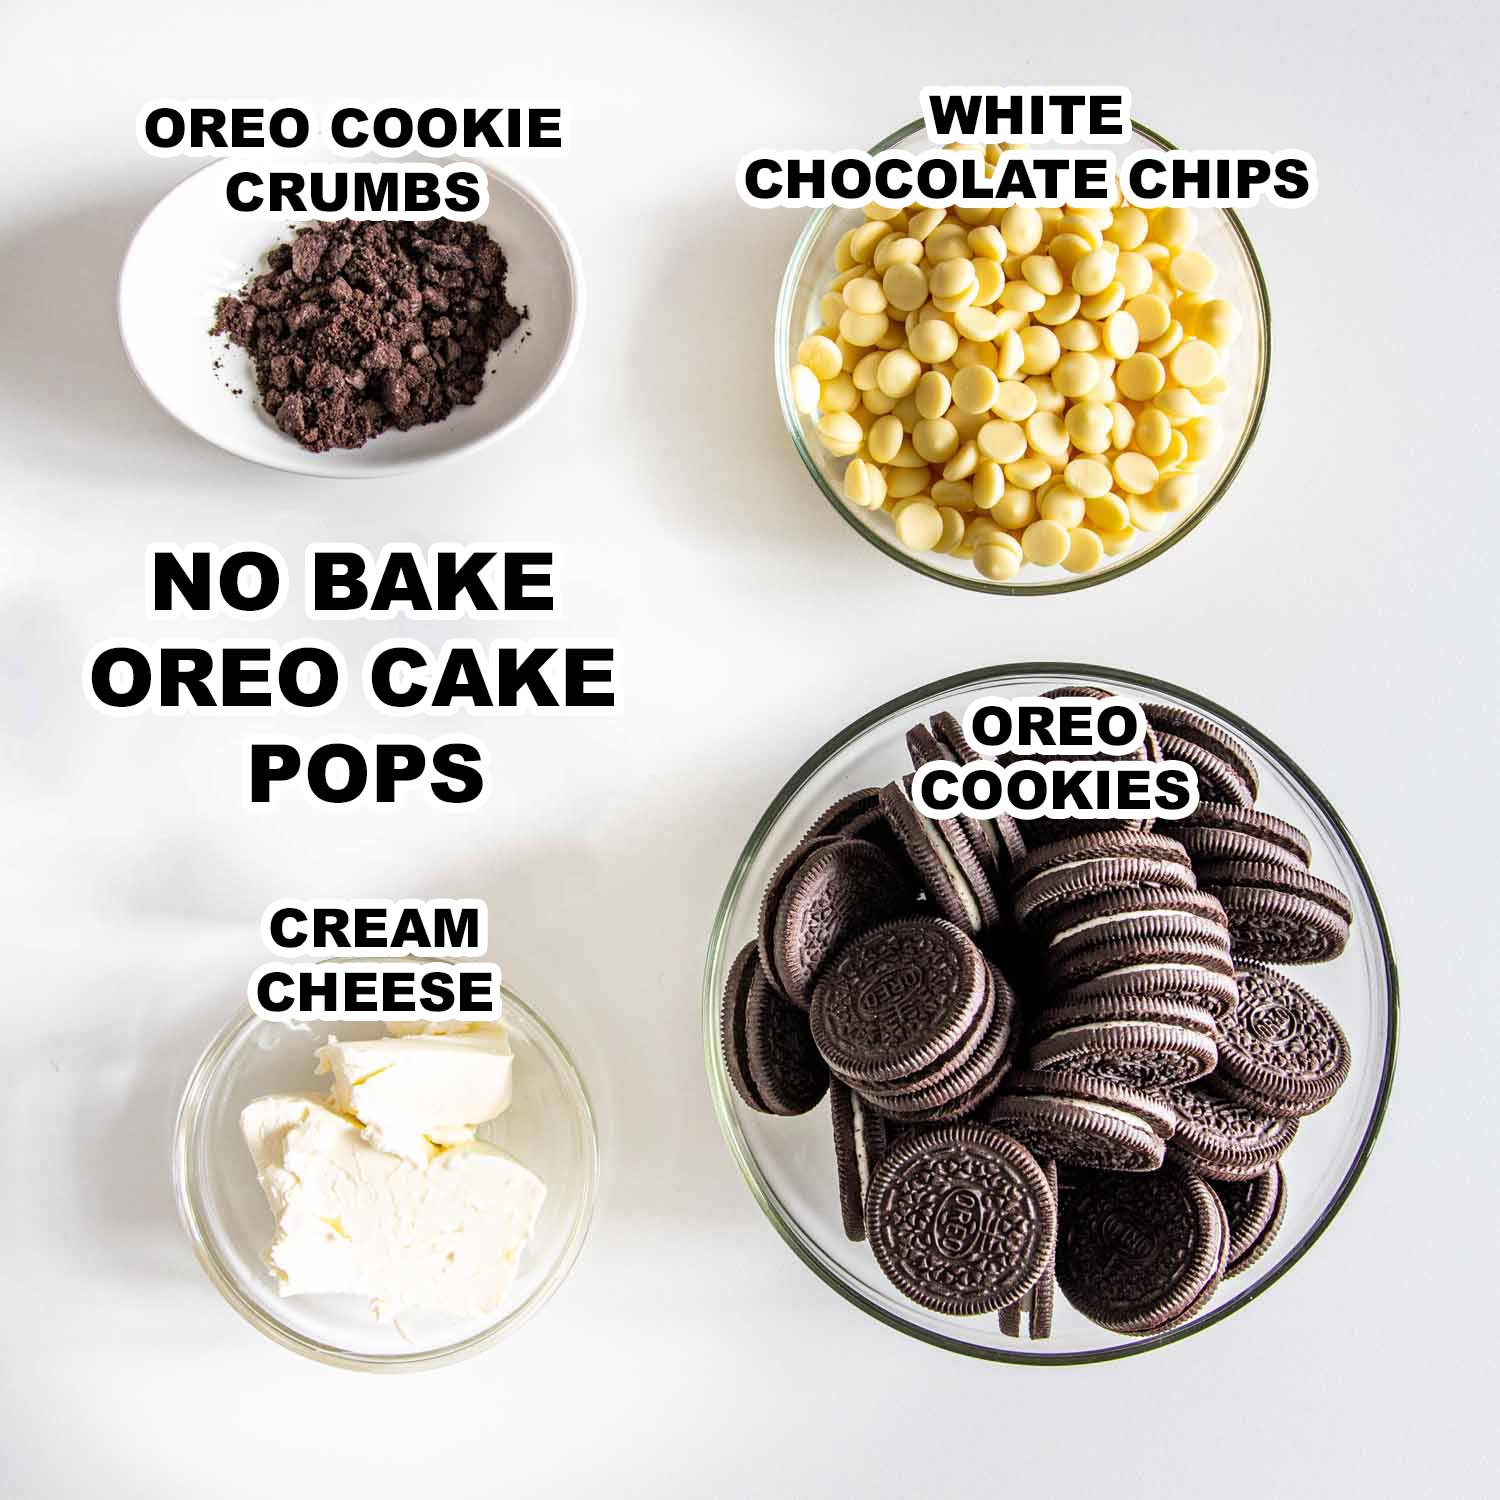
- Oreo Cookies – You’ll need some regular Oreos! But you don’t have to use the brand name. You can also use double-stuffed or Golden Oreos too.
- Cream Cheese – The cream cheese needs to be at almost room temperature. It’s used to mold the cake pops into balls and makes them creamy. Cream cheese frosting is another option.
- Chocolate – Used to coat the cake pops. You can use any type of chocolate you prefer from milk chocolate, semi-sweet chocolate, or dark chocolate. You can even use white chocolate as long as it will melt.
These sweet treats are ridiculously easy! You don’t even have to turn on the oven! Once you crumble the cookies it takes just minutes to make the balls and then dip them in chocolate.

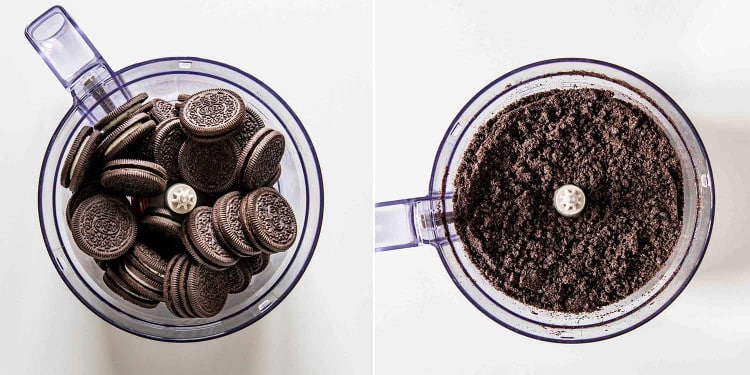
To begin, you need to turn the Oreos into crumbled cookies. To do this just put the cookies in a food processor and then pulse them a few times until they are fine crumbs. You can also put the cookies in a plastic ziplock bag and then crush them using a rolling pin or meat mallet.

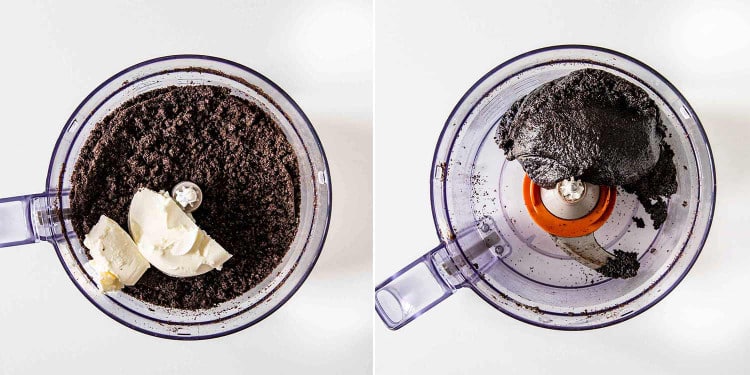
Next, put the Oreo cookie crumbs into a large bowl and add the cream cheese. Then use your hands to mix everything together until it’s fully combined. You can also combine the two right in the food processor.

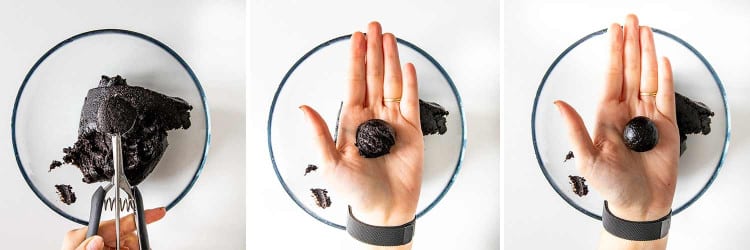
Now, form and roll the mixture into about 16 1-inch balls.
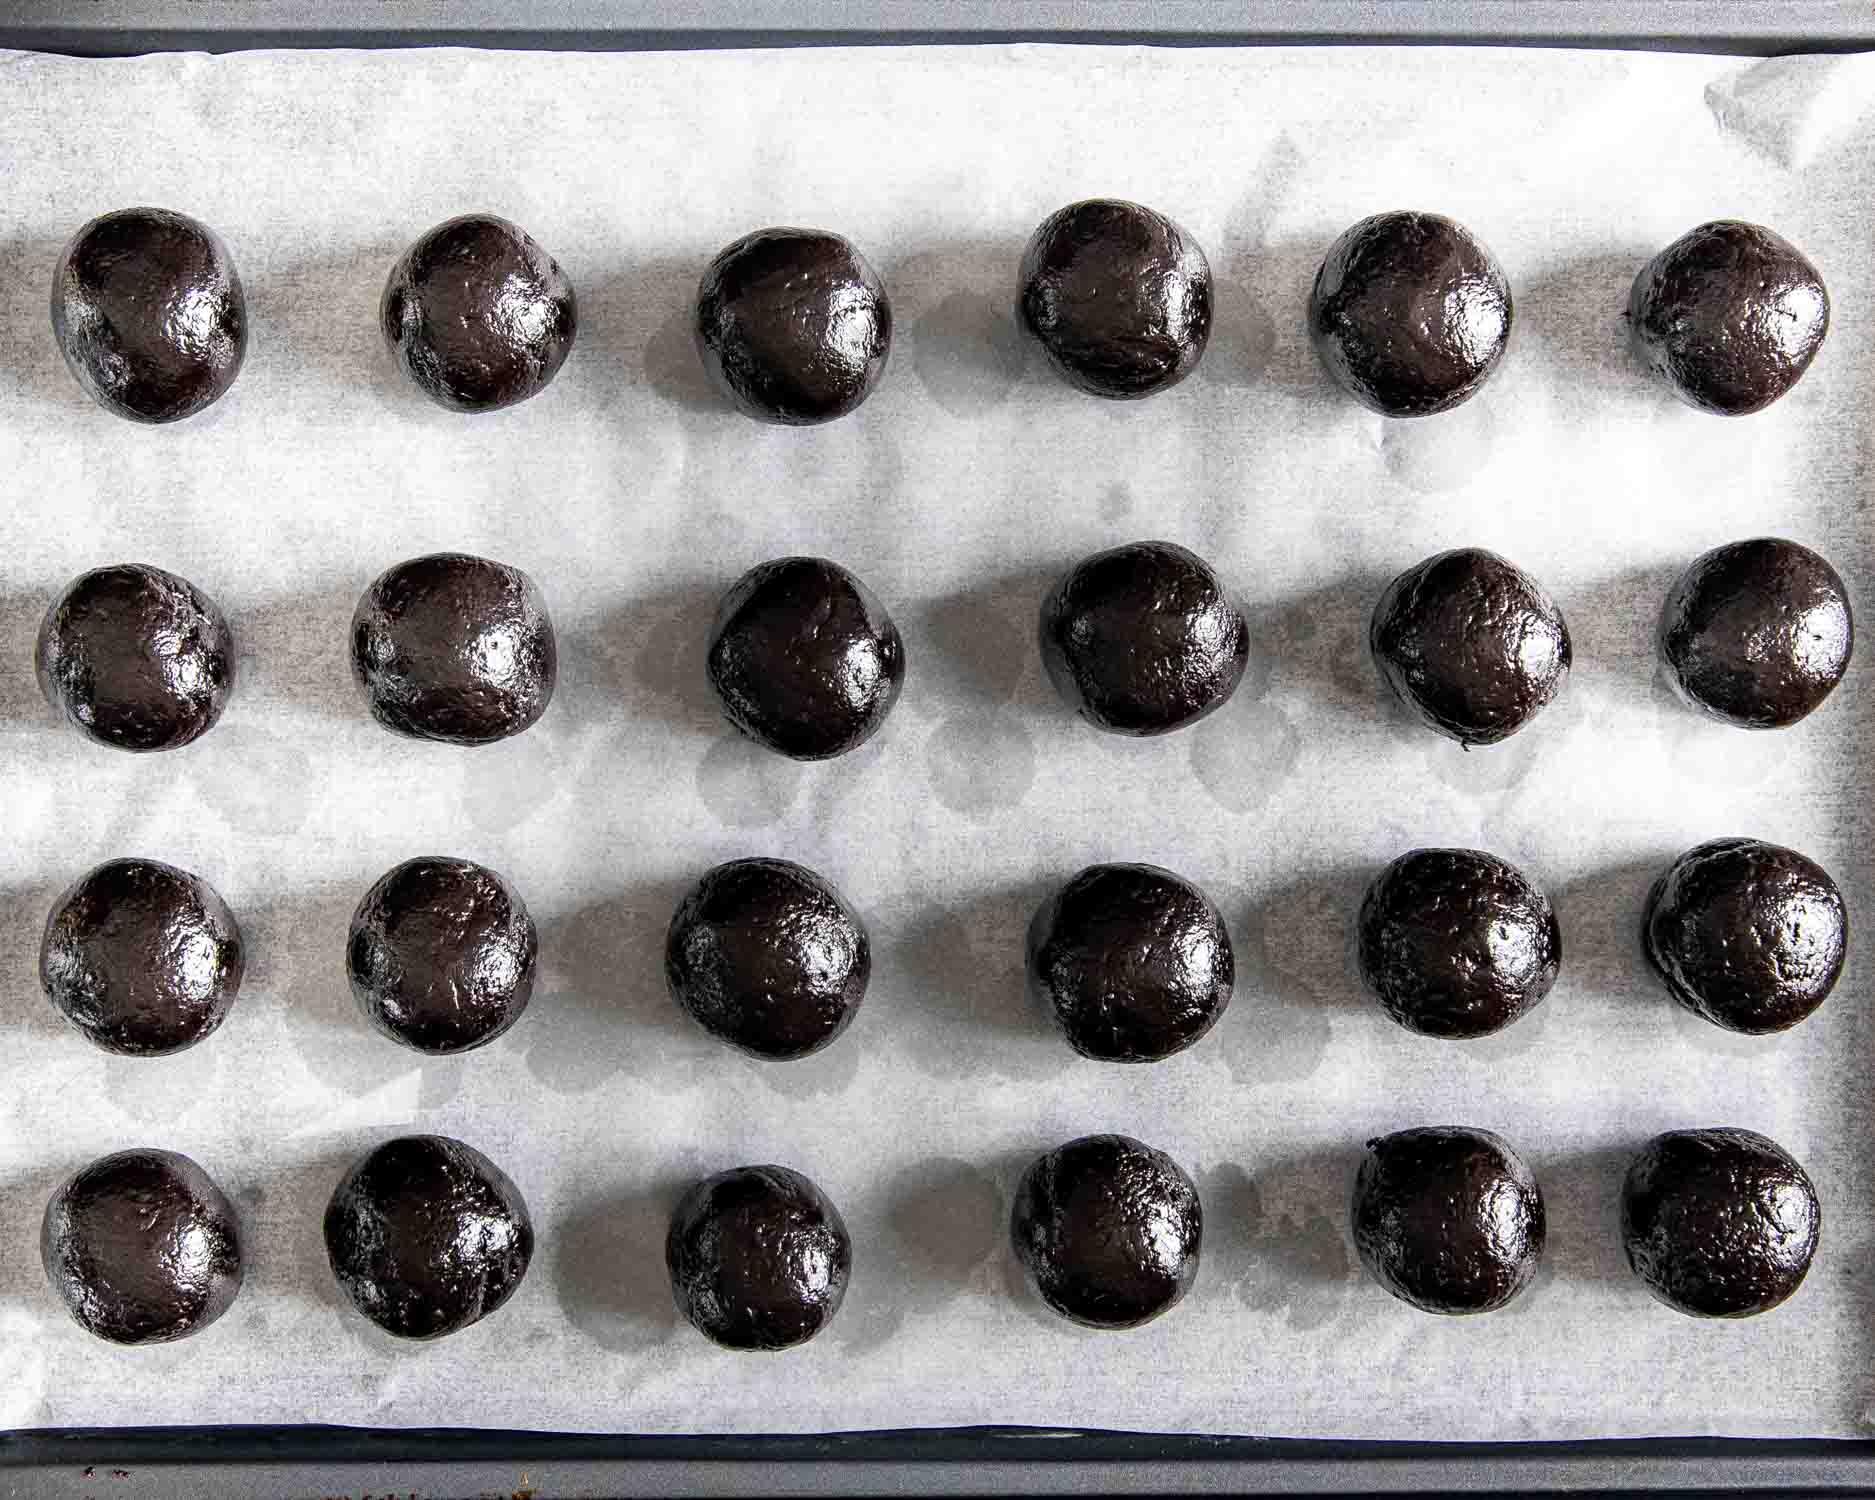
After all the dough has been rolled into balls, put them into the fridge for at least 10 to 15 minutes to chill. They need to firm up a bit before you cover them in chocolate. If you don’t wait the balls will be mushy and lose their form.
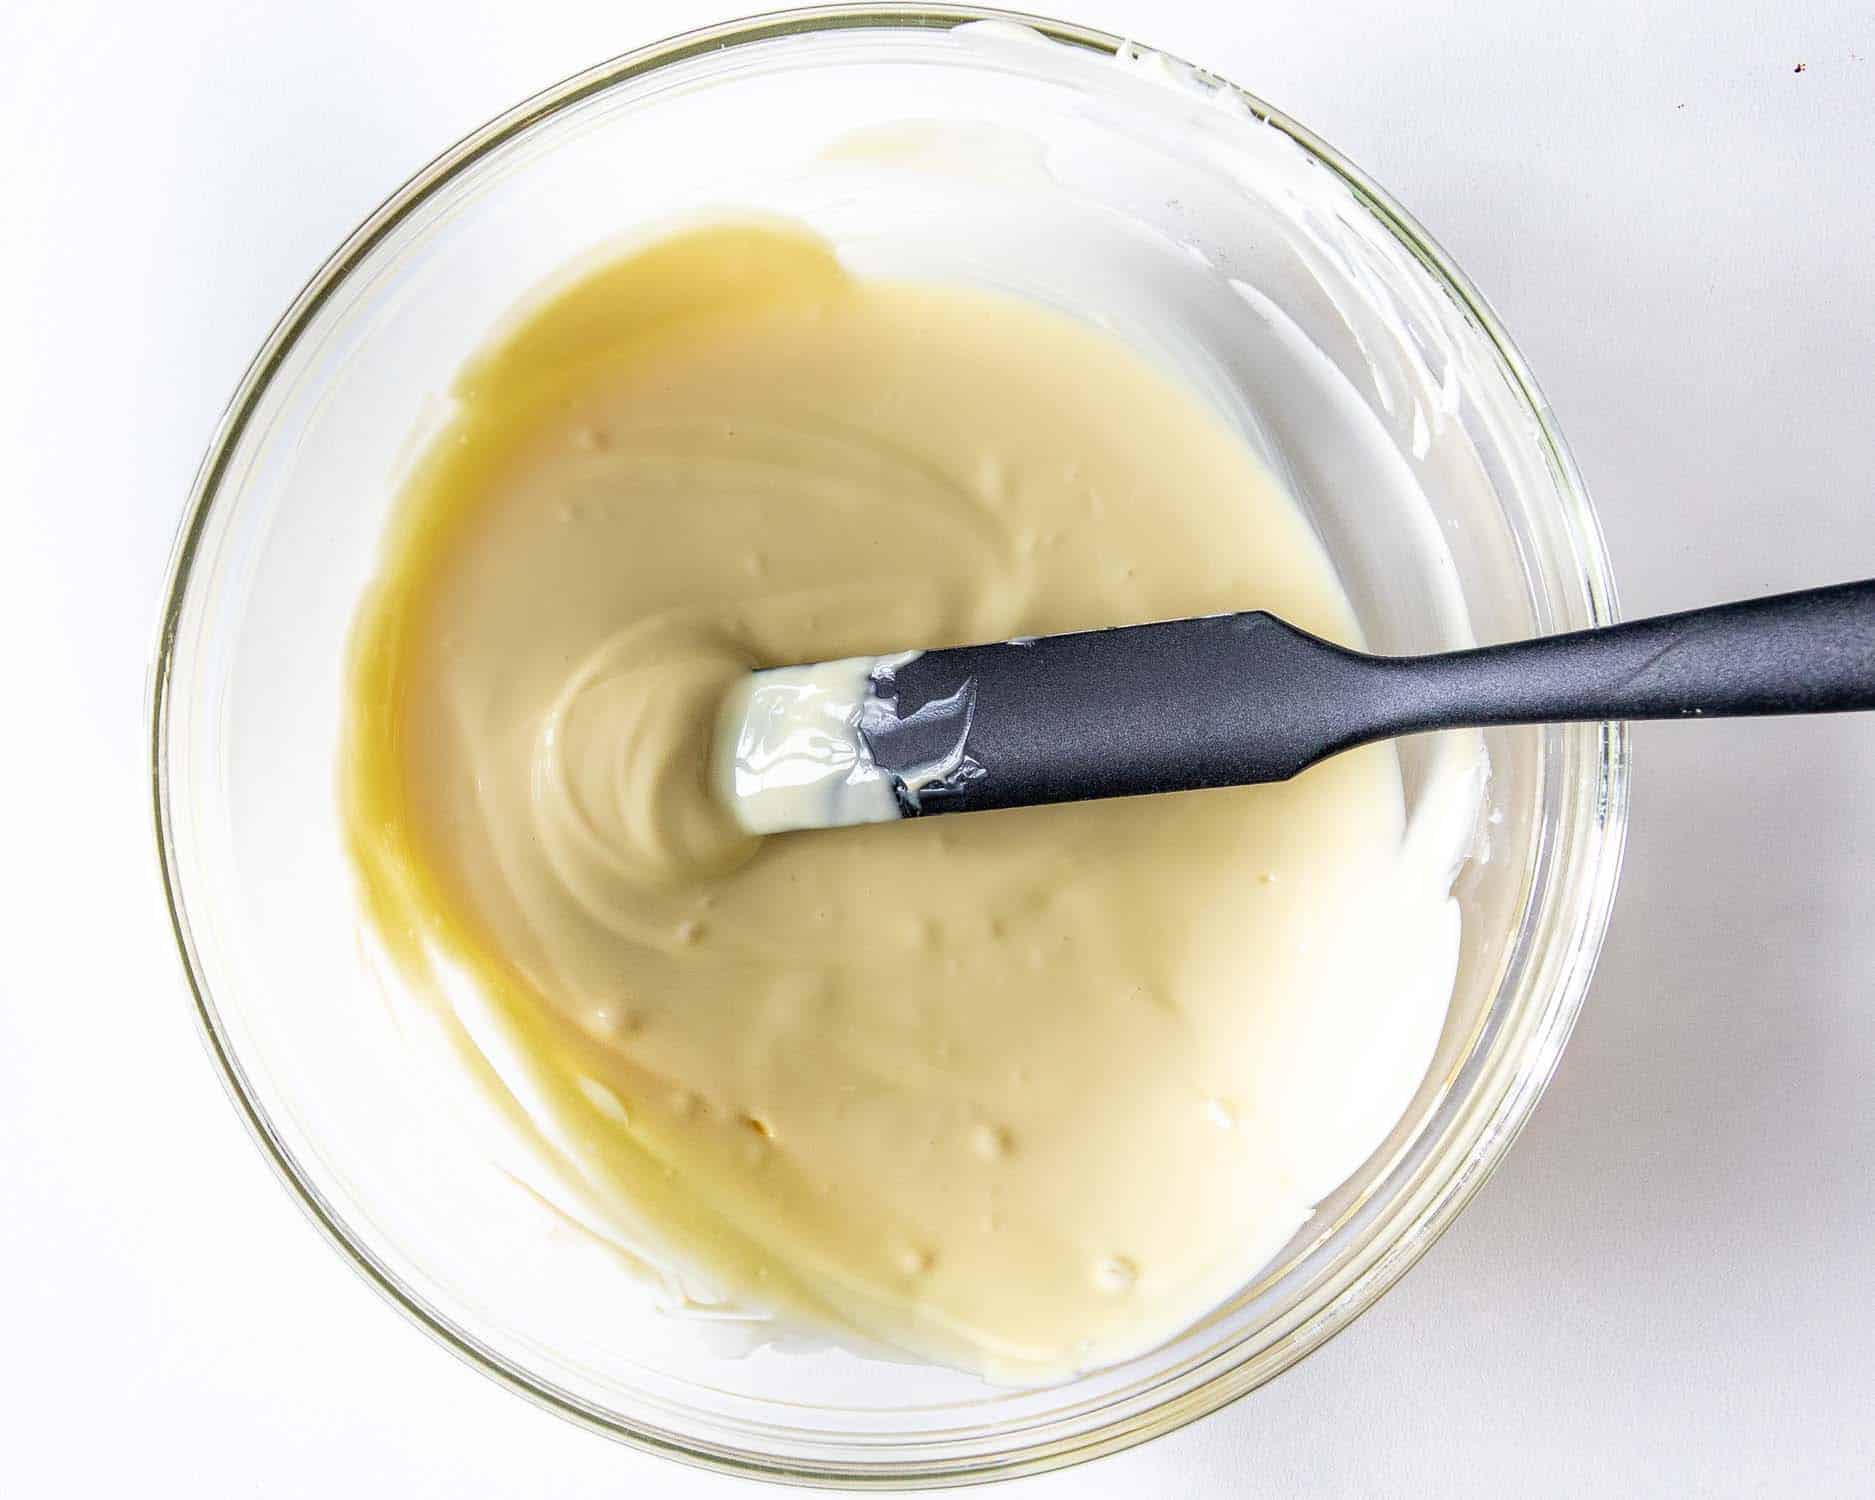
Once the dough balls are chilled, you can melt the chocolate. You should melt your chocolate according to the package instructions. However, if there are no instructions you can do it in the microwave, but you need to be careful not to burn it. Just put the chocolate in a microwave-safe bowl and then microwave it in 30 seconds intervals, stirring after every 30 seconds until smooth and melted.
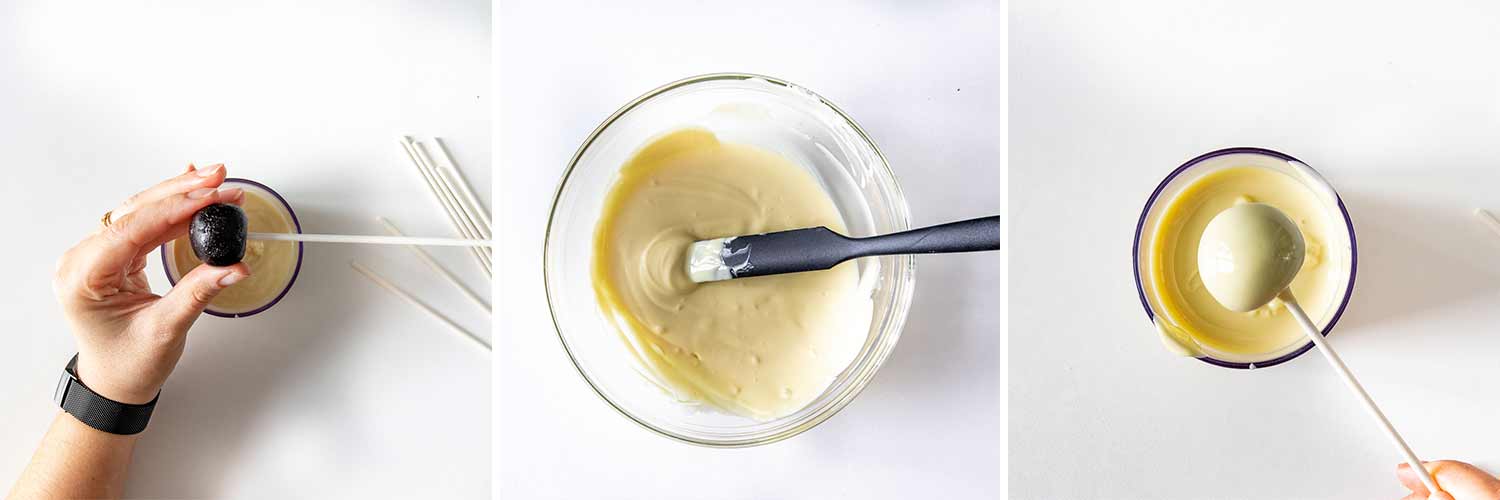
First, take the cake balls out of the fridge and stick a lollipop stick in each one to turn them into cake pops! Next, dip each pop into the melted chocolate one at a time and sprinkle them with some more cookie crumbs or even sprinkles if you like.
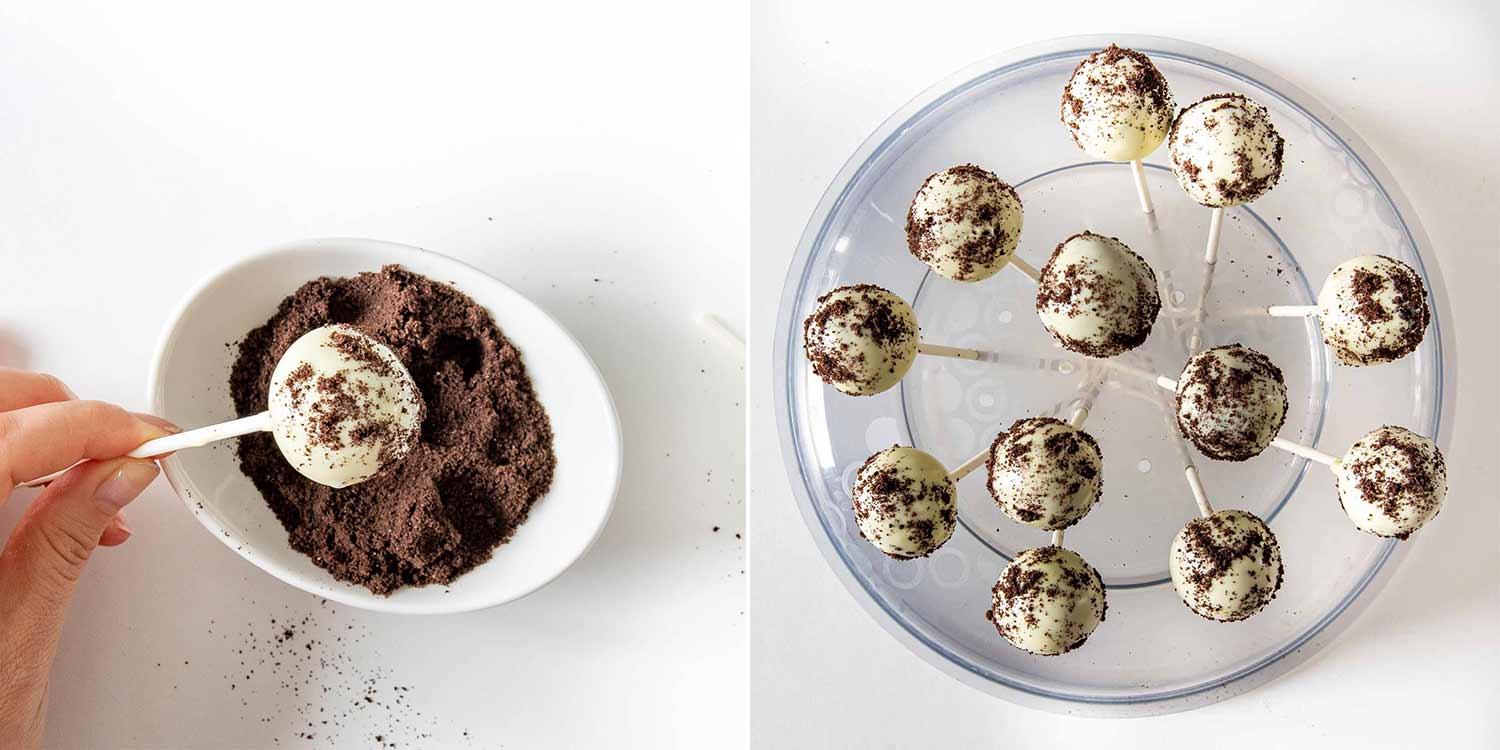
Then set the decorated cake pops on a baking sheet lined with parchment paper with the stick up. Now, put the cake pops into the refrigerator to chill for about 30 minutes or until the chocolate fully sets.
What Can I Add To The Cake Pops?
The ratios of the ingredients must stay exactly the same or the recipe won’t work. But you can use any type of sandwich cookies you like to create other flavors. You could also even try to use chocolate chip cookies. However, you may need to add more cream cheese for some cookies to help the balls mold together. You can also drizzle them with caramel or sprinkle the cake pops with other things like nuts, mini chocolate chips, or diced dried fruit. Feel free to get as creative as you like.
Why Are My Cake Pops Sweating?
The sweating is just condensation and doesn’t impact the taste at all. It happens and is totally normal when things are stored in the fridge. This is why it’s important to store the cake pops in an airtight container which can help to prevent the pops from sweating. You can also dab them with some paper towels before serving to remove the condensation.
Expert Tips
- Soft cream cheese. The cream cheese needs to be at almost room temperature to mix it together with the cookies. Hard cream cheese is too chunky and firm.
- The dough balls must chill. The cake pops will not hold their shape if the cream cheese is warm. You must let the formed balls chill in the fridge until they firm up.
- Tap off excess chocolate. After dipping the pops in melted chocolate you should shake or tap off the excess. This helps it to distribute more evenly and coat the cake pops.
Storage
Oreo cake pops will keep in the fridge for up to 5 days in an airtight container. You can also store them in the freezer for up to 1 month. Then just allow them to thaw in the fridge. Cake pops can not be stored at room temperature.

More Yummy Treats To Try
- Chocolate Peanut Butter Cheesecake Pops
- No Bake Nutella Cheesecake
- Banana Pudding
- Instant Pot Rice Pudding
- The Perfect Shortbread Cookies
- Slow Cooker Chocolate Candy
- Banana Split Cake (No Bake)
Before You Begin! If you make this, please leave a review and rating letting us know how you liked this recipe! This helps our business thrive & continue providing free recipes.

No Bake Oreo Cake Pops
Ingredients
- 24 Oreo cookies
- 4 ounces cream cheese
- 5 ounces white chocolate (melted)
Before You Begin! If you make this, please leave a review and rating letting us know how you liked this recipe! This helps our business thrive & continue providing free recipes.
Instructions
- Place the cookies in a food processor and pulse it a few times, until thoroughly crumbled.

- Put the Oreo cookie crumbs into a large bowl and add the cream cheese. Then use your hands to mix everything together until it’s fully combined. You can also combine the two in the food processor directly.
- Roll the dough into 1 inch balls. You should get about 16 balls.

- Refrigerate balls for at least 10 to 15 minutes.

- Once the dough balls are chilled, you can melt the chocolate. You should melt your chocolate according to the package instructions. However, if there are no instructions you can do it in the microwave, but you need to be careful not to burn it. Just put the chocolate in a microwave-safe bowl and then microwave it in 30 seconds intervals, stirring after every 30 seconds until smooth and melted.
- Take out the cake balls and stick a lollipop stick in them, then dip them in the chocolate one by one.
- Sprinkle with more cookie crumbles or sprinkles, if desired. Refrigerate again until chocolate sets.


Equipment
Notes
- Soft cream cheese. The cream cheese needs to be at almost room temperature to mix it together with the cookies. Hard cream cheese is too chunky and firm.
- The dough balls must chill. The cake pops will not hold their shape if the cream cheese is warm. You must let the formed balls chill in the fridge until they firm up.
- Tap off excess chocolate. After dipping the pops in melted chocolate you should shake or tap off the excess. This helps it to distribute more evenly and coat the cake pops.
- Oreo cake pops will keep in the fridge for up to 5 days in an airtight container. You can also store them in the freezer for up to 1 month. Then just allow them to thaw in the fridge. Cake pops can not be stored at room temperature.
Nutrition Information
Notice: Nutrition is auto-calculated for your convenience. Where relevant, we recommend using your own nutrition calculations.
