No Churn Cherry Chocolate Ice Cream
This post may contain affiliate links. Please read my disclosure policy.

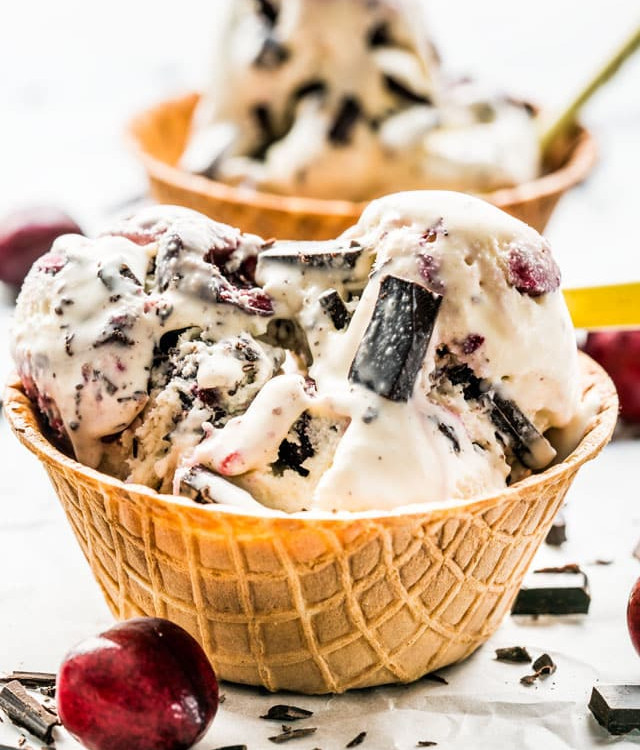
All you need are 4 ingredients to make this No Churn Cherry Chocolate Ice Cream. It’s super creamy, smooth and loaded with fresh cherries and chocolate. The perfect summer treat!

At first I was skeptical when I discovered this method thinking that the ice cream was going to be different, that it won’t be as creamy and smooth if you were to use the no churn technique. I was wrong. While I still love my rocky road ice cream, because let’s face it, that is my all time favorite ice cream, this no churn ice cream is just as smooth and just as creamy and delicious.
What I love about this ice cream is really how easy it is to make and how many variations of it you can make. The two main ingredients of a no churn ice cream are whipping cream and sweetened condensed milk. That’s it. From there on the sky is the limit.
Why Don’t We Churn This Ice Cream?
Well you still need to mix it, the whipping cream that is, until stiff peaks form. Then you will incorporate your condensed milk and just like that you’ve got the freezer ready makings of beautiful ice cream! Believe me this summer time decadent treat will make you kiss the store bought varieties good bye.

Ingredients
- Cherries – They’re in abundance at the markets this time of year so why not? Just be sure to pit your cherries.
- Chocolate – Dark and chopped up roughly.
- Whipping cream – Yes we need whipping cream to achieve that all too familiar texture and to ensure a light and airy ice cream.
- Condensed milk – Sweetened and incorporated after the cream has been whipped.
And that’s it! The directions how to make this dish are almost as short as the ingredient list itself.

How To Make No Churn Cherry Chocolate Ice Cream
- Prepare the cherries: Prepare your cherries first by pitting them and cutting them in half. You can cut them in smaller pieces if you prefer, it also depends on how big your cherries are.
- Chop the chocolate: Chop up the chocolate into chunks. I prefer bigger chunks, but feel free to cut them as big or small as you prefer.
- Form the ice cream base: Add the whipping cream to the bowl of your mixer and beat until stiff peaks form. Add the sweetened condensed milk to the bowl and whisk until well combined, for about 1 minute.
- Freeze the ice cream: Stir in the cherries and the chocolate then pour into a container, preferably with a lid as you will need to close it or cover it tight. You could use a loaf pan and just cover it with plastic wrap, but I would place a rubber band over the wrap just to make sure the plastic wrap will stay secure. Freeze the ice cream for at least 6 hours.
- Finish the no churn ice cream: Let the ice cream stand for about 5 minutes before scooping into bowls and serving.

How To Pit Cherries
If you have a handy dandy cherry pitter lying around, then by all means go at it with this recipe, but for those who don’t here’s some great tips. A pastry tip or a chop stick can push those tricky pits out perfectly! Easy as that.
What Do I Need To Make This No Churn Ice Cream?
To make this ice cream all you need is a mixer, and it doesn’t have to be a stand mixer, it can be a hand held one. You just beat the whipping cream until stiff peaks form, then add the sweetened condensed milk and beat it a bit more. Then the fun begins where you add all your favorite ingredients.

Storage
You can store this ice cream for up to 6 weeks in an airtight container in the freezer. If you find your ice cream too hard to scoop, try incorporating vanilla extract into your ice cream mix and run your metal ice cream scoop under hot water before scooping.
Craving More Cherry Recipes? Try These:
Before You Begin! If you make this, please leave a review and rating letting us know how you liked this recipe! This helps our business thrive & continue providing free recipes.
No Churn Cherry Chocolate Ice Cream
Video
Ingredients
- 2 cups cherries
- ½ cup dark chocolate
- 2 cups whipping cream ((500 ml))
- 14 ounce sweetened condensed milk ((1 can))
Before You Begin! If you make this, please leave a review and rating letting us know how you liked this recipe! This helps our business thrive & continue providing free recipes.
Instructions
- Prepare your cherries first by pitting them and cutting them in half. You can cut them in smaller pieces if you prefer, it also depends on how big your cherries are.
- Chop up the chocolate into chunks. I prefer bigger chunks, but feel free to cut them as big or small as you prefer.
- Add the whipping cream to the bowl of your mixer and beat until stiff peaks form.
- Add the sweetened condensed milk to the bowl and whisk until well combined, for about 1 minute.
- Stir in the cherries and the chocolate then pour into a container, preferably with a lid as you will need to close it or cover it tight. You could use a loaf pan and just cover it with plastic wrap, but I would place a rubber band over the wrap just to make sure the plastic wrap will stay secure.
- Freeze the ice cream for at least 6 hours. Let the ice cream stand for about 5 minutes before scooping into bowls and serving.
Equipment
Notes
- Chocolate chips can be used instead. I prefer to use a good quality dark chocolate and just cut it up into large chunks.
Nutrition Information
Notice: Nutrition is auto-calculated for your convenience. Where relevant, we recommend using your own nutrition calculations.
