Red Velvet Cake
This post may contain affiliate links. Please read my disclosure policy.
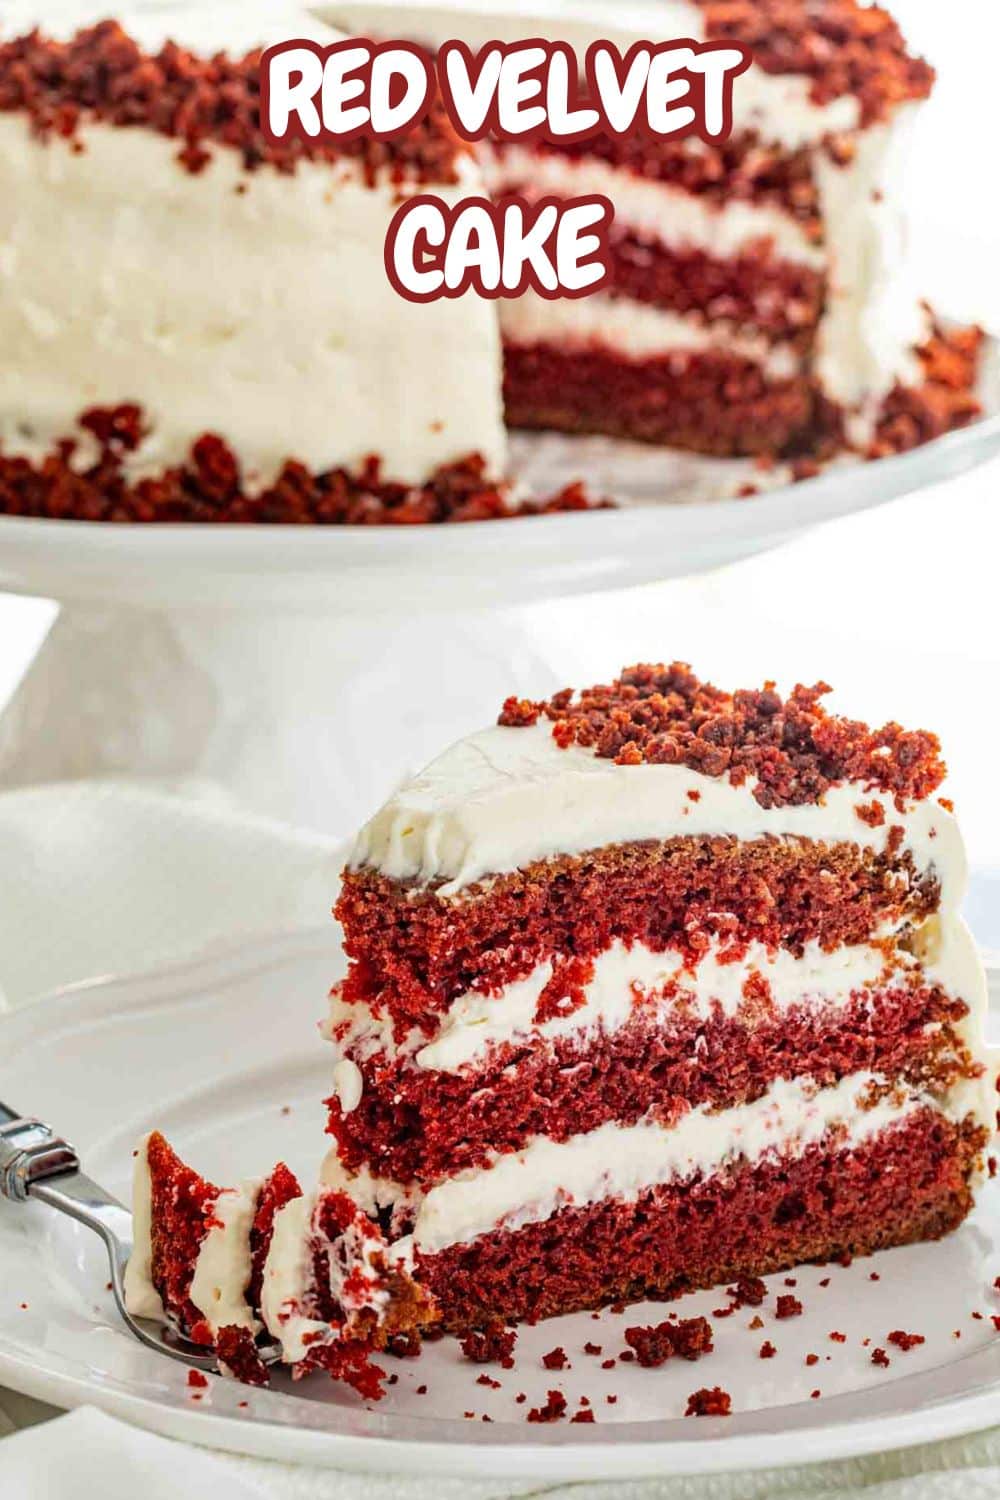
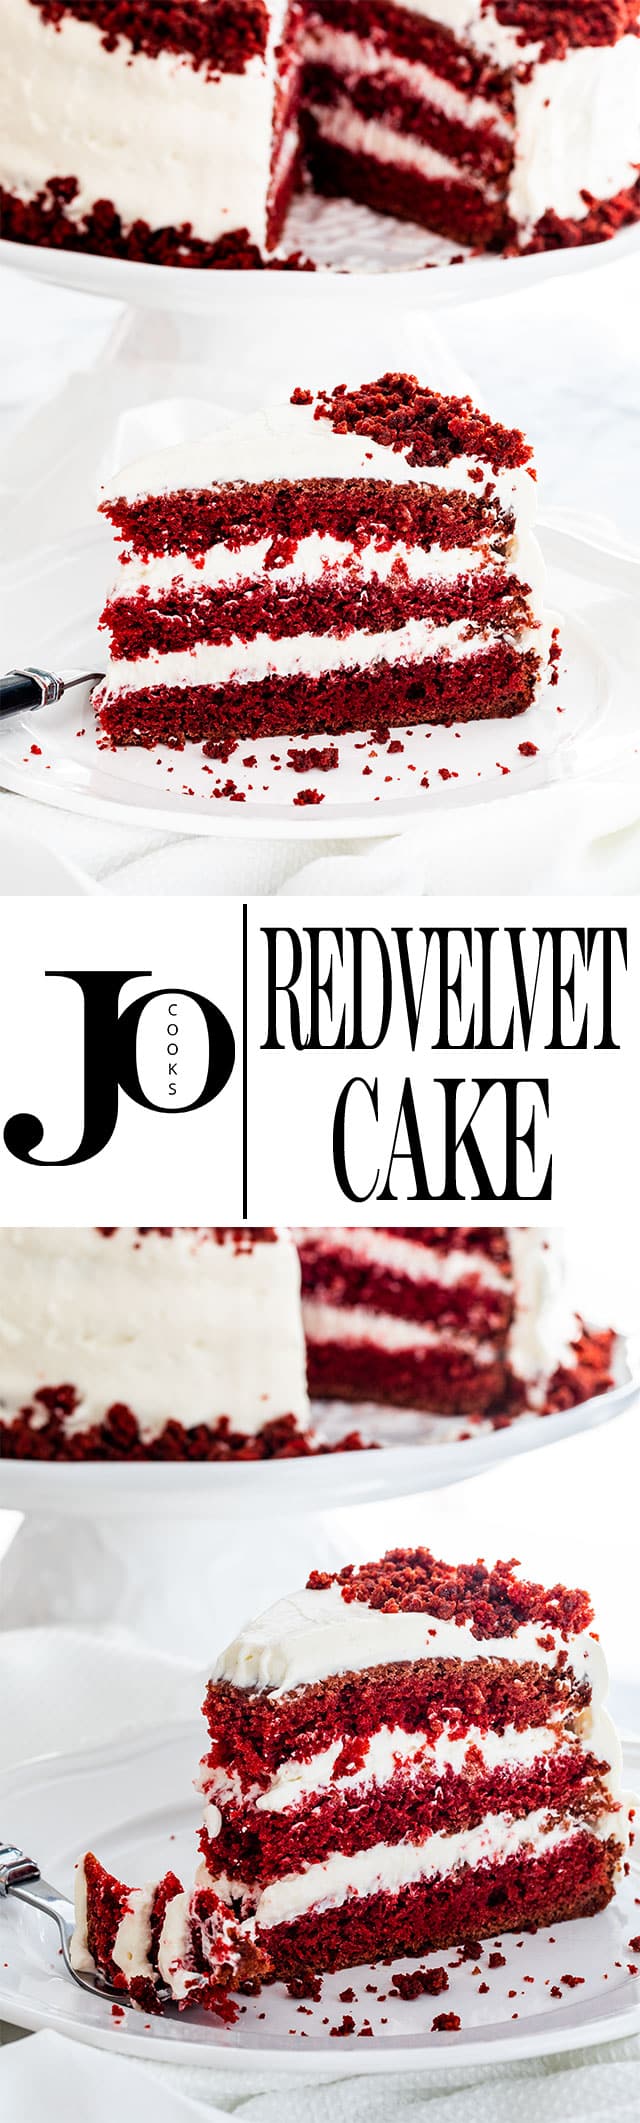
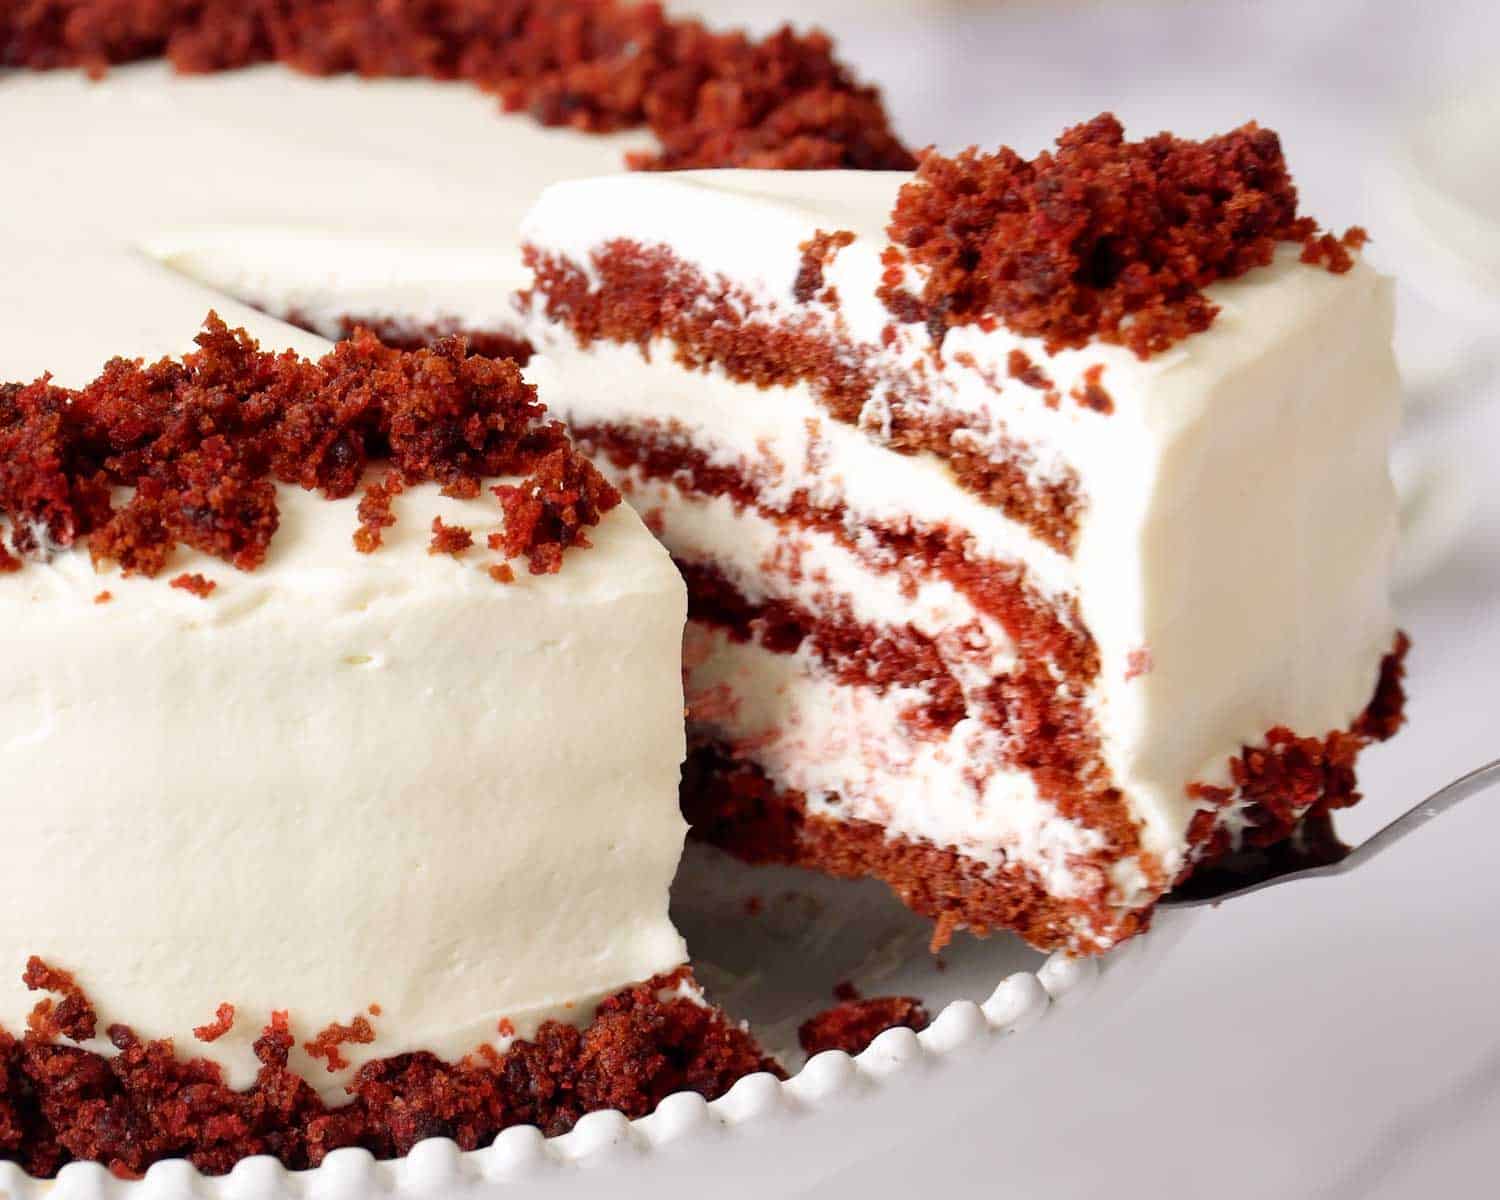
Red Velvet Cake with an incredible cream cheese frosting that’s actually moist, deeply red, and not dry by day two. This is the cake I’ve been making for years, and it has never let me down.


Why This Red Velvet Cake Is My Favorite
Valentine’s Day is coming up, which means chocolate, flowers, and desserts that look good but are impossible to make. This is where my Red Velvet Cake quietly wins. It’s dramatic without being fussy, feels special without being complicated, and looks like you put in more effort than you actually did, which at this point in life feels like excellent decision making.
This has always been my favorite cake, and the cream cheese frosting is a big reason why. I am not a buttercream person and never have been. Cream cheese frosting is where it’s at, tangy, smooth, and not cloyingly sweet. This cake is straightforward, forgiving, and absolutely doable even if baking is not your comfort zone. If you can follow directions and own a couple of cake pans, you can make this and feel very good about it.
Why This Recipe Works
- It’s genuinely moist and stays that way, thanks to a couple of smart ingredient choices that actually make a difference.
- The cream cheese frosting is light, tangy, and made without butter, which is exactly why it works so well here.
- The cake has a deeper flavor than most red velvet cakes without tasting overly chocolatey or sweet.
- The recipe is straightforward and forgiving, even if baking isn’t usually your thing.
- It looks impressive on the table, especially for Valentine’s Day, without being stressful to make.
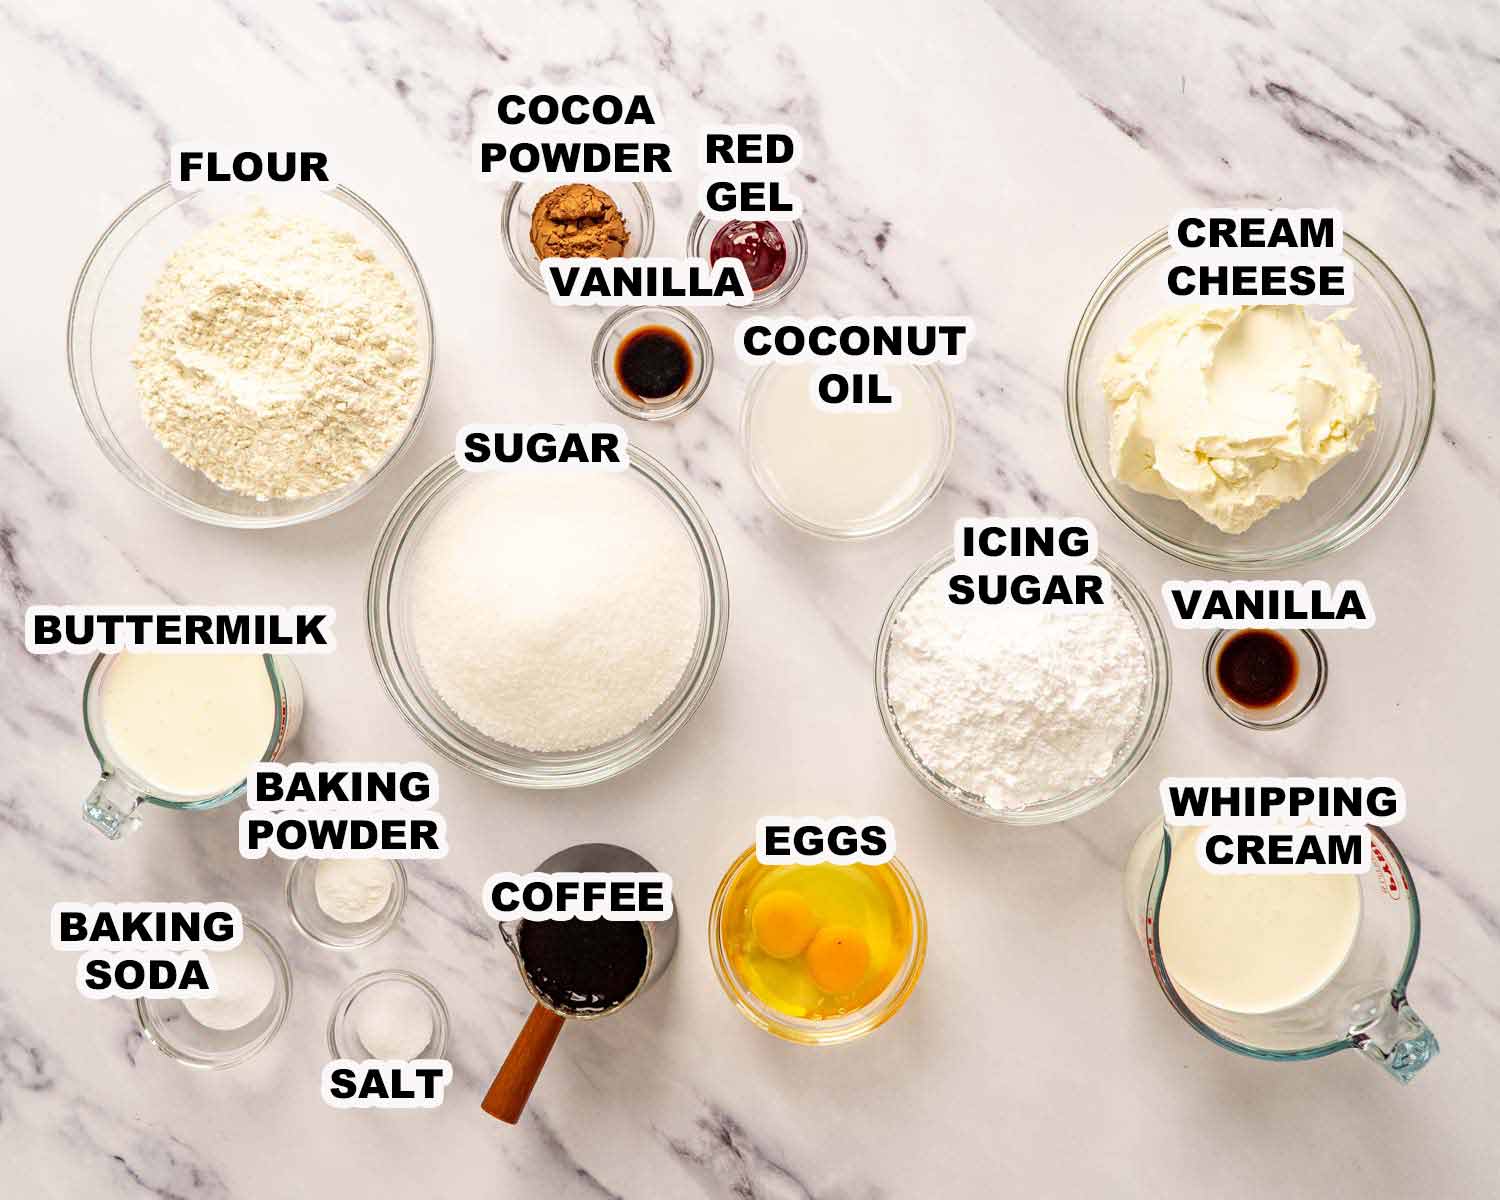
Key Ingredients & Tips
- Coffee: Yes, there’s coffee in the cake, and no, it will not taste like coffee. Coffee deepens the cocoa flavor and makes the cake taste richer without turning it into a mocha situation. This is one of those quiet ingredients that does a lot of heavy lifting.
- Coconut oil instead of butter: Coconut oil keeps the cake incredibly moist and gives it a softer crumb than butter does. You don’t taste coconut at all, but you do get a cake that stays tender for days instead of drying out overnight.
- Buttermilk: Buttermilk adds moisture and a slight tang, which balances the sweetness and helps keep the cake soft. If you don’t have any, you can make your own, but real buttermilk gives the best results here.
- Red gel food coloring: Gel food coloring gives you that deep red color without having to use half a bottle. Liquid food coloring works, but you’ll need more of it and the color won’t be as rich.
- Cream cheese frosting without butter: This frosting is whipped cream cheese and whipped cream, not buttercream. That’s very much on purpose. It’s lighter, tangier, and doesn’t taste like straight butter, which lets the cake shine instead of fighting it.
- Don’t overbake: Start checking the cakes early. Red velvet can dry out if it goes too long, and pulling it at the right moment makes all the difference.
- Let the cakes cool completely before frosting: Warm cake and cream cheese frosting do not get along. Be patient here or you’ll end up with sliding layers and a mess.
The steps to make this Red Velvet Cake are quite simple. Start by preheating the oven to 350℉. Prepare two 8 inch cake pans by lining the bottoms with parchment paper and spraying the bottoms and sides with cooking spray.
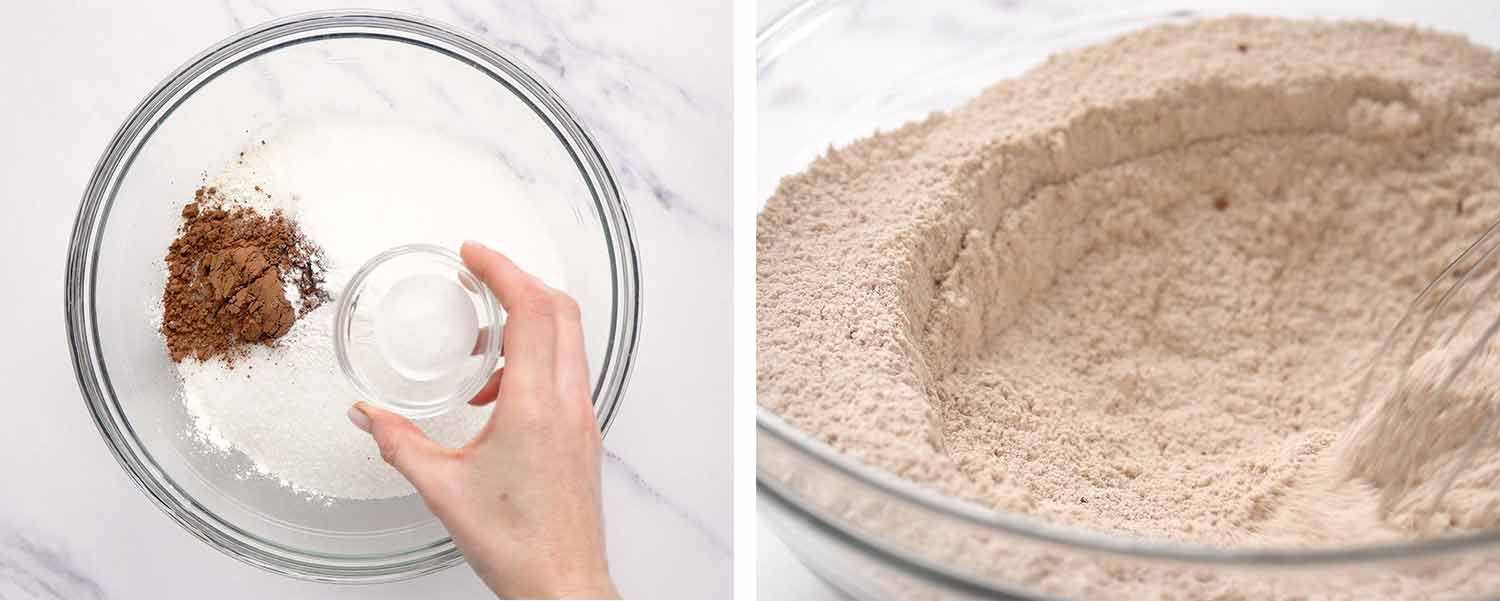
In the bowl of a mixer, combine the flour, sugar, cocoa powder, salt, baking powder, and baking soda. Mix briefly just to combine.
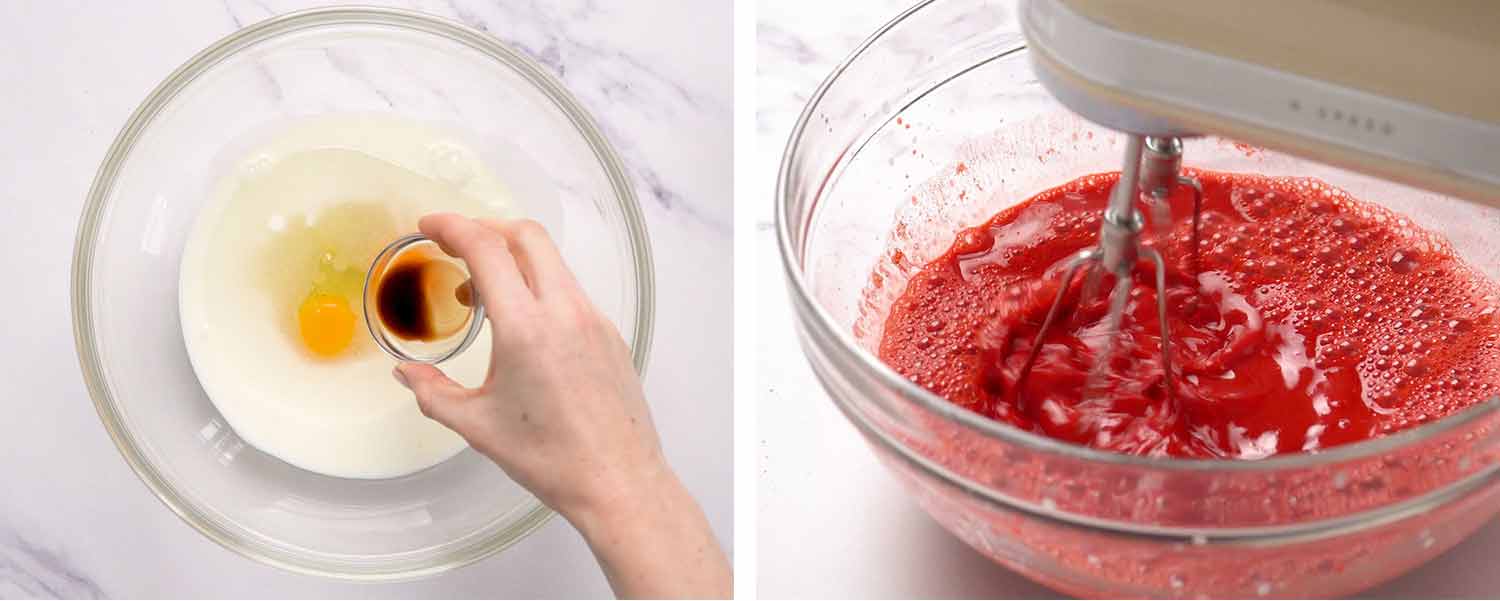
In a separate bowl, whisk together the buttermilk, coconut oil, eggs, and vanilla. Whisk in the hot coffee and red food coloring until smooth.
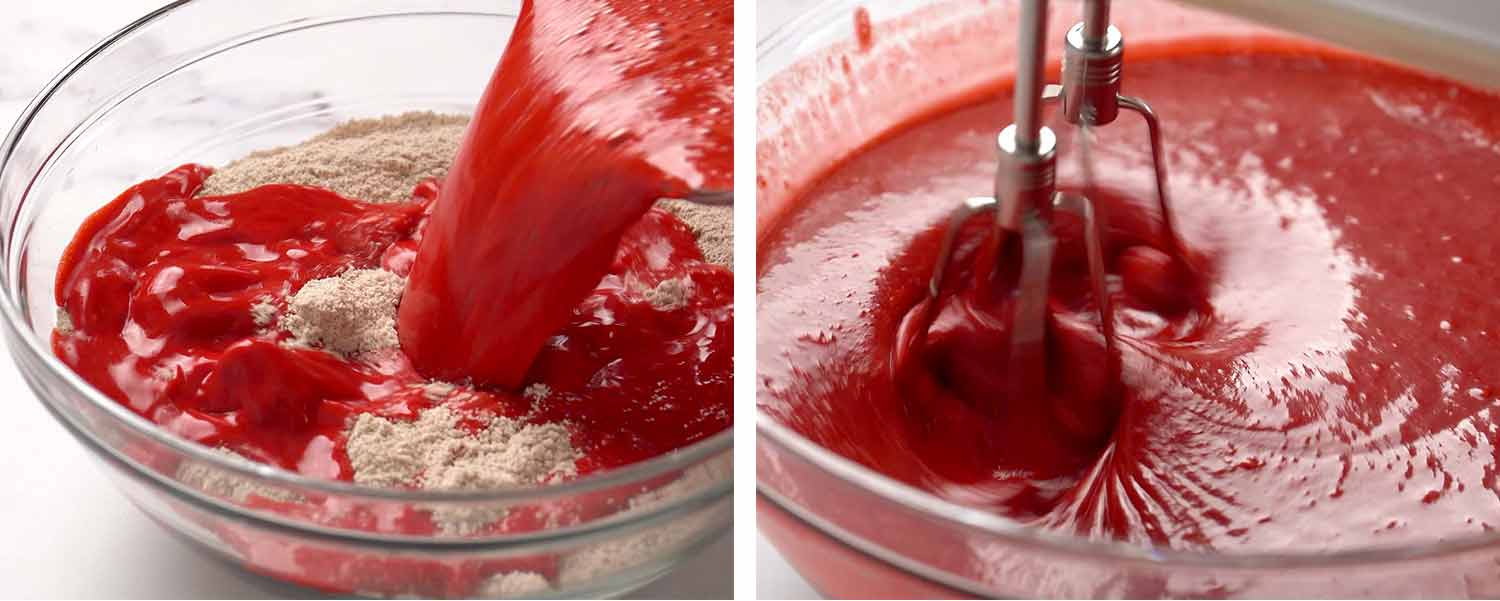
Add the wet ingredients to the dry ingredients and mix on medium speed for about 2 minutes, until smooth and fully combined. Scrape down the bowl as needed. Adjust the food coloring if you want a deeper red.

Divide the batter evenly between the prepared pans. Bake for 30 to 35 minutes, or until a toothpick inserted into the center comes out clean. Let the cakes cool in the pans for about 30 minutes, then turn them out onto a rack and cool completely.
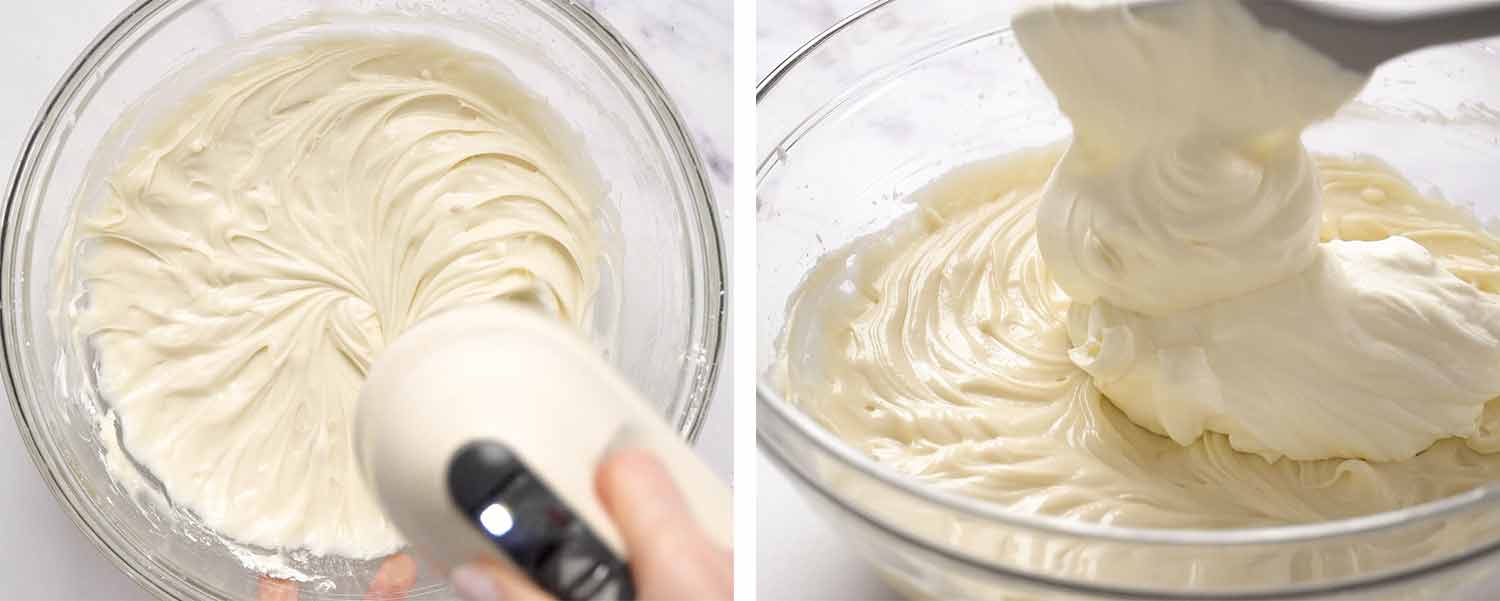
Whip the cream until soft peaks form, then refrigerate it. In a separate bowl, beat the cream cheese with the vanilla and icing sugar until smooth. Gently fold in the whipped cream until fully combined.
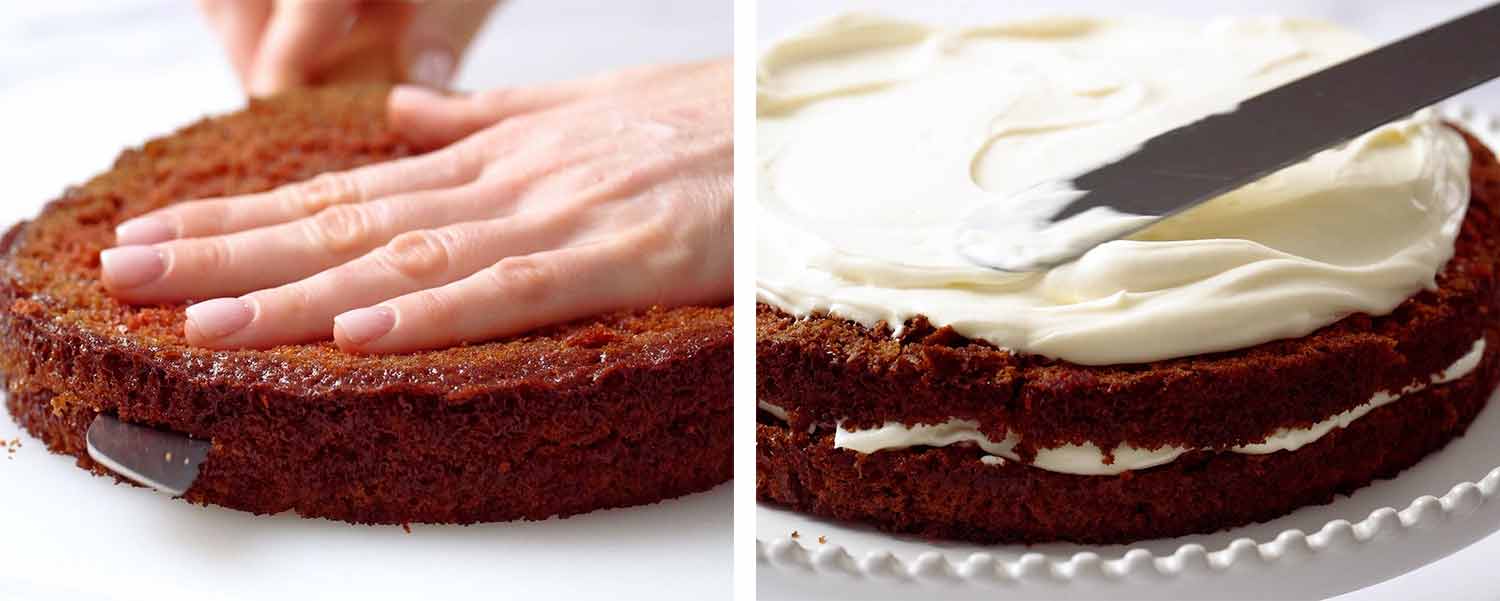
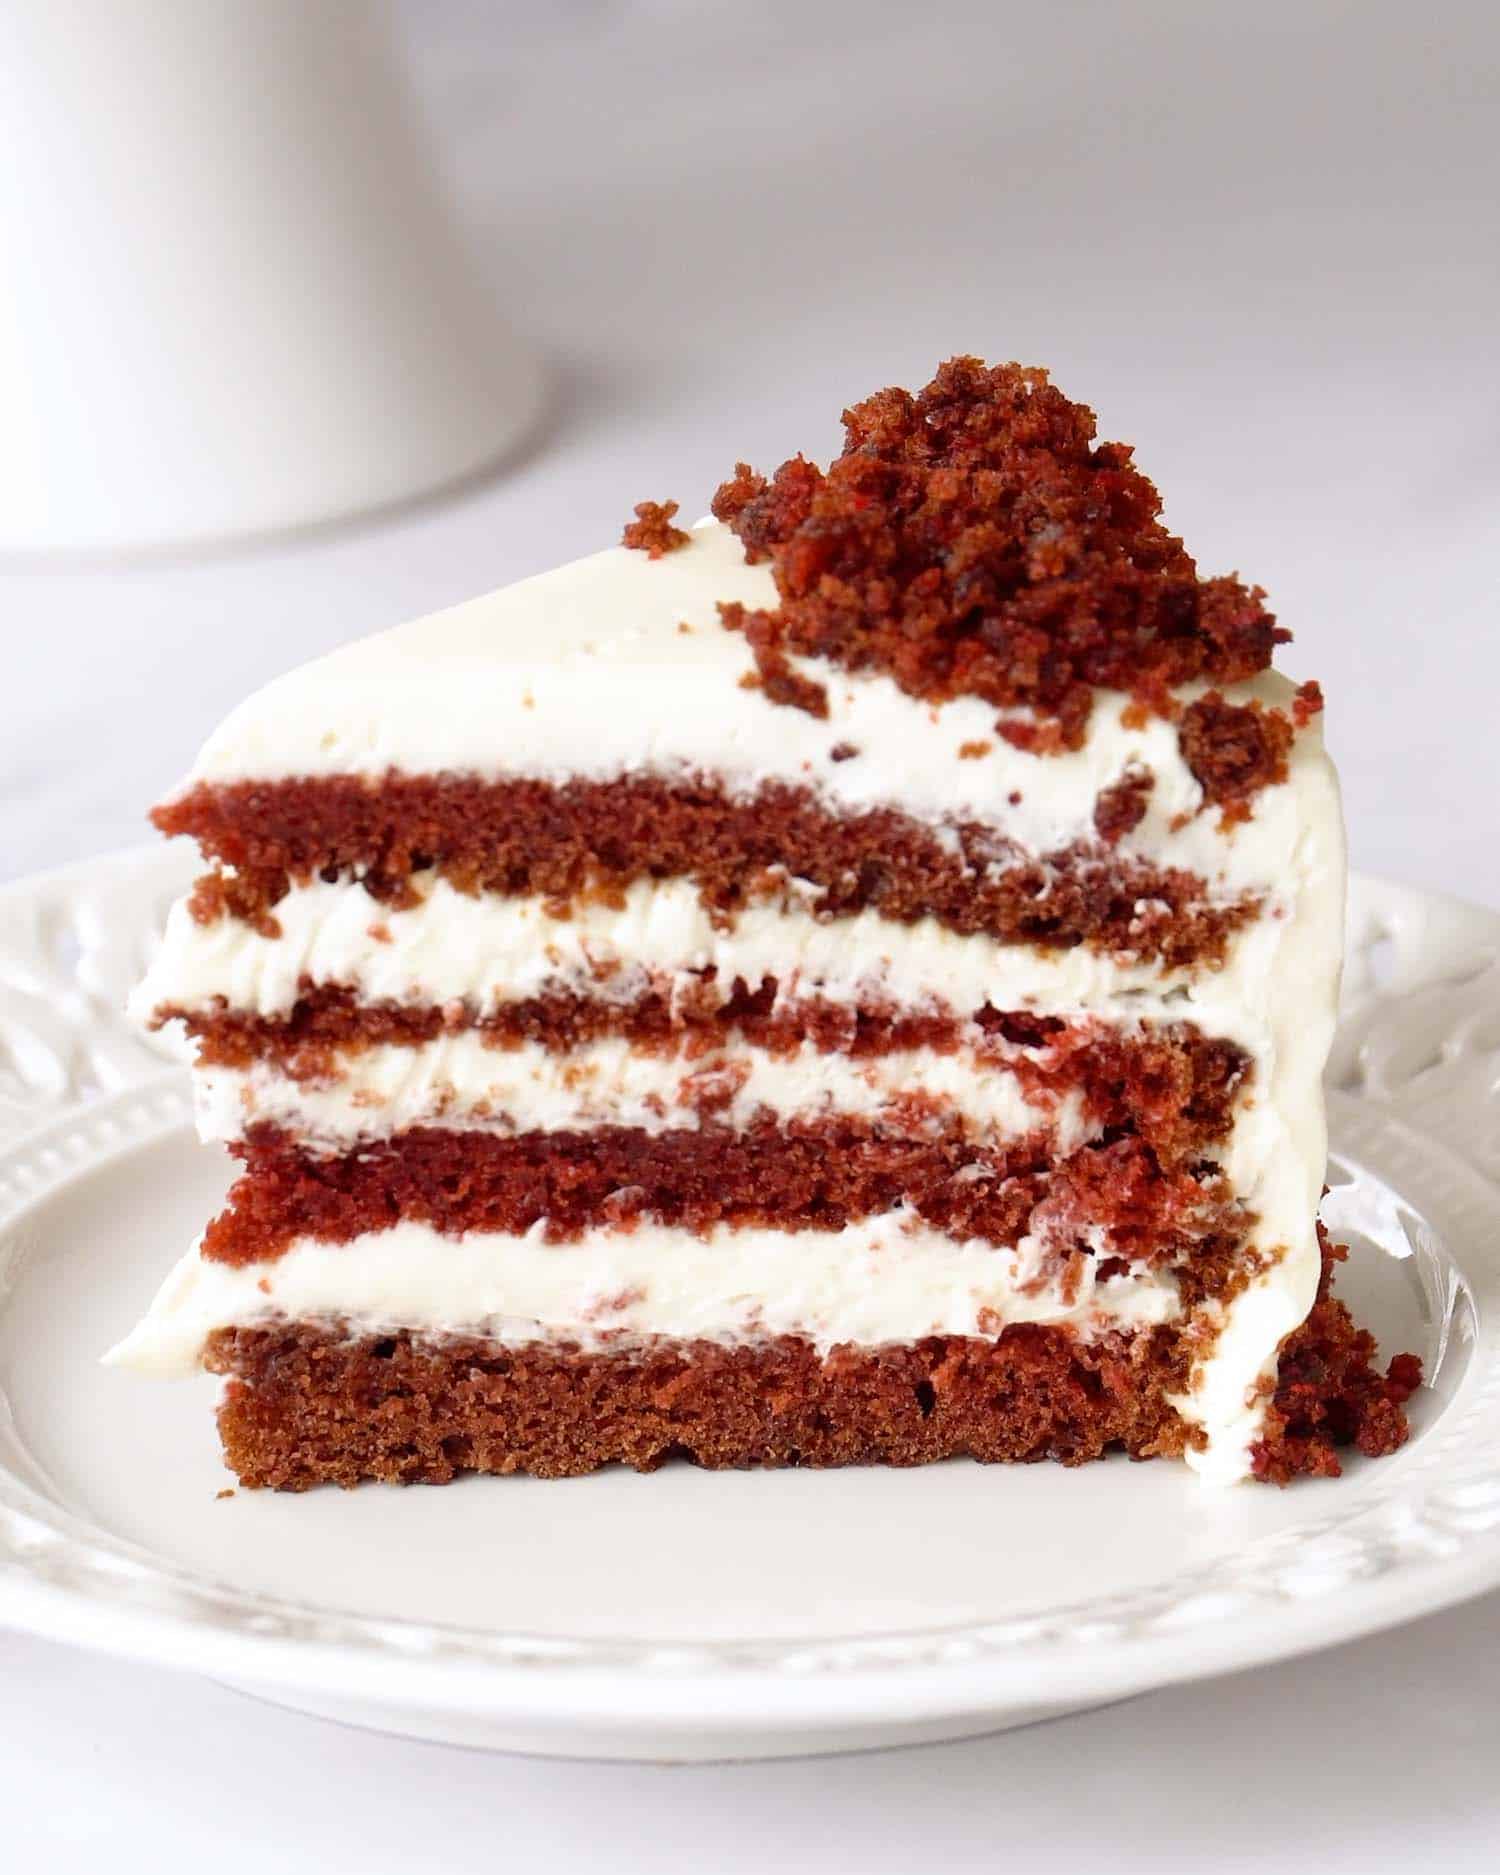
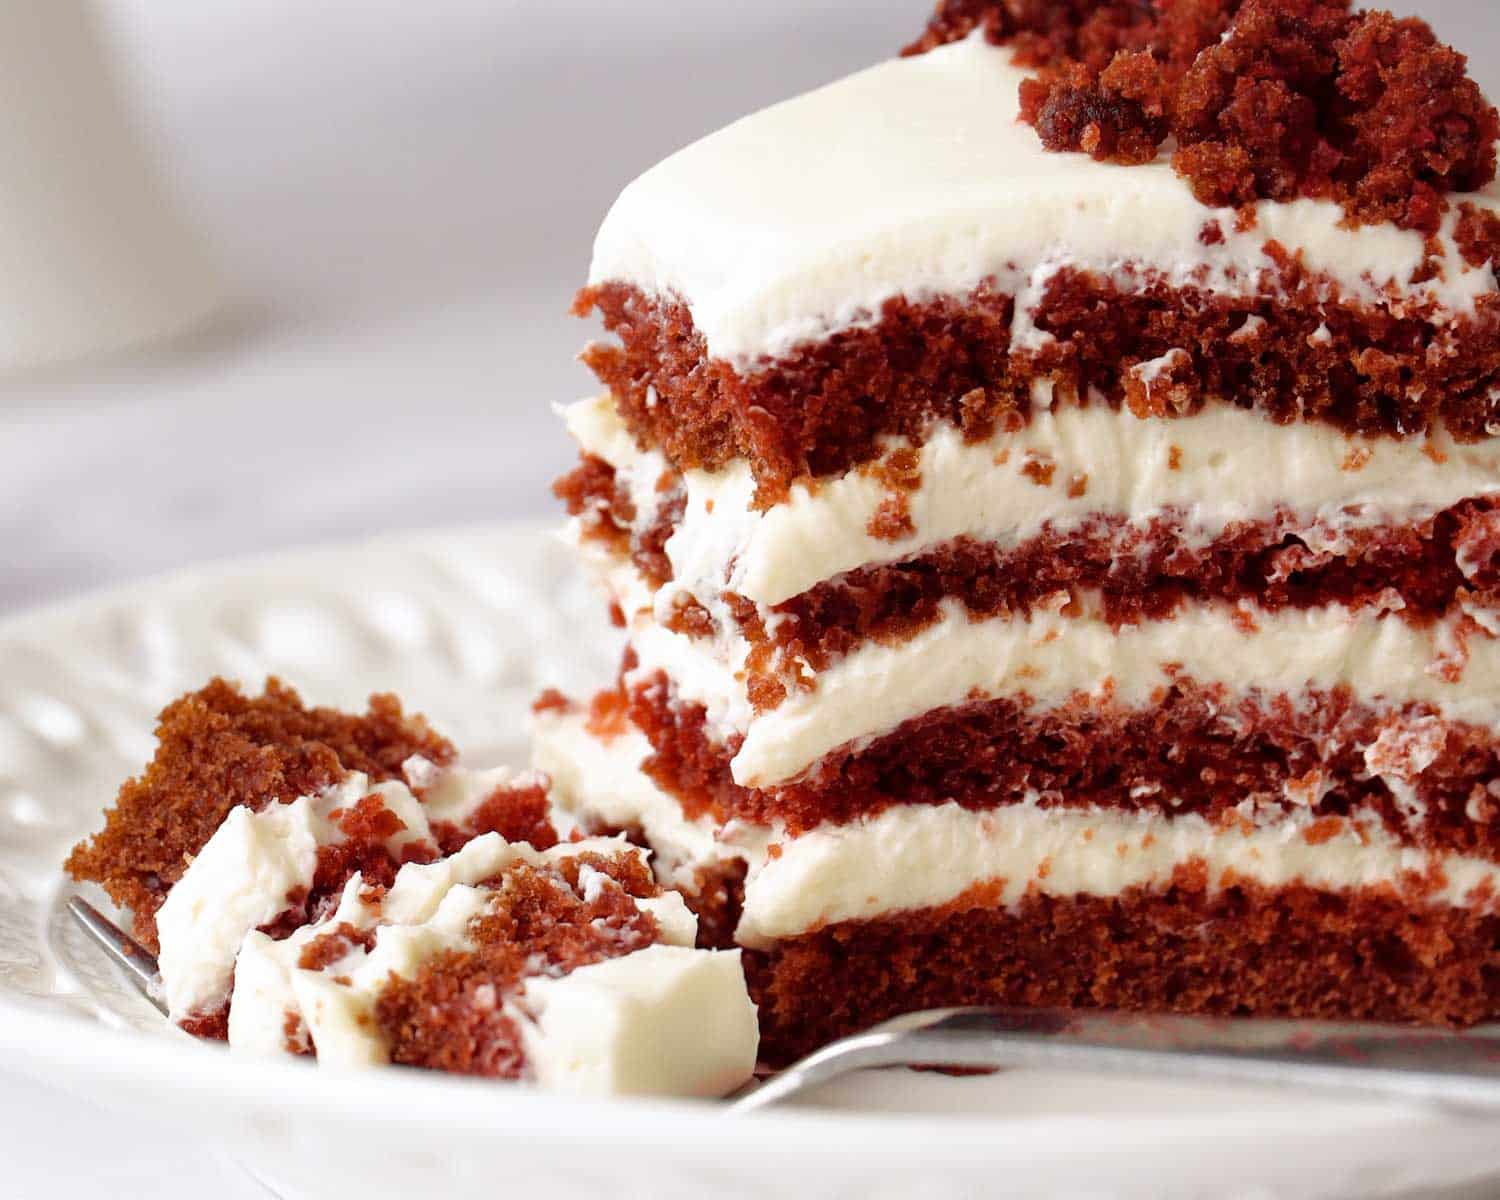
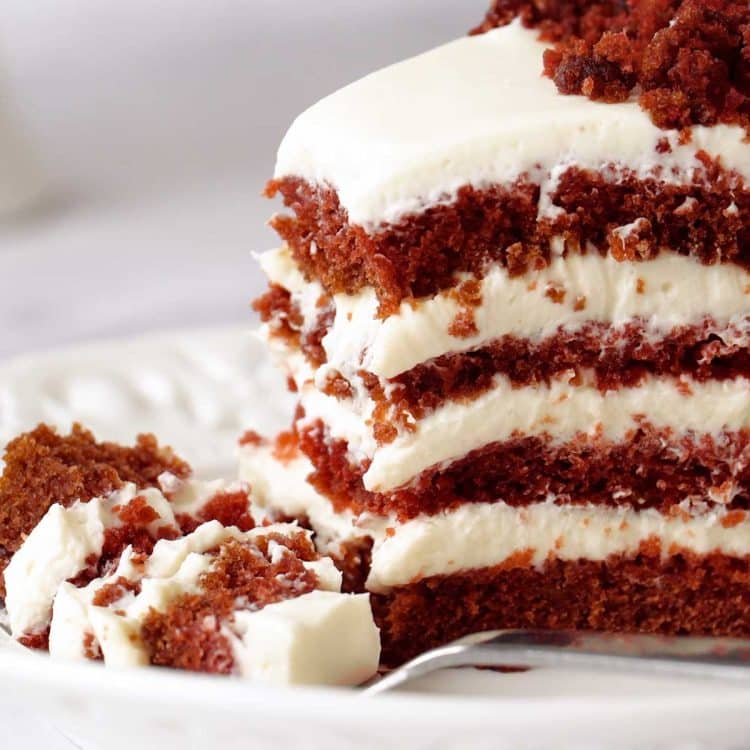
Trim the tops of the cakes if needed. Cut each cake in half horizontally if making a 4 layer cake. Layer cake and frosting, finishing with frosting on the top and sides. Use any extra cake crumbs for decorating if you like. Refrigerate the cake until ready to serve so the frosting sets nicely.
Frequently Asked Questions
Does the cake taste like coffee?
No. The coffee deepens the chocolate flavor but you won’t taste coffee at all. If no one tells you it’s in there, you’d never know.
Can I skip the coffee and use something else?
Yes. Hot water works if you really don’t want to use coffee, but coffee gives the best flavor. I recommend it.
Can I use butter instead of coconut oil?
You can, but the texture will be different. Coconut oil keeps this cake softer and moister for longer. You won’t taste coconut.
Do I have to use gel food coloring?
You don’t have to, but I strongly recommend it. Gel gives you a deep red color without needing a ton of dye. Liquid food coloring works, but you’ll need more and the color won’t be as rich.
Can I make this cake ahead of time?
Yes. You can bake the cake layers a day ahead, wrap them well, and keep them at room temperature. Frost the cake the day you plan to serve it.
Does this cake need to be refrigerated?
Yes, because of the cream cheese frosting. Store it in the fridge and let it sit out for about 20 minutes before serving.
Why is there no butter in the frosting?
On purpose. This frosting is lighter, tangier, and not overly sweet. It balances the cake instead of overpowering it.
Can I make this as a three layer cake?
Yes. Use three pans and skip cutting the layers in half. The recipe works either way.
Try These Delicious Cakes Next
Before You Begin! If you make this, please leave a review and rating letting us know how you liked this recipe! This helps our business thrive & continue providing free recipes.
Red Velvet Cake
Video
Ingredients
Cake
- 2 cups all-purpose flour
- 2 cups sugar (granulated)
- 1 tablespoon cocoa powder (unsweetened)
- 1 teaspoon salt
- 1 teaspoon baking powder
- 2 teaspoon baking soda
- 1 cup buttermilk
- ½ cup coconut oil
- 2 large eggs
- 1 teaspoon vanilla extract
- 1 cup coffee (hot)
- 1 tablespoon red gel food coloring
Cream Cheese Frosting
- 1½ cups whipping cream
- 16 ounce cream cheese
- 1 teaspoon vanilla extract
- 1½ cups icing sugar (same as powdered sugar or confectioner’s sugar)
Before You Begin! If you make this, please leave a review and rating letting us know how you liked this recipe! This helps our business thrive & continue providing free recipes.
Instructions
- Preheat the oven to 350℉.
- Prepare the baking pans: Prepare 2 8 inch cake pans. Cut out 2 parchment paper circles that will fit inside each pan and spray them with some cooking spray. Make sure to spray some cooking spray up the sides of the pans too.
- Make the cake batter: In the bowl of your mixer, add the flour, sugar, cocoa powder, salt, baking powder, baking soda and using the paddle attachment mix everything together until well combined, on low speed.
- In a large bowl mix together the buttermilk, coconut oil, eggs, and vanilla extract. Whisk in the coffee and food coloring.
- Add the wet ingredients to the mixer bowl and mix everything over medium speed for about 2 minutes, until everything is well combined. Scrape the bottom of the bowl with a spatula and mix as needed. Add more red food coloring as needed to get to the desired color. Pour the batter into the 2 prepared pans, equally.
- Bake: Place the cake pans in the oven and bake for 30 to 35 minutes. To test if the cake is done, insert a toothpick in the middle of the cake and if it comes out clean, it’s done. Let the cake cool in the pans for about 30 minutes, then turn them out onto a cooling rack or a cutting board and cool completely.
- Prepare the cream cheese frosting: In the bowl of your mixer whip the whipping cream until soft peaks form. Remove from mixer bowl and refrigerate until ready to use.
- In the bowl of your mixer, beat the cream cheese together with the vanilla extract and icing sugar, until smooth. Fold in the whipping cream gradually until well combined.
- Assemble the cake: Cut the top part of the cake first and crumbled it up in a bowl, we’ll use this for decoration after.
- Cut each cake into 2 pieces. Start by placing 1 cake layer onto your serving cake platter, then spread some of the cream cheese frosting, about 1/4, evenly over the cake layer. Repeat with remaining cake layers. Using a spatula, spread the cream cheese frosting evenly over the top of the cake and up the sides. Decorate the cake with the remaining cake crumbs if desired.
- Refrigerate until ready to serve.
Notes
- Coffee enhances the chocolate flavor without making the cake taste like coffee. If needed, hot water can be used instead, but coffee gives the best result.
- Coconut oil keeps the cake extra moist and gives it a softer crumb than butter. There is no coconut flavor once baked.
- Gel food coloring works best for achieving a deep red color without using a large amount of dye.
- This frosting contains no butter, which keeps it light, tangy, and balanced instead of overly rich.
- The cake can be made as a 2 layer, 3 layer, or 4 layer cake. Adjust pan sizes and baking time as needed.
- Because of the cream cheese frosting, store the cake in the refrigerator and let it sit at room temperature for about 20 minutes before serving.
Nutrition Information
Notice: Nutrition is auto-calculated for your convenience. Where relevant, we recommend using your own nutrition calculations.
