Red Velvet Kiss Cookies
This post may contain affiliate links. Please read my disclosure policy.
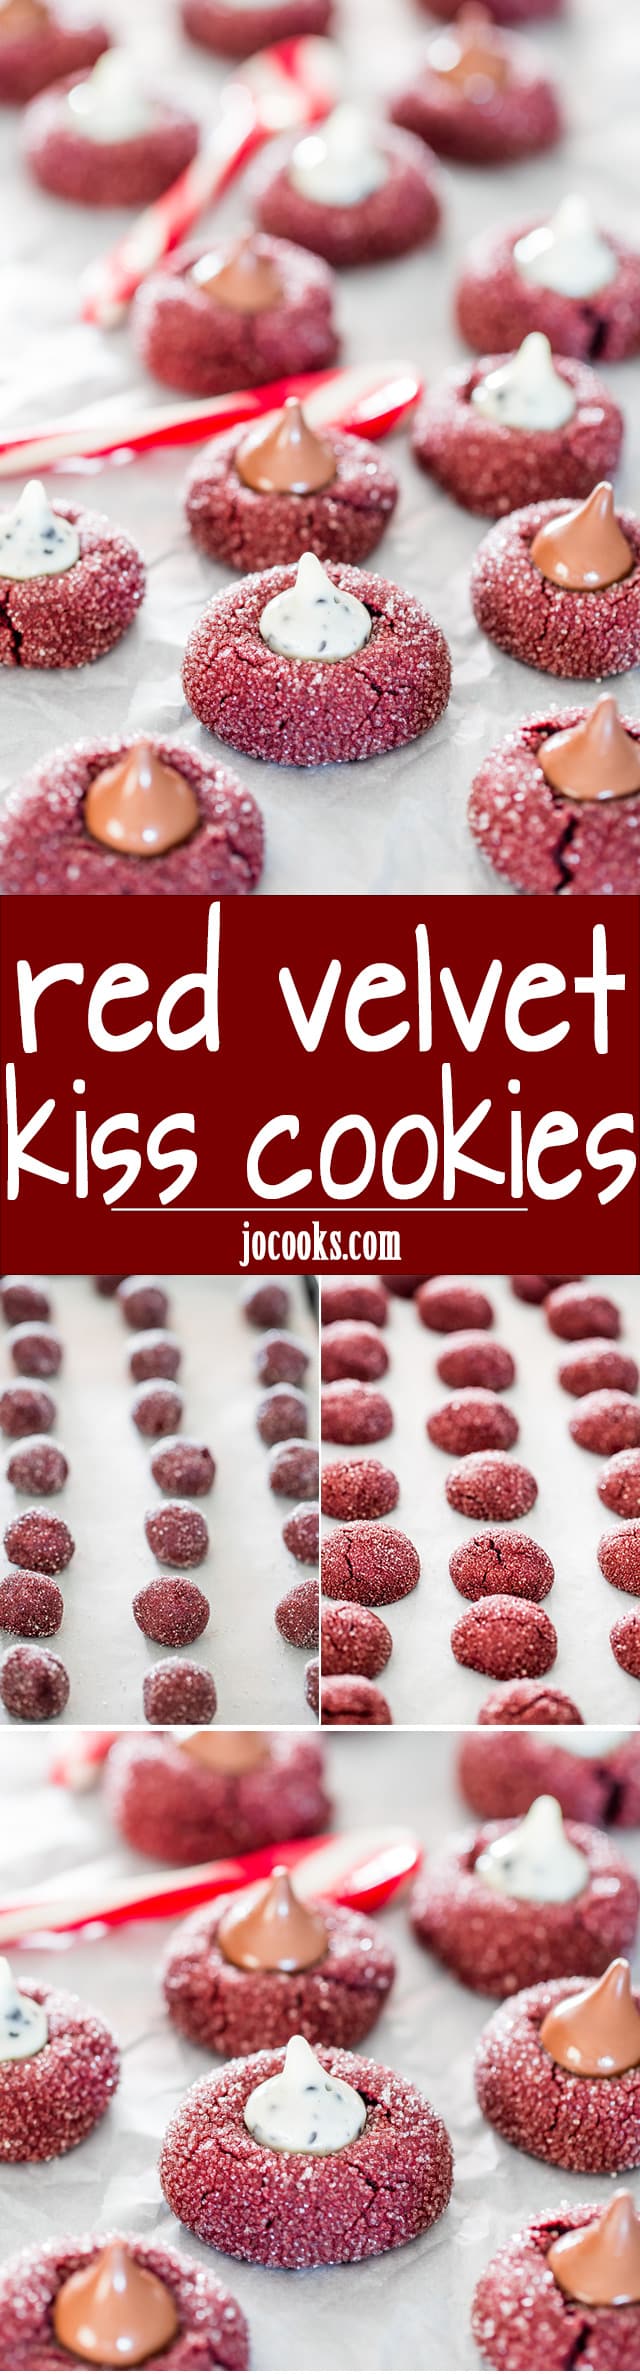
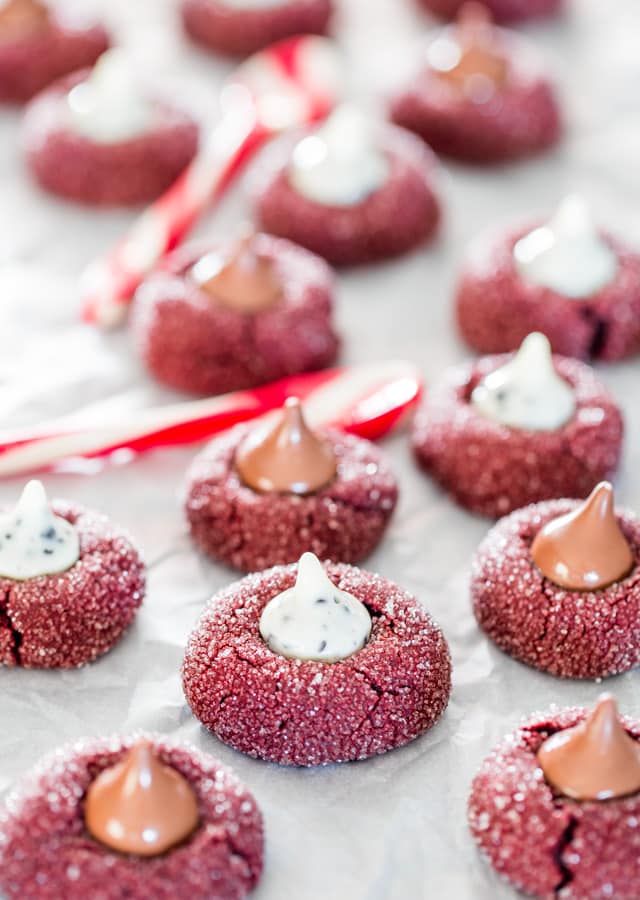
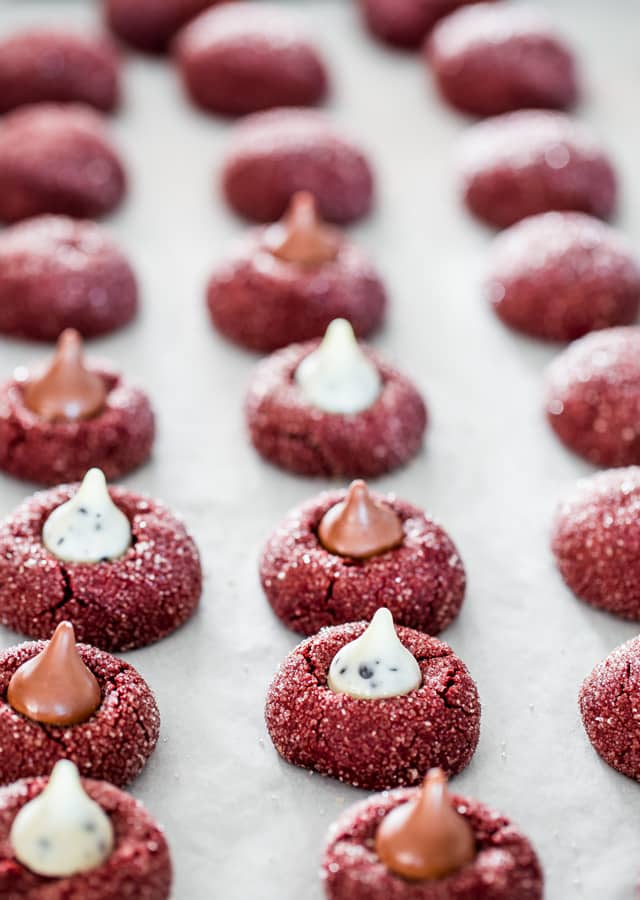
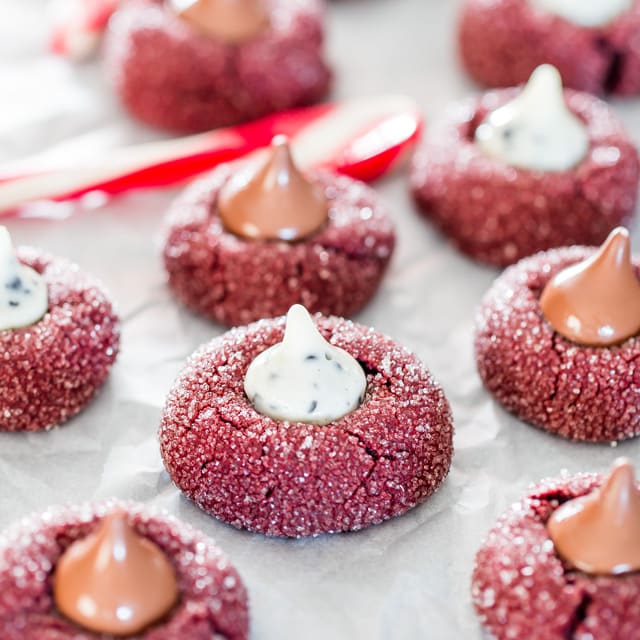
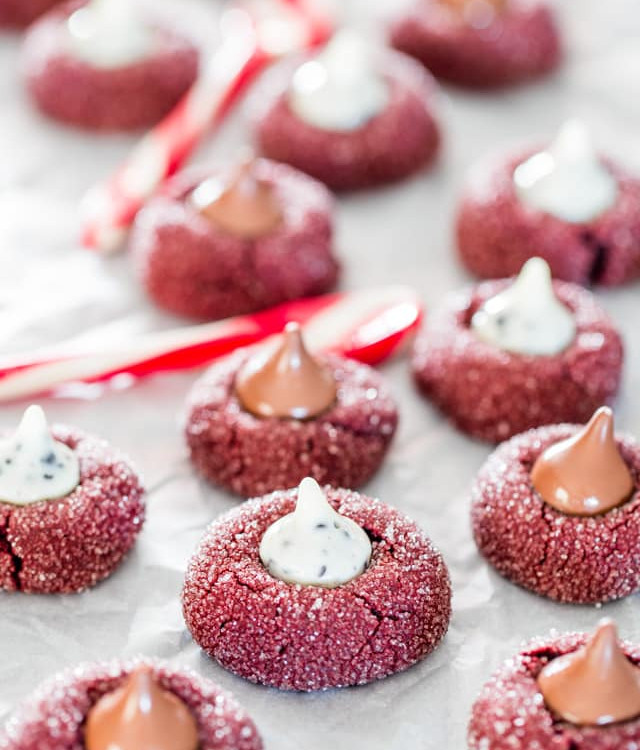
Red Velvet Kiss Cookies – chewy and delicious red velvet cookies topped with a Hershey’s Kiss! A delightful Christmas cookie that will make everyone smile!
Only a few more days left until Christmas and things are getting stressful, who can keep track of all that needs to be done? One thing I do to get ready, though, is make cookies in advance and freeze them, take them out the day before and they’re as good as just fresh out of the oven. Today I made these red velvet kiss cookies which I think are just perfect for the Holidays.
To get the beautiful red color I used red velvet liquid food coloring which I found at Michael’s, but you should be able to find it anywhere. The batter is really simple to make then all you basically do is roll the dough into small cookie balls, roll the cookies through some sugar and bake – that’s it!
Isn’t Red Velvet Just Chocolate Cake Dyed Red?
A lot of people think red velvet is just chocolate cake with coloring but that’s not quite true. In a cake there’s cocoa and the addition of buttermilk and vinegar make it tangier and give it the “velvet” texture.
These cookies however are just inspired by red velvet so we axed those liquid ingredients listed above. So these cookies are all about the flavor, combined with a visually stunning finish.
Ingredients
Detailed measurements and instructions can be found on the printable recipe card at the bottom of the page.
- Wet ingredients – Butter, brown sugar, vanilla extract, eggs and liquid food coloring.
- Dry ingredients – Salt, flour, baking powder, baking soda and cocoa powder.
- Kisses – Hershey’s that is! 1 bags worth.
Can I Use Gel Food Coloring?
Gel food coloring works best for this recipe as it allows us to achieve a truly vibrant and consistent red that lasts long after baking. Regular red food dye will also work just fine if that’s what you have on hand as will beet root powder if you’re looking for a natural alternative.
How To Make Red Velvet Kiss Cookies
Detailed measurements and instructions can be found on the printable recipe card at the bottom of the page.
- Preheat oven to 350 F degrees. Line 2 baking sheets with parchment paper.
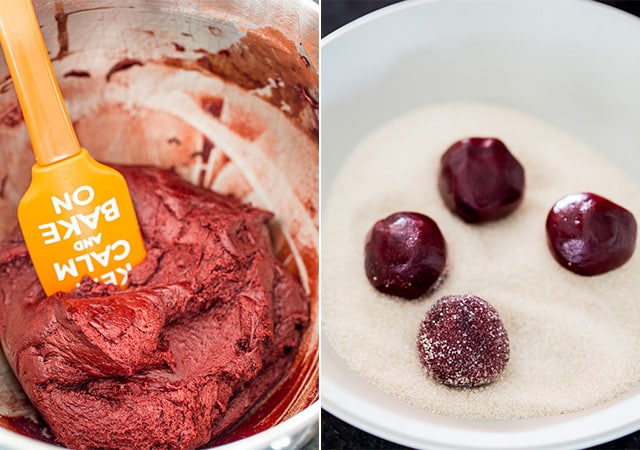
- Combine the wet ingredients: To the bowl of your mixer add the butter, brown sugar, vanilla extract and beat well until creamy. Add the egg and egg yolk, food coloring and continue mixing until the color is fully incorporated in the batter.
- Combine the dry ingredients: In a bowl combine the salt, flour, baking powder, baking soda and cocoa powder together. Add the dry ingredients to the mixer, half at a time, mix well, then add the other half.
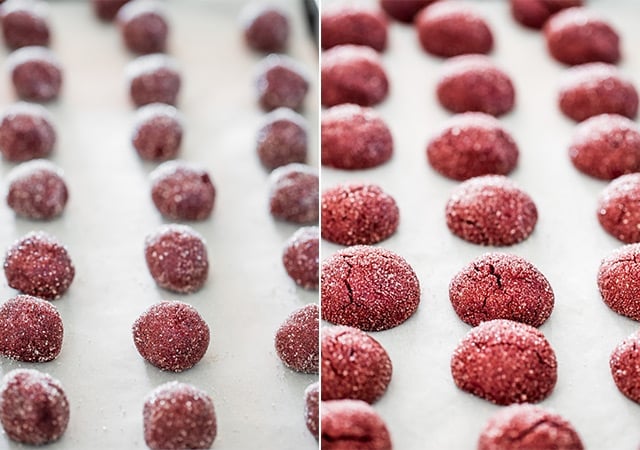
- Assemble the cookies: Place the granulated sugar in a shallow plate. Roll the cookie dough into 1 inch cookie balls, then roll through the sugar. Place the cookies on the prepared baking sheets and repeat until all the dough is rolled. The dough should generate about 4 dozen cookies.
- Bake in the preheated oven for 11 to 13 minutes. Make sure you don’t overbake the cookies because they will be dry.
- Finish the cookies: As soon as you take the cookies out from the oven, place a kiss in the center of each cookie. Transfer cookies to a wire rack until cooled completely.
Why Do We Coat The Cookies With Sugar?
As you bake the granulated sugar melts slightly and forms a perfect little crust around each of our cookies. This will create a sweet little crust around our richly flavored red velvet treats. The sugar also prevents the cookies from spreading too much as they bake.
Be Quick With The Kisses
As soon as you take these cookies out of the oven you want to immediately place a kiss on top of each cookie, pressing down a bit. Then you can transfer them to a wire rack to cool completely, though this is when I usually steal a cookie or two and eat them because I like my cookies warm and the chocolate will melt a bit as you bite into them….yeah it’s as good as you’re imagining right now.
Storing Leftovers
Be sure to store these in an airtight container at room temperature and your cookies will last for 2 – 3 weeks! This will ensure you keep the cookies soft and will prevent them from turning hard. If you don’t have an airtight container, add a slice of bread which will keep them soft. It works the same way as you do with brown sugar.
Freezing
These cookies are perfect for freezing. You can either wrap them individually or place them together in an airtight container. They will last in the freezer for 3 months, just warm them back up in the oven and enjoy.
More Must Try Drool Worthy Cookies?
- Best Ever Chocolate Chip Cookies
- Date Nut Pinwheel Cookies
- Chocolate Sugar Cookies
- Chocolate Rumballs
- Snickerdoodle Cookies
- Lemon Shortbread Cookies
- Peanut Butter Cookies
Before You Begin! If you make this, please leave a review and rating letting us know how you liked this recipe! This helps our business thrive & continue providing free recipes.
Red Velvet Kiss Cookies
Ingredients
- 14 tablespoon butter (room temperature)
- 1½ cup brown sugar
- 1 tablespoon vanilla extract
- 1 egg
- 1 egg yolk
- 1 tablespoon red liquid food coloring
- ½ teaspoon salt
- 1¾ cups all-purpose flour
- 1 teaspoon baking powder
- ½ teaspoon baking soda
- ½ cup cocoa powder
- ½ cup granulated sugar (for coating)
- 12 ounce Hershey’s kisses (1 bag)
Before You Begin! If you make this, please leave a review and rating letting us know how you liked this recipe! This helps our business thrive & continue providing free recipes.
Instructions
- Preheat oven to 350℉. Line 2 baking sheets with parchment paper.
- To the bowl of your mixer add the butter, brown sugar, vanilla extract and beat well until creamy. Add the egg and egg yolk, food coloring and continue mixing until the color is fully incorporated in the batter.
- In a bowl combine the salt, flour, baking powder, baking soda and cocoa powder together.
- Add the dry ingredients to the mixer, half at a time, mix well, then add the other half.
- Place the granulated sugar in a shallow plate. Roll the cookie dough into 1 inch cookie balls, then roll through the sugar. Place the cookies on the prepared baking sheets and repeat until all the dough is rolled. The dough should generate about 4 dozen cookies.
- Bake in the preheated oven for 11 to 13 minutes. Make sure you don’t overbake the cookies because they will be dry.
- As soon as you take the cookies out from the oven, place a kiss in the center of each cookie. Transfer cookies to a wire rack until cooled completely.
Notes
- I used liquid food coloring but gel food coloring will work as well.
- Be sure to store these in an airtight container at room temperature and your cookies will last for 2 – 3 weeks! This will ensure you keep the cookies soft and will prevent them from turning hard. If you don’t have an airtight container, add a slice of bread which will keep them soft. It works the same way as you do with brown sugar.
- These cookies are perfect for freezing. You can either wrap them individually or place them together in an airtight container. They will last in the freezer for 3 months, just warm them back up in the oven and enjoy.
Nutrition Information
Notice: Nutrition is auto-calculated for your convenience. Where relevant, we recommend using your own nutrition calculations.
