Pumpkin Scones
This post may contain affiliate links. Please read my disclosure policy.
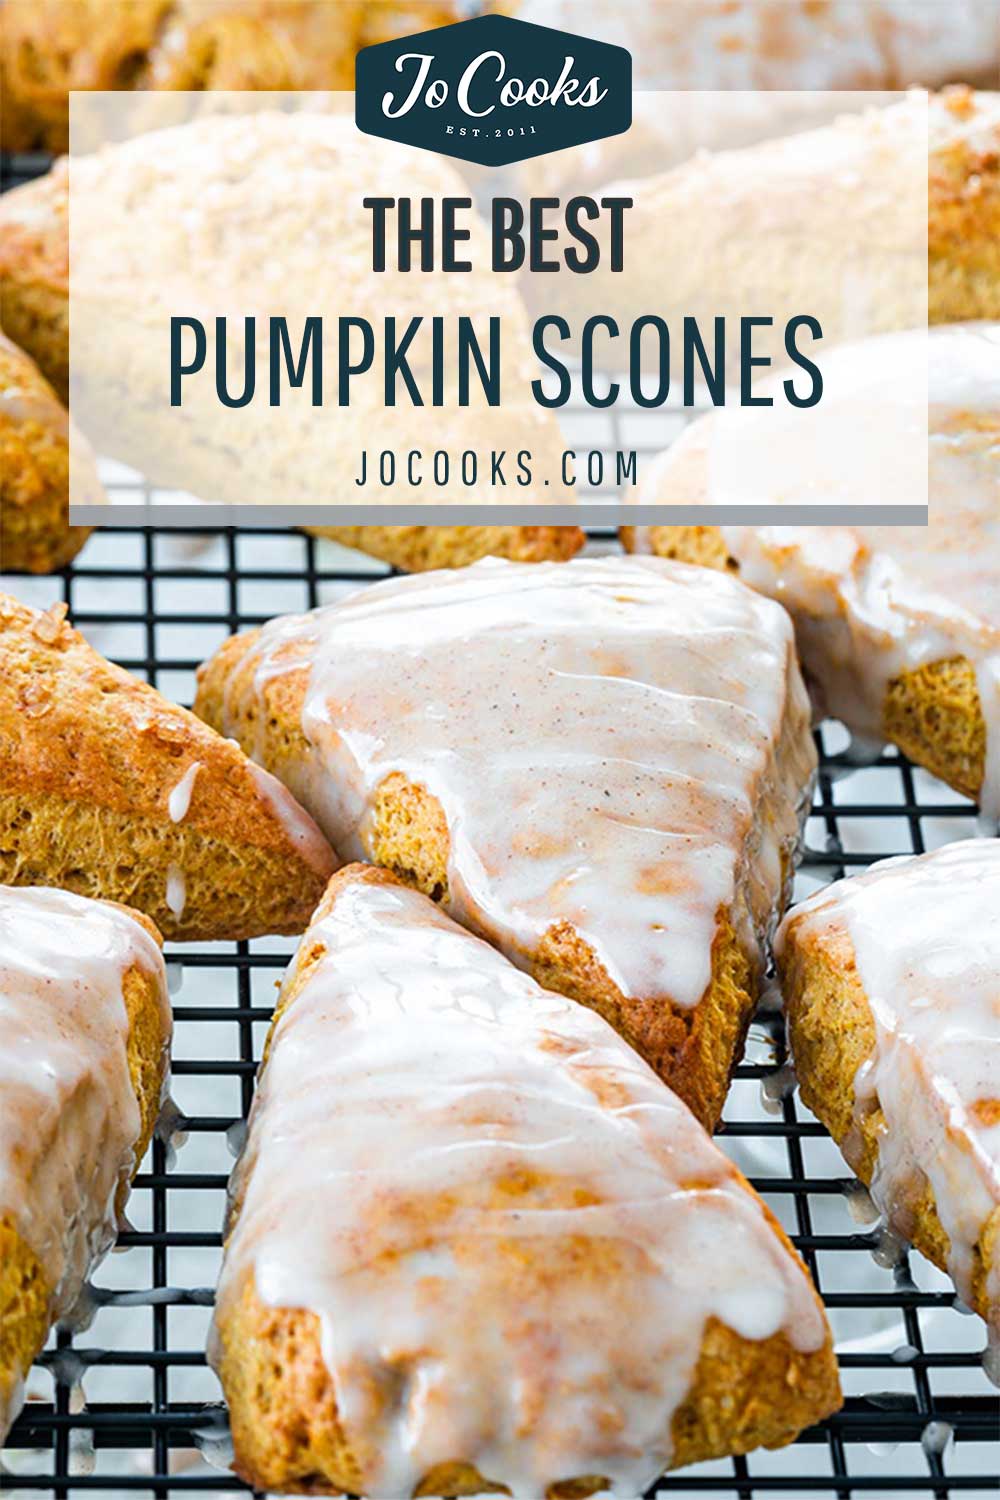
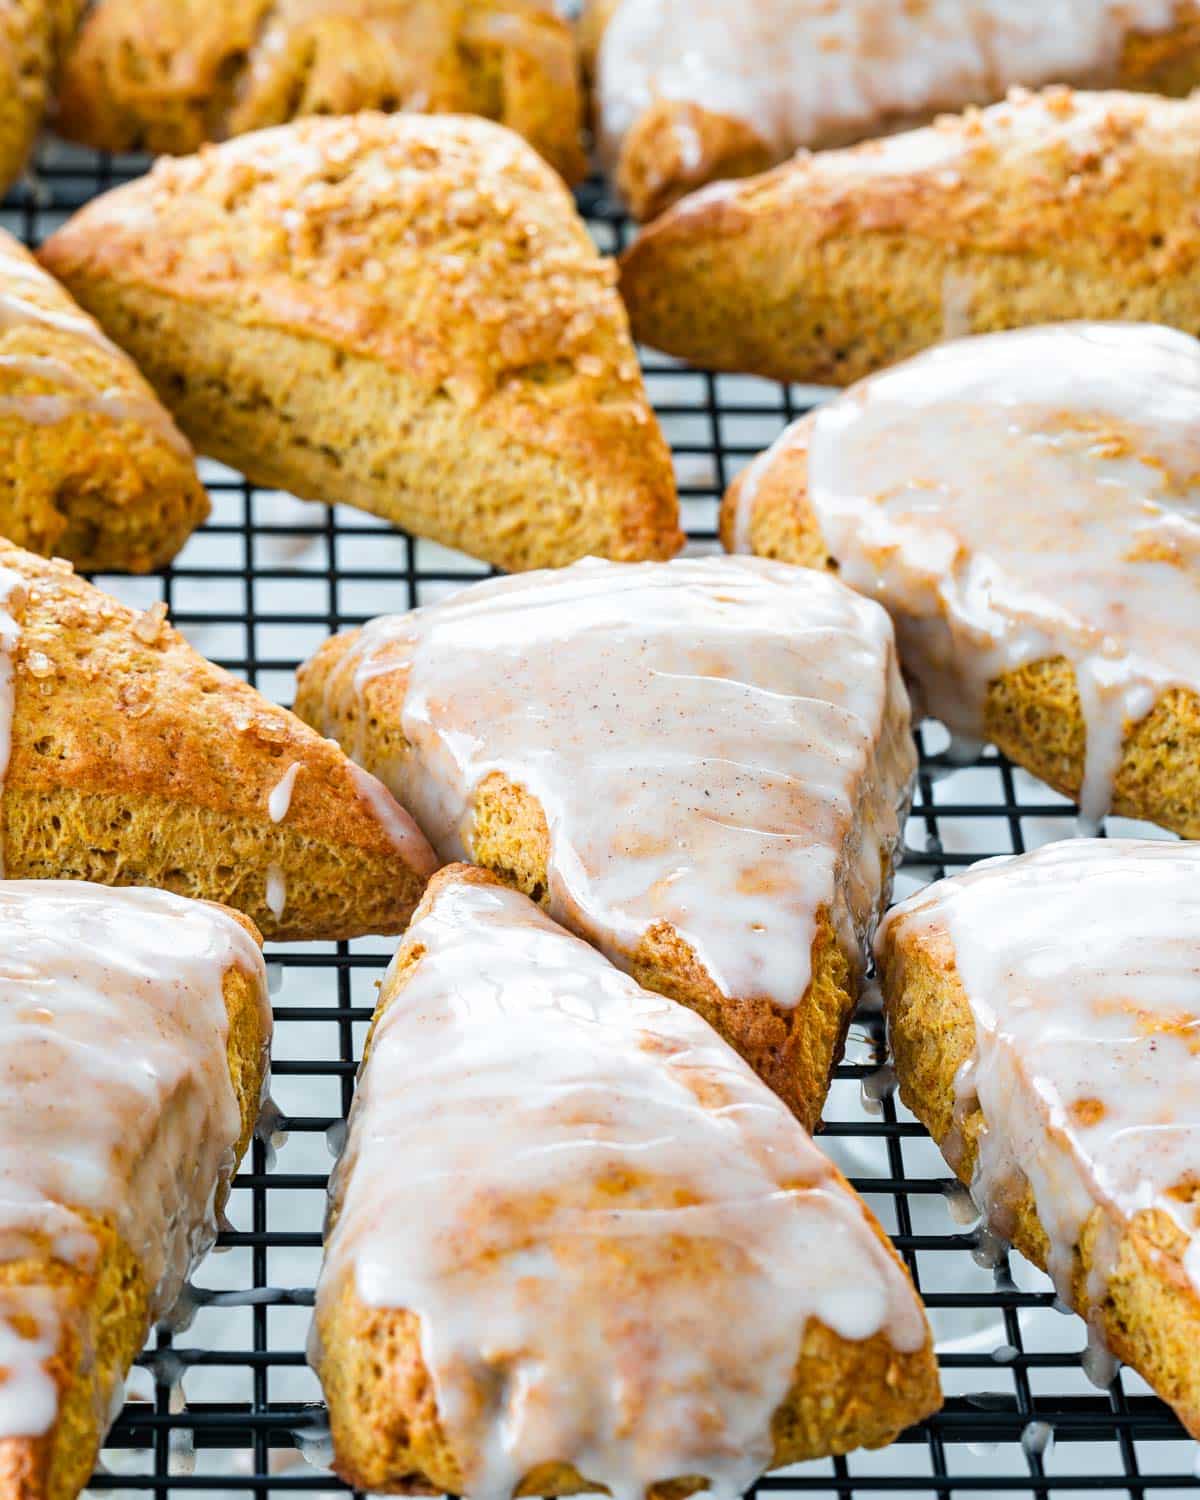
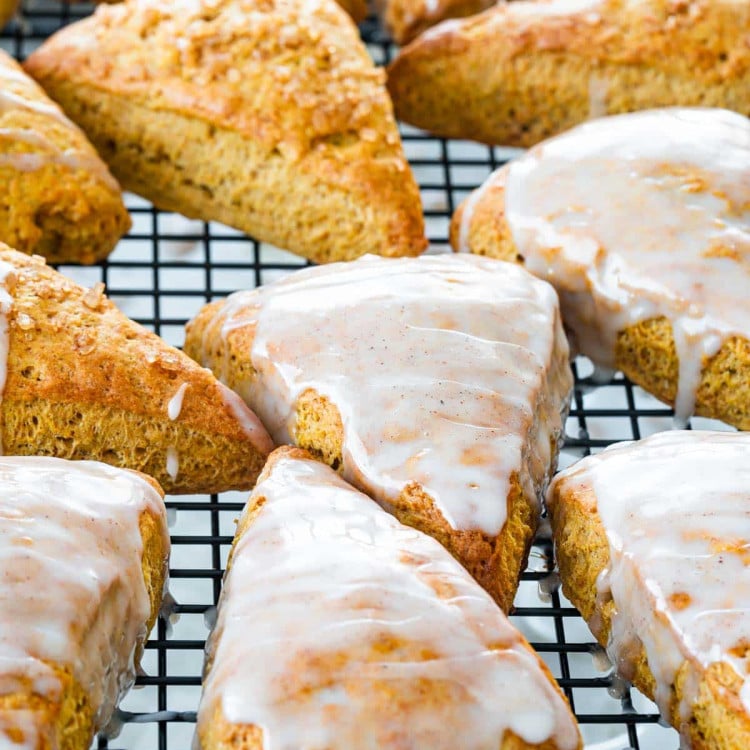
Imagine these Pumpkin Scones fresh out of the oven, warm and drizzled with two different types of glazes. Super easy recipe that yields the most delicious, flaky and perfectly spiced scones.
When fall is here, the number one thing that comes to my mind are pumpkins!! I feel like I haven’t shared enough pumpkin recipes with you guys this year, so I’m here to fix that problem with this easy pumpkin scone recipe.
These Pumpkin Scones are easy, delicious and perfect for breakfast on those cooler fall days. I also included two different glazes so use none or both, up to you!
Why Make These Pumpkin Scones
- Really easy to make!
- Takes under an hour from start to finish!
- Perfect for Fall
- Portable Breakfast/Snack
- Soft, Tender and Delicious
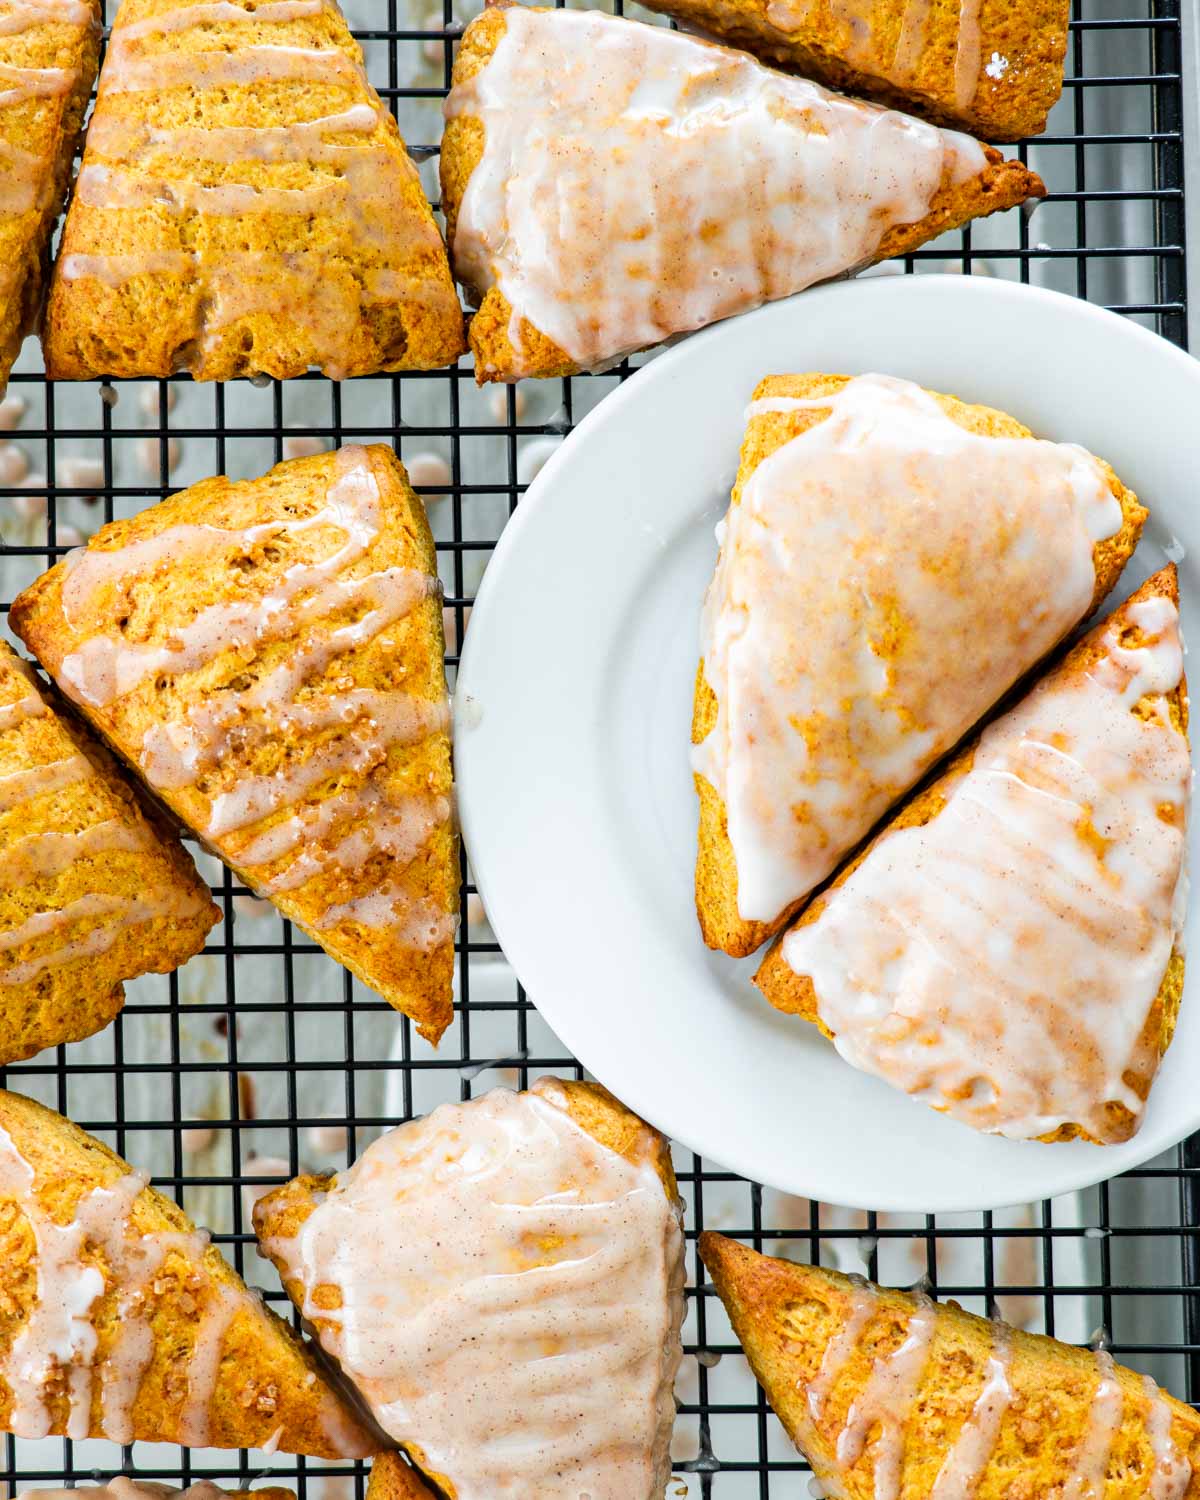
- Comes Complete with Two Different Glaze Recipes
Making scones is super easy! You can literally throw everything together in 15 or 20 minutes, and you’ve got yourself a wonderful breakfast or afternoon snack! Might I add they go perfectly with a good cup of hot coffee. This recipe also comes complete with not one, but TWO different glazes to amplify your pumpkin scones to the next level.
Ingredient Notes
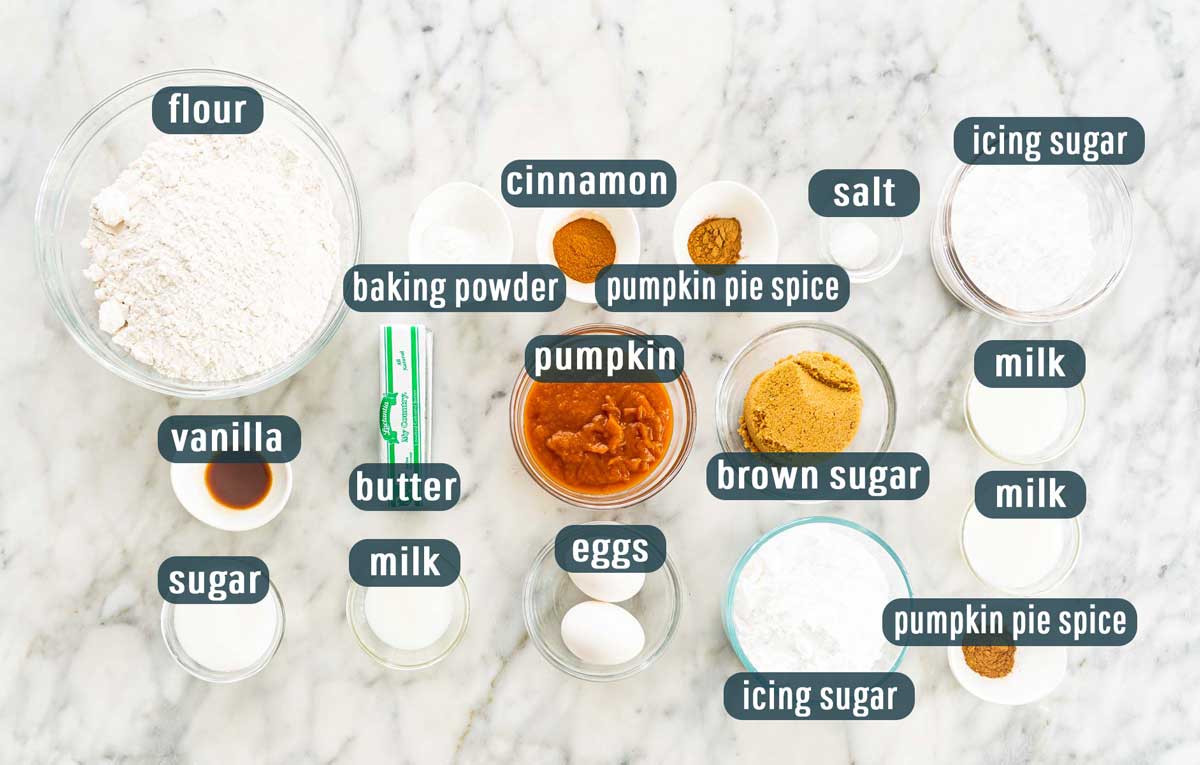
Scones
- The Basics – Flour, Baking Powder, Salt, Brown Sugar, Eggs, Vanilla.
- Spices – We will be using a combination of ground cinnamon and pumpkin pie spice.
- Butter – Make sure it’s frozen!
- Pumpkin – Canned pumpkin makes this recipe super simple!
Icing Sugar Glaze
- Icing Sugar – same as confectioners sugar or powdered sugar.
- Milk
Pumpkin Spiced Glaze
- Icing sugar – same as confectioners sugar or powdered sugar.
- Milk
- Pumpkin Pie Spice – make your own using my recipe here.
How To Make Pumpkin Scones
Making the Scones:
- Prep: Preheat the oven to 400°F. Line two baking sheets with parchment paper.
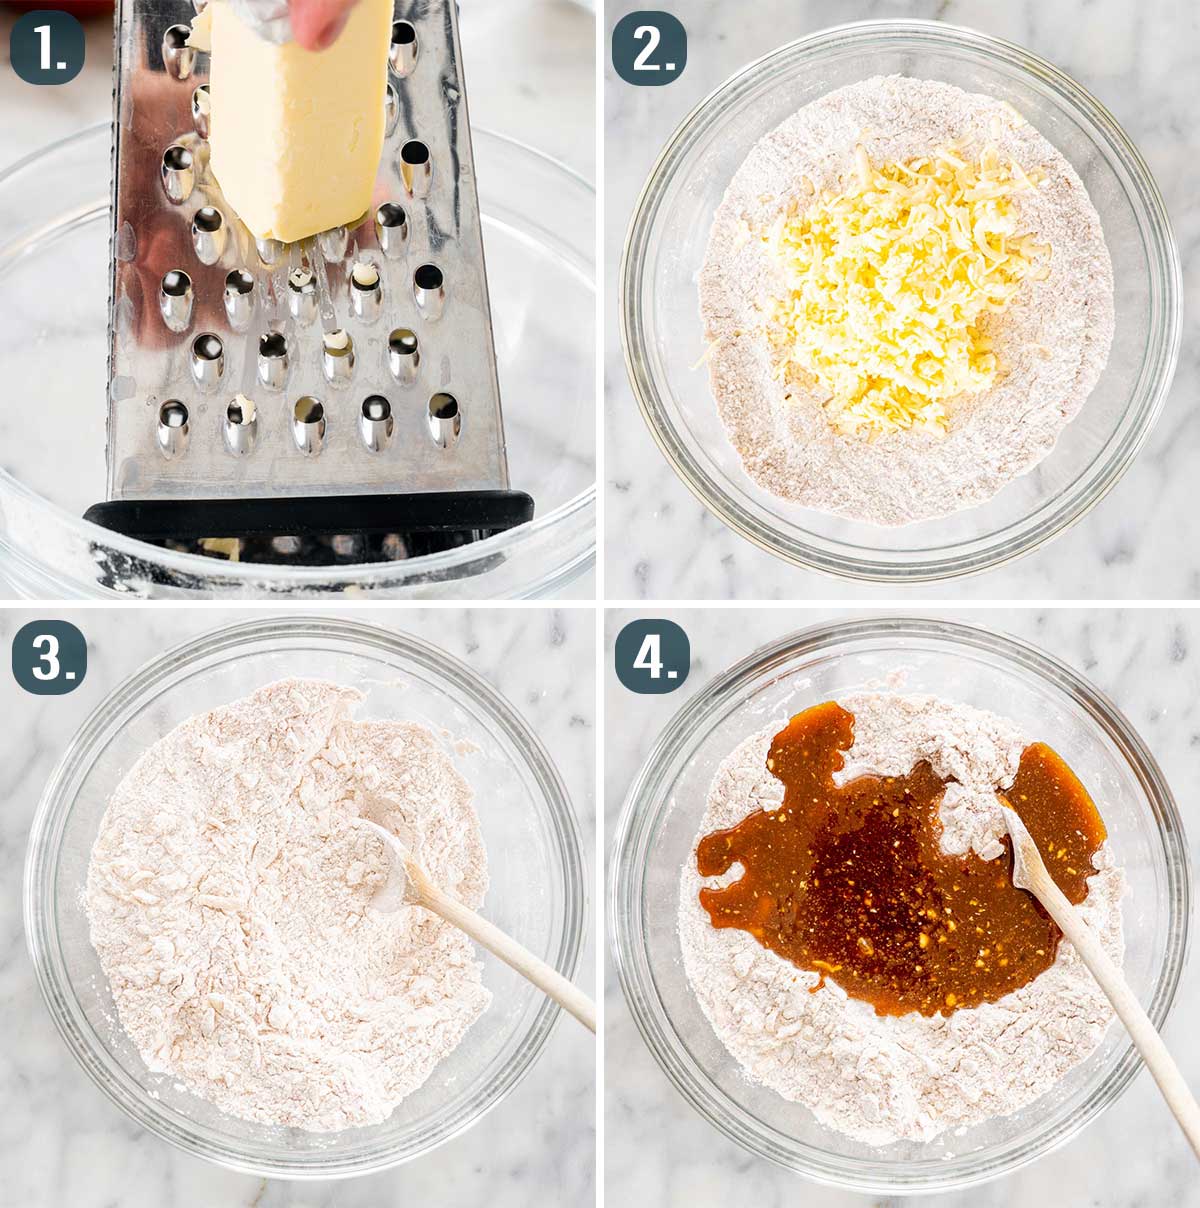
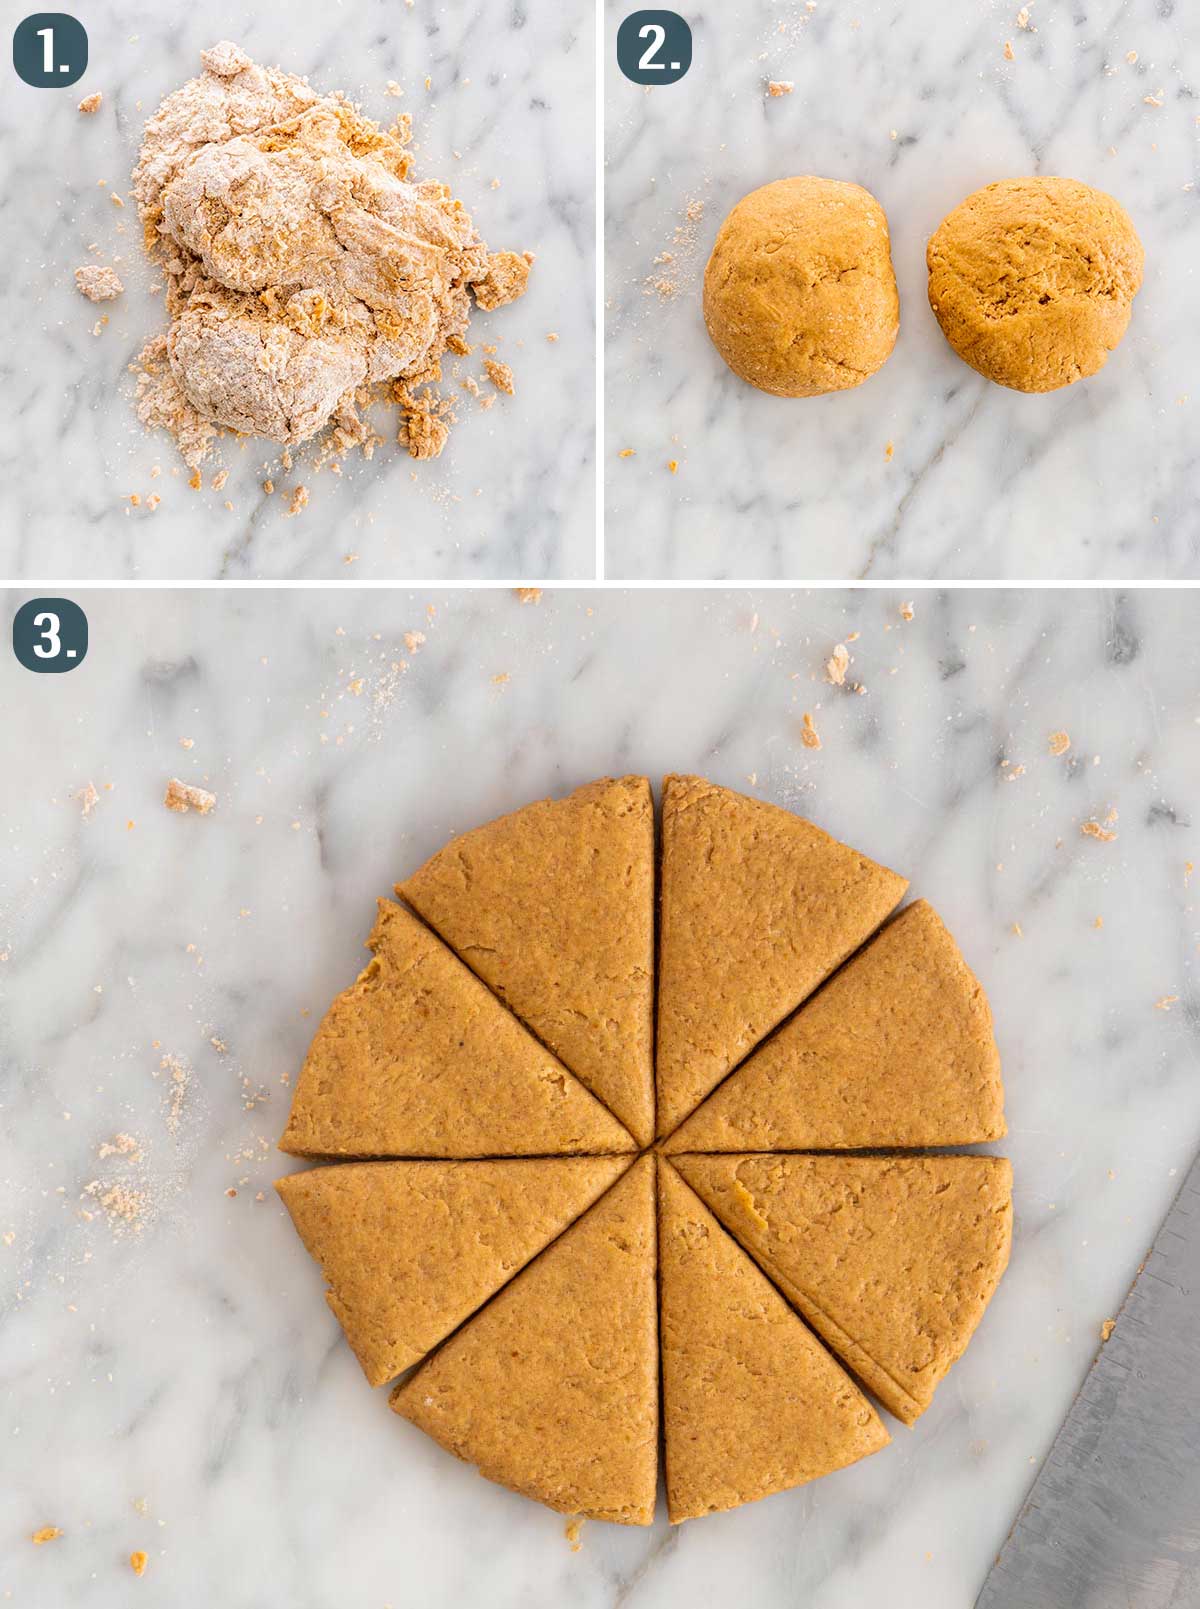
- Combine the dry ingredients: In a large bowl combine the flour, baking powder, cinnamon, pumpkin pie spice and salt together.
- Add the butter: Grate the frozen butter using a box grater, then add it to the flour mixture bowl. Using a pastry cutter or fork, combine the butter with the flour mixture. If you want to add other ingredients such as chocolate chips or chopped pecans, now’s the time.
- Combine wet and dry ingredients: In another bowl whisk the pumpkin, eggs, brown sugar and vanilla together. Pour this over the flour mixture and mix it all together until everything appears moistened.
Forming and Baking the Scones:
- Form the Dough: Transfer the dough onto a floured work surface and knead it a couple times until it comes together. Don’t over-knead. Form the dough in 2 disks that are 3/4-inch (2 cm) in thickness and cut each disk into 8 equal smaller scones, or you can form it in one disk and make 8 larger scones.
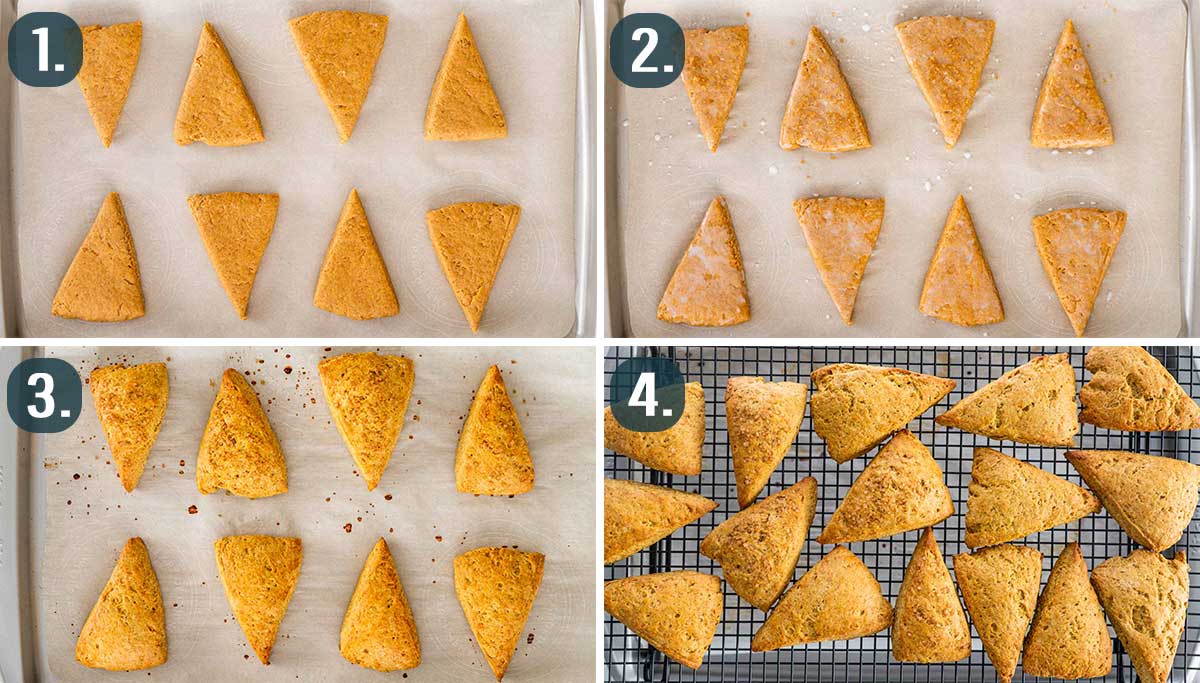
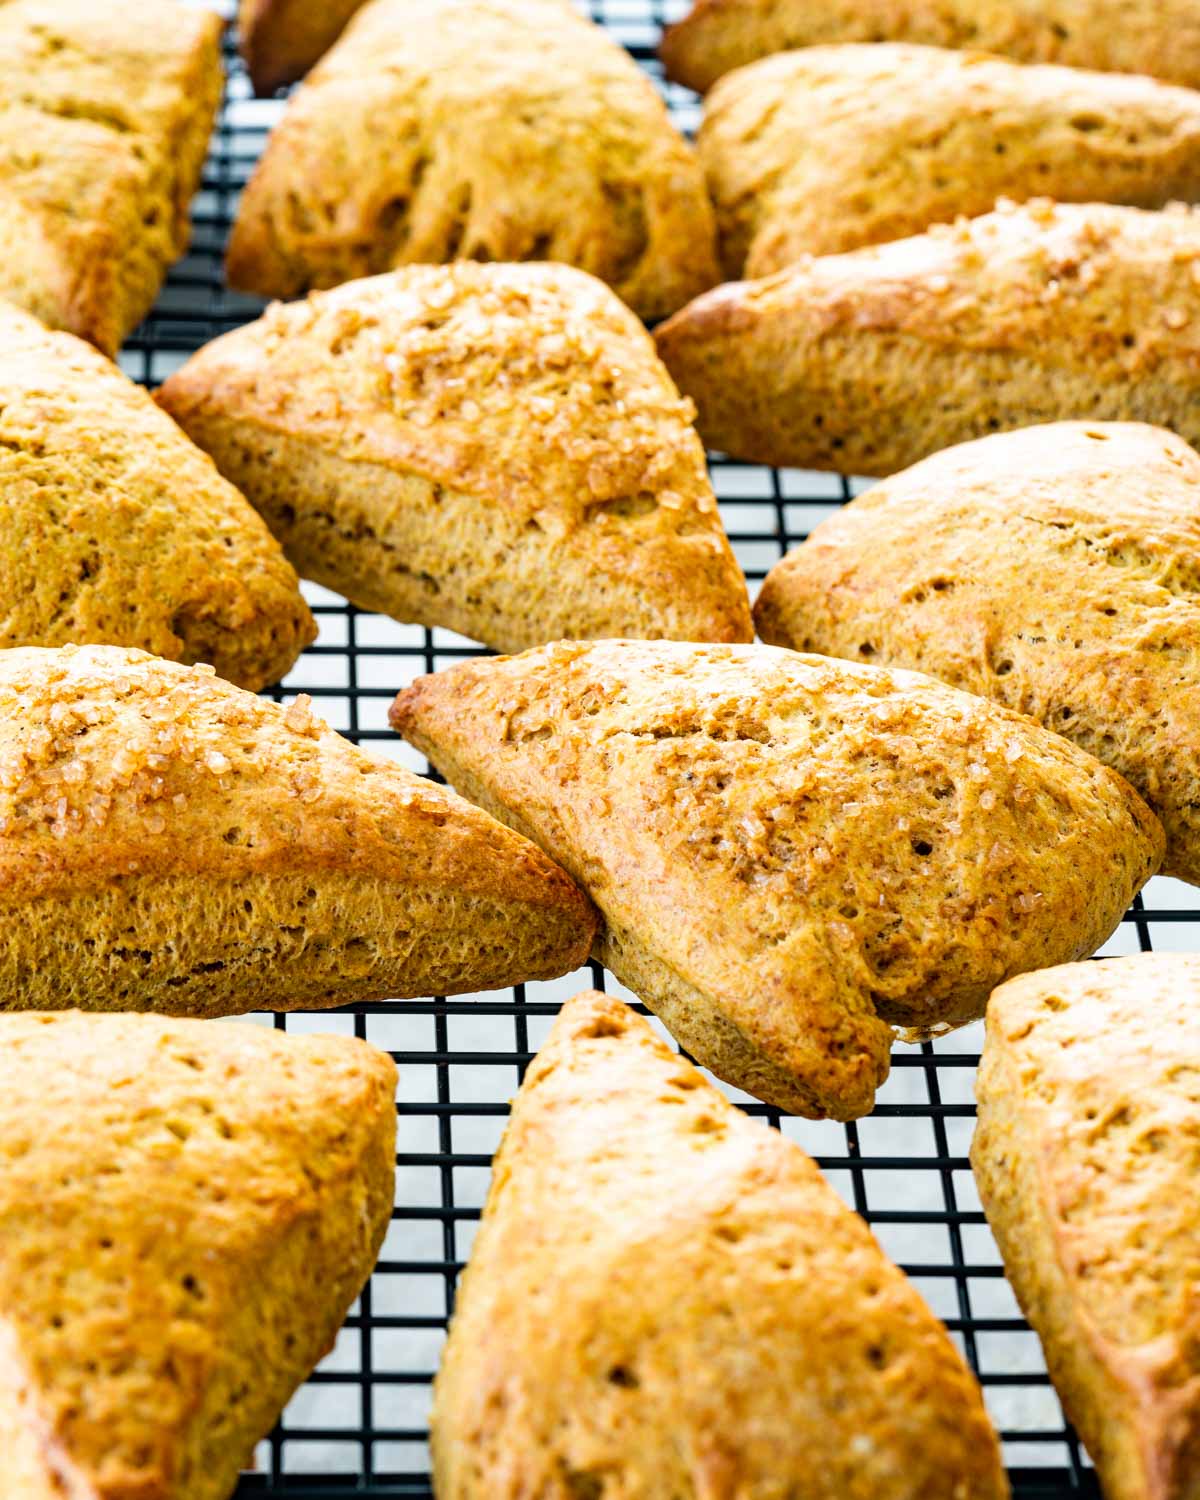
- Bake: Transfer the scones onto the prepared baking sheets, at least 2 inches apart. Brush the scones with milk and sprinkle some sugar on top. If topping them with glaze, you can skip the sugar. Transfer the pans to the oven and bake for 20 to 25 minutes, or until you stick a toothpick down the middle of a scone and it comes out clean.
- Glaze and Enjoy: Make the glazes, by whisking all the ingredients for each glaze in a bowl. Drizzle over warm scones.
Frequently Asked Questions
What Should My Dough Look Like?
Ideal scone dough is wet and somewhat sticky. If the dough is too dry, the scones won’t rise and will become crumbly. On the other hand, if the scones are too wet, they won’t rise either, and will be too tough and chewy once baked. Don’t hesitate to tweak the amounts and proportions to get the right texture. Keep in mind: things like temperature and humidity can affect a recipe and its ingredients.
How Do I Get Fluffy Pumpkin Scones?
Knead Gently! Just enough to bring the dough together, if you knead the dough too much, you’ll get air bubbles causing flat and tough scones. Also, make sure you’re using fresh baking powder! Use one that has been opened less than 6 months ago.
How to Serve
Serve your pumpkin scone with a hot beverage of your choice and spread with butter, Nutella or leave as is!
Storing Leftovers
Store any leftover pumpkin scones in an airtight container at room temperature for 1 to 2 days or in the fridge for up to 3 days.
Freezing
These scones can be easily frozen! Wrap them in plastic wrap individually then place them in a ziploc bag and freeze for up to 3 months.
More Related Recipes
Before You Begin! If you make this, please leave a review and rating letting us know how you liked this recipe! This helps our business thrive & continue providing free recipes.
Pumpkin Scones
Ingredients
- 2 ¾ cups all-purpose flour
- 1 tablespoon baking powder
- 1 teaspoon cinnamon (ground)
- 1 teaspoon pumpkin pie spice
- ¾ teaspoon salt
- ½ cup butter (frozen)
- ⅔ cup canned pumpkin
- 2 large eggs
- ½ cup brown sugar
- 1 teaspoon vanilla extract
- milk (for brushing)
- sugar (for sprinkling over the top of the scones.)
Icing Sugar Glaze
- 1 cup icing sugar
- 2 tablespoon milk
Pumpkin Spiced Glaze
- 1 ¼ cups icing sugar
- 2 tablespoon milk
- ½ teaspoon pumpkin pie spice
Before You Begin! If you make this, please leave a review and rating letting us know how you liked this recipe! This helps our business thrive & continue providing free recipes.
Instructions
- Prep: Preheat the oven to 400°F. Line two baking sheets with parchment paper.
- Combine the dry ingredients: In a large bowl combine the flour, baking powder, cinnamon, pumpkin pie spice and salt together.
- Add the butter: Grate the frozen butter using a box grater, then add it to the flour mixture bowl. Using a pastry cutter or fork, combine the butter with the flour mixture. If you want to add other ingredients such as chocolate chips or chopped pecans, now's the time.
- Combine wet and dry ingredients: In another bowl whisk the pumpkin, eggs, brown sugar and vanilla together. Pour this over the flour mixture and mix it all together until everything appears moistened.
- Form the Dough: Transfer the dough onto a floured work surface and knead it a couple times until it comes together. Don't over-knead. Form the dough in 2 disks that are ¾-inch (2 cm) in thickness and cut each disk into 8 equal smaller scones, or you can form it in one disk and make 8 larger scones.
- Bake: Transfer the scones onto the prepared baking sheets, at least 2 inches apart. Brush the scones with milk and sprinkle some sugar on top. If topping them with glaze, you can skip the sugar. Transfer the pans to the oven and bake for 20 to 25 minutes, or until you stick a toothpick down the middle of a scone and it comes out clean.
- Glaze and Enjoy: Make the glazes, by whisking all the ingredients for each glaze in a bowl. Drizzle over warm scones.
Equipment
Notes
- Nutritional information includes both glazes and is per smaller scone.
- Ideal scone dough is wet and somewhat sticky. If the dough is too dry, the scones won’t rise and will become crumbly. On the other hand, if the scones are too wet, they won’t rise either, and will be too tough and chewy once baked. Don’t hesitate to tweak the amounts and proportions to get the right texture. Keep in mind: things like temperature and humidity can affect a recipe and its ingredients.
- Store any leftover pumpkin scones in an airtight container at room temperature for 1 to 2 days or in the fridge for up to 3 days.
- These scones can be easily frozen! Wrap them in plastic wrap individually then place them in a ziploc bag and freeze for up to 3 months.
Nutrition Information
Notice: Nutrition is auto-calculated for your convenience. Where relevant, we recommend using your own nutrition calculations.

This is a marvelous scone and seasonally perfect. Thanks for a great recipe!
My pleasure!
So would freezing one of the disks for later use be okay? And if so, should I let it thaw a little or bake it straight from the freezer?
Hi Melanie,
I’m not really sure as I’ve never had to freeze mine, however, I don’t see why you couldn’t be able to, I freeze dough all the time and it’s just fine. I would let them thaw out a bit before baking them.
Good luck.
Your scones look great. I made them and added your link to my blog post. You can see your link on my blog, Baking is my Zen.
http://bakingismyzen.blogspot.com/2011/10/harvest-pumpkin-scones-fall-comfort.html
~ Carmen
Thanks, glad yours turned out. 🙂
Hey! I’m so glad that you made these! They came out beautifully, and the pecans were a fantastic idea. My boyfriend doesn’t like nuts, so I never get to add them to desserts, unfortunately.
Hi Laura,
Yes I loved them, and I love pecans and will put them in almost anything. 🙂 Thanks for the recipe.
I’ve been WAITING for it be to time to use pumpkin again. Obviously you can use it any time of year, but it just fits fall so well. I will definitely be making these scones (minus the pecans, because I’m not a big fan of nuts). I love that they are so thick, just the way I like them!
I can’t tell you how ridiculously excited I got when I spied these on Foodgawker. Thank you for sharing them!! I’m definitely going to make these very soon. Can’t wait! They look delicious.
Lol, they are delicious, let me know how they turn out.
Looks yummy, I’d love to wake up to such a treat for breakfast. The pumpkin and chocolate is such a great combo.. love the photos.