Crispy Belgian Waffles
This post may contain affiliate links. Please read my disclosure policy.
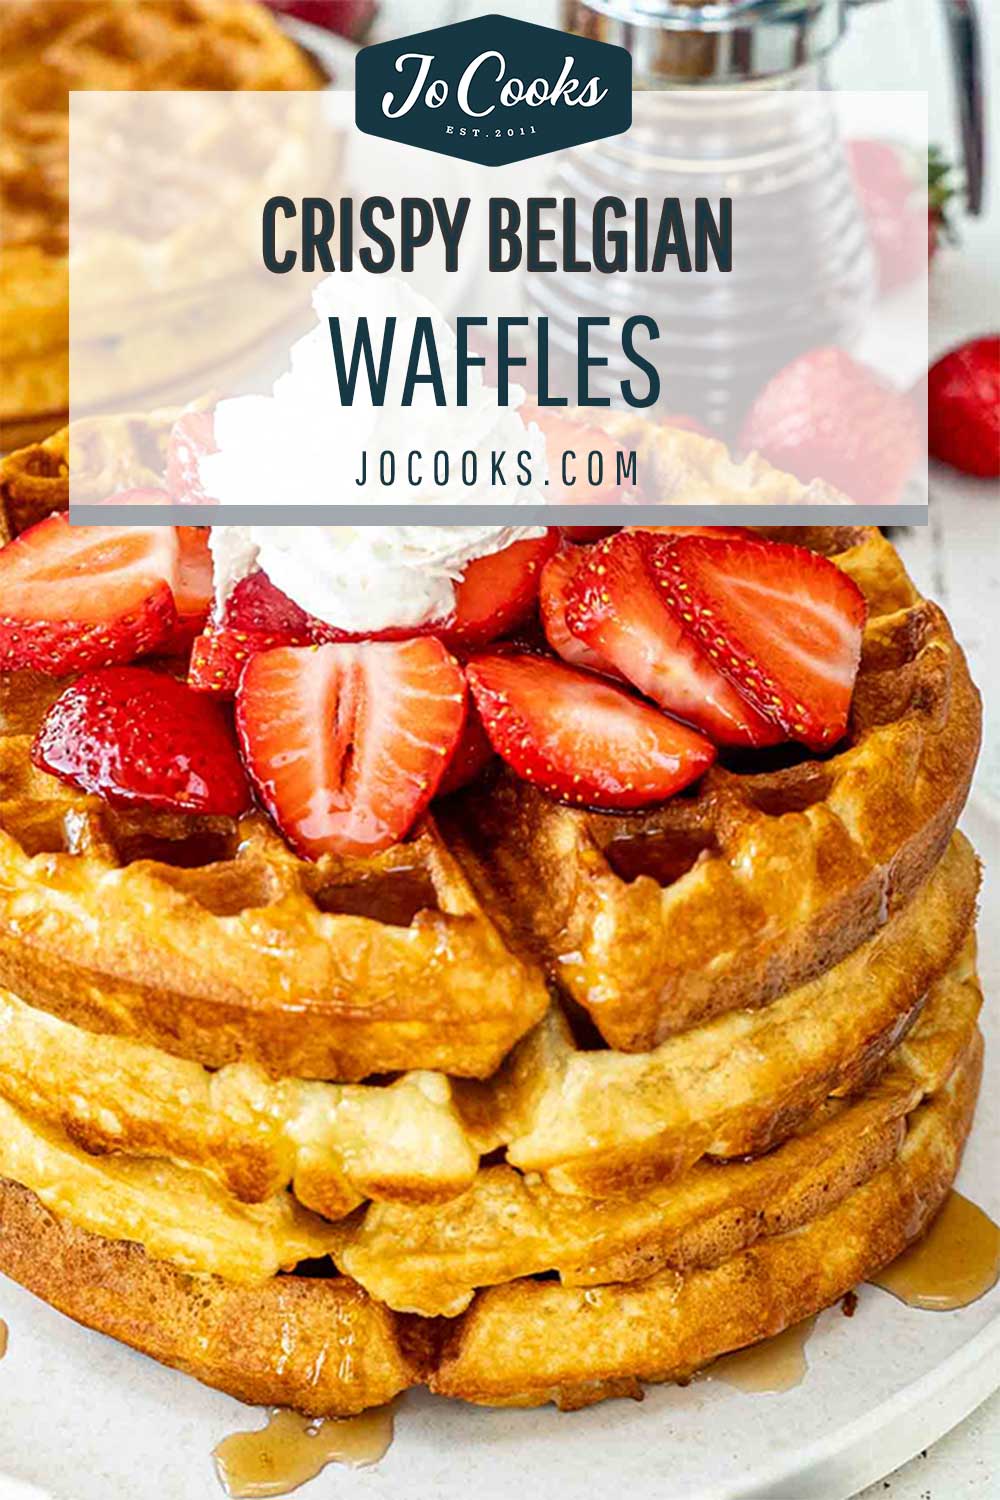
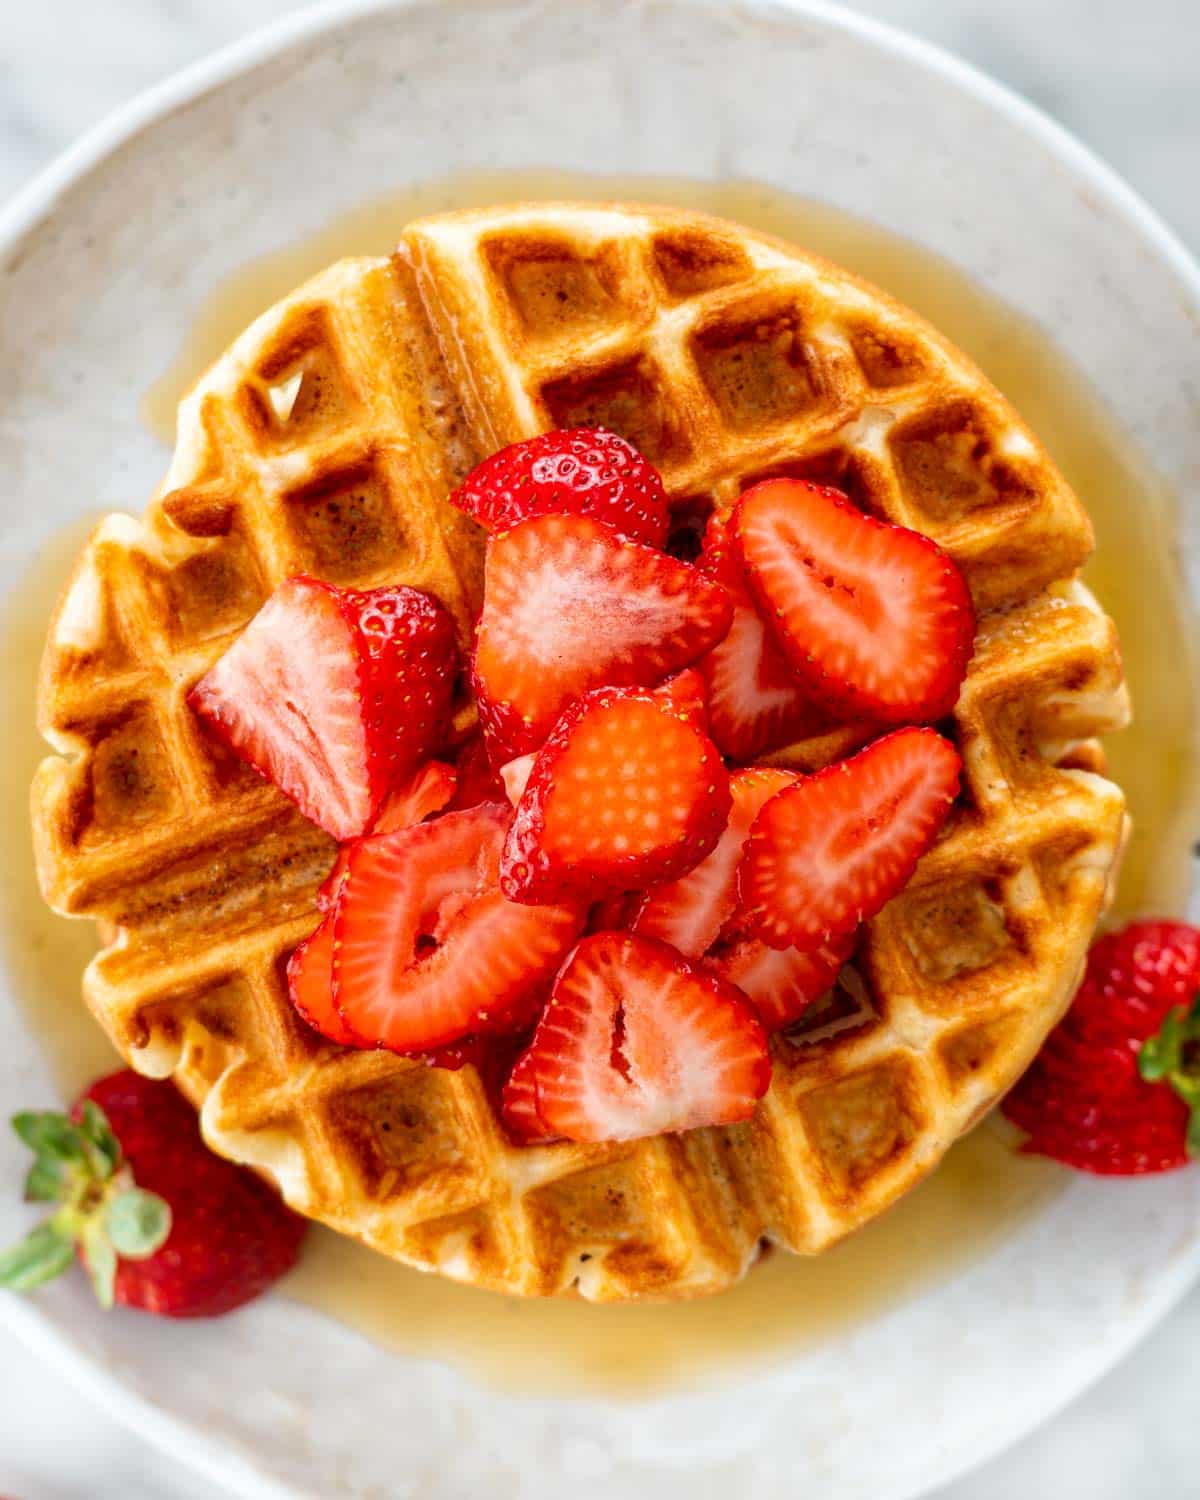
Delicious Belgian Waffles with a crispy exterior and light fluffy interior. Perfect for a weekend breakfast or brunch, you’ll be piling your waffles high with toppings in no time! Make sure to check out the recipe for the secret ingredient that makes them extra crispy!

The Best Belgian Waffles
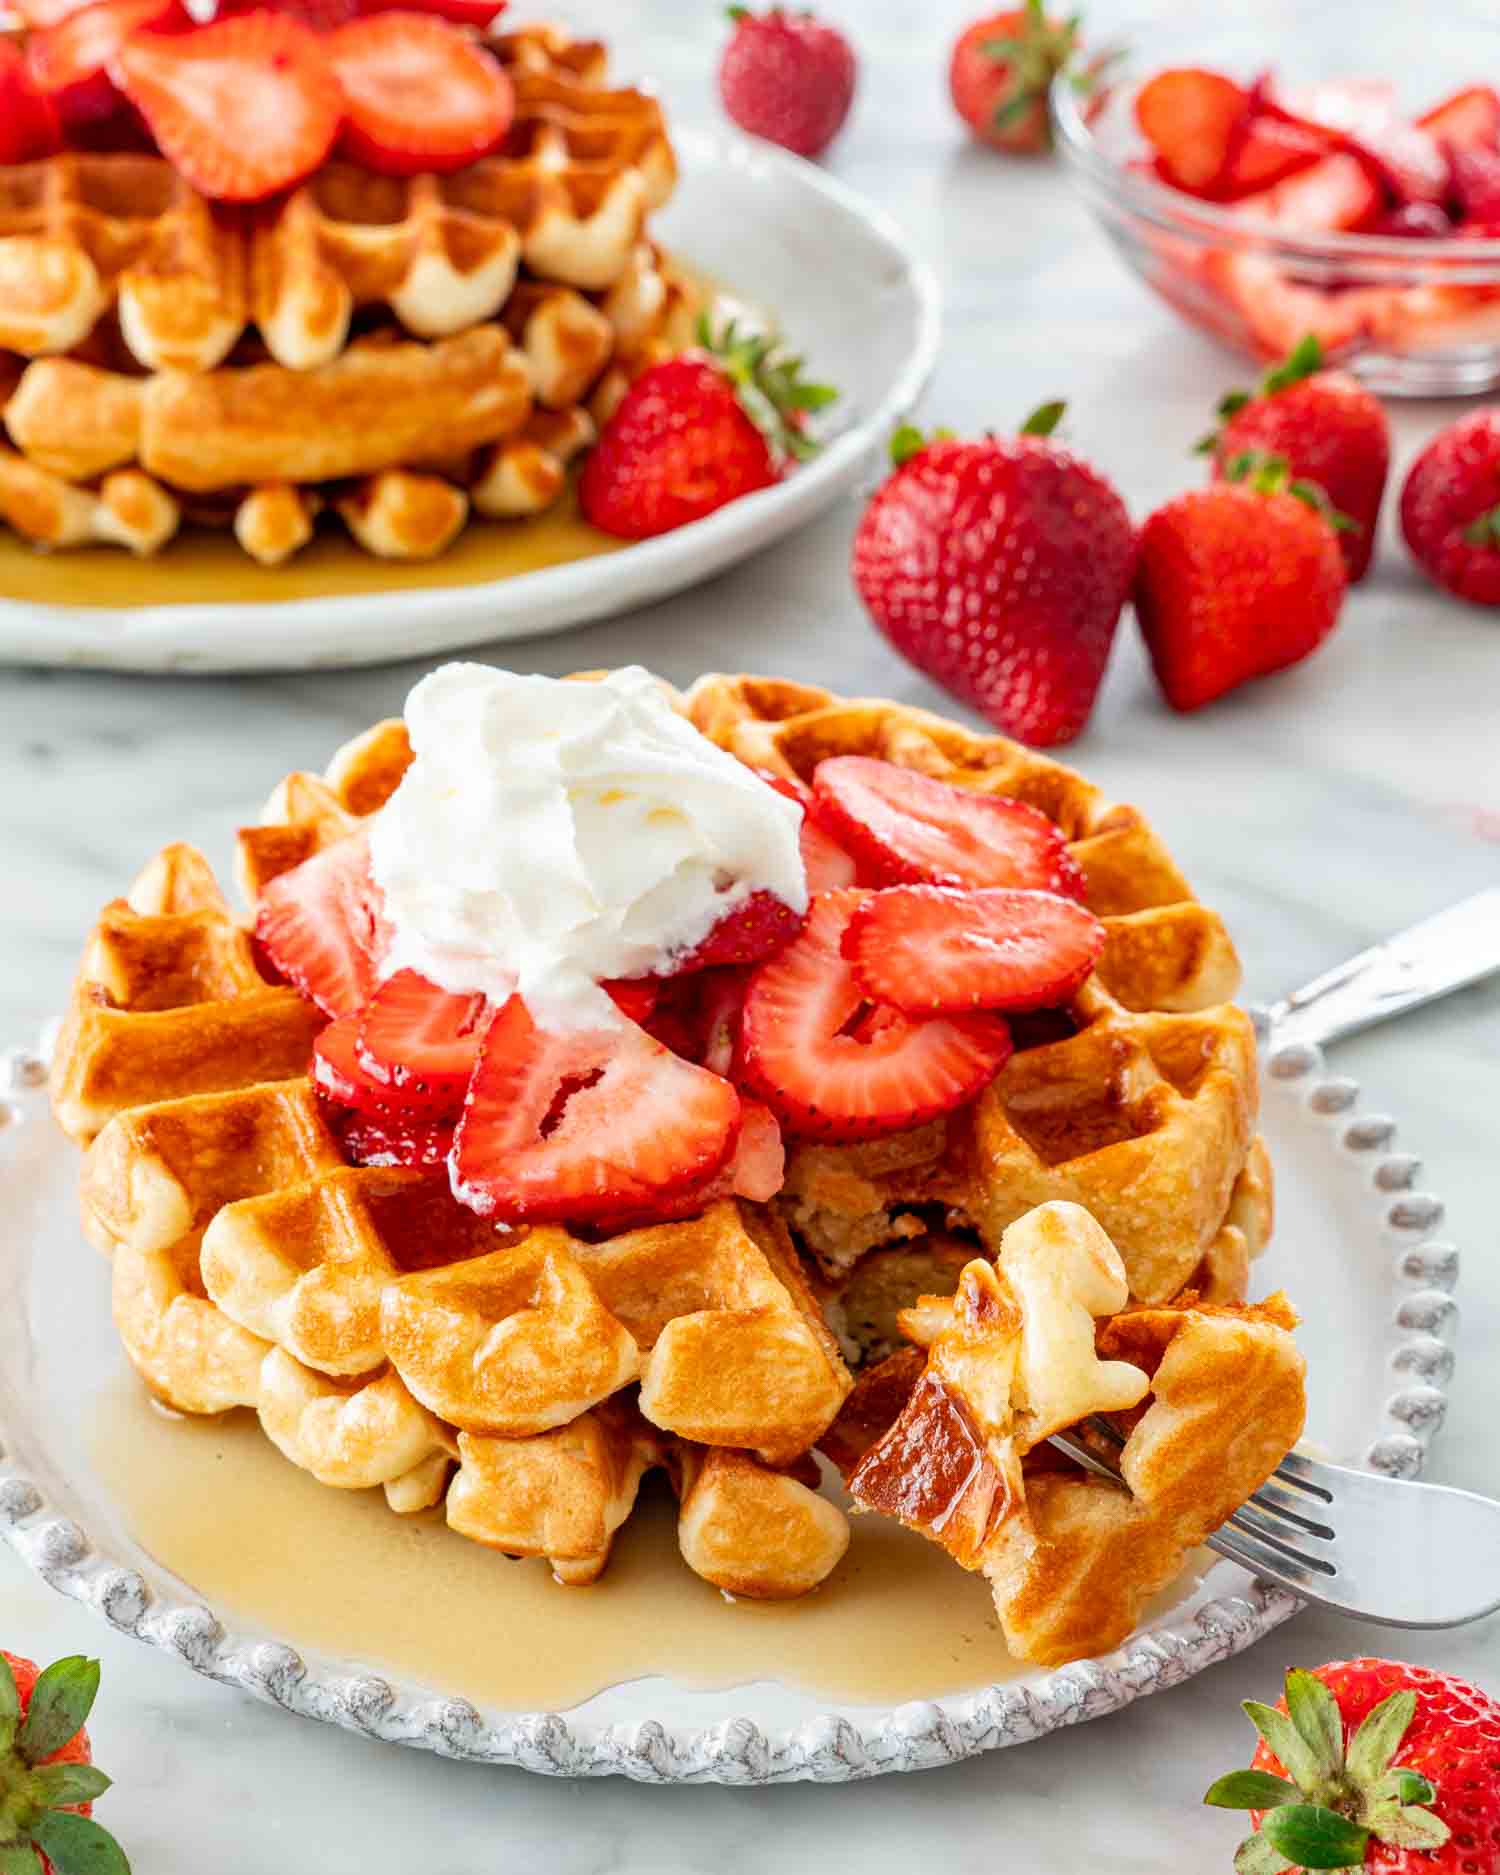
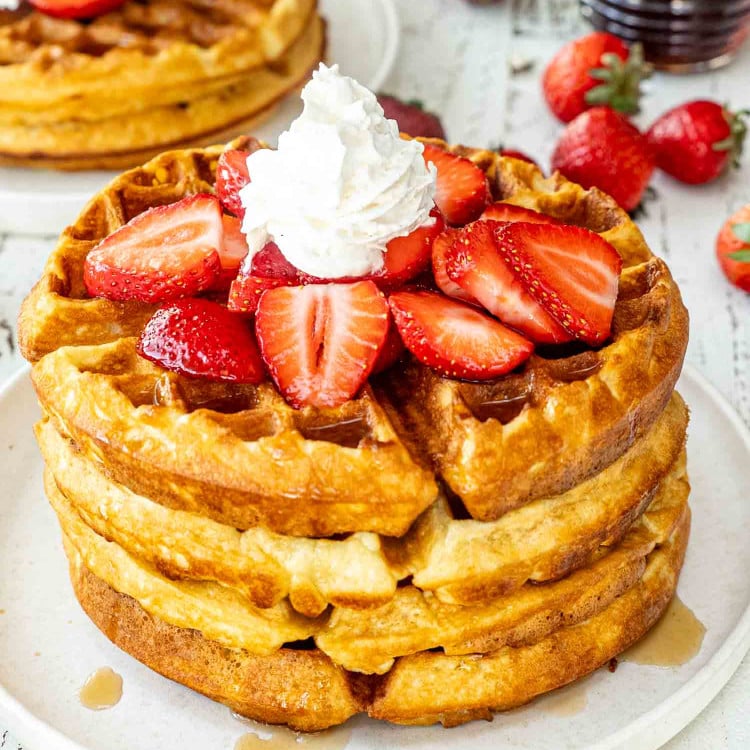
I am OBSESSED with Belgian waffles, regular waffles, chicken and waffles – anything with the world “waffle” attached to it, sign me up! Thick, fluffy, with deep pockets perfect for holding ooey gooey maple syrup, these Belgian waffles are a standout at the breakfast table!
Crispier and fluffier than their flattened counterpart, I would hands down choose waffles over pancakes any day! Plus, they are SO easy to put together. All you need is a waffle iron and a handful of pantry staple ingredients to make your #breakfastgoals dream come true!
Belgian waffles vs regular waffles
Regardless of which waffle I’m eating, I’ll enjoy it; BUT, there is a difference when it comes to “types of waffles.” Belgian waffles are thicker and typically larger than regular waffles because they are made with a waffle iron that has deeper grids ( if you don’t have a waffle iron I suggest you stop reading right now and go buy one, trust me – it’s worth it 😉 ) They also have a crispier, lighter texture than your typical waffle.
The batter for Belgian waffles is also made a little differently by using a leavening agent or egg whites ( like I used in this recipe) to make the batter extra light and fluffy! The secret ingredient to get them extra crispy is the cornstarch! So there you have it, the more you know.
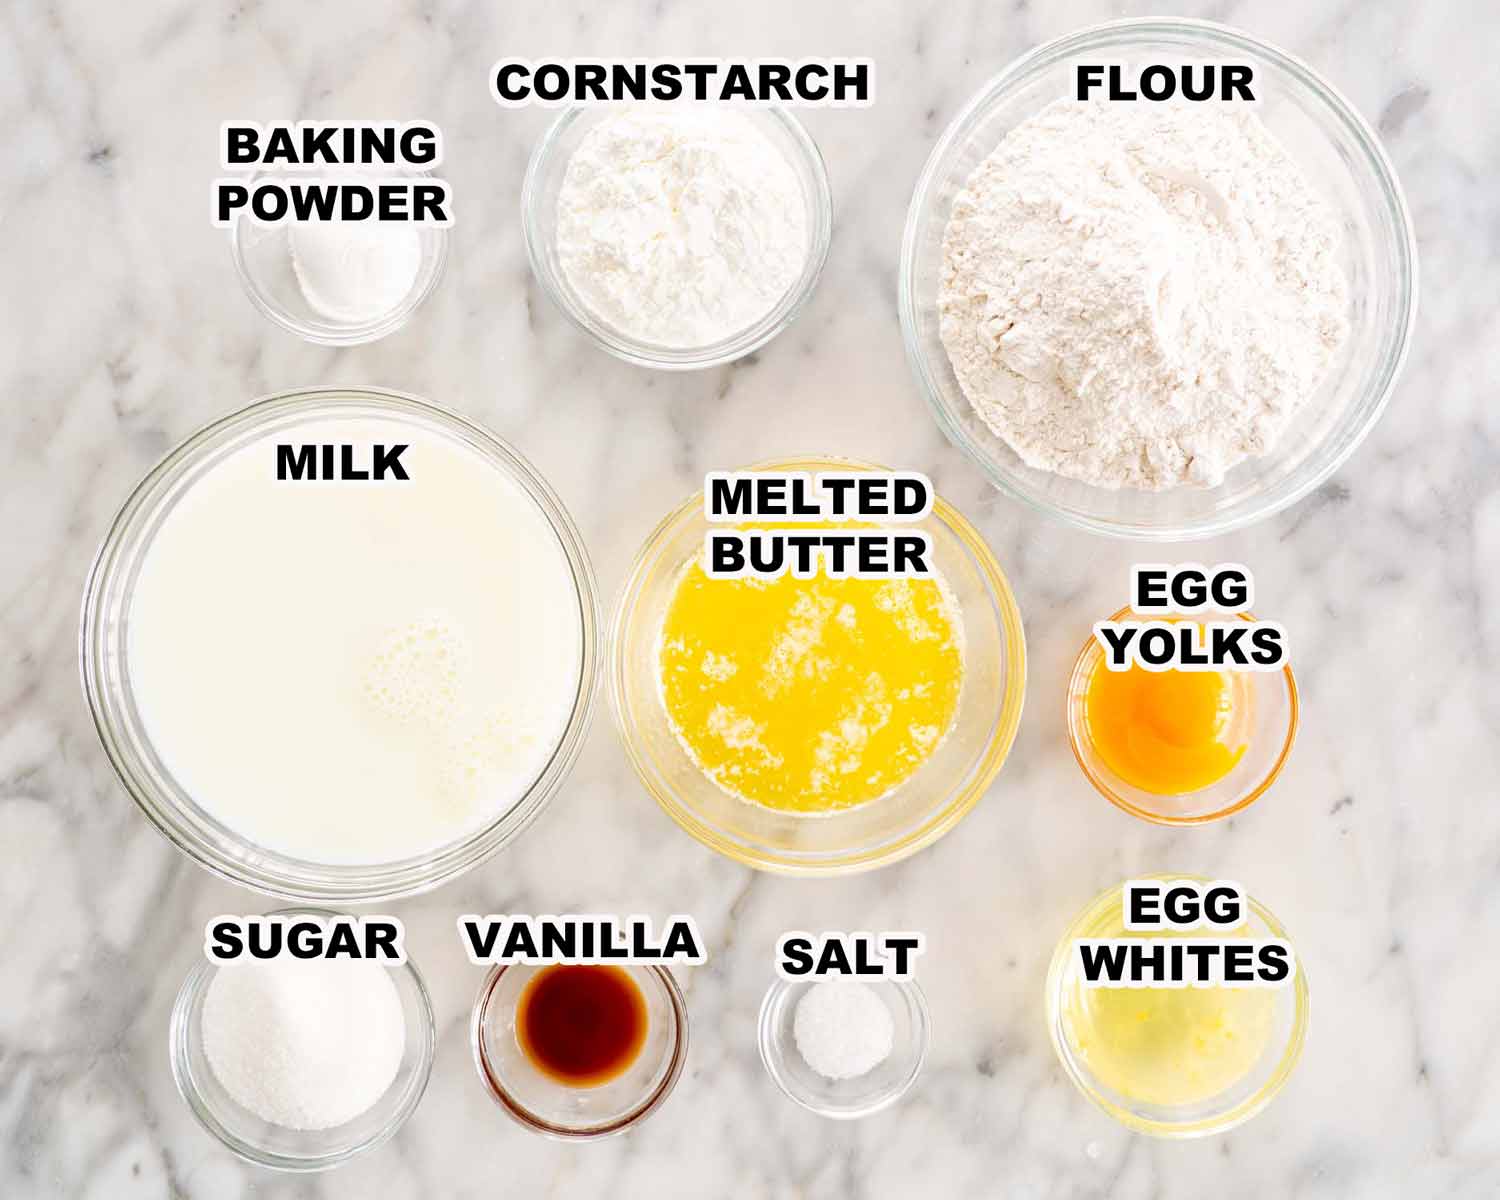
- Flour – I used all-purpose flour.
- Cornstarch – This is the secret ingredient that makes these waffles extra crispy!
- Baking Powder – The pantry staple.
- Sugar – I used granulated sugar, you can substitute with brown sugar, honey, agave or maple syrup.
- Salt – To taste.
- Eggs – Make sure the whites are separated from the yolks! We separate the whites to make our Belgian waffles extra light and fluffy.
- Butter – Unsalted, melted.
- Milk – Use your preference, dairy or non dairy will work.
- Vanilla Extract – For that added hint of flavor.
Making these Belgian Waffles is surprisingly easy, and the results? Absolutely heavenly. Imagine a weekend morning with these beauties on your plate; it’s like a little bit of brunch paradise at home. Alright, let’s get to it:
First things first, let’s tackle that waffle iron. Heat it up, and don’t forget to give it a quick spritz with non-stick spray. This little step is a game-changer – trust me, it makes everything easier.
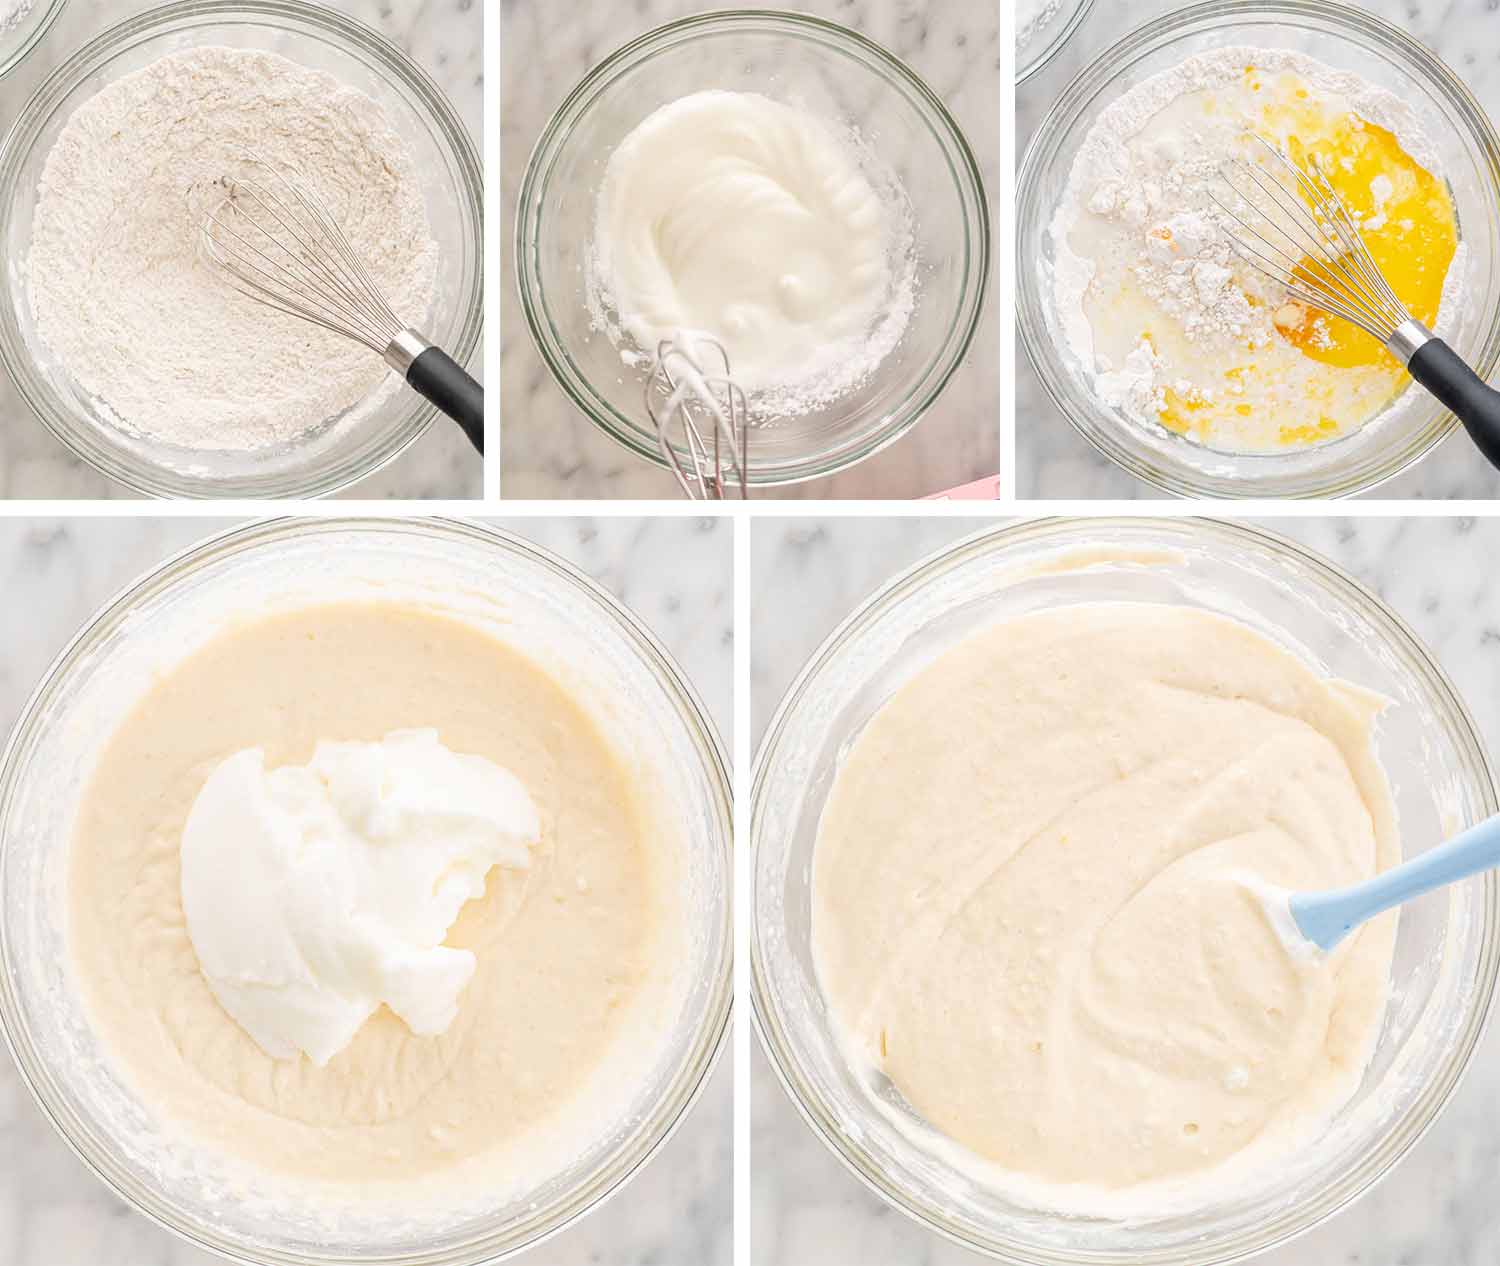
First, mix your dry ingredients together. We’re talking flour, cornstarch, baking powder, sugar, and a pinch of salt. Now, take those egg whites and beat them until they look like fluffy clouds – we’re going for stiff peaks here. Next up, in the bowl with the dry mix, add your egg yolks, melted butter, milk, and a dash of vanilla extract. Give it a good mix – you want everything to be well acquainted. Once that’s done, gently fold in your egg whites. This part’s important – be gentle, we don’t want to lose that fluffiness!
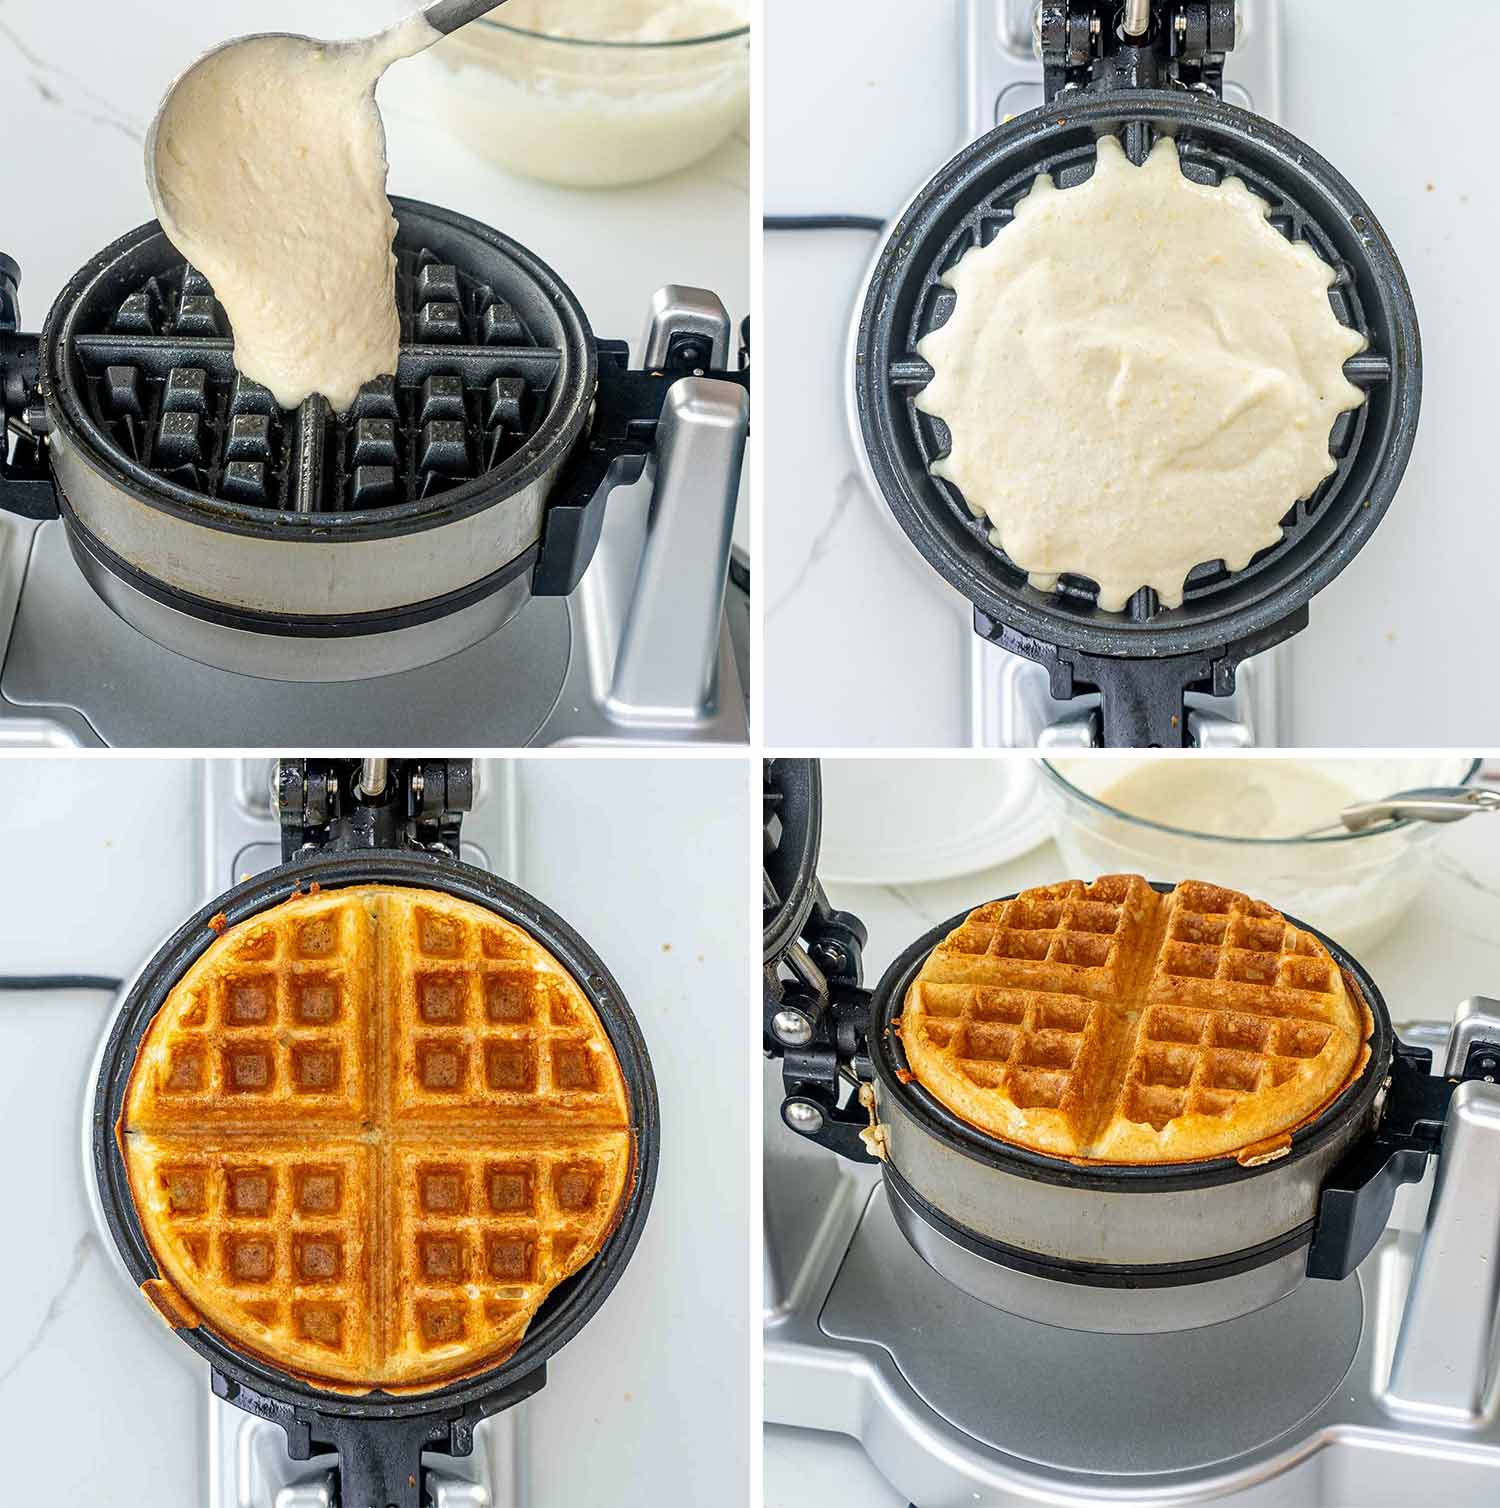
Pour the batter onto your hot waffle iron and cook according to your manufacturer’s instructions here; each waffle maker is a bit different.

Frequently Asked Questions
Can I make these waffles ahead of time?
Absolutely! If you want to prep ahead, just cook your waffles, let them cool, and then store them in an airtight container. They’ll keep in the fridge for 3-4 days. For longer storage, layer them with parchment paper, pop them into freezer bags, and they’ll be good in the freezer for up to 3-4 months. Just reheat in a toaster or oven when you’re ready to serve.
What if I don’t have a Belgian waffle maker? Can I use a regular waffle iron?
Sure thing! While Belgian waffle makers are designed for thicker waffles with deeper pockets, a regular waffle iron works too. The texture and thickness will be different, but they’ll still be delicious. Just be sure to adjust the cooking time as needed.
Can I use this batter for pancakes as well?
This batter is specifically for waffles, which typically have a different texture due to the beaten egg whites. However, if you’re in a pinch, you can try making pancakes with it. They might not be as fluffy as traditional pancakes, but they’ll still taste great.
How do I know when the waffles are done cooking?
Most waffle irons have a light or a sound signal to let you know when the waffles are done. If yours doesn’t, a good rule of thumb is to wait until the steam stops coming out of the waffle iron. That usually means they’re ready – golden on the outside and fluffy on the inside.
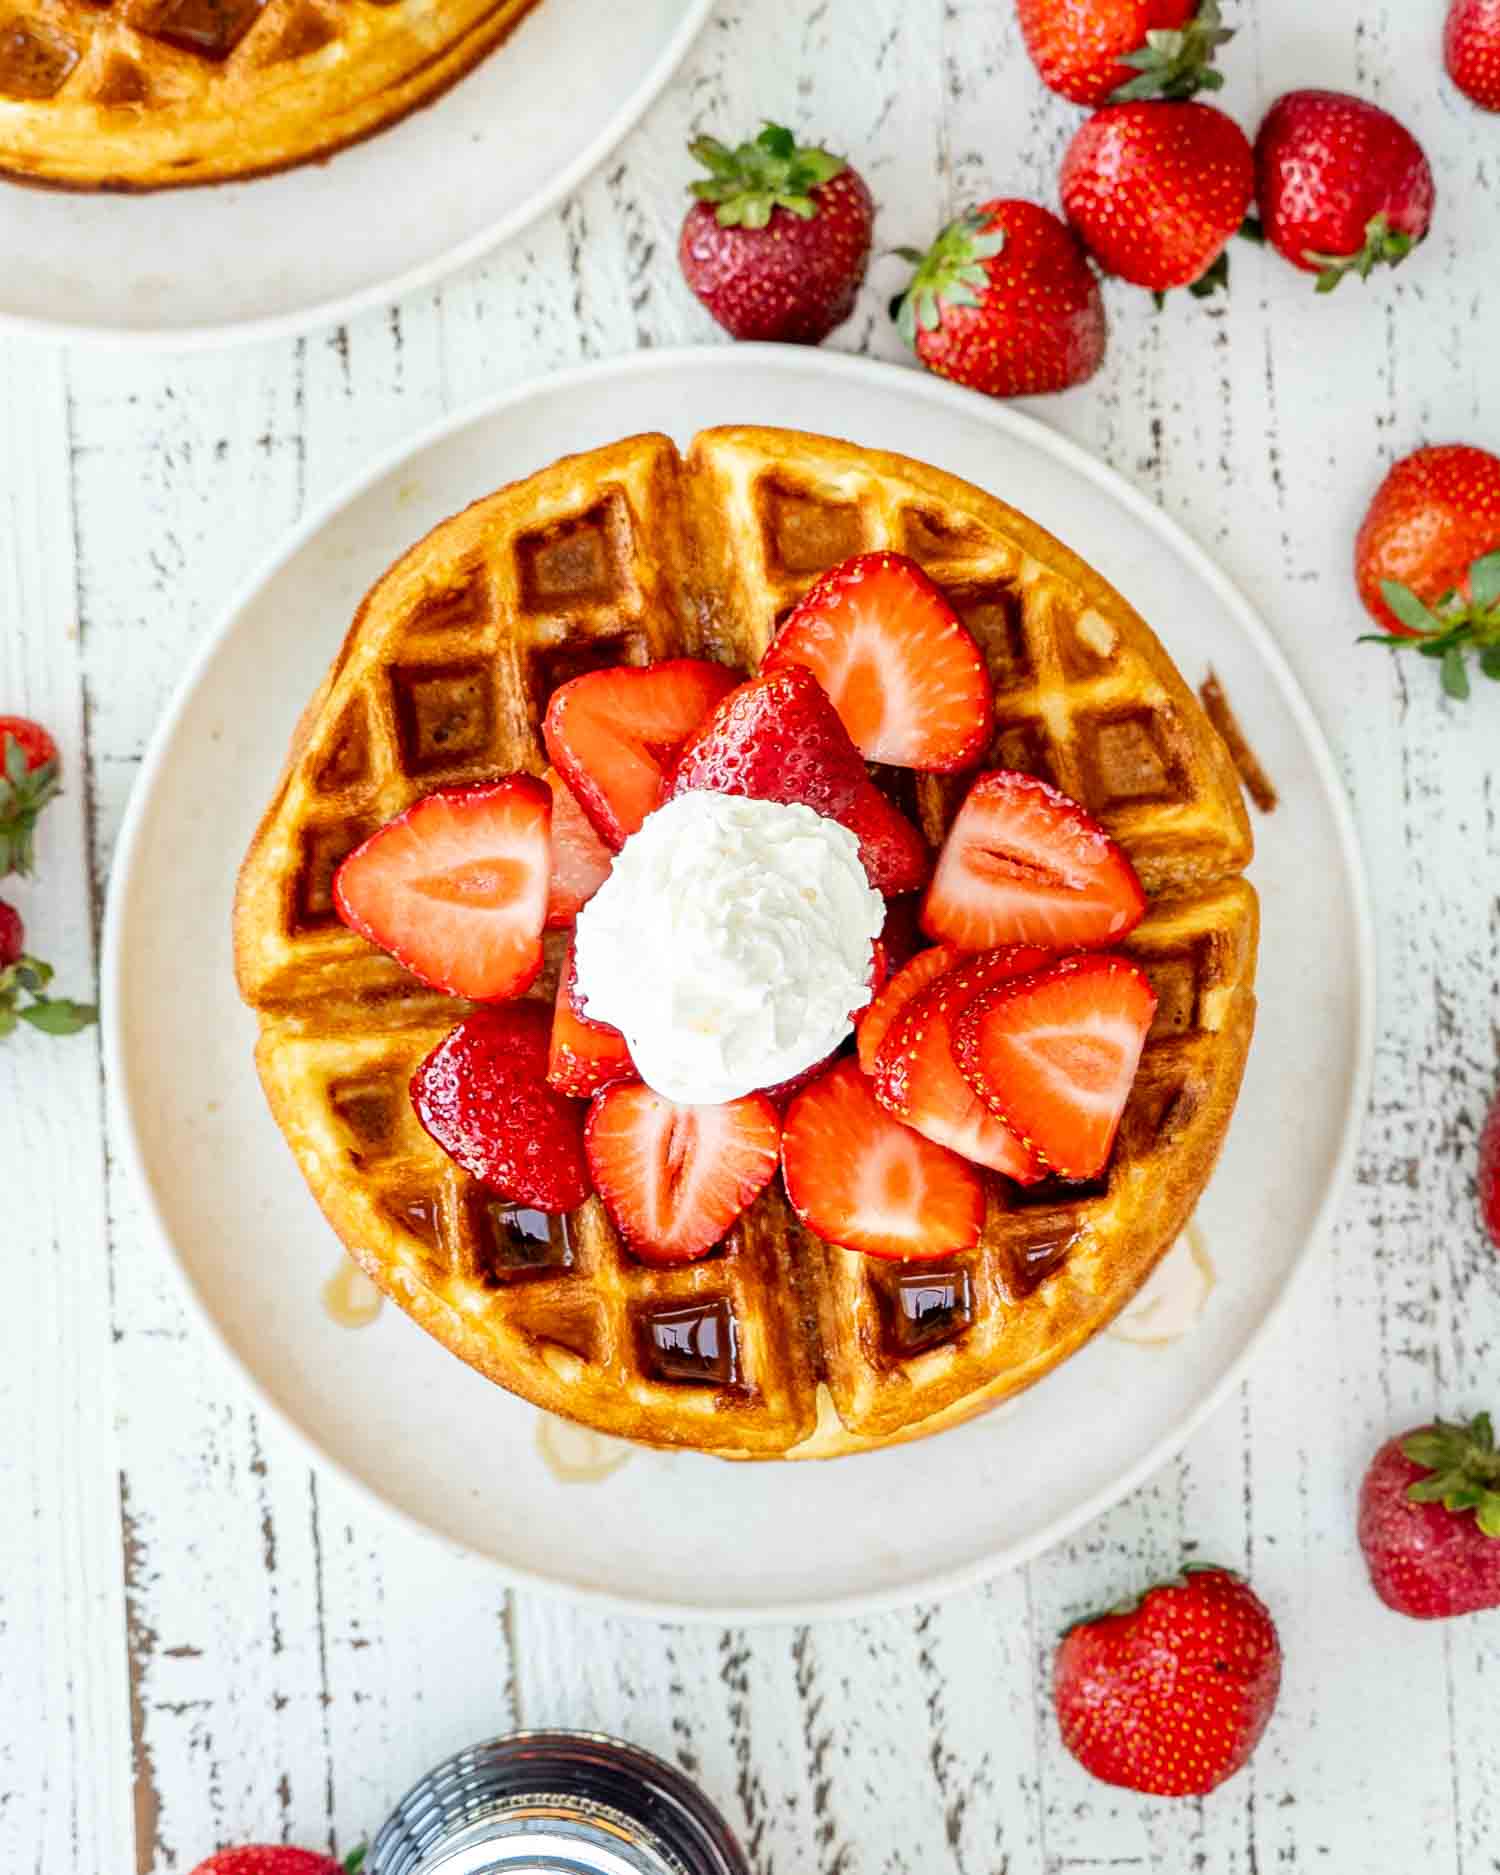
What are some creative toppings I can use besides syrup and berries?
Oh, the possibilities are endless! Try savory toppings like crumbled bacon and cheddar cheese for a twist. Or go sweet with chocolate chips, banana slices, and a dollop of peanut butter. You can also experiment with different syrups, like caramel or fruit compotes.
Expert Tips
- Room Temperature Ingredients: For the best results, use ingredients like eggs and milk at room temperature. This helps them mix more evenly into the batter, giving you a smoother, more consistent waffle.
- Don’t Overmix the Batter: When you combine the wet and dry ingredients, mix just until they’re combined. Overmixing can lead to gluten development, making your waffles less fluffy and more chewy.
- Properly Fold in Egg Whites: The key to light and airy waffles is in the egg whites. Gently fold them into the batter until just incorporated, avoiding over-stirring. This helps retain the air and gives the waffles their signature texture.
- Preheat Your Waffle Iron: Always make sure your waffle iron is fully preheated before pouring in the batter. A properly heated waffle iron ensures a crispy exterior and even cooking.
Storage
Place leftover waffles in an airtight container and store them in the refrigerator for 3 to 4 days.
Freezing
If you want your Belgian waffles to last longer, let them cool completely, then place each waffle between a layer of parchment paper. Place the stack of waffles in freezer bags and squeeze out as much air as possible! Place them in the freezer and store for 3 to 4 months.
Reheating Your Waffles
There are a couple options when it comes to reheating waffles. My favorite thing about them – you do not need to thaw them out! Simply take them out of your freezer and use one of the following methods:
- Toaster: If your waffles can fit in your toaster, use the toaster to toast them!
- Microwave: You can put them in the microwave until they’re heated through.
- Oven: Last but not least, my favorite method: the oven. Preheat the oven to 350°F (175°C). Line a baking sheet with parchment paper and place the waffles on the baking sheet. Bake for about 10 to 15 minutes or until heated through. This method will ensure they will turn out crispy!
Discover More Delicious Breakfast Recipes
- Maple Ricotta Stuffed Crepes
- Sausage French Toast Roll Ups
- Chocolate Waffles
- Strawberry Chocolate Chip Scones
- Blueberry Buttermilk Pancakes
- French Toast
- Nutella Berry Crepes
- Strawberry Cream Cheese French Toast Roll Ups
- Banana Nutella Stuffed Waffles
Before You Begin! If you make this, please leave a review and rating letting us know how you liked this recipe! This helps our business thrive & continue providing free recipes.
Belgian Waffles
Video
Ingredients
- 1¾ cups all-purpose flour
- ½ cup cornstarch
- 1 tablespoon baking powder
- 3 tablespoon sugar
- ½ teaspoon salt
- 2 large eggs (whites separated from yolks)
- ½ cup butter (unsalted, melted)
- 2 cups milk
- 1 teaspoon vanilla extract
Before You Begin! If you make this, please leave a review and rating letting us know how you liked this recipe! This helps our business thrive & continue providing free recipes.
Instructions
- Preheat your waffle iron, spray with non stick cooking spray and set aside.
- To a large bowl add the flour, cornstarch, baking powder, sugar, salt and whisk until combined.
- In another bowl, add the egg whites and beat them with a hand mixer until stiff peaks form. Set aside.
- Add the egg yolks, melted butter, milk and vanilla extract to the bowl with the flour mix and mix until well combined. Fold in the egg whites with a spatula.
- Pour the batter onto your hot waffle iron and cook according to manufacturer's directions.
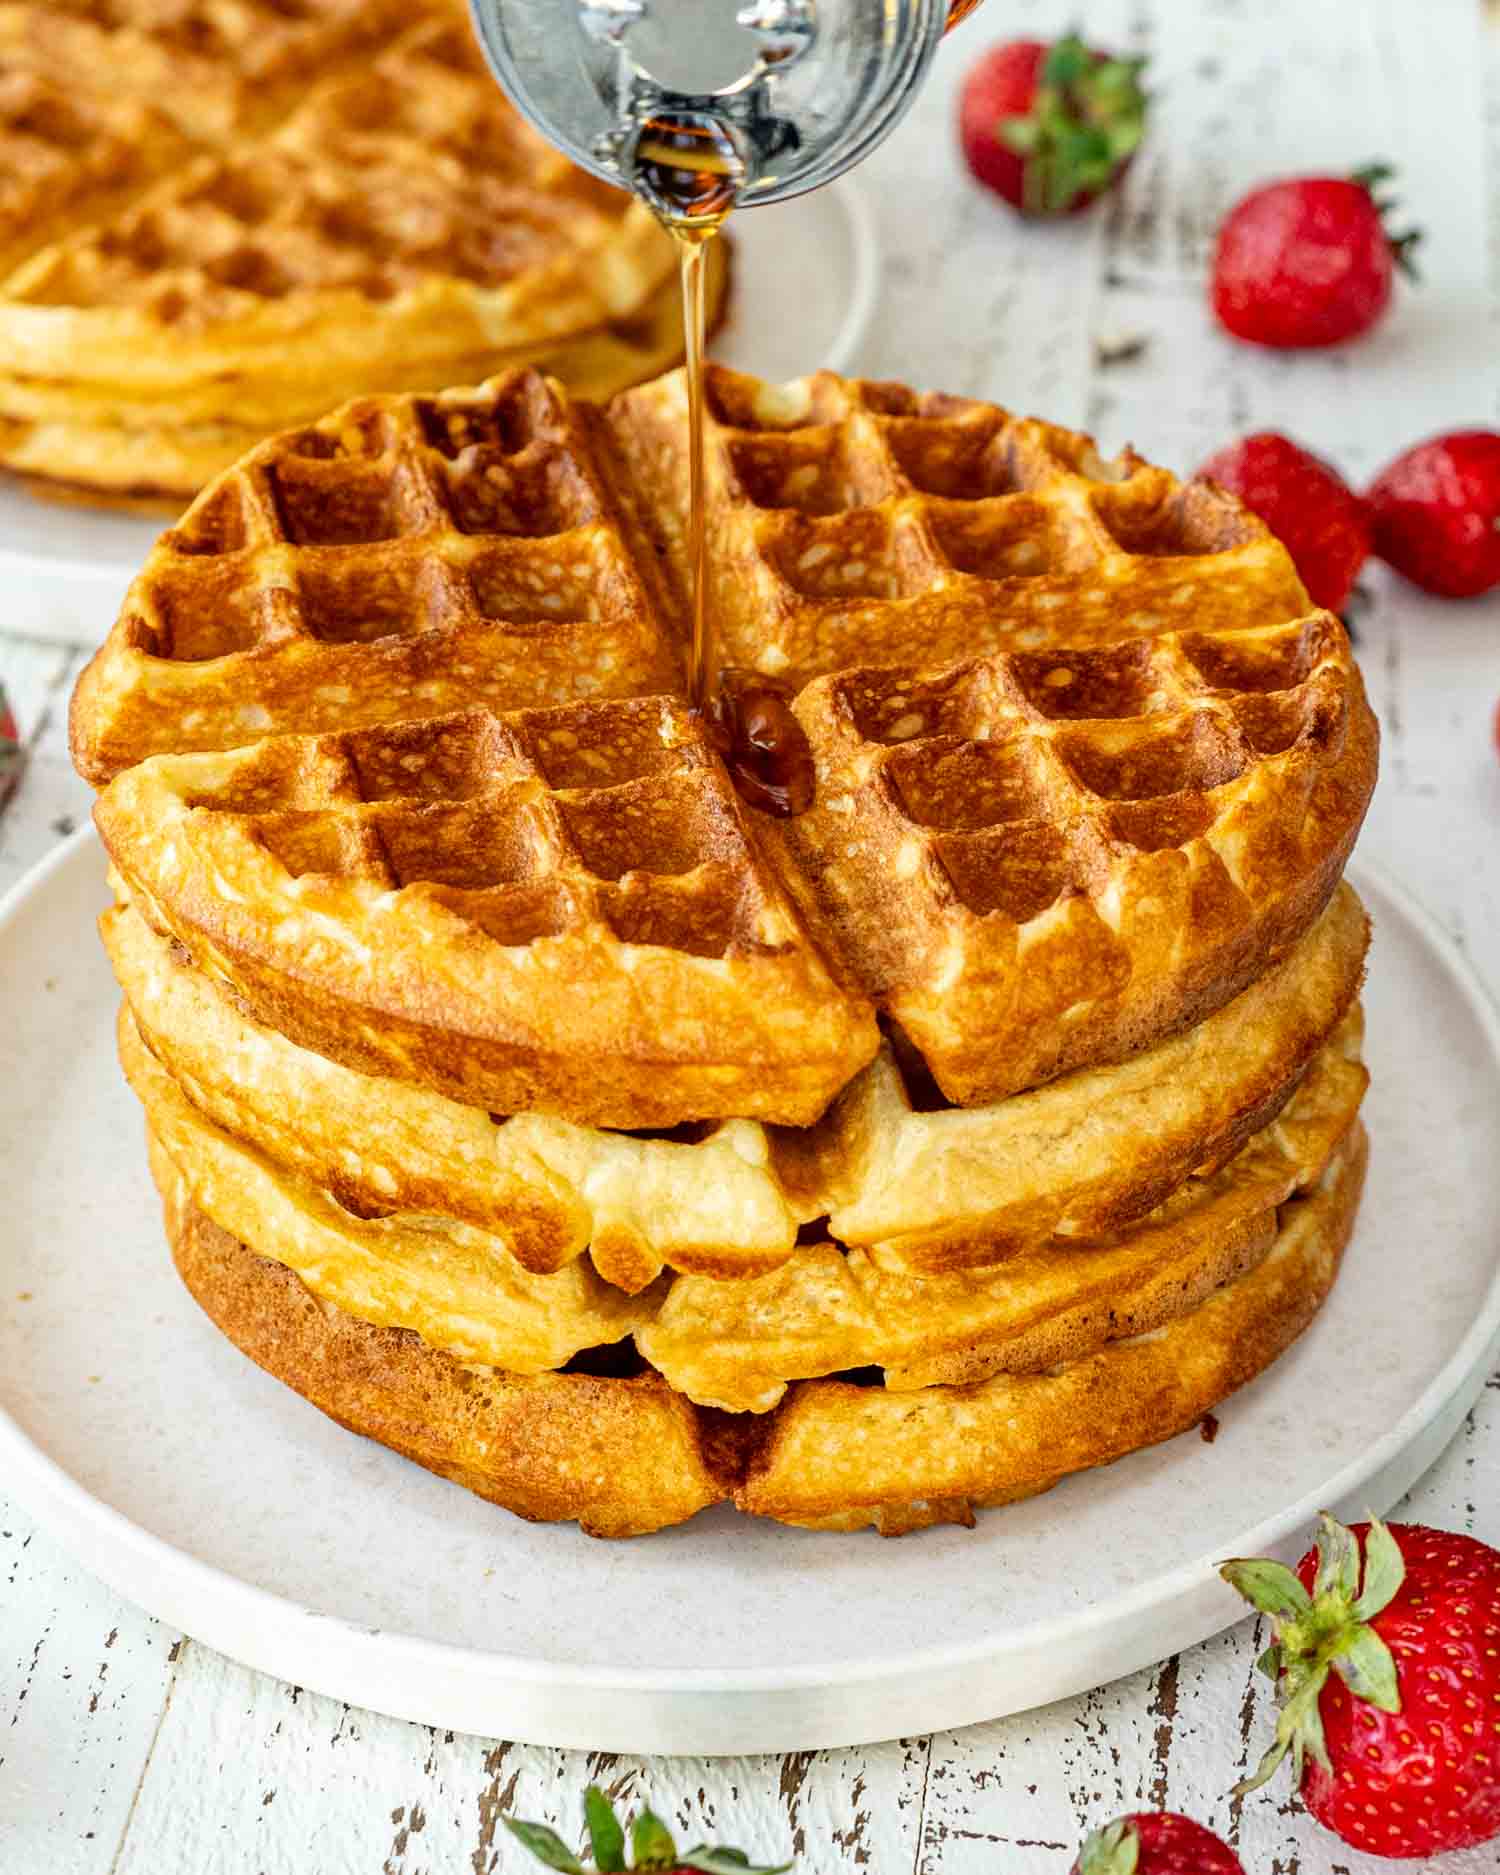
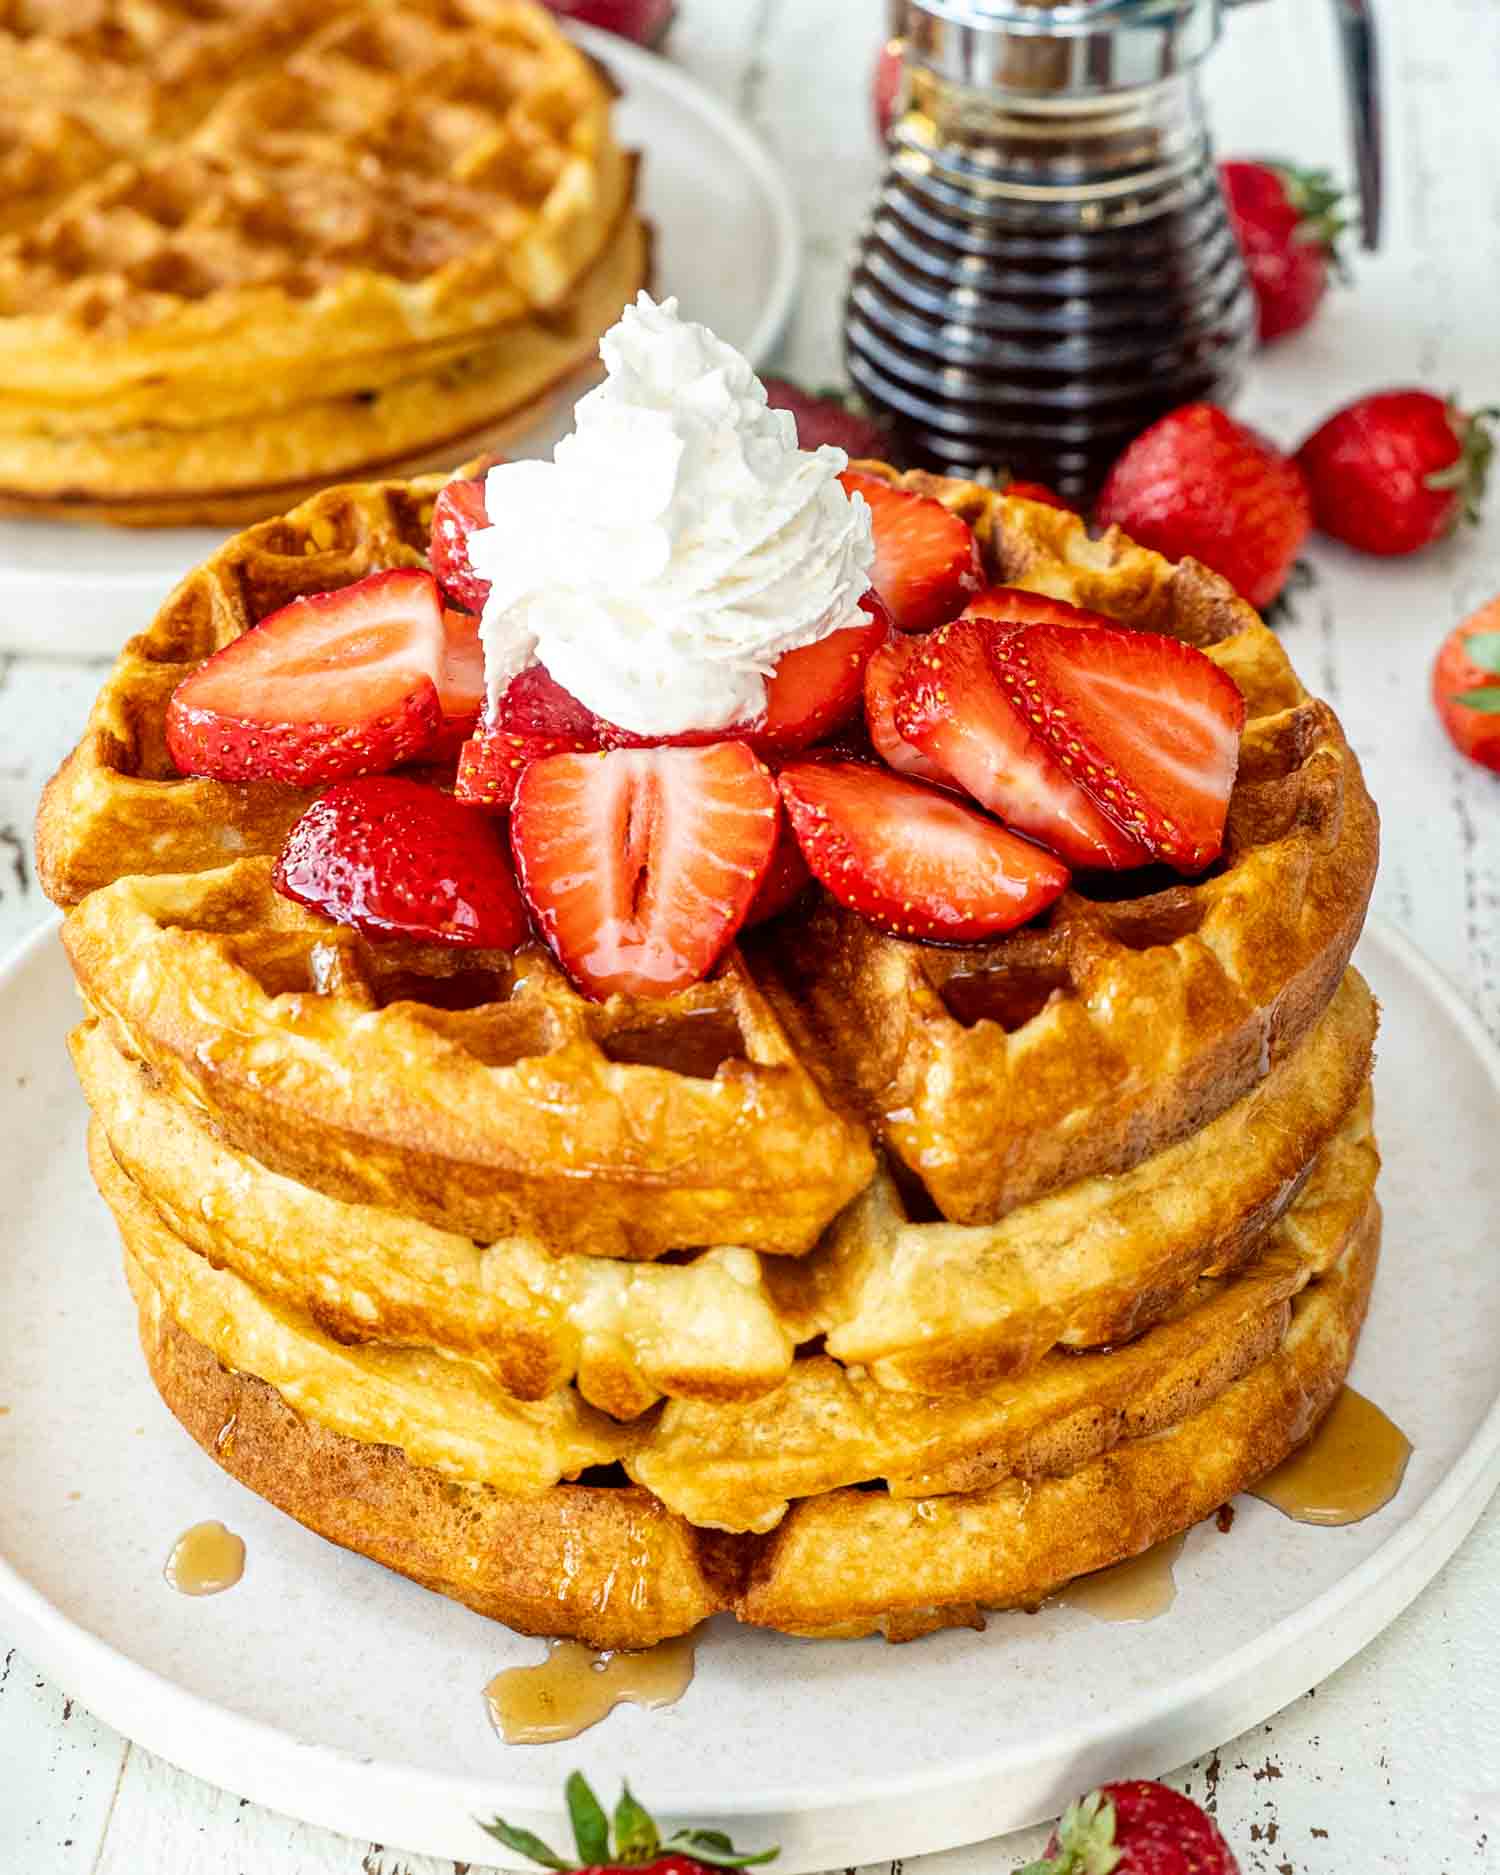
- Serve immediately with maple syrup, berries and whipped cream.
Notes
- Place leftover waffles in an airtight container and store them in the refrigerator for 3 to 4 days.
- If you want your Belgian waffles to last longer, let them cool completely, then place each waffle between a layer of parchment paper. Place the stack of waffles in freezer bags and squeeze out as much air as possible! Place them in the freezer and store for 3 to 4 months.
- Waffle Iron Variations: Belgian waffle makers are ideal for this recipe, but you can use a standard waffle iron too. Just keep in mind that the texture and size of the waffles will vary.
- Dairy-Free Alternative: If you need a dairy-free option, you can substitute the milk with almond milk and use a dairy-free butter alternative.
- Egg-Free Option: For an egg-free version, you can try using a commercial egg replacer. However, this may slightly alter the texture of the waffles.
- Gluten-Free Adaptation: You can make these waffles gluten-free by using a gluten-free all-purpose flour blend. Make sure to check if your baking powder and other ingredients are gluten-free as well.
Nutrition Information
Notice: Nutrition is auto-calculated for your convenience. Where relevant, we recommend using your own nutrition calculations.
