Honey Garlic Shrimp
This post may contain affiliate links. Please read my disclosure policy.
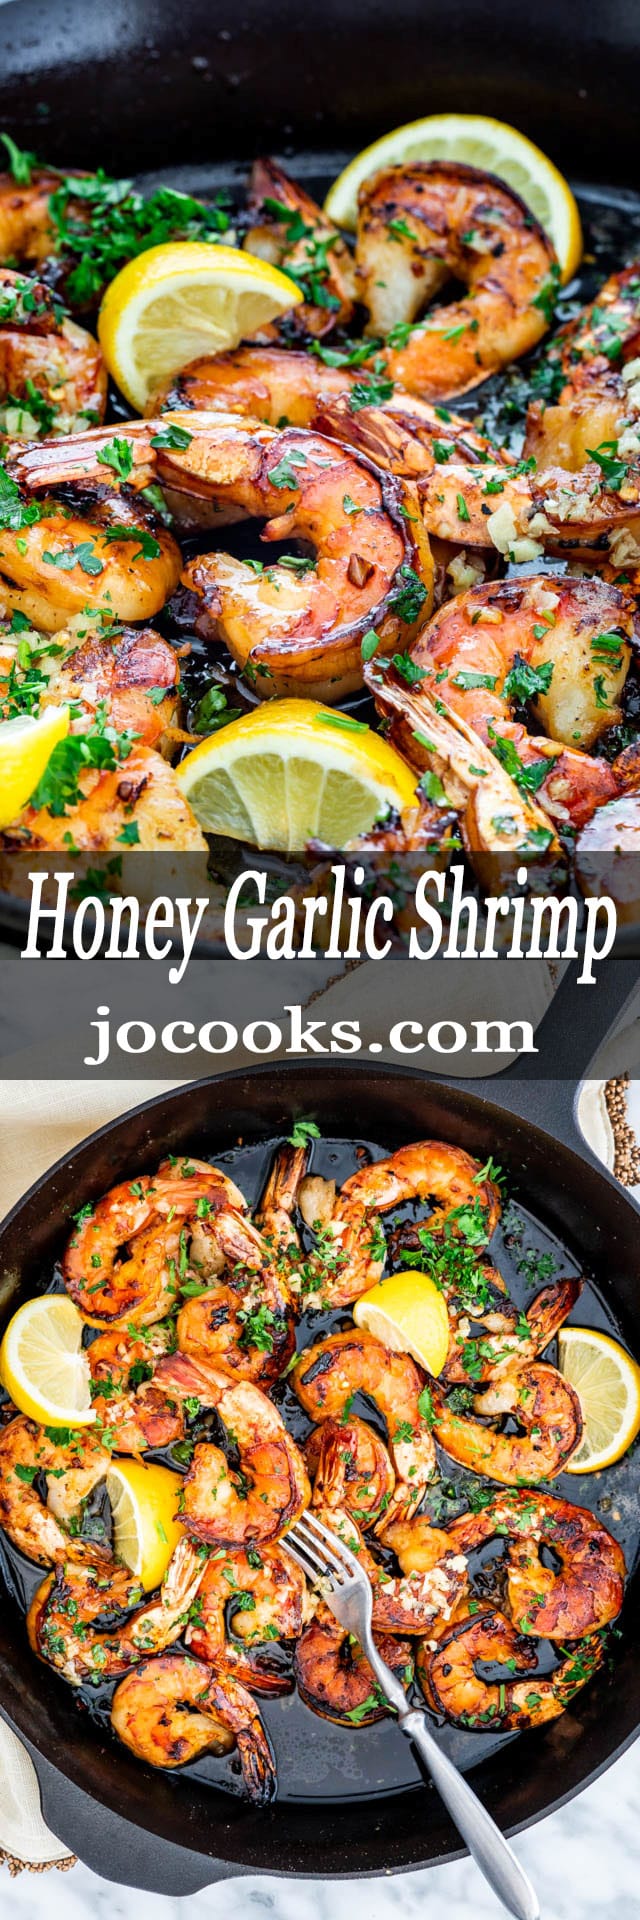
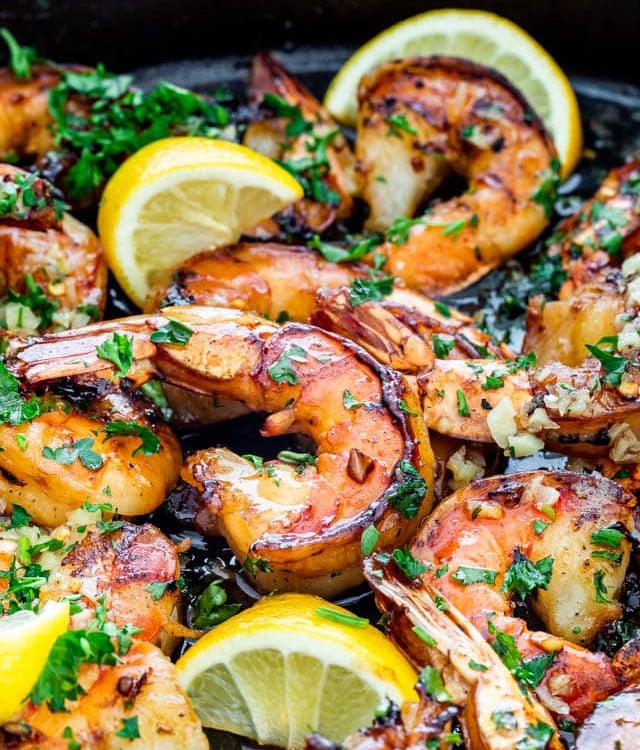
This Sweet and Zesty Honey Garlic Shrimp is ready in just 15 minutes. It’s super easy to make, a handful of ingredients, no marinating required and no fail results.

Honey Garlic Shrimp Recipe
A few days ago we went to this big Asian market we have in Calgary and my favorite thing to buy there is seafood. They have all kinds of different and weird seafood. I especially love buying the big jumbo shrimp they have. Every time I buy it I know I have to make something special with it.
Which is why I thought this recipe for honey garlic shrimp would be a perfect use of this jumbo shrimp. It’s sweet, garlicky, zesty and everyone loves it. We especially love all the pan sauce, so we always serve this with a crusty bread. Perfect for dipping in that sauce and trust me that sauce is money. Don’t waste any!

- Butter (Unsalted): Adds a rich, creamy base to your sauce and is used to sauté the shrimp. You can substitute with olive oil if preferred.
- Garlic (Minced): Provides a sharp, aromatic base flavor. Fresh garlic is best, but garlic powder can be used in a pinch.
- Lemon Juice (Freshly Squeezed): Brightens the sauce and cuts through the richness of the butter. Lime juice can be used as a substitute.
- Honey: Adds a touch of sweetness to balance out the tartness of the lemon. Maple syrup or brown sugar can be used as a substitute if needed.
- Red Pepper Flakes: Adds a bit of heat to the dish. The amount can be adjusted to taste, or it can be omitted entirely if you’re sensitive to spicy foods.
- Salt & Pepper: Basic seasonings to enhance the other flavors.
- Shrimp (Peeled, Deveined, Tail on): The star of the dish, shrimp is high in protein and has a sweet, delicate flavor that pairs well with the honey garlic sauce. You can also use prawns if you prefer.
- Parsley (Chopped): Adds a pop of color and a fresh flavor. Substitute with cilantro for a different flavor profile.
- Lemon (Cut into Wedges): For serving. Gives diners the option to add more tanginess if desired.
What Kind of Shrimp to Use
I prefer to use nice big jumbo shrimp for this, however, they can be quite pricey. This recipe will actually work on any shrimp, however if you’re looking for the wow factor, I strongly recommend to buy the largest shrimp you can afford.
If you’re using larger shrimp, make sure to devein them and keep their tails on. Most times, the shrimp already come deveined, but if they don’t just make sure to do it yourself.
Why and How to Devein Shrimp
If using smaller shrimp it’s completely unnecessary to devein shrimp. However, you’ll find that larger shrimp have a dark, sandy intestinal tract. You won’t get sick if you don’t remove this but it’s recommended to remove this to avoid affecting the shrimp’s clean taste.
First you have to peel the raw shrimp, but leave the tails on. This makes it easier to grab the shrimp when eating, plus they look fancier.
Devein by making a shallow slit down the middle of the back to expose the black intestine. Using a paring knife, lift out the black vein and wipe it off on a paper towel. Rinse out the shrimp and you’re done.
How to Make Honey Garlic Shrimp

Making this shrimp recipe couldn’t get any easier. Make sure to prepare all your ingredients before actually starting to cook. It’s all going to go very quick.
Once everything is ready heat up your skillet and make the honey garlic sauce. Pour about 3/4 of the sauce into a cup and keep the rest in the skillet. Pan sear the shrimp in the skillet for about 2 min per side, making sure to not over cook it. You might also need to do this in 2 batches.
Once all the shrimp is cooked, add it all back to the skillet and pour the reserved honey garlic sauce over the shrimp. Garnish with parsley and lemon wedges and serve!
Some Tips on How to Make This
To save time you can buy peeled shrimp. You can buy it frozen rather than fresh. I hardly ever buy fresh, since I can never find it. To thaw frozen shrimp, take it out of the freezer the night before and transfer it to the refrigerator. It will thaw out overnight. Sometimes, if I forget to take it out the night before, I simply run it under cool water for a few minutes, it will thaw quickly.
As with most dishes, it’s best to prepare all your ingredients before starting to cook. Once you have all your ingredients prepped, this recipe will go quite quickly. You will not have time to prepare ingredients once you start cooking. This is called “Mise en place”!
Use fresh garlic and freshly squeezed lemon juice. Fresh ingredients are always better.
Do not over cook your shrimp!

How to Serve Honey Garlic Shrimp
As I mentioned I love serving this just with some crusty bread so we can dip and scoop all that yummy sauce. This shrimp is also great served over a bed of basmati or jasmine rice. If you’re looking to keep it low carb, try serving this over cauliflower fried rice.
You can also serve this with a salad or with steamed vegetables.
How to Store Leftovers and Reheat Shrimp
This honey garlic shrimp is best served right away. However, if you have leftovers, store the shrimp in an airtight container in the fridge for up to 3 or 4 days.
The fastest and easiest way is to reheat the shrimp in the microwave. You will notice the butter will solidify in the fridge, but once reheated, you’ll get a nice garlic sauce again. Do not reheat the shrimp more than 3 minutes, as it will overcook.
My favorite way to reheat this shrimp recipe is using a skillet. Simply dump all the shrimp and sauce into a hot skillet or frying pan and arrange the shrimp evenly in one layer. Let the shrimp cook for about 3 minutes until heated through and the butter has melted.

Try These Delicious and Easy Shrimp Recipes:
- Garlic Parsley Butter Shrimp
- Honey Soy Shrimp
- Spicy New Orleans Shrimp
- Blackened Shrimp
- Chili Garlic Shrimp
- Bang Bang Shrimp
- Honey Walnut Shrimp
- Shrimp Cocktail
Before You Begin! If you make this, please leave a review and rating letting us know how you liked this recipe! This helps our business thrive & continue providing free recipes.
Honey Garlic Shrimp
Video
Ingredients
- 6 tablespoon butter (unsalted)
- 4 cloves garlic (minced)
- 2 tablespoon lemon juice (freshly squeezed)
- ¼ cup honey
- ¼ teaspoon red pepper flakes
- ¼ teaspoon salt (or to taste)
- ½ teaspoon pepper (or to taste)
- 1 ½ pound shrimp (peeled, deveined, tail on)
Garnish
- 2 tablespoon parsley (chopped)
- 1 lemon (cut into wedges)
Before You Begin! If you make this, please leave a review and rating letting us know how you liked this recipe! This helps our business thrive & continue providing free recipes.
Instructions
- Add the butter to a large skillet and melt it over medium-high heat. Once the butter has melted completely, cook for another minute. Make sure to watch it so it doesn’t burn.
- Stir in the minced garlic and cook for another 30 seconds, again watching it so the garlic doesn’t burn.
- Add the lemon juice, honey, red pepper flakes, salt and pepper and stir it all together. Cook for 1 minute, you’ll notice the sauce will thicken a bit.
- Pour out about 3/4 of the butter garlic mixture into a cup or bowl and set aside. Leave the rest of the butter mixture in the skillet.
- Add the shrimp to the skillet and sear on both sides for about 2 minutes per side, just until it turns pink and it’s no longer opaque. You might have to do this in 2 batches, so you don’t overcrowd the shrimp in the skillet.
- Once all the shrimp has been cooked, add them all back to the skillet and pour the reserved butter garlic sauce over the shrimp. Garnish with parsley and remove from heat.
- Serve with lemon wedges, over rice or with a salad.
Notes
- This honey garlic shrimp is best served right away. However, if you have leftovers, store the shrimp in an airtight container in the fridge for up to 3 or 4 days.
- This shrimp is great served over a bed of basmati or jasmine rice. If you’re looking to keep it low carb, try serving this over cauliflower fried rice.
- You can also serve this with a salad or with steamed vegetables.
Nutrition Information
Notice: Nutrition is auto-calculated for your convenience. Where relevant, we recommend using your own nutrition calculations.
