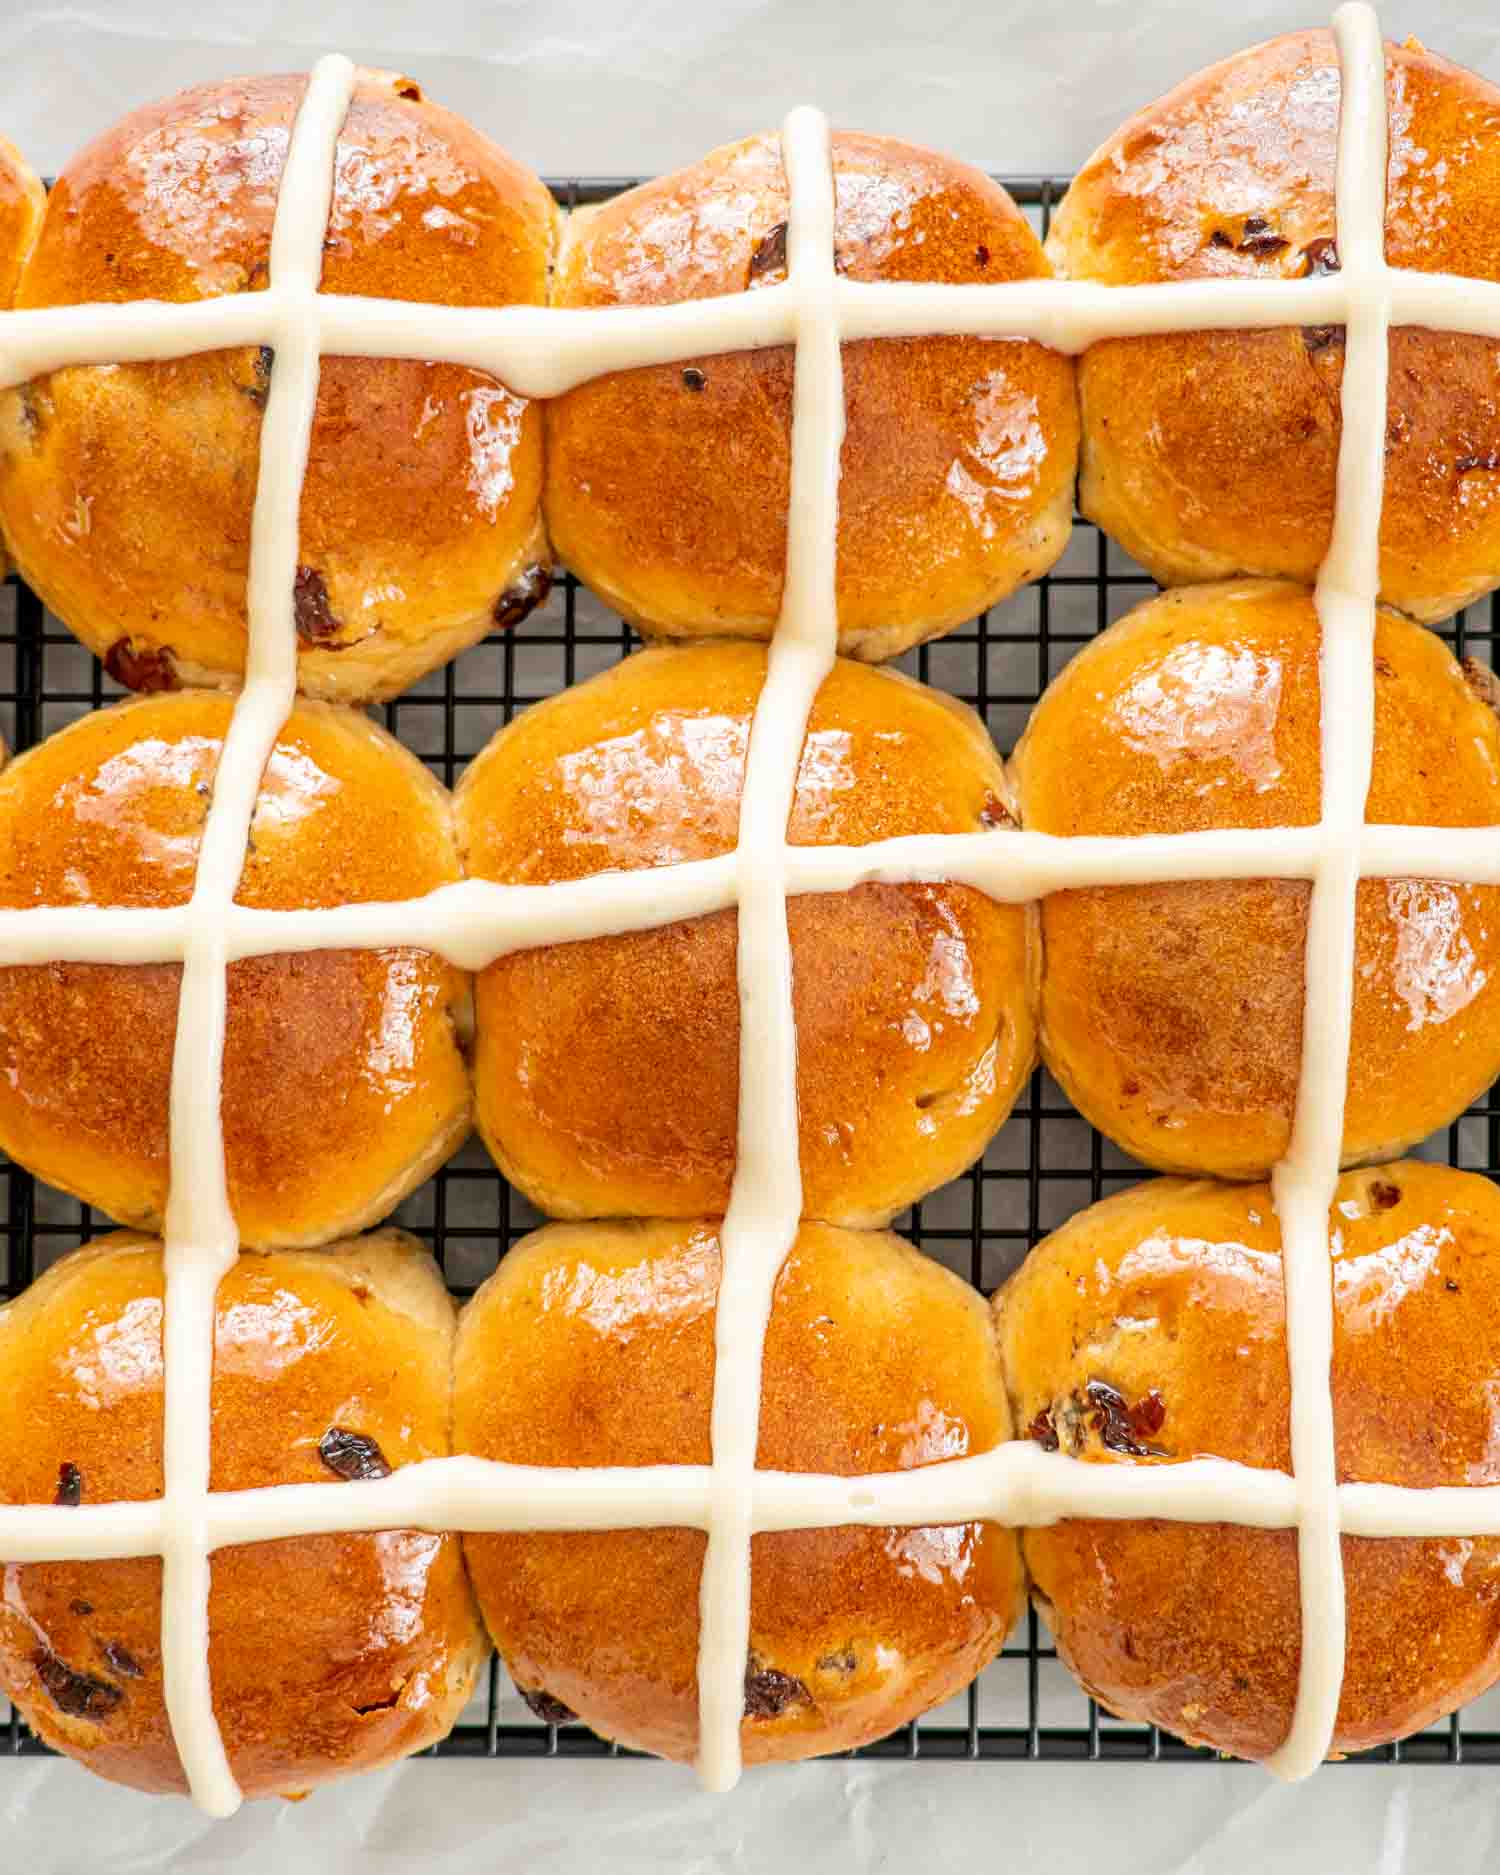
Easy Hot Cross Buns Recipe (Soft And Fluffy Easter Buns)
This post may contain affiliate links. Please read my disclosure policy.
Easy Hot Cross Buns Recipe made with a simple dough that turns out soft, fluffy, and perfect for Easter brunch. If you’ve never baked bread before, this is a great place to start because the dough is very forgiving. These buns are lightly spiced, filled with raisins, and much easier to make than you think.
Hot Cross Buns Are Easier Than You Think
A lot of people are intimidated by yeast dough, and I get it. Bread baking sounds complicated, and the idea of dough rising, kneading, and getting the texture right can feel like a lot. But hot cross buns are actually a great place to start if you’ve never baked bread before because the dough is soft, forgiving, and very easy to work with.
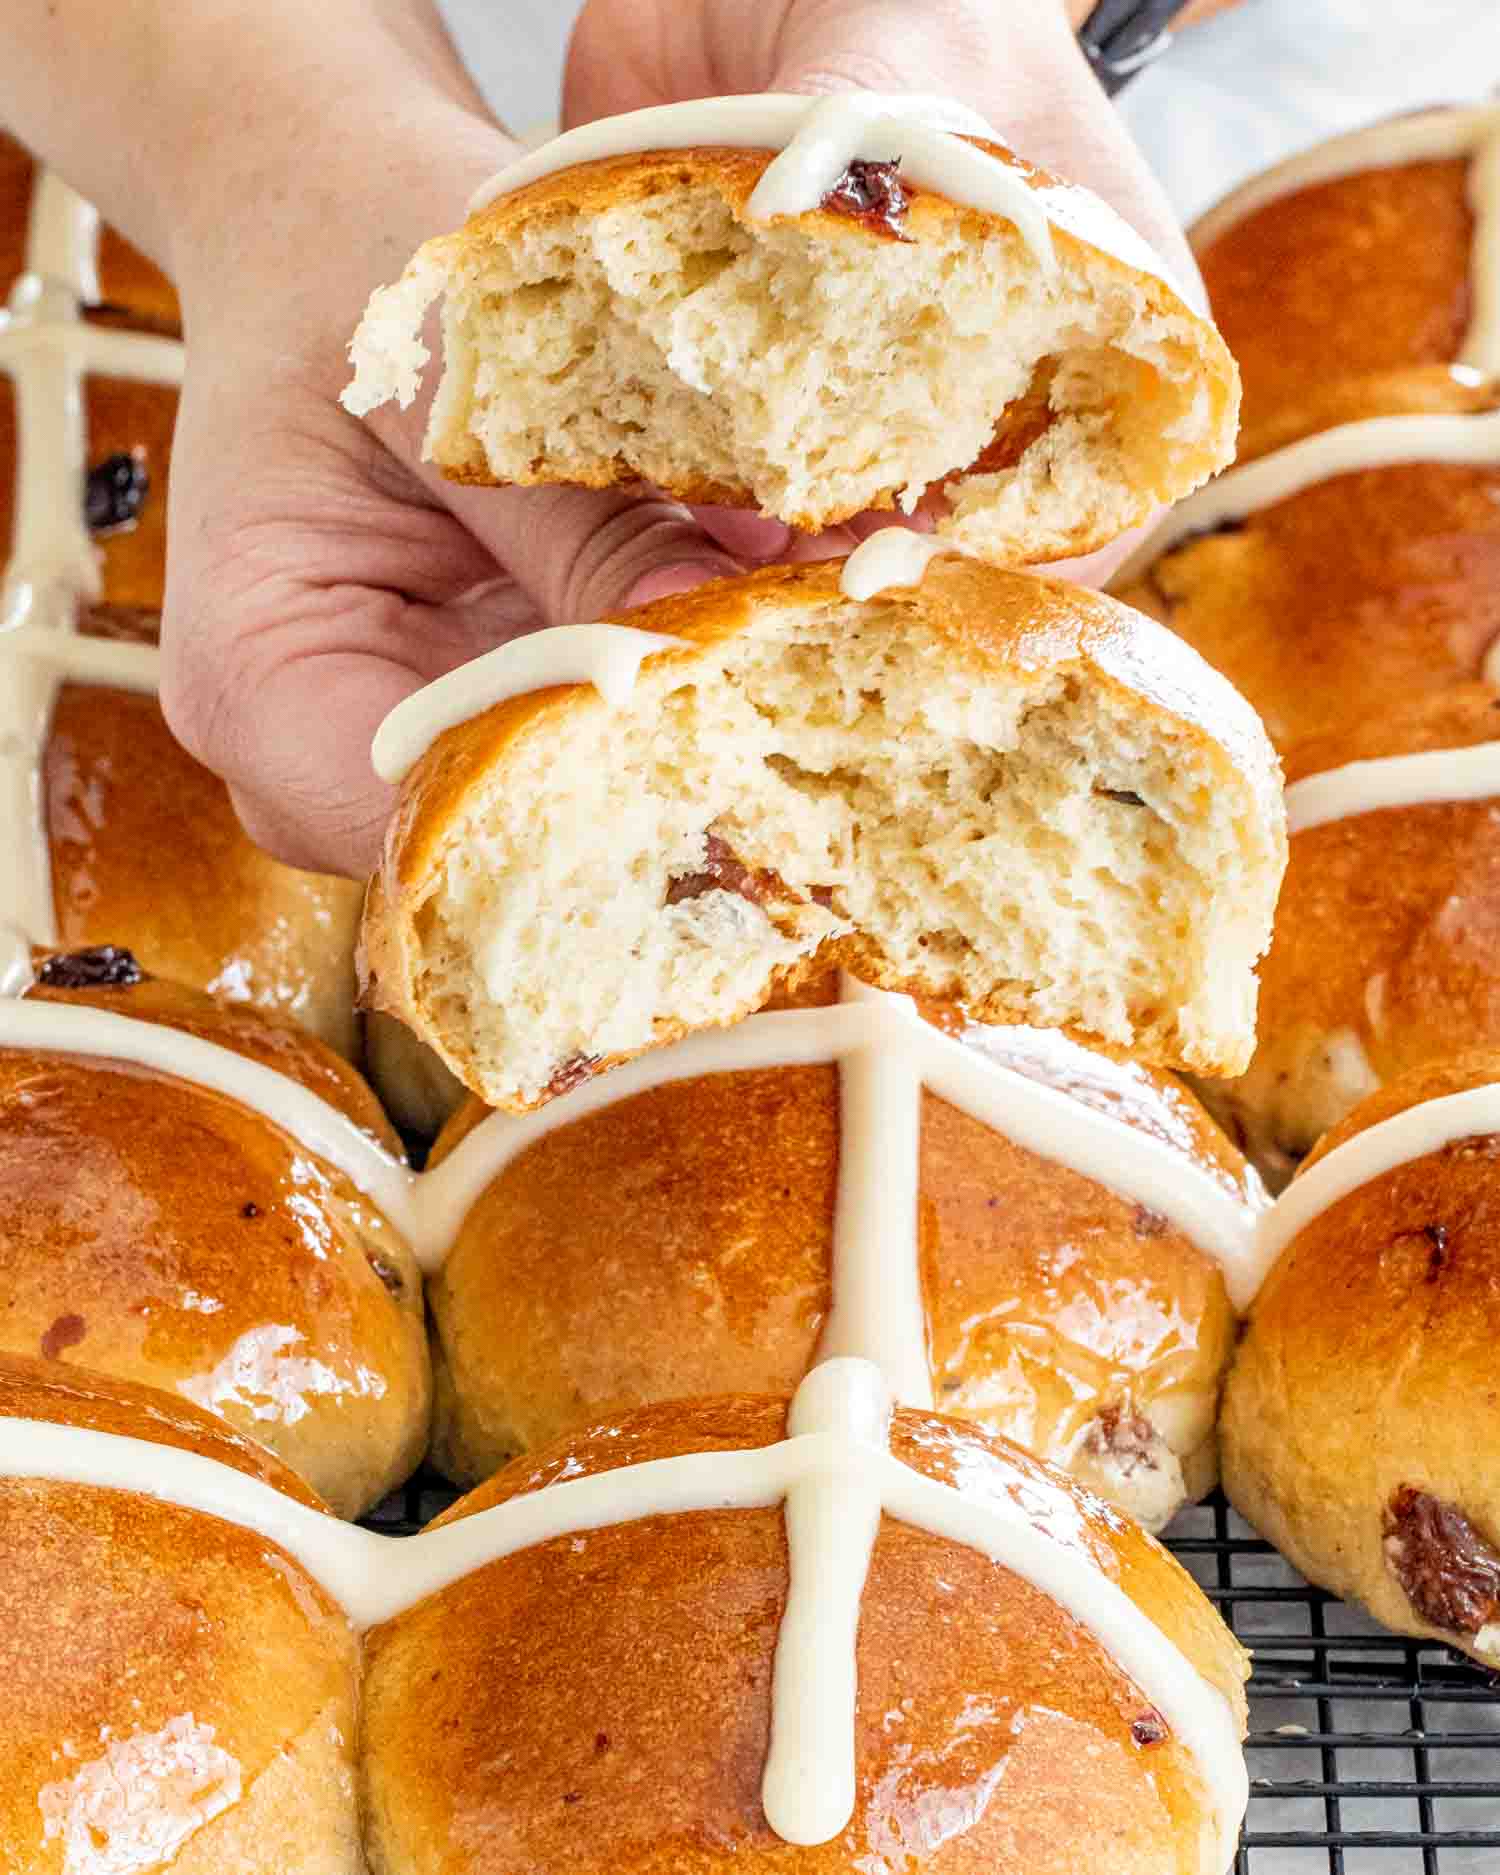
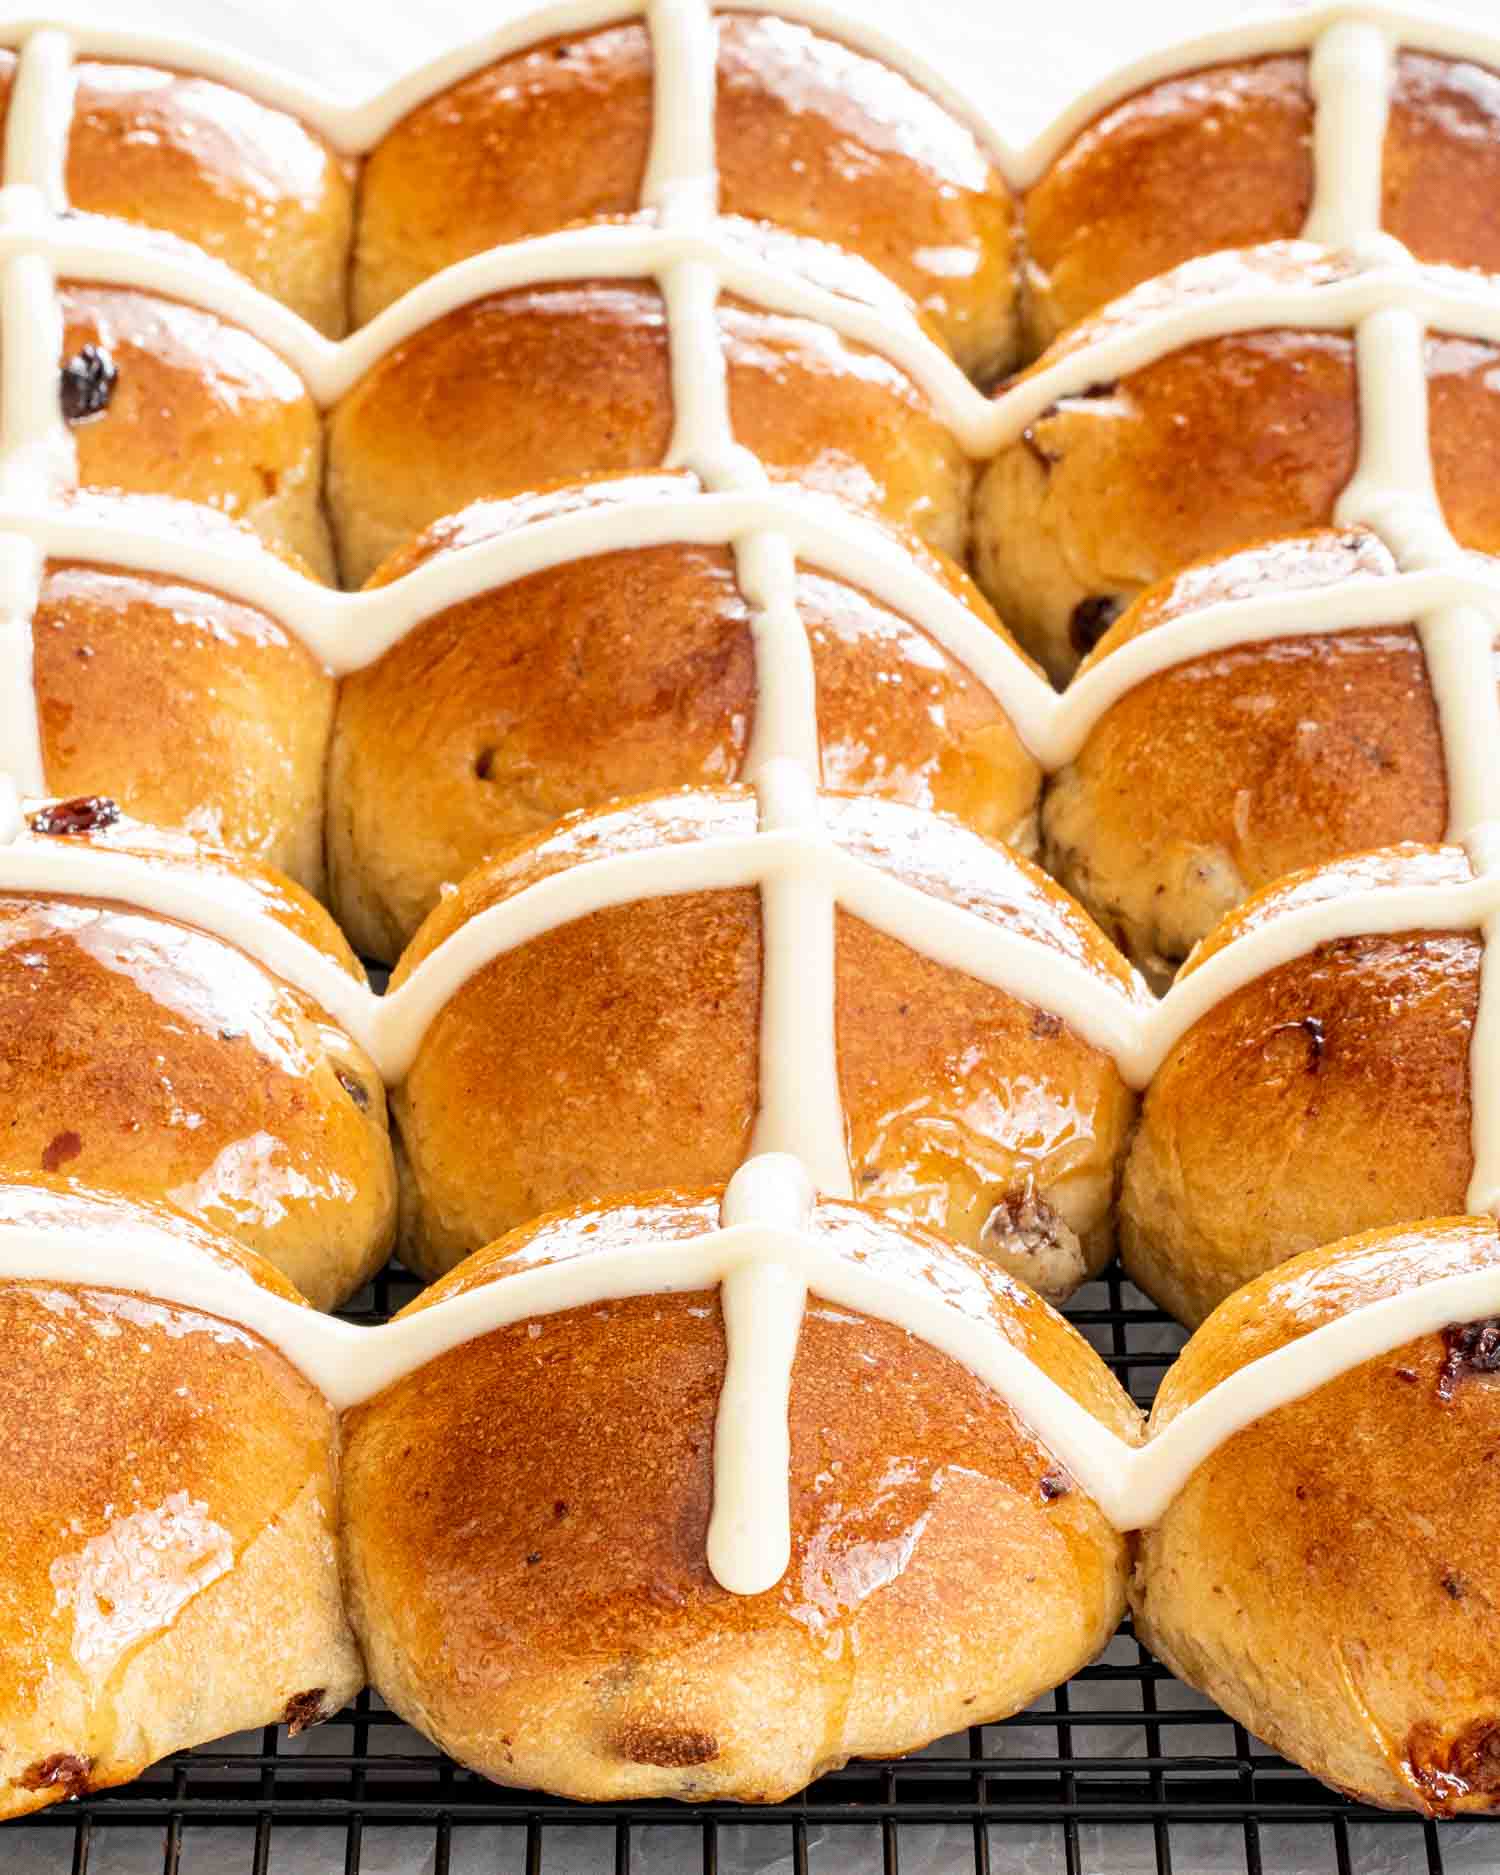
I’ve been making bread for many years, and these easy hot cross buns are one of my favorite Easter recipes because you can make the dough ahead of time, freeze the buns, or bake them fresh for Easter morning. They turn out soft, fluffy, lightly spiced, and perfect with a bit of butter while still warm.
Why You’ll Love These Hot Cross Buns
- They’re easier than you think: If yeast dough intimidates you, this is a great beginner bread recipe because the dough is soft and very forgiving.
- Perfect for Easter brunch: These buns are lightly sweet, soft, and full of warm spices, perfect with butter and coffee.
- Make ahead friendly: You can prepare the dough the day before and bake the buns fresh the next morning.
- Freezer friendly: You can freeze the baked buns or even freeze the shaped dough before baking.
- Stand mixer does the work: The mixer kneads the dough, so there’s very little hands-on work.
- Soft and fluffy texture: These buns stay soft for days and reheat beautifully.
- Customizable: Use raisins, currants, dried cranberries, chopped apricots, or leave the fruit out completely.
- Your house will smell amazing: The warm spices while these bake are one of the best parts.
- Great for sharing: These are perfect for Easter brunch, spring gatherings, or gifting to friends and neighbors.
- They look impressive but are actually simple to make.
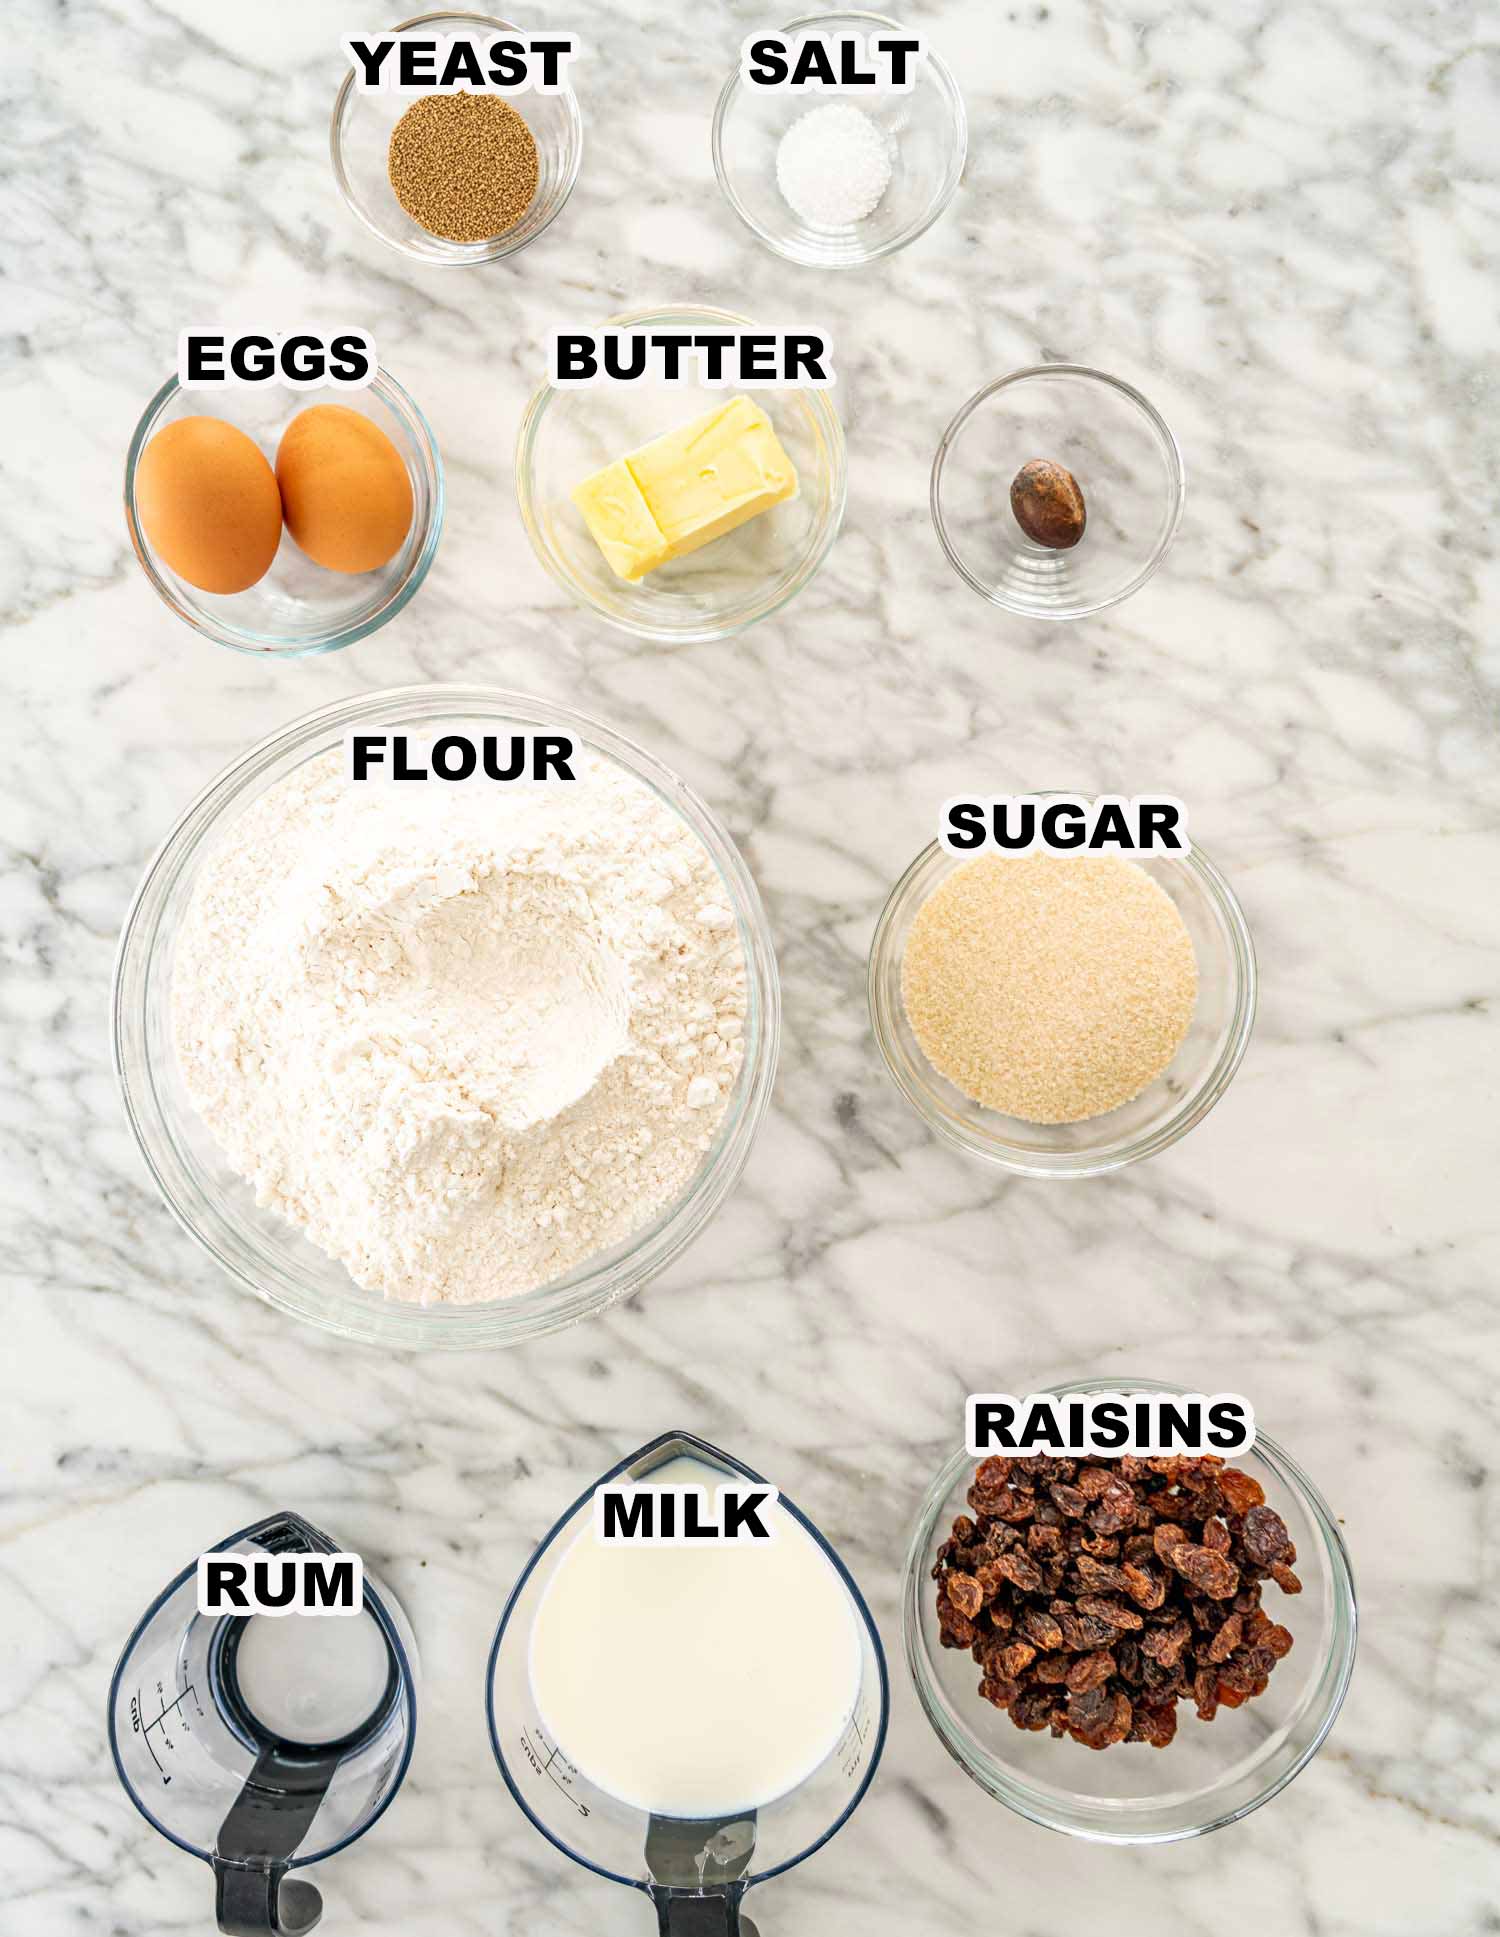
Ingredients You’ll Need
- Milk: The milk should be lukewarm between 98°F and 110°F (36.5°C to 43°C). If it’s too hot it will kill the yeast, and if it’s too cold the yeast won’t activate properly.
- Yeast: I use active dry yeast and always bloom it first to make sure it’s active and working before adding it to the dough.
- Flour: All purpose flour works perfectly here and gives you soft buns. Add just enough flour so the dough is soft and slightly sticky but not dry.
- Sugar: These buns are lightly sweet, not overly sweet, because the glaze and icing add extra sweetness later.
- Eggs: Eggs make the dough richer, softer, and give the buns a nice texture.
- Butter: Use softened butter so it mixes easily into the dough and makes the buns soft and fluffy.
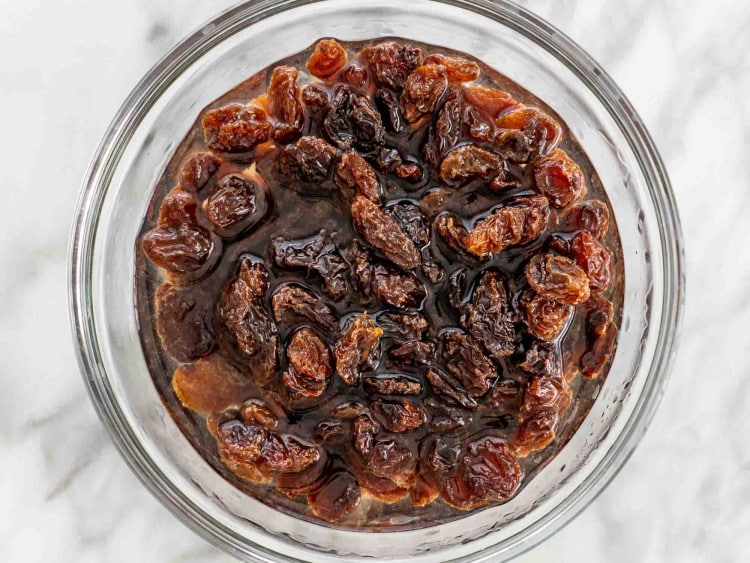
- Raisins: I like to soak the raisins in rum or hot water so they plump up and don’t dry out during baking.
- Nutmeg and spices: Hot cross buns are known for their warm spice flavor. Freshly grated nutmeg makes a big difference.
- Orange zest (optional): A little orange zest in the dough adds really nice flavor and works really well with the spices and raisins.
- Dough texture: The dough should be soft and elastic, not stiff. If you add too much flour the buns will be dense.
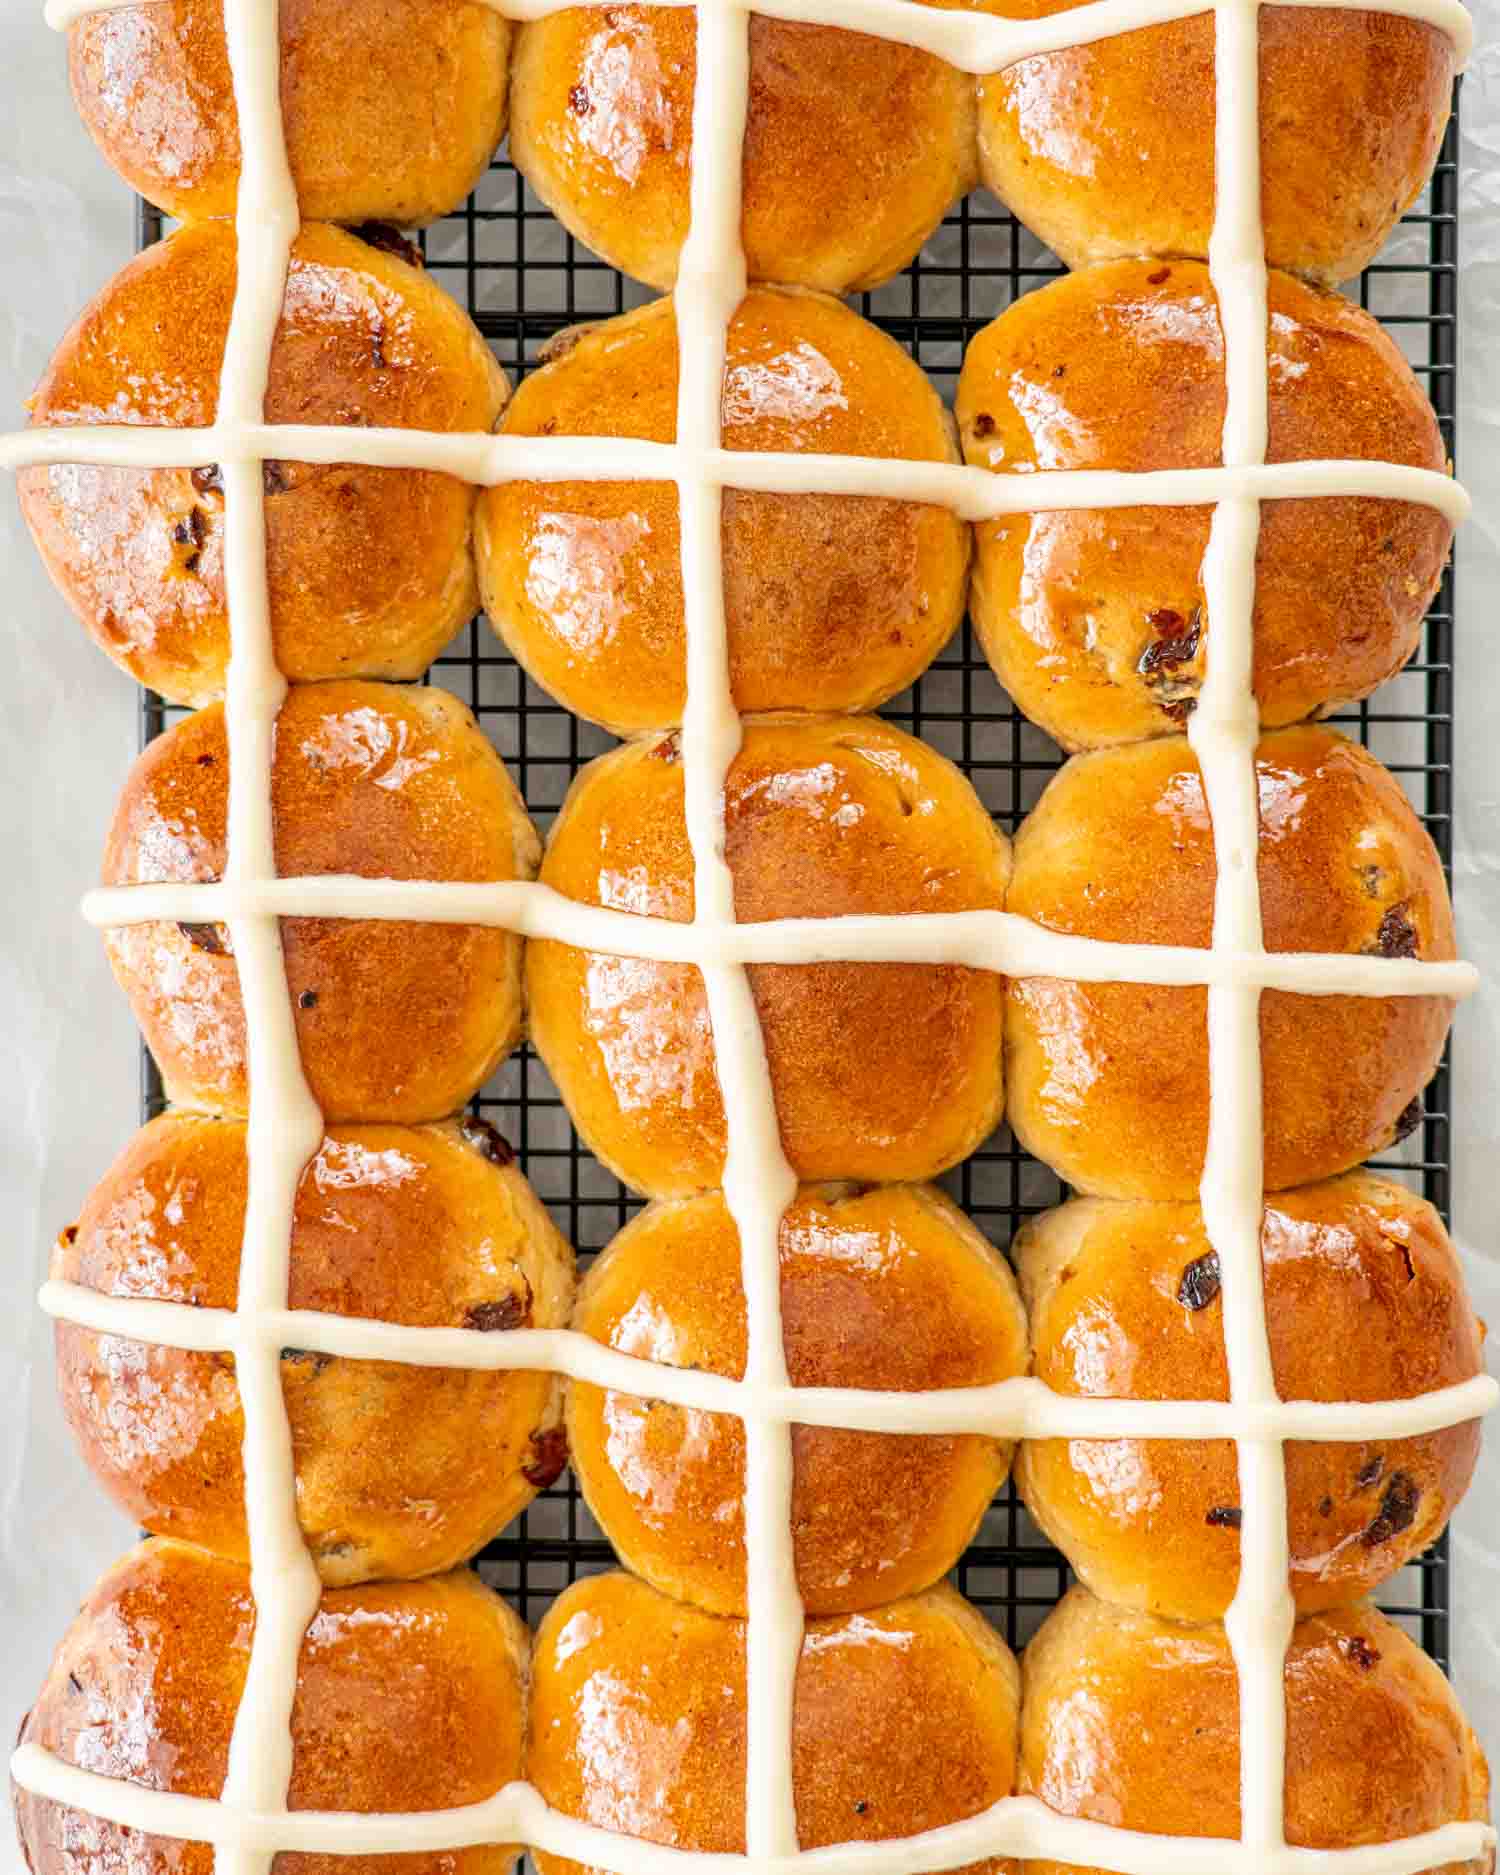
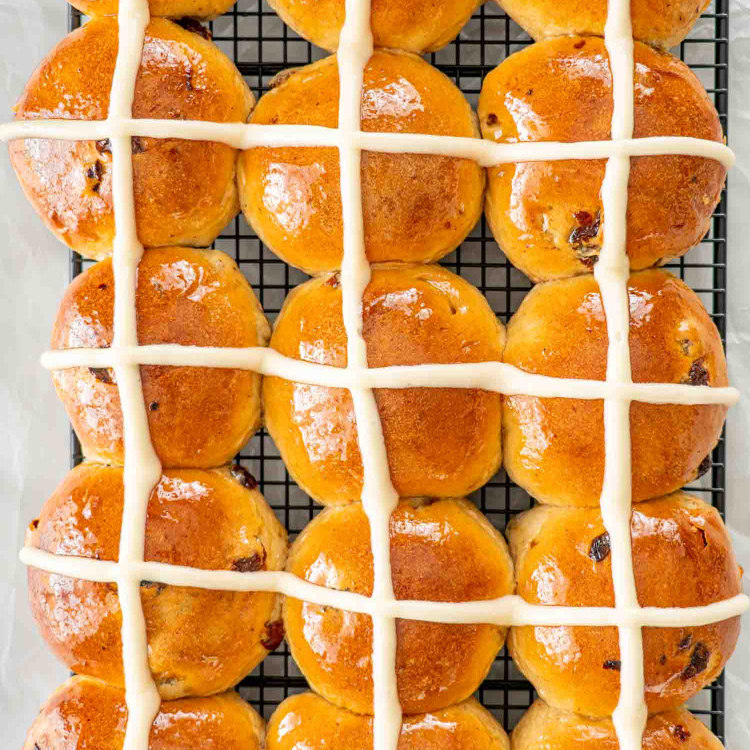
- Sugar glaze: Brushing the buns with a simple sugar syrup right after baking gives them that shiny bakery finish and keeps the tops soft.
- Crosses on top: Traditionally the crosses are made with a flour and water paste and baked on the buns, but I also like using cream cheese icing after baking.
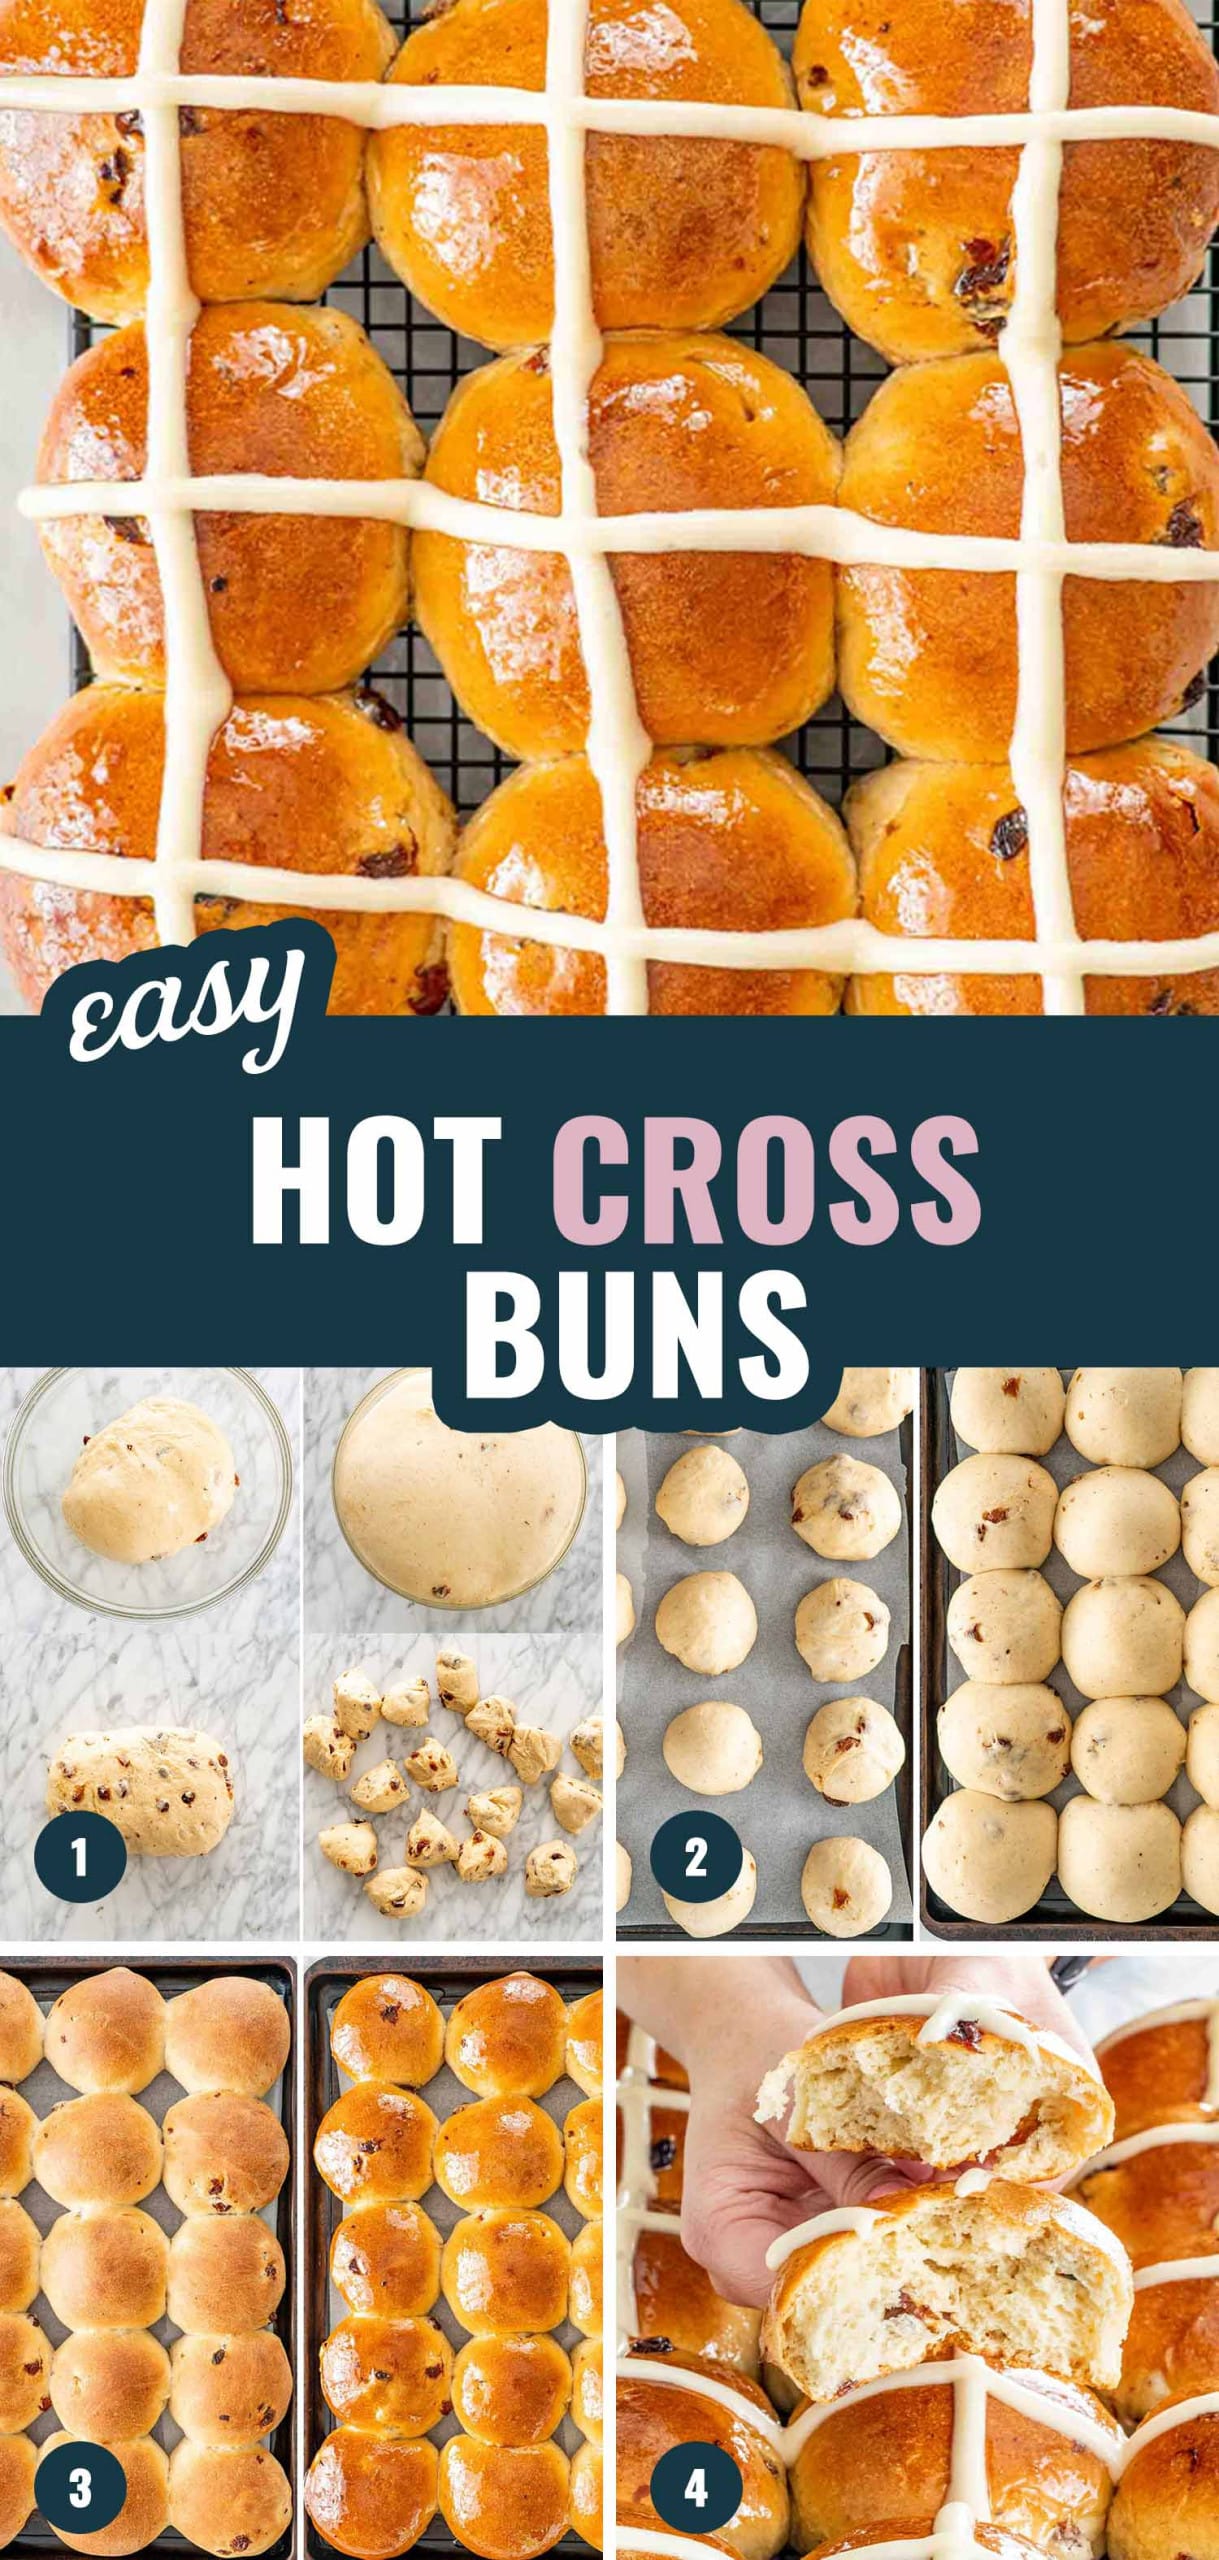
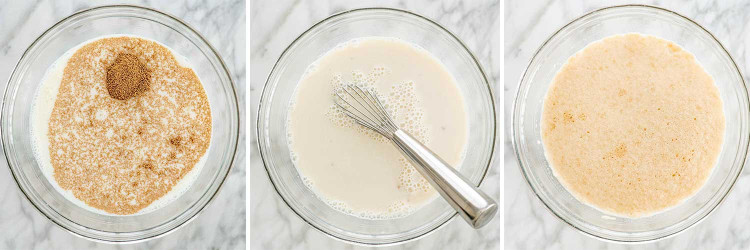
Making hot cross buns is very similar to making dinner rolls, just with spices and raisins added to the dough. Start by activating the yeast in lukewarm milk and sugar and let it sit until it becomes foamy. If you’re using raisins, you can soak them in a little rum or hot water so they plump up and don’t dry out while baking.
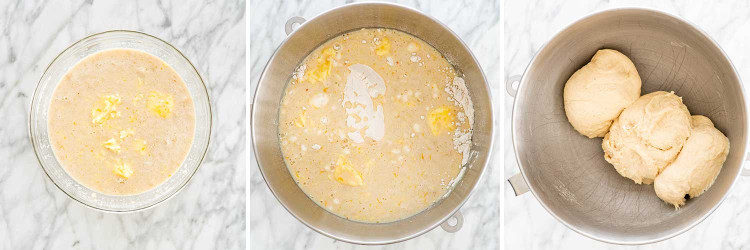
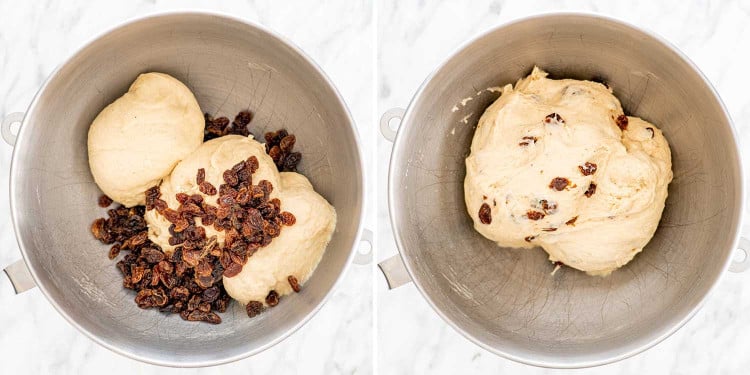
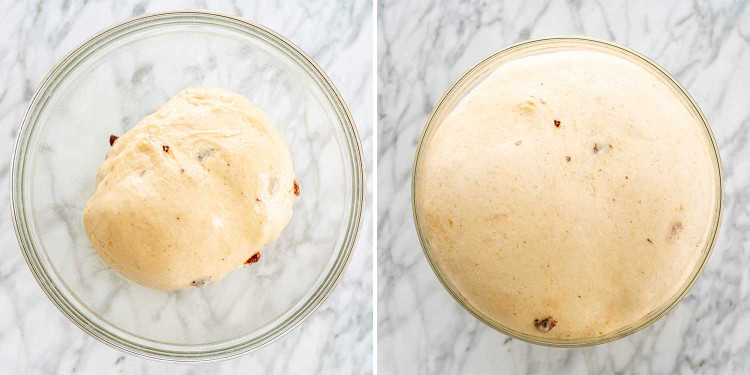
Next, mix the flour, salt, and spices, then add the yeast mixture, eggs, and butter to form a soft dough. Knead the dough until it becomes smooth and elastic, then mix in the raisins. Place the dough in a greased bowl, cover it, and let it rise until doubled in size.
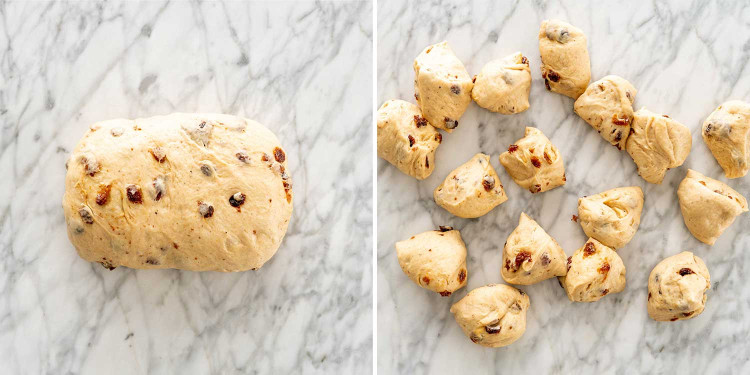
Once the dough has risen, divide it into equal pieces and roll them into balls. Place them on a baking sheet and let them rise again until puffy. Bake until golden brown, brush them with the sugar glaze while they’re still warm, then pipe the crosses on top once the buns have cooled.
Overnight Hot Cross Buns
If you want fresh hot cross buns in the morning without starting from scratch, you can make the dough the night before and let it rise in the refrigerator overnight.
Prepare the dough as instructed and place it in a greased bowl, cover it tightly with plastic wrap, and refrigerate it after the dough has been mixed and kneaded. The dough will slowly rise in the refrigerator overnight. The next morning, remove the dough from the fridge, let it sit at room temperature for about 30 to 45 minutes, then shape the buns, let them rise again until puffy, and bake as directed.
You can also shape the buns the night before and place them on the baking sheet, cover them tightly, and refrigerate overnight. In the morning, let the buns sit at room temperature for about 45 to 60 minutes until they become puffy, then bake them as directed.
This is a great option if you want fresh hot cross buns for Easter morning without having to wake up early to make the dough from scratch.
Make Ahead Hot Cross Buns
Hot cross buns are great for making ahead, especially if you’re planning Easter brunch or feeding a crowd. You can bake the buns a day or two in advance and store them in an airtight container at room temperature.
To serve, warm the buns in the oven at 300°F (150°C) for about 10 minutes so they become soft again. You can also microwave them for about 15 to 20 seconds to warm them up.
Hot cross buns also freeze very well. Once the buns have completely cooled, place them in a freezer bag or airtight container and freeze for up to 2 to 3 months. When ready to serve, let them thaw at room temperature and warm them in the oven before serving.
Common Mistakes To Avoid
- Milk too hot or too cold: The milk should be between 98°F and 110°F (36.5°C to 43°C). If it’s too hot it will kill the yeast, and if it’s too cold the yeast won’t activate properly.
- Yeast didn’t foam: If the yeast doesn’t become foamy after 10 minutes, don’t continue with the recipe. Your dough will not rise and the buns will be dense.
- Adding too much flour: The dough should be soft and slightly sticky. Adding too much flour will make the buns dense and dry instead of soft and fluffy.
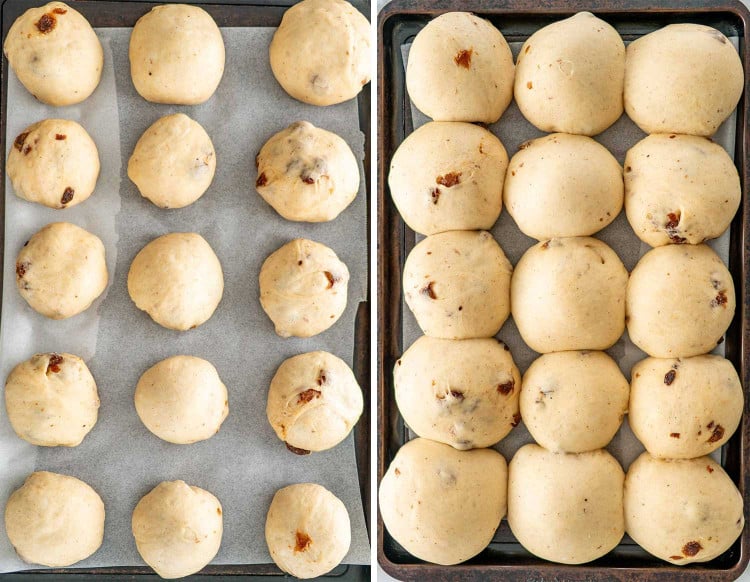
- Not letting the dough rise enough: The dough should double in size during the first rise and the buns should look puffy before baking. If you bake them too soon, they will be dense.
- Over baking the buns: Bake just until golden brown. Over baking will make the buns dry instead of soft.
- Not brushing the glaze while hot: Brush the sugar syrup on the buns right after they come out of the oven so it soaks in and gives them that shiny finish.
- Piping icing on hot buns: If you’re using icing crosses, make sure the buns are completely cooled or the icing will melt and slide off.
Frequently Asked Questions
Why are my hot cross buns dense?
Dense buns usually happen if too much flour was added, the dough didn’t rise long enough, or the yeast wasn’t active. The dough should be soft and slightly sticky, and it should double in size before shaping and again before baking.
Can I use instant yeast instead of active dry yeast?
Yes, you can use instant yeast. You don’t need to activate it in milk first, and you can mix it directly with the dry ingredients. Use about 25% less instant yeast than active dry yeast.
Can I make hot cross buns without raisins?
Yes, you can leave the raisins out completely or substitute them with dried cranberries, chopped dried apricots, currants, or even chocolate chips.
Can I make hot cross buns the night before?
Yes, you can refrigerate the dough overnight after mixing and kneading, or you can shape the buns and refrigerate them overnight and bake them in the morning.
Can I freeze hot cross buns?
Hot cross buns freeze very well. You can freeze them baked or unbaked. Just thaw and warm them before serving.
Can I make these without a stand mixer?
Yes, you can knead the dough by hand. It will take about 10 to 15 minutes of kneading until the dough becomes smooth and elastic.
What spices are used in hot cross buns?
Hot cross buns usually include warm spices like nutmeg, cinnamon, allspice, or cloves. You can adjust the spices to your taste.
How do I store hot cross buns?
Store them in an airtight container at room temperature for up to 3 to 4 days, or freeze them for longer storage.
Can I reheat hot cross buns?
Yes, you can warm them in the oven at 300°F (150°C) for about 10 minutes or microwave for 15 to 20 seconds.
Storage And Freezing
If you somehow end up with leftover hot cross buns, just store them in an airtight container at room temperature and they’ll keep for about 3 to 4 days. I like to warm them up a bit before serving because they become soft again and taste almost like fresh baked.
To reheat, you can pop them in the oven at 300°F (150°C) for about 10 minutes, or just microwave one for about 15 to 20 seconds.
These buns also freeze really well, which is great if you want to get ahead for Easter. Once they’re completely cooled, place them in a freezer bag and freeze for up to 2 to 3 months. When you’re ready to eat them, just let them thaw and warm them up in the oven.
You can even freeze the shaped unbaked buns. Just freeze them after shaping, then thaw and let them rise until puffy before baking. This is a great trick if you want fresh hot cross buns without making the dough the same day.
Other Delicious Easter Recipes You’ll Enjoy
- Carrot Cake
- Deviled Egg Macaroni Salad
- Loaded Scalloped Potatoes
- Potatoes Au Gratin
- Prime Rib Roast
- Deviled Eggs
- Spinach Ricotta Brunch Bake
Before You Begin! If you make this, please leave a review and rating letting us know how you liked this recipe! This helps our business thrive & continue providing free recipes.
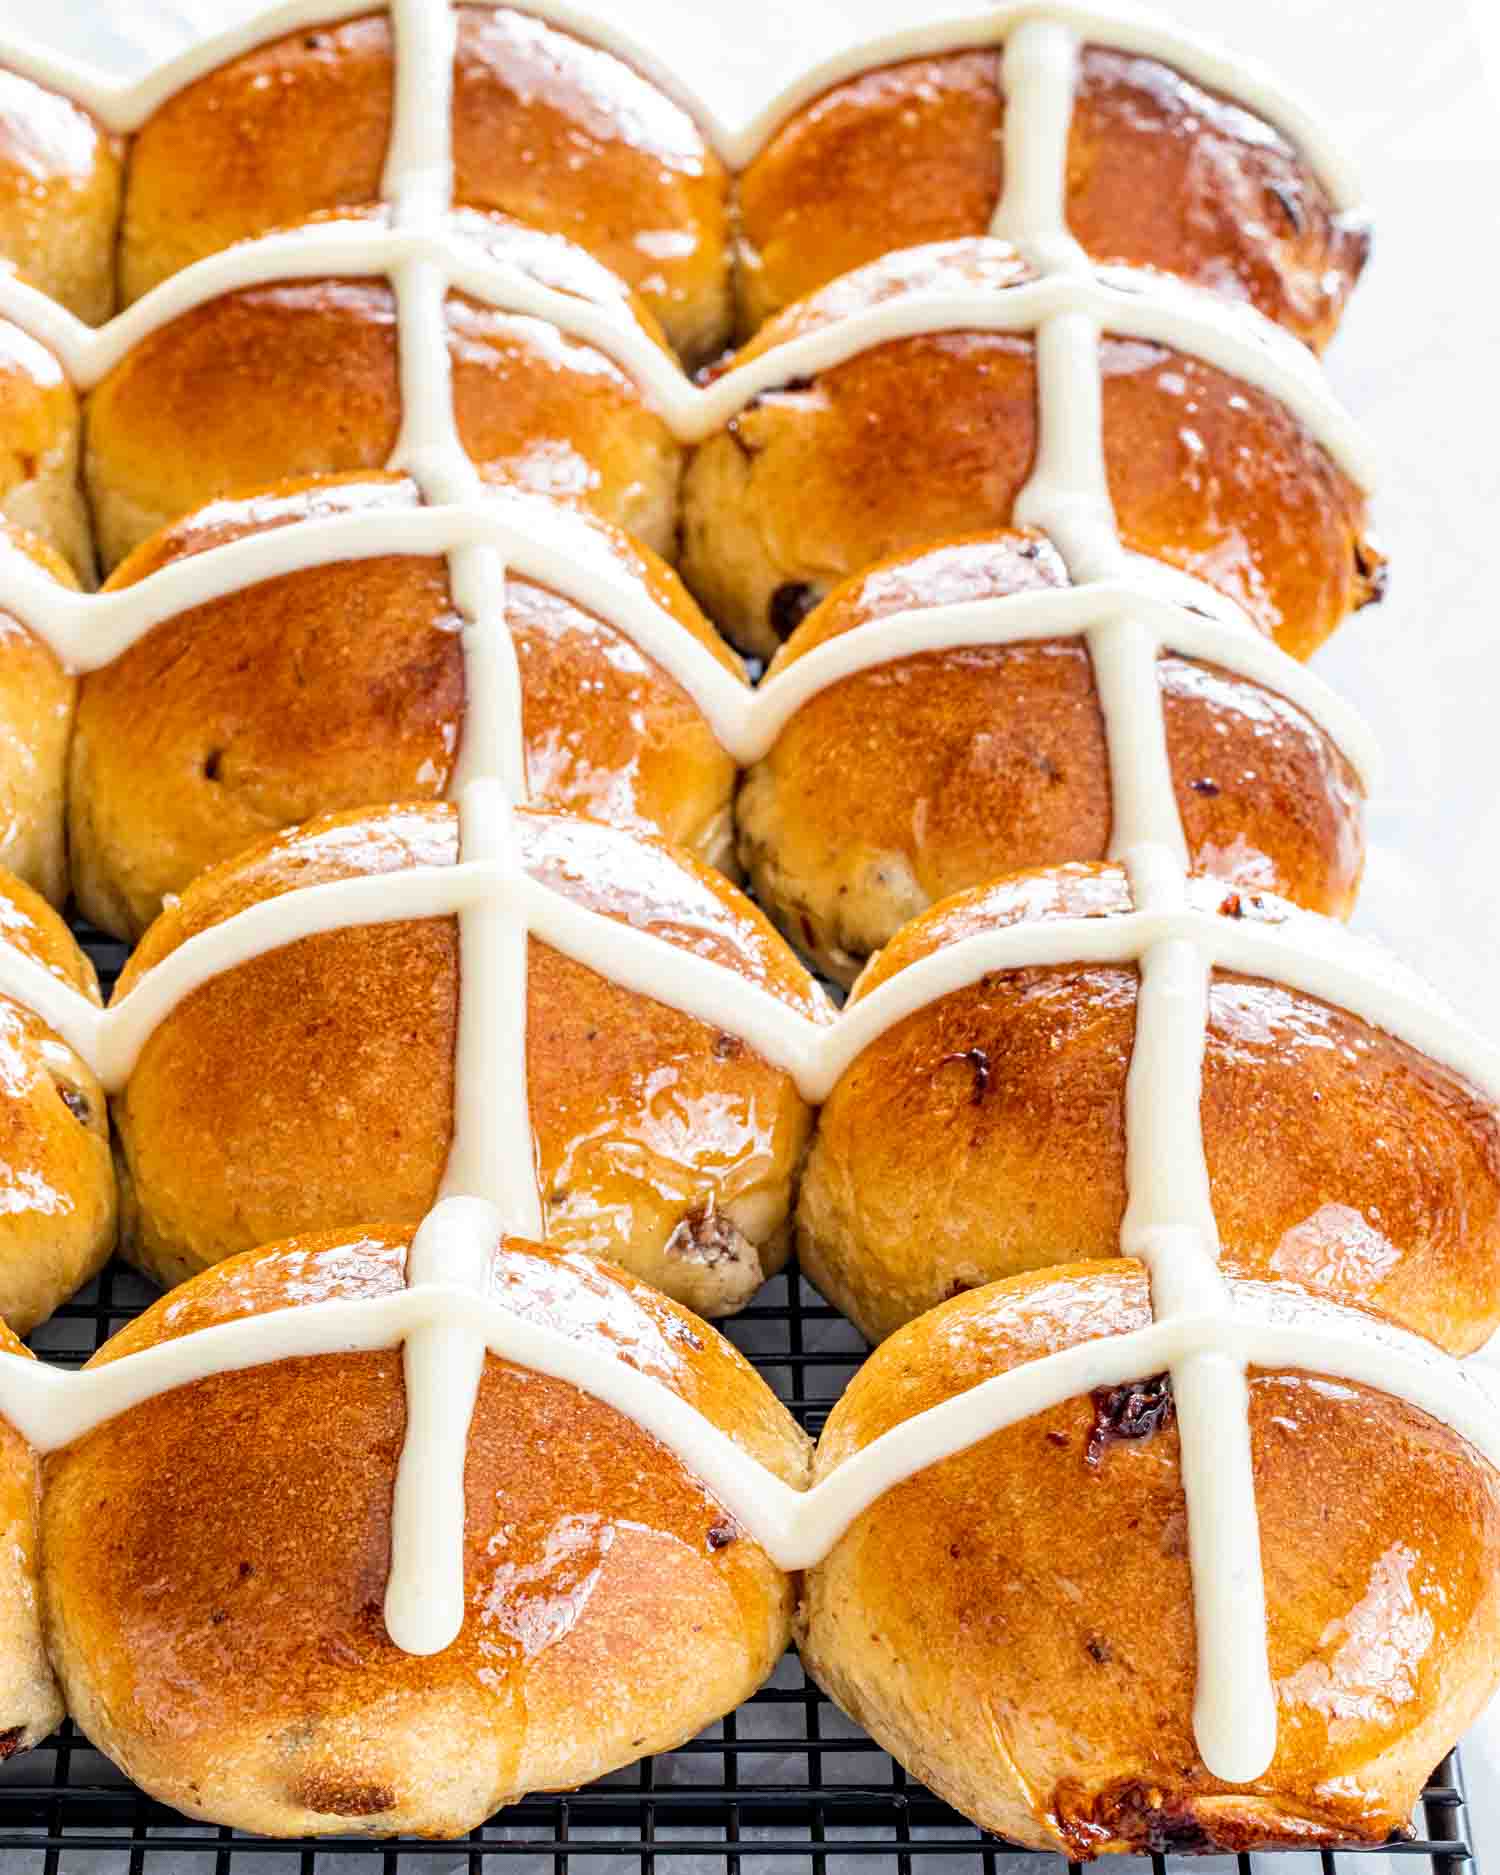
Hot Cross Buns
Video
Ingredients
For hot cross buns
- 1½ cups milk (lukewarm between 98°F (36.5°C) and 110°F (43.3°C))
- ½ cup sugar
- 1 tablespoon active dry yeast
- 4½ cups all-purpose flour
- ½ teaspoon salt
- ½ teaspoon nutmeg
- 2 large eggs
- 4 tablespoons butter (unsalted (1/2 stick), softened)
- 1 cup raisins (soaked in rum if preferred)
For syrup glaze
- ¼ cup water
- ¼ cup sugar
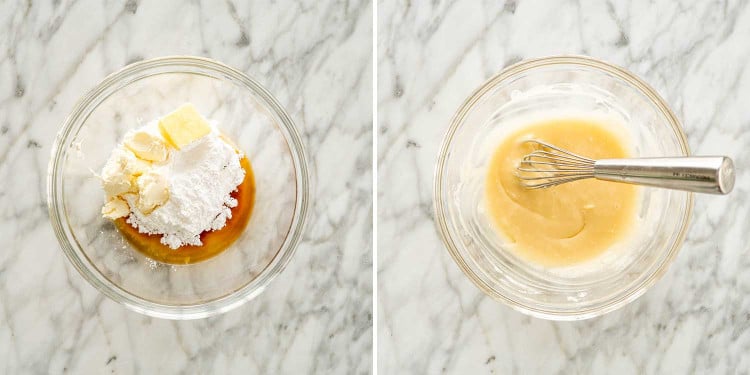
For cream cheese icing
- ½ cup powdered sugar (same as icing sugar or confectioners sugar)
- 2 tablespoons cream cheese
- 1 tablespoon butter (unsalted, at room temperature)
- 1 teaspoon vanilla extract
- ½ tablespoon water
Before You Begin! If you make this, please leave a review and rating letting us know how you liked this recipe! This helps our business thrive & continue providing free recipes.
Instructions
- In a small bowl combine the lukewarm milk, sugar and yeast. Stir and let it rest for about 10 minutes until the yeast activates, you will notice bubbles forming.

- Soak the raisins in rum. This step is completely optional. If you're soaking them in rum, you'll need about ¼ cup of rum.

- In the bowl of your mixer add 4 cups of flour, salt and nutmeg. Mix until combined. Add the eggs and butter to the yeast mixture and stir. Pour the yeast mixture over the flour, and using the dough hook attachment mix for about 5 minutes.
- Add raisins (drained if soaked in rum) and continue mixing for another minute. If the dough is too wet add more flour as needed. The dough should be quite soft and elastic. You will know when it's done when it doesn't stick to the sides of the bowl anymore.

- In a large bowl add a bit of oil, about a tablespoon and place the dough in the bowl, rolling it around so that it gets oil all over, this way it won’t get dry. Cover the bowl with plastic wrap. You need to let the dough rise for a couple hours until doubled in size. You can also do my trick where I turn the oven on for about 1 to 2 minutes just until it’s warm in there, and place the bowl in the oven, close the door, make sure you turned off the oven and in about half an hour the dough would have doubled in size.
- Preheat oven to 375°F (190°C). Line a baking sheet with parchment paper. I used a roasting pan that's 16×12 inches.
- Clean and flour your work surface. Usually I don't add any flour to my work surface because I find it easier to roll the buns on a clean surface, but it's totally up to you. Punch down the dough, and cut it into 15 equal pieces.
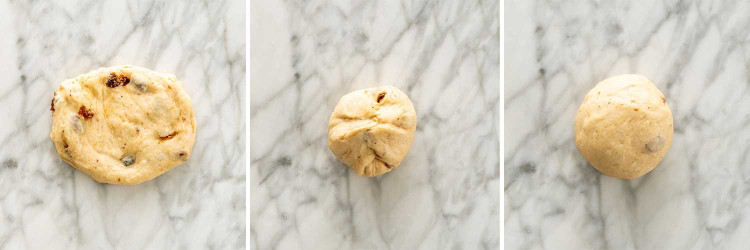
- Roll each piece into a ball by cupping your hand around the dough and rolling it in a circular motion on a flat surface. Apply gentle pressure as you roll to create a smooth, round shape.
- Place each ball onto the prepared baking sheet, leaving some space between them to allow for expansion. Cover the buns with a towel and let them rise for another 30 minutes.

- While the rolls are rising, make the syrup by mixing the sugar with the water in a sauce pan and bring to a boil over low heat. Continue boiling for another minute or until syrup thickens a bit. Let it cool.
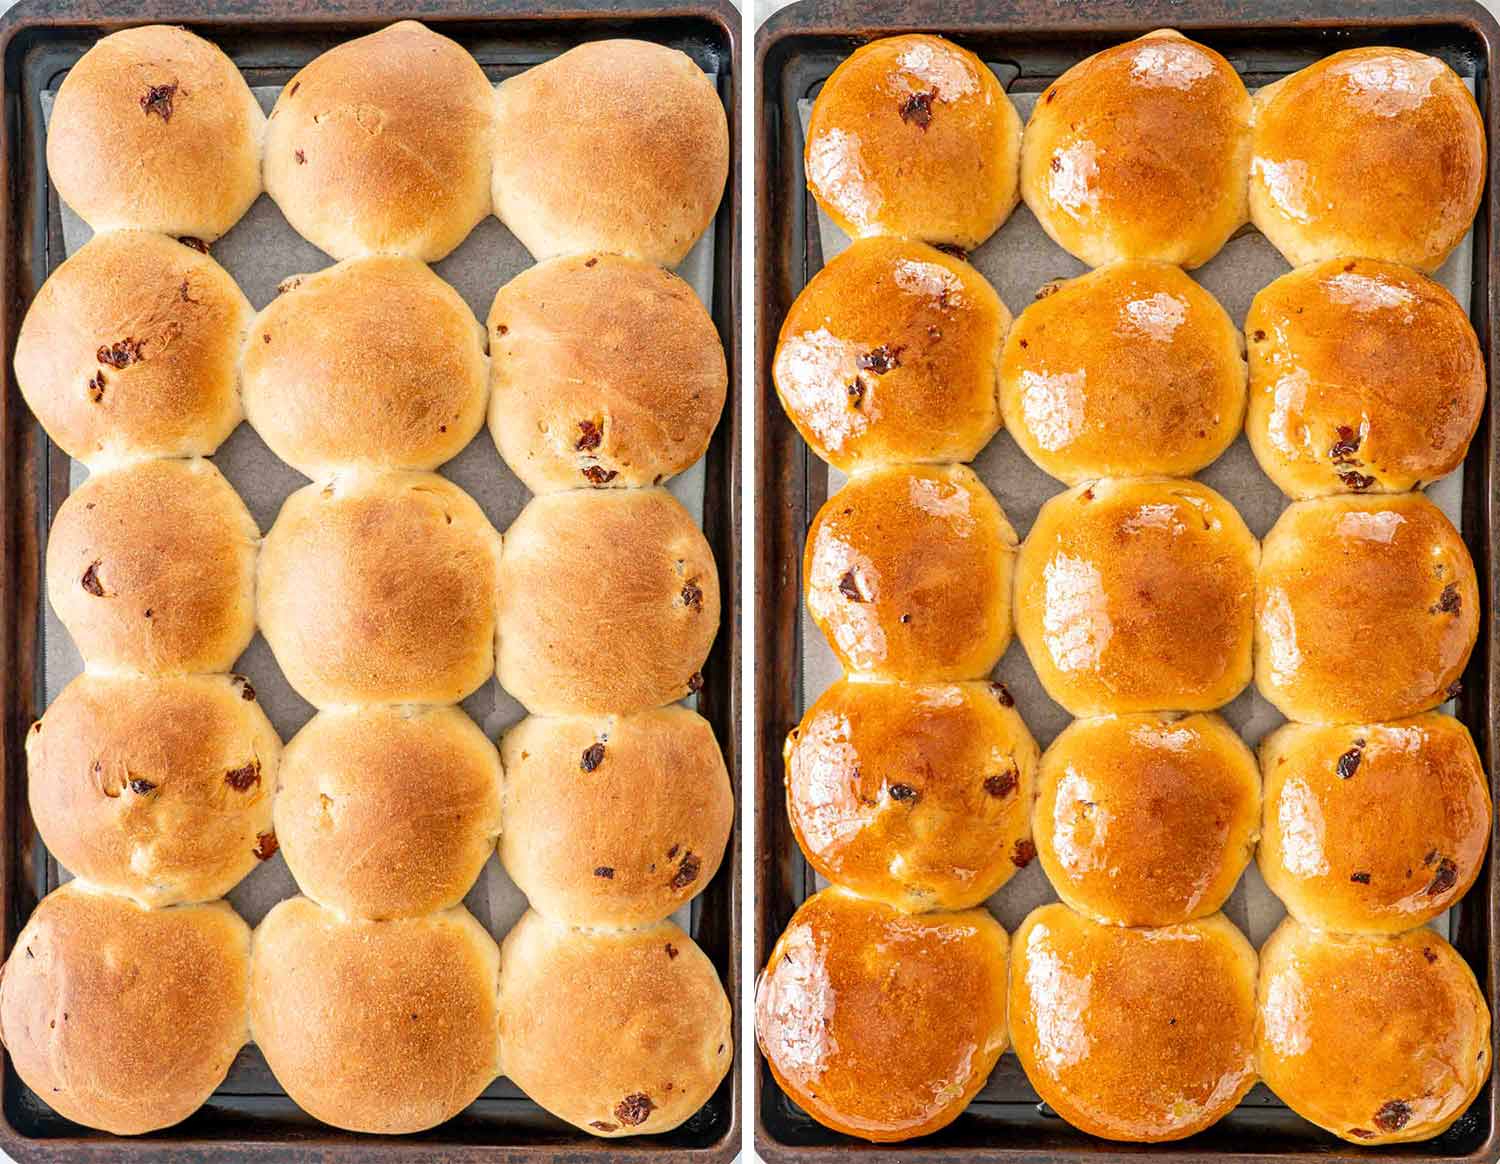
- Transfer the baking pan to the oven and bake for about 20 or until golden brown. Mine were actually done after 17 minutes so keep an eye on them. As soon as you take the rolls out of the oven, brush them with the glaze.
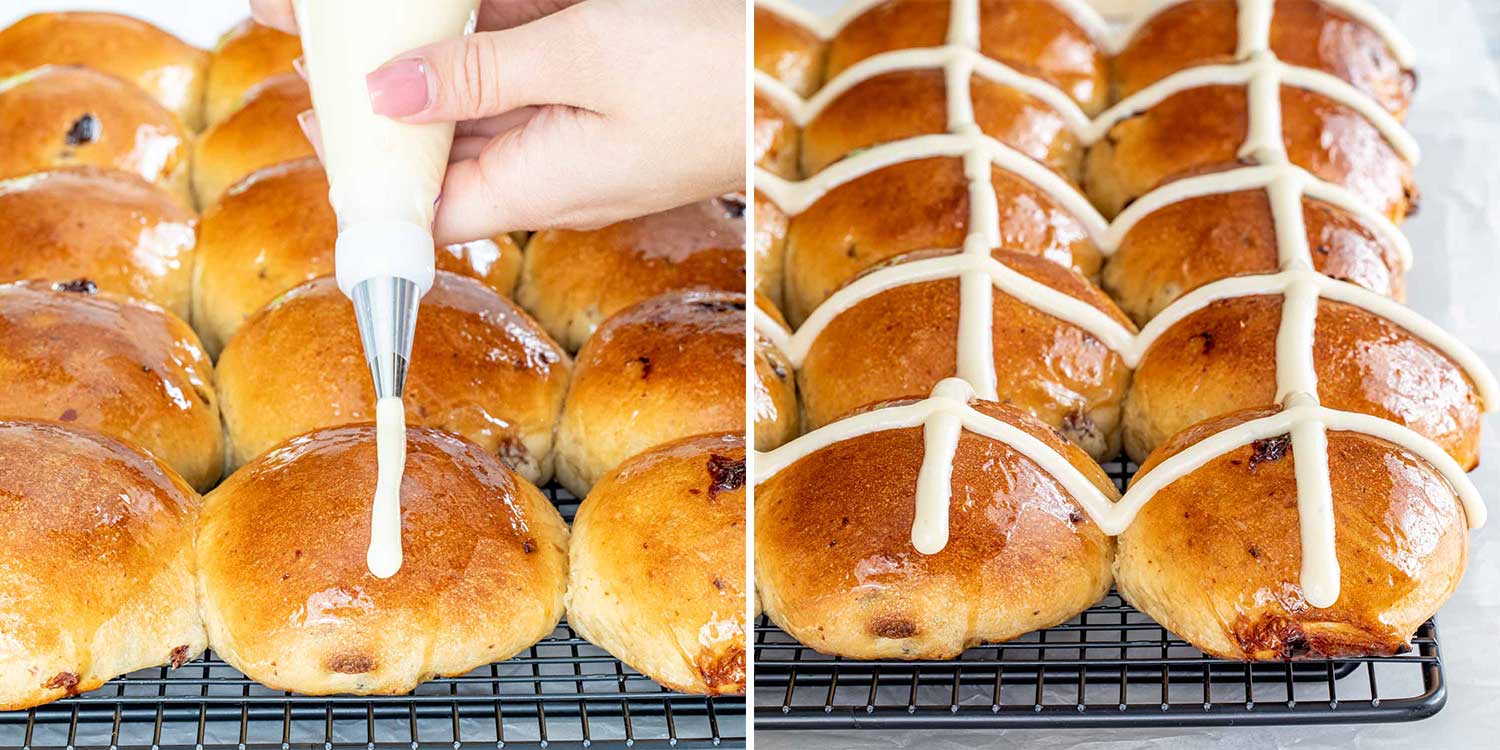
- To make the cross icing, whisk all the ingredients together and pour in a piping bag and refrigerate until ready to use. If the icing is too thin add more icing sugar, if it's too thick add more water until desired consistency.
- Allow the rolls to cool, then pipe crosses onto your rolls.


Notes
- The milk should be between 98°F and 110°F (36.5°C to 43°C) so the yeast activates properly.
- If the yeast does not foam after 10 minutes, do not continue with the recipe because the dough will not rise.
- The dough should be soft and slightly sticky. If you add too much flour the buns will be dense.
- You can soak the raisins in rum, hot water, or orange juice to plump them up before adding them to the dough.
- You can prepare the dough the night before and refrigerate it overnight, then shape and bake the buns the next day.
- You can freeze the baked buns or freeze the shaped unbaked buns and bake them later.
- Brush the buns with the sugar syrup right after baking so they get a shiny finish and stay soft.
- If you are piping icing crosses, make sure the buns are completely cooled or the icing will melt.
- Do not over bake the buns or they will become dry instead of soft.
Nutrition Information
Notice: Nutrition is auto-calculated for your convenience. Where relevant, we recommend using your own nutrition calculations.
