Soft Buttermilk Dinner Rolls
This post may contain affiliate links. Please read my disclosure policy.
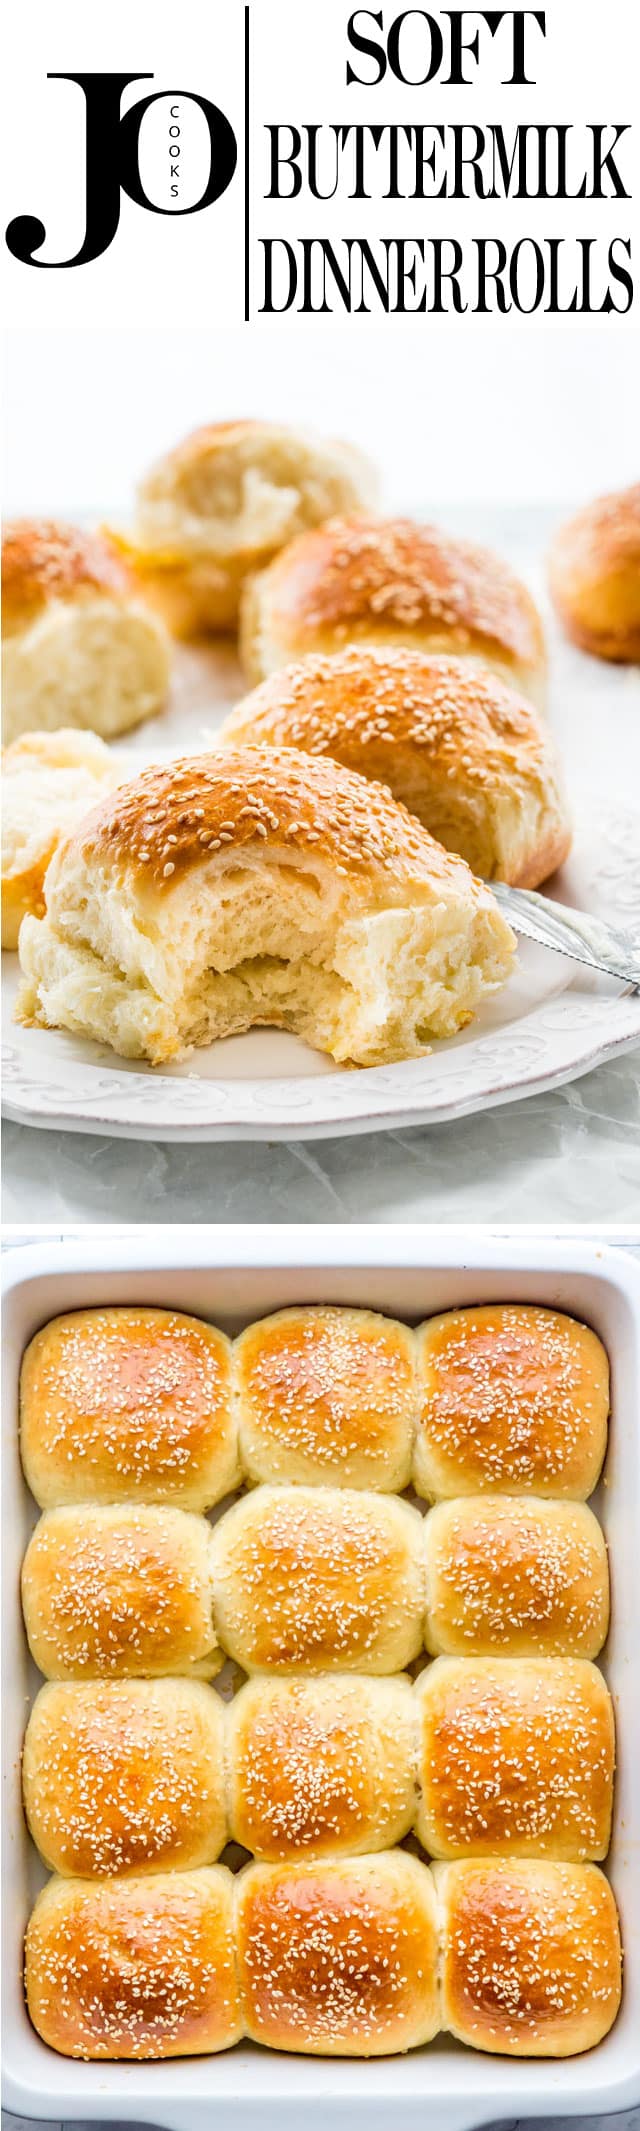
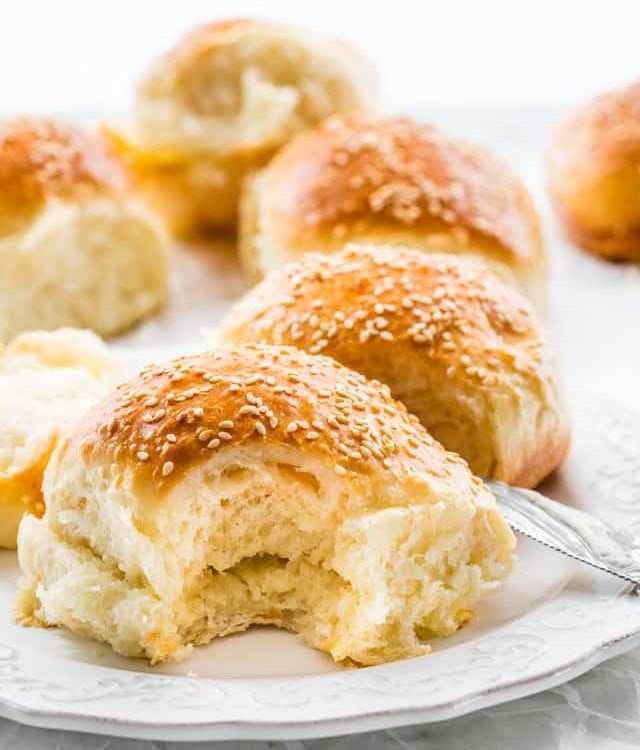
These Buttermilk Dinner Rolls are light and fluffy, super soft, a bit sweet, extra delicious and simple to make! This will be the only dinner roll recipe you’ll ever need!

I firmly believe everyone should have a great recipe for dinner rolls in their arsenal. I hope you add this perfect little recipe for the most perfect buttermilk dinner rolls to yours! They’re so light and fluffy, a bit sweet from the honey and oh so soft, quite easy to make and fool proof if I may say so myself!
Why Buttermilk?
Let’s talk about the buttermilk in these dinner rolls because the buttermilk plays a very important role here. First of all, the buttermilk will add complexity and depth to your dinner rolls. It’s what makes these dinner rolls super soft and light and what keeps them from browning too quickly so that you end up with rolls that are baked perfectly on the inside yet golden on the outside.

Ingredients
- Buttermilk – Our star ingredient! Buttermilk is critical for soft, tender, buttery rolls.
- Honey – We need some sweetness in our rolls today and honey works perfectly. Maple syrup can be used as a substitute if that’s what you have on hand.
- Butter – Unsalted as we want to control our salt and melted before adding.
- Eggs – The binding agent of our roll recipe and for our final egg wash.
- Flour – All purpose works perfectly fine. If you’d like to make these rolls gluten free be sure to add 1 1/2 teaspoons of xanthan gum alongside your gluten free flour.
- Yeast – Instant yeast is needed for this recipe, instant yeast doesn’t require the need to activate and set aside.
- Salt – Salt is so important for any baked goods!
- Sesame seeds – Sprinkled over top and totally optional. Poppy seeds or other seeds such as sunflower seeds can also be used instead.

How To Make Soft Buttermilk Dinner Rolls
- Preheat your oven: To 200 F degrees then turn off. This is to provide a warm and draft free environment for your dough while it rises.
Forming the dough
- Combine wet ingredients: In a medium size bowl whisk together the buttermilk, honey, melted butter and eggs. Set aside.
- Combine dry ingredients: In the bowl of your mixer add the 3 cups of flour, instant yeast, salt and mix to combine, using your dough hook attachment.
- Create your dough: Add the buttermilk mixture to the mixer bowl and mix for 3 to 5 minutes until the dough comes clean from the side of the bowl. If the dough is too wet or too sticky add more flour as needed, but no more than 4 cups. The dough should be soft.
- Allow the dough to rise: Place the dough in a large metal or glass bowl that has been lightly greased or sprayed with cooking spray, cover with a clean towel or plastic wrap and place in the prepared oven. Allow the dough to rise for about 1 hour to 1 1/2 hours or until doubled in size.
Assembly
- Prepare the pan: Spray a 9×13 inch pan with cooking spray or grease with butter. Set aside.
- Assemble the dough: Lightly flour your work surface and remove the dough from the bowl on to the work surface. Cut the dough into 12 equal pieces before rolling each piece into rounds and place into the prepared baking pan. Place a clean kitchen towel over the top or cover with plastic wrap and place back in the oven and let rise again for another 30 min or until doubled in size.
- Prepare the oven for baking: Remove the rolls and preheat the oven to 375 F degrees.
- Finish the rolls: Brush the rolls with a beaten egg then sprinkle with sesame seeds. Place the pan in the preheated oven and bake for 15 or 20 minutes or until golden brown.

Some Tips
- Be sure to check the expiry date of your yeast as it’ll affect the effectiveness of these rolls.
- If using active dry yeast, please make sure you activate it first by dissolving it in a bit of warm water. If it does not begin to froth up, do not continue with the recipe.
- To keep your yeast fresh and longer lasting, unopened yeast packages or jars should be stored in a cool or dry place such as your cupboard.
- It is so important to let your rolls double in size! This will ensure that your rolls are light, tender, and fluffy.
- Egg wash is important for ensuring a glossy golden brown finish to our rolls.
Leftovers
You can store these buttermilk dinner rolls right on the counter wrapped in foil or plastic wrap for up to 5 days. You can freeze these rolls easily, just place them separately on a baking sheet and freeze before transferring to a freezer bag or airtight container. They will last for up to 6 months and can be thawed right on the counter when ready to eat.
Craving More Rolls? Try These Delicious Recipes:
- Hawaiian Sweet Rolls
- Texas Roadhouse Rolls
- Classic Dinner Rolls
- Parker House Rolls
- Honey Rolls
- Homemade Slider Buns
- Best Ever Dinner Crescents
- Saffron Raisin Buns
Before You Begin! If you make this, please leave a review and rating letting us know how you liked this recipe! This helps our business thrive & continue providing free recipes.
Soft Buttermilk Dinner Rolls
Video
Ingredients
- 1 cup buttermilk
- ¼ cup honey
- ⅓ cup butter (unsalted and melted)
- 2 eggs
- 3 cups all-purpose flour ((or more if needed))
- 1 tablespoon instant yeast
- 1 teaspoon salt
- 1 egg (beaten for egg wash)
- 2 tablespoon sesame seeds
Before You Begin! If you make this, please leave a review and rating letting us know how you liked this recipe! This helps our business thrive & continue providing free recipes.
Instructions
- Heat your oven to 200℉ then turn it off. This is to provide a warm and draft free environment for your dough while it rises.
- In a medium size bowl whisk together the buttermilk, honey, melted butter and eggs. Set aside.
- In the bowl of your mixer add the 3 cups of flour, instant yeast, salt and mix to combine, using your dough hook attachment.
- Add the buttermilk mixture to the mixer bowl and mix for 3 to 5 minutes until the dough comes clean from the side of the bowl. If the dough is too wet or too sticky add more flour as needed, but no more than 4 cups. The dough should be soft.
- Place the dough in a large metal or glass bowl that has been lightly greased or sprayed with cooking spray, cover with a clean towel or plastic wrap and place in the prepared oven. Allow the dough to rise for about 1 hour to 1½ hours or until doubled in size.
- Spray a 9×13 inch pan with cooking spray or grease with butter. Set aside.
- Lightly flour your work surface and remove the dough from the bowl on to the work surface. Cut the dough into 12 equal pieces. Roll each piece into rounds and place into the prepared baking pan. Place a clean kitchen towel over the top or cover with plastic wrap and place back in the oven (no need to preheat the oven again) and let rise again for another 30 min or until doubled in size.
- Preheat the oven to 375℉.
- Brush the rolls with the beaten egg then sprinkle with sesame seeds.
- Place the pan in the preheated oven and bake for 15 or 20 minutes or until golden brown.
Notes
- Please not that this dough is very soft. If you find that your dough is too wet add some more flour, a little bit at a time, but you shouldn’t have to add more than 4 cups.
- If using active dry yeast, please make sure you activate it first by dissolving it in a bit of warm water. If it does not begin to froth up, do not continue with the recipe. Subtract the quantity of water used from the buttermilk. If using instant yeast as specified in the recipe, you do not need to activate it first.
- Always check the expiration date on your yeast and make sure it hasn’t expired. All your yeast products whether it’s in a jar or a package should be stamped with a “Best if Used by” date. Always make sure you check this date, even when you purchase the yeast, who knows it could have been on the shelf past its expiry date.
- To keep your yeast fresh and longer lasting, unopened yeast packages or jars should be stored in a cool or dry place such as your cupboard. However, you can also store your yeast in the fridge or freezer. If you do store it in the freezer and need to use yeast for your baking, make sure you take out the amount you need and let it sit at room temperature for at least half hour before using.
- Once your yeast package or jar has been opened, you must refrigerate the yeast or freeze it in an airtight container.
- One thing to remember about your yeast, is that it is a living organism and over time it will lose activity, even if you’ve never opened the jar or package. So if you don’t bake often, buy the smaller yeast packages rather than a big jar of yeast.
- You can store these rolls right on the counter wrapped in foil or plastic wrap for up to 5 days. You can freeze these rolls easily, just place them separately on a baking sheet and freeze before transferring to a freezer bag or airtight container. They will last for up to 6 months and can be thawed right on the counter when ready to eat.
Nutrition Information
Notice: Nutrition is auto-calculated for your convenience. Where relevant, we recommend using your own nutrition calculations.
