Cherry Cobbler
This post may contain affiliate links. Please read my disclosure policy.
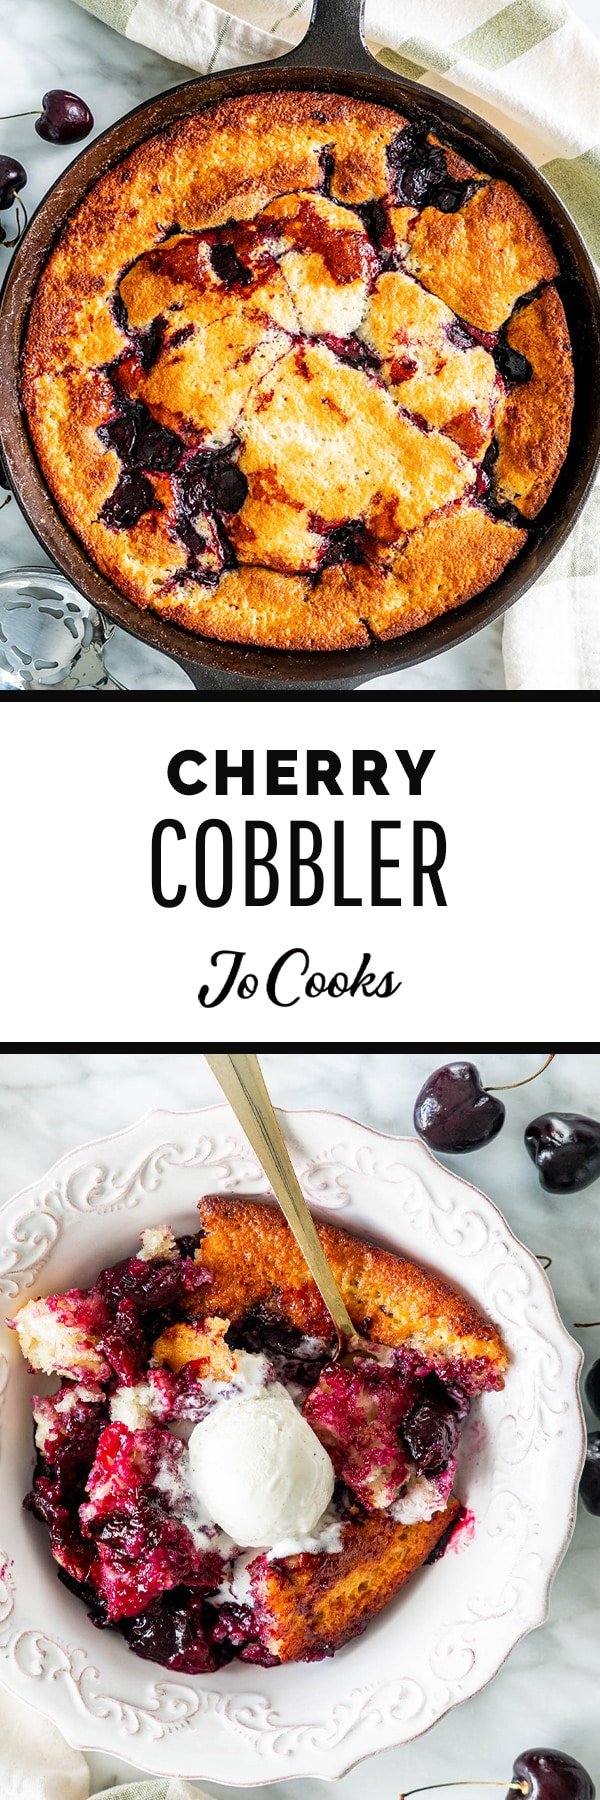
This easy homemade Cherry Cobbler recipe is made with fresh cherries and a soft rise-to-the-top topping. Served with a scoop of ice cream it’ll be at the top of your dessert go-to list!

Cherry Cobbler
When I think about sweet comfort in a bowl, a homemade cherry cobbler is at the top of my list. It’s so simple! With just a few basic staple ingredients and beautiful fresh cherries you’ll be rewarded with a dessert you can serve on a night in with the family or even to guests.
It’s such a simple dessert to make that’s perfect during the summer months when cherries are in abundance at the markets. So don’t put it off any longer. Buy a bag of cherries and let get baking.
What Is A Cobbler?
You’ve probably seen a few variations of this simple dessert and wondered, “what is a true cobbler?” The definition of cobbler really is as versatile as the difference of recipes you can find for it. It is simply a filling, typically made with fruits but savory fillings can work as well, topped with either batter, biscuits, or dumplings. With a loose definition like that you can really get creative with cobblers!
Ingredients

For the filling:
- Cherries – I used fresh cherries pitted and halved. I found that the cherries I bought were pretty large, so you don’t have to cut them if you find that yours are small enough.
- Sugar – Since this mixture is cooked down, you can use alternatives such as brown sugar, honey, or agave.
- Cornstarch – This is what will make your mixture thick and glossy. You can use 1/4 cup flour as a substitute. Tapioca flour would also be a great substitute.
- Lemon juice – I always recommend using fresh juice. The flavor is so much better!
- Salt – We are just using a very small amount of salt here to bring together all the flavors. You can leave it out if you prefer.
For the batter:
- Flour – Use all-purpose flour for this recipe.
- Sugar – Regular granulated sugar will work best.
- Baking powder – Baking soda won’t work as a substitute; make sure you are using baking powder so that our cobbler rises nicely while baking.
- Salt – This will help bring out the flavors in your cobbler. Of course, it can be left out.
- Egg – I used a large egg for this recipe.
- Milk – Any type of milk will be okay. I use 2%.
- Butter – I always use unsalted butter, especially for sweet recipes.

Can I Use Other Types of Fruit?
Definitely! You can even mix and match different types of fruit. Give these a try:
- Blueberries, blackberries, strawberries, and/or raspberries
- Peach
- Apple
- Rhubarb
What Type of Cherries Work Best for Cobbler?
Use sweeter varieties such as Lambert or Bing cherries. You’ll be looking for those nice and big dark red types! I don’t suggest using sour cherries. This dessert is all about that sweetness. You can also use frozen cherries, but keep in mind they will release more liquid.
Only go for fresh cherries for this recipe. Canned cherries will have too much liquid and have trouble standing up well in your cobbler.

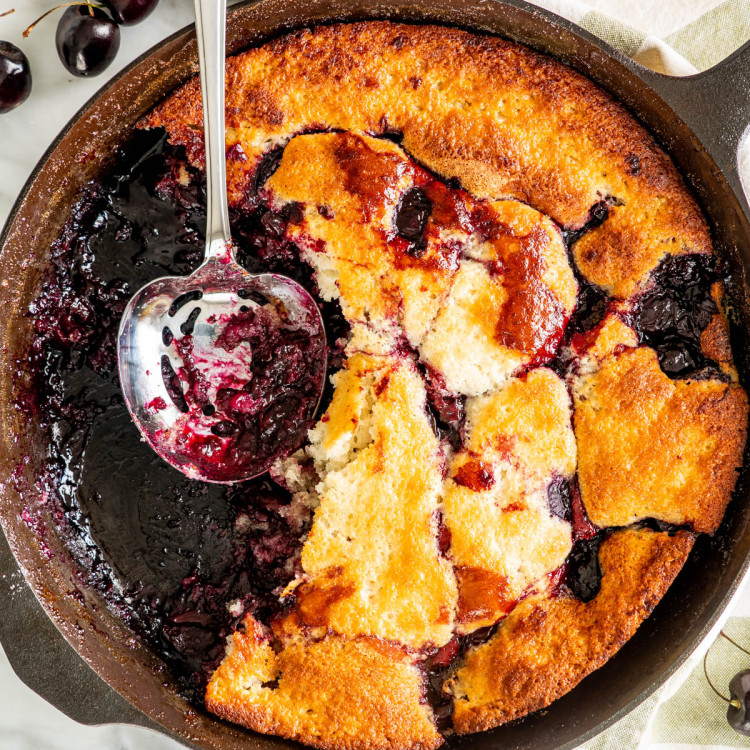
How to Make Cherry Cobbler
- Cook the cherry filling: Wash and pit your cherries. This process is much faster and easier with a cherry pitter. Slice them in half and add them to a saucepan with the rest of the filling ingredients. Cook them over medium heat for about 5 minutes, stirring occasionally.
- Make the batter: Mix the flour, sugar, baking powder, salt, egg, and milk in a bowl until smooth. Melt the butter in the skillet, remove from heat, then pour the batter in.
- Bake: Spoon the cherry mixture in an even layer over the batter and bake in a 350F oven for 40 to 45 minutes, or until golden brown.
You might be thinking right now, “Wait a second! I thought the fruit is supposed to be on the bottom?” Well, have no fear. The cherries will sink to the bottom while everything bakes. This process will give you delicious streaks of cherry filling throughout the cake layer. This will also help the cherries stick to the batter a bit better, giving you a better formed cobbler.
What Type of Skillet Should I Use?
I used a 12″ cast iron skillet. Any 12″ oven-safe skillet will work! You can get away with an 11″ or 10″ skillet, but you may need to reduce the recipe slightly so avoid spilling over the edge. If you hover your cursor over the number of servings listed in the recipe card, a sliding bar will appear so you can adjust the cherry cobbler recipe as you see fit.
If you don’t have an oven-safe skillet, you can use a regular 9×13″ cake pan.

Tips for Making the Best Cherry Cobbler Recipe
- Get yourself a cherry pitter! Cherry cobbler is best made with fresh cherries. Using a pitter will save a lot of time and hassle.
- While you can make a cobbler without cooking down the cherries first, I highly suggest taking the extra step. This will give your cherries a perfect consistency and ensure they are nice and soft. I’ve tried it both ways, and they’re much better if you cook them down a bit.
- Don’t open the oven door while everything is baking. Contain the urge! You want to make sure everything rises properly so the cherries end up on the bottom.
How to Serve
I think it should be law that cobbler must be enjoyed warm with a big scoop of vanilla ice cream. It is a match made in heaven! If you want to dress up the plate, you can dust the cobbler with powdered sugar, add a scoop of ice cream, and top it with a sprig of mint. Such a simple way to turn a traditionally messy dessert into something you can serve guests.
Leftovers
Your cobbler will last 4-5 days in the fridge. You can store it in an airtight container or right in the skillet to avoid making a big mess. If you leave it in the skillet, make sure it has cooled fully, then cover it well with either plastic wrap or foil. Reheating in the microwave works best, but you can also reheat in the oven at 325F for about 15 minutes, or until heated through.
You can also store your cobbler in the freezer for 6-8 months. If you keep it in the skillet, make sure to wrap it well with a layer of plastic wrap and a layer of foil to make sure you don’t get any freezer burn. Let it thaw overnight in the fridge before reheating. Keep in mind that the cobbler if frozen and thawed it will be a bit more watery.

Did You Love This Recipe? Try These!
- Strawberry Rhubarb Pie
- Cherry Sheet Cake
- Mini Blueberry Galettes
- Cherry Clafoutis
- Strawberry Rhubarb Bars
- Peaches and Cream Strudel
- Easy Summer Fruit Salad
- Strawberry Rhubarb Crisp
- Cherry Rolls
Before You Begin! If you make this, please leave a review and rating letting us know how you liked this recipe! This helps our business thrive & continue providing free recipes.
Cherry Cobbler
Video
Ingredients
Cherry filling
- 2 pounds cherries (fresh, pitted and cut in half)
- ½ cup sugar (granulated)
- 2 tablespoon cornstarch
- 2 tablespoon lemon juice
- ⅛ teaspoon salt
Batter
- 1 cup all purpose flour
- 1 cup sugar
- 1 tablespoon baking powder
- ¼ teaspoon salt
- 1 egg
- ¾ cup milk
- ½ cup butter (unsalted, melted, for the skillet)
Before You Begin! If you make this, please leave a review and rating letting us know how you liked this recipe! This helps our business thrive & continue providing free recipes.
Instructions
- Preheat oven to 375℉.
- Cook the cherry filling: Wash and pit your cherries. This process is much faster and easier with a cherry pitter. Slice them in half and add them to a saucepan with the rest of the filling ingredients. Cook them over medium heat for about 5 minutes, stirring occasionally.
- Make the batter: Mix the flour, sugar, baking powder, salt, egg, and milk in a bowl until smooth. Melt the butter in the skillet, remove from heat, then pour the batter in.
- Bake: Spoon the cherry mixture in an even layer over the batter and turn the oven down to 350℉. Bake for 40 to 45 minutes, or until golden brown.
Notes
Nutrition Information
Notice: Nutrition is auto-calculated for your convenience. Where relevant, we recommend using your own nutrition calculations.
