No Knead Bread
This post may contain affiliate links. Please read my disclosure policy.
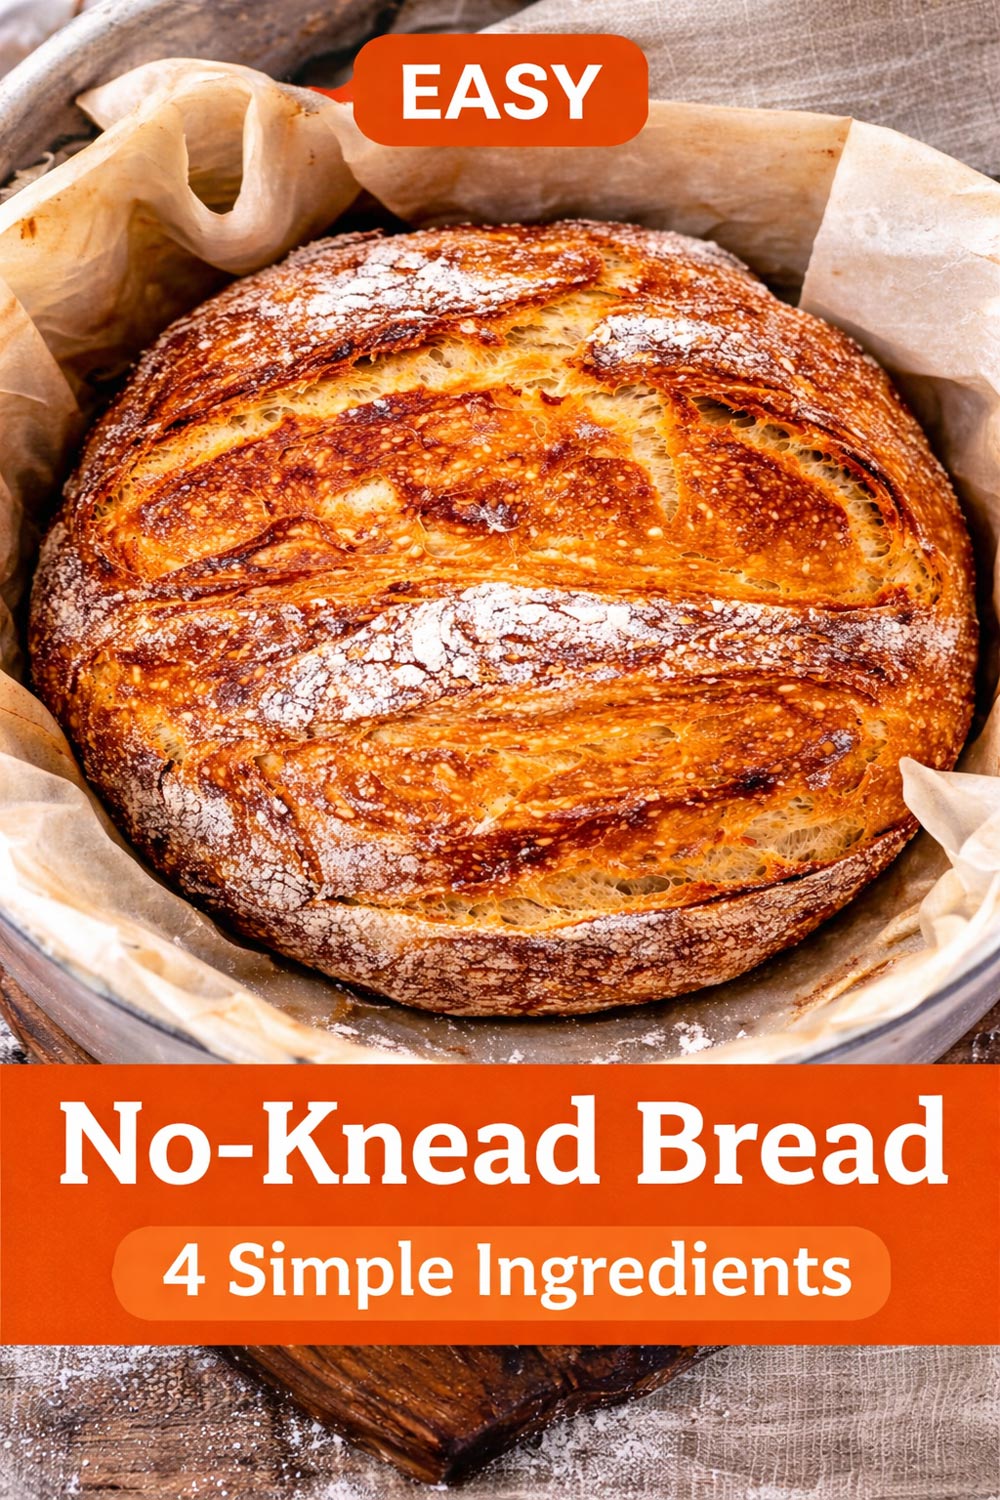
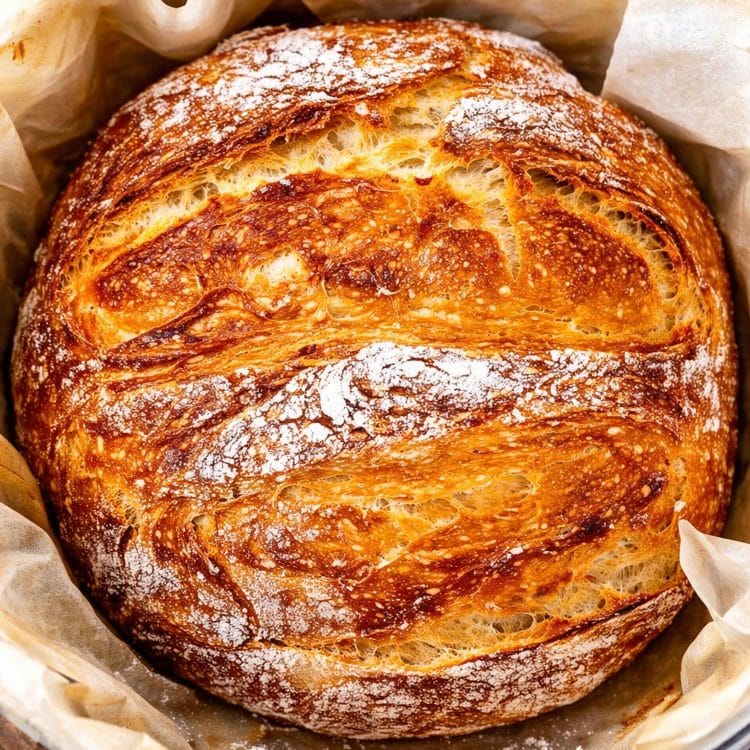
The easiest No Knead Bread! You guessed it, no kneading required! 4 simple ingredients, all baked in a Dutch Oven resulting in a bread that is simply perfection! Hands down the best bread you’ll ever eat!
The Perfect Rustic Loaf Of Bread
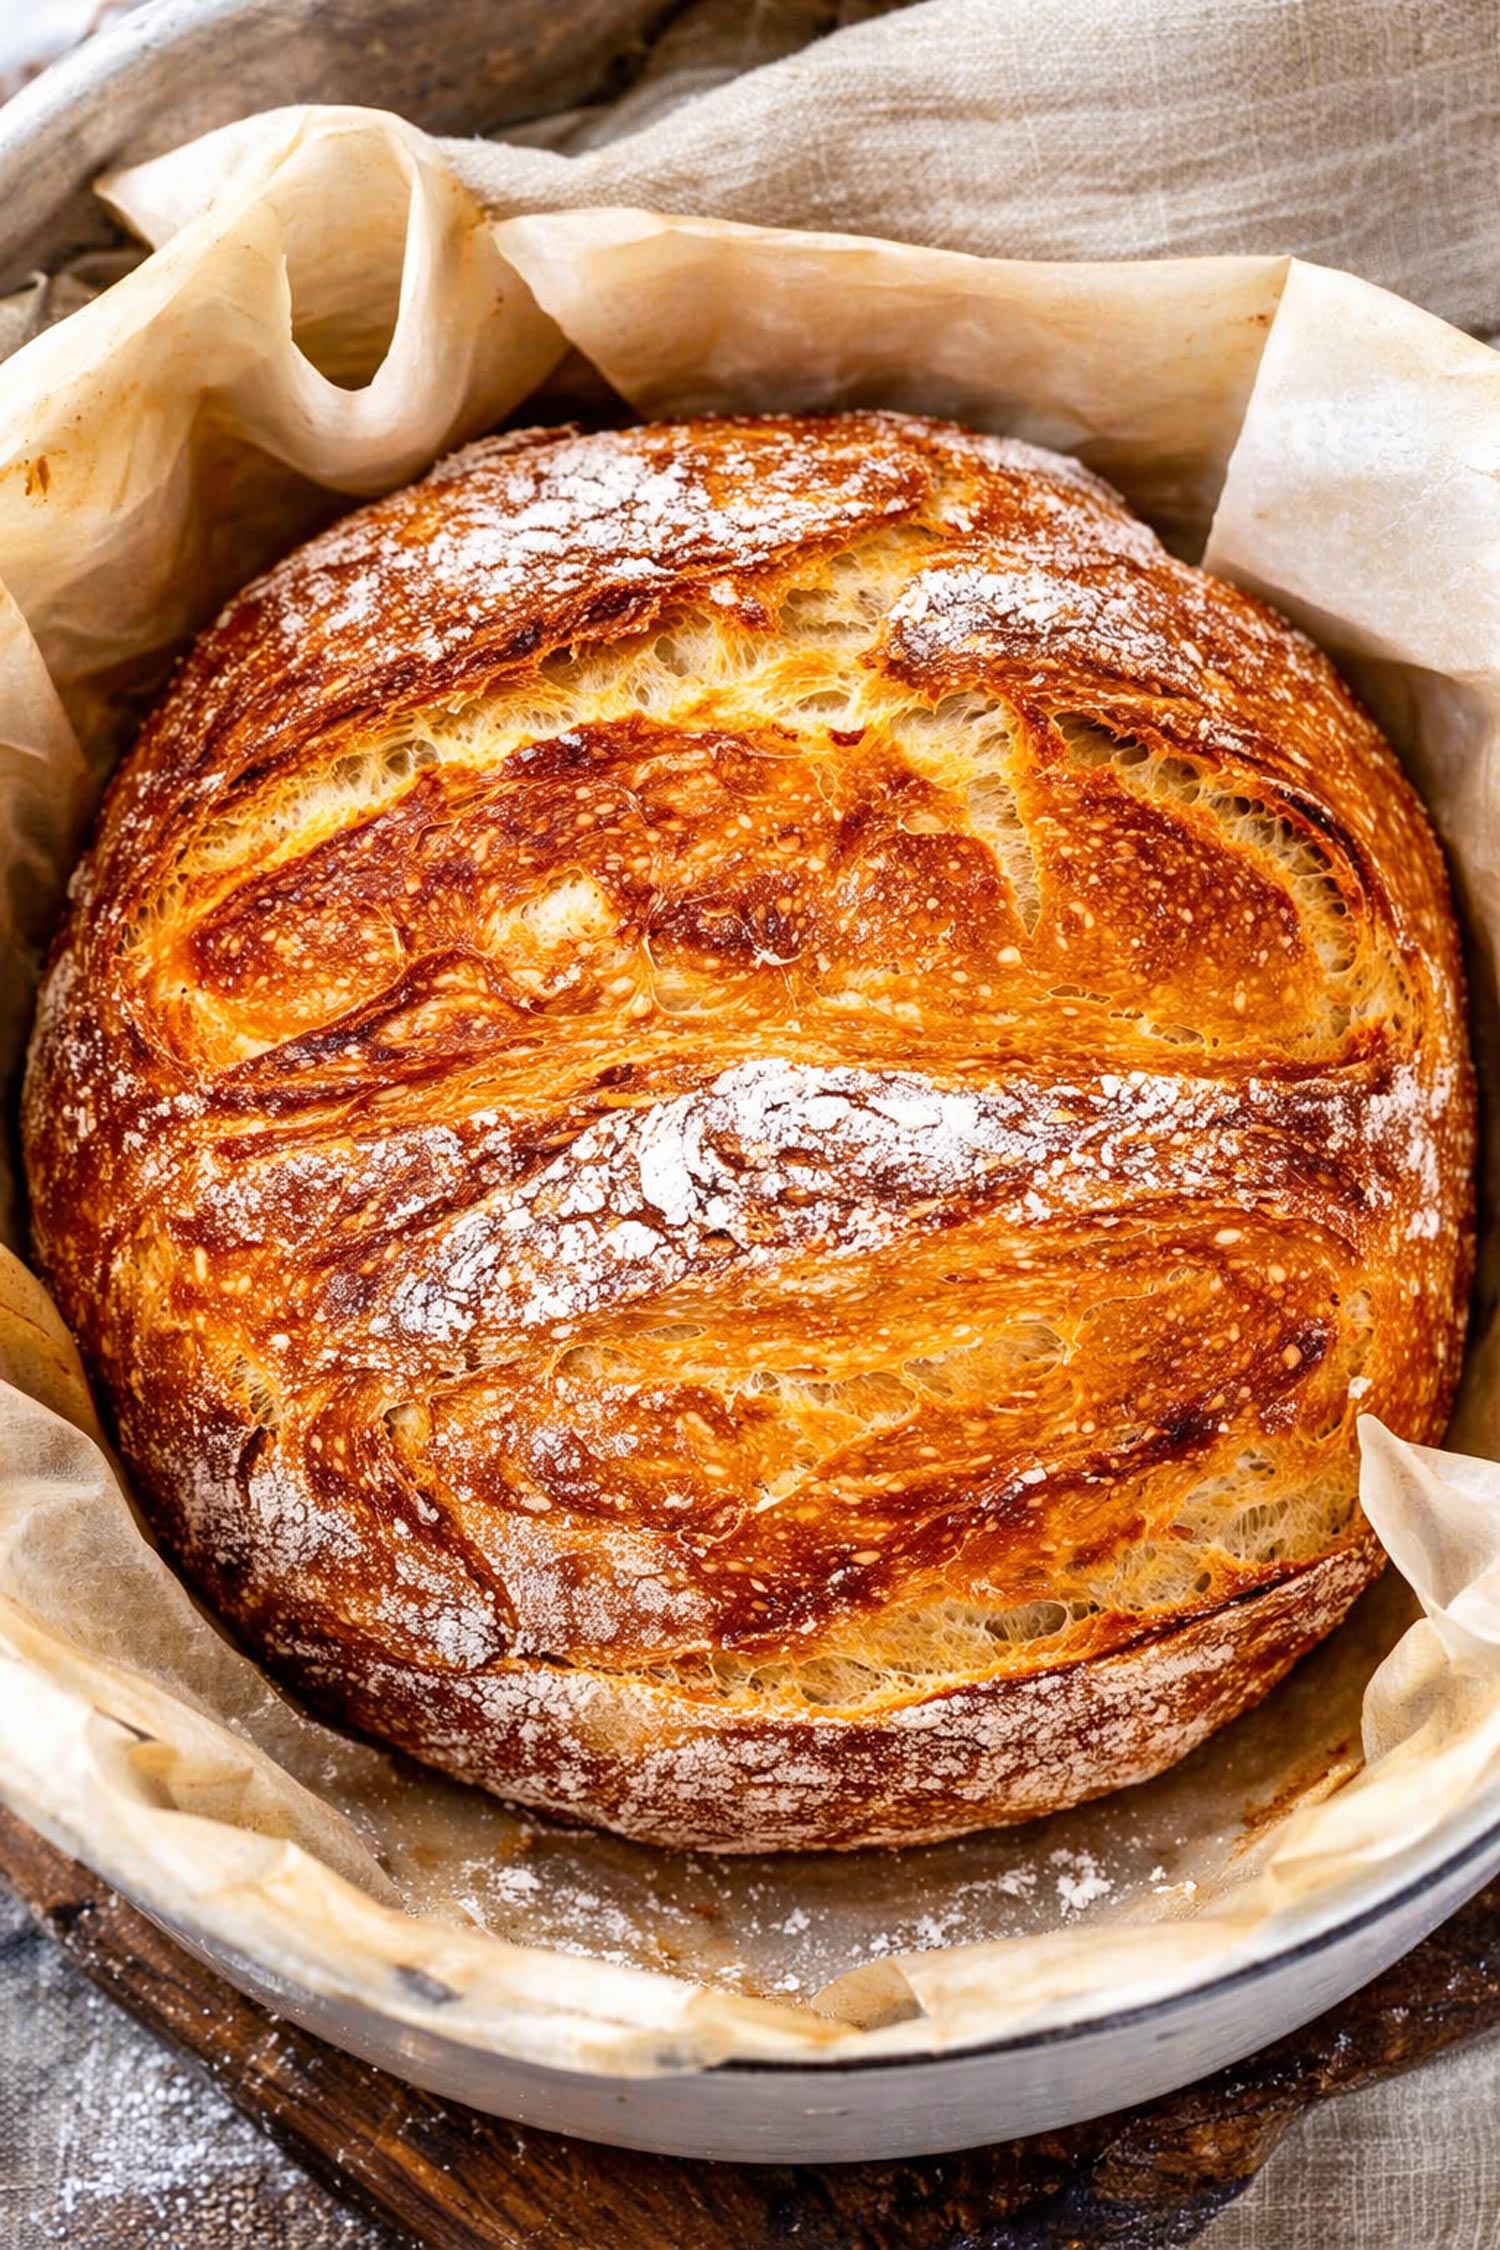
The simplicity of this no knead bread is what I love the most! The ingredients for this loaf are the same as for my famous artisan bread but the way it’s made is totally different. We’re going to achieve flavor by allowing for a slow rise and a perfect crust by baking this bread in a pot with the lid on.
The thought of baking bread in a cast iron pot with the lid is simply genius. As you bake it with the lid on, it creates steam inside the pot therefore creating a nice crust on the bread. Did I mention it’ll also fill your house with the wonderful aroma of freshly baked bread? With this fool-proof method, you end up with a perfect loaf of bread, every single time!
What Is No Knead Bread?
No Knead Bread was first published in the New York Times about 10 years ago. This bread requires no kneading which is why it’s become so popular. You basically throw everything in a bowl, mix it up, let it sit around for a few hours and let the yeast do its work, then bake it.
The slow rise is what gives the bread that great flavor, and the baking method is what gives it that incredible crispy crust. Super simple right? I promise I’m not pulling your leg, this recipe is super simple and super delicious. It’s a recipe that I make often. This bread makes its way in my kitchen at least once a month so trust me when I tell you, that this really works and it really gives you the best bread ever!

No Knead Bread Highlights
- No Kneading Required. As the name suggests, there really is no kneading required. Simply add all the ingredients to a large bowl and stir using either a wooden spoon or a plastic spatula until all the ingredients come together!
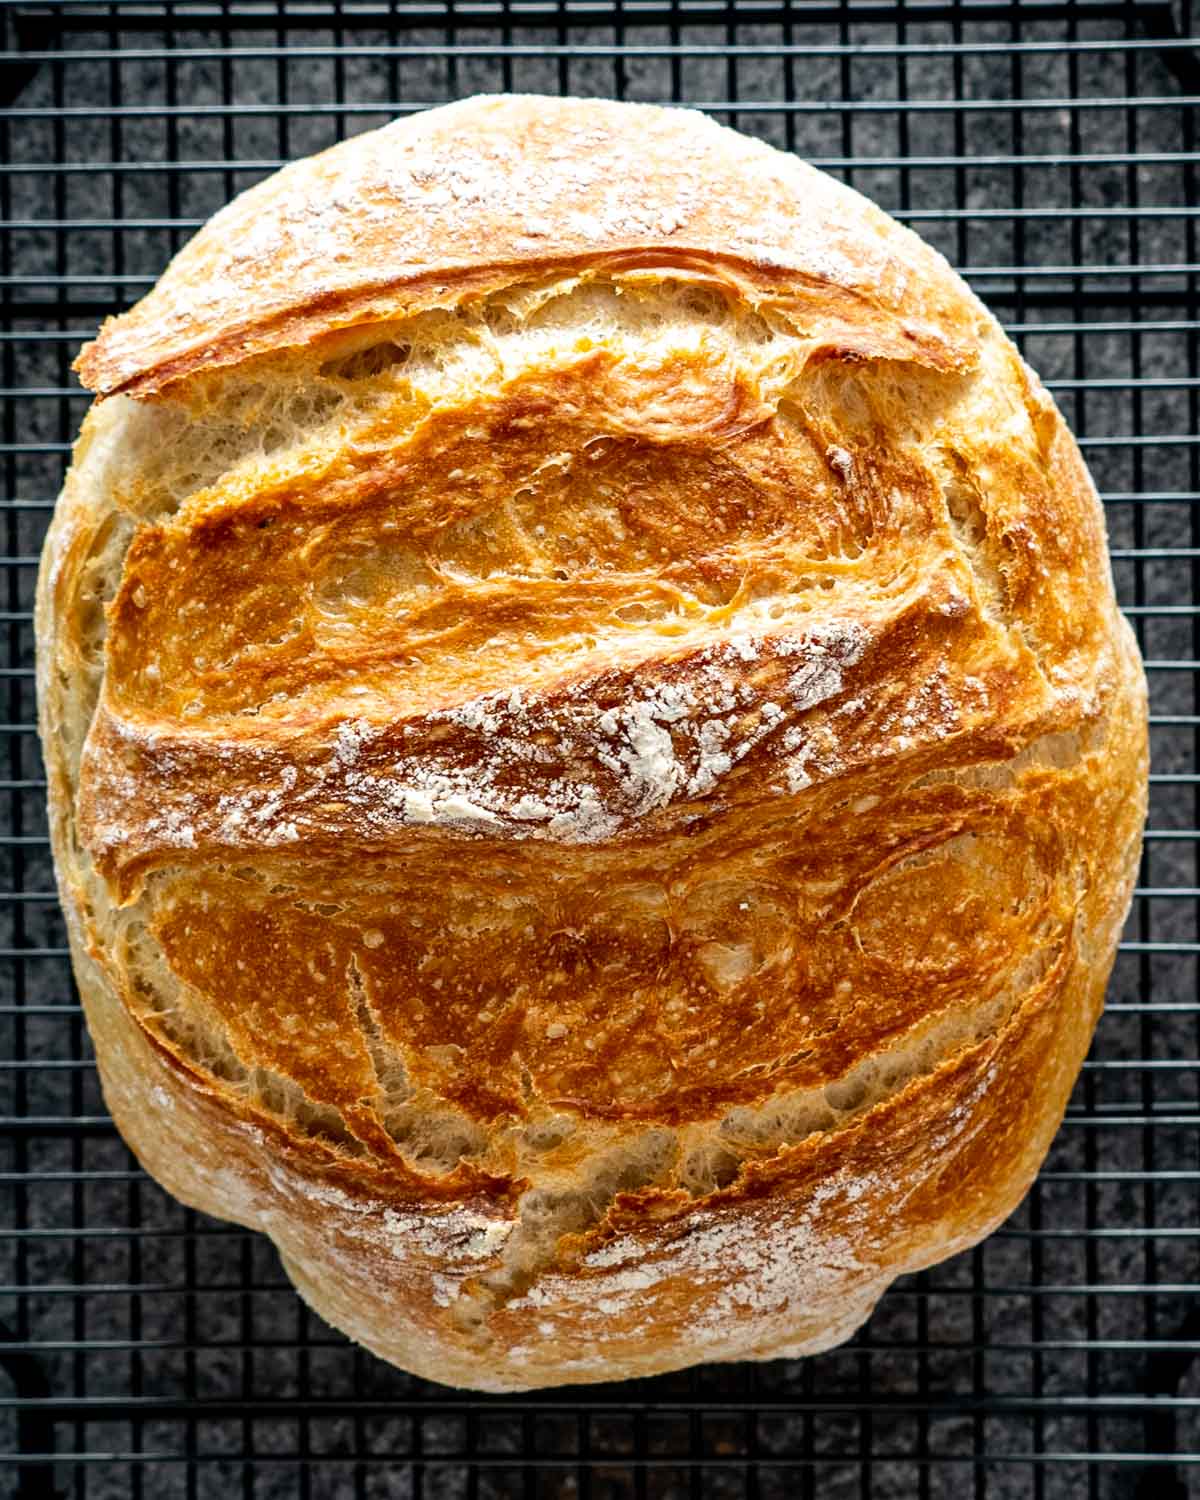
- Perfect Crust. Because you bake the bread in a cast iron pot with a lid on at first, at a high temperature, this will create steam inside the pot, giving us a great crust on the bread. For the last 15 minutes, you remove the lid and finish baking the bread. During this time the bread turns a gorgeous golden brown color, with an incredible crust.
- Effortless To Make. The no knead bread recipe couldn’t get any easier to make. The hardest part is actually waiting for the dough to slowly rise. So give it a try, what have you got to lose?
- Fool-proof Recipe. Since I first published this recipe back in 2012, I have made this recipe countless times, learning pretty much all there is to learn about making this bread. I now, can share with you everything I’ve learned, giving you all the tools and knowledge you need to make this bread perfectly the first time.
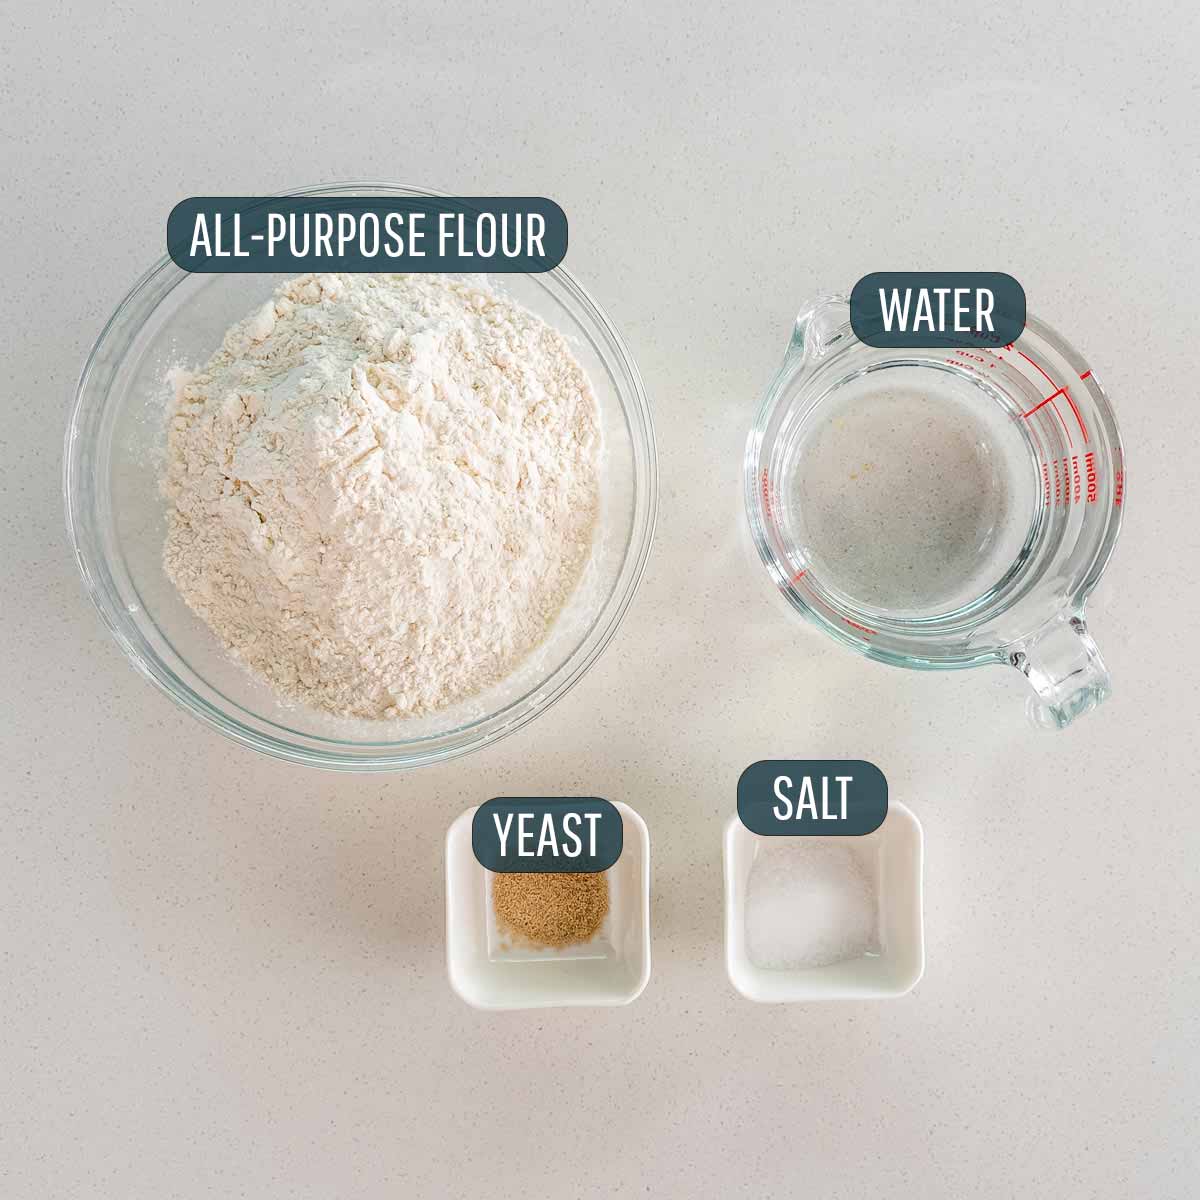
- Flour – You’ll need to use all-purpose flour for this recipe. If you’d like to use whole wheat flour, check out my recipe here for Whole Wheat No Knead Bread.
- Salt – Use as much or as little as you’d like. Just don’t skip it, without it the bread won’t have any taste at all.
- Yeast – In this recipe I call for active dry yeast which I recommend using because we really want a long and slow rise to develop our flavor. However, instant yeast can be used as well but the technique is a little bit different. If you’d like to try it, check out my recipe for Fast And Easy No Knead Bread.
- Water – Water should be warm but not hot to activate yeast, generally about 110°F to 115°F (43°C to 46°C). If the water is too hot, it can kill the yeast, and if it’s too cold, it won’t activate the yeast.
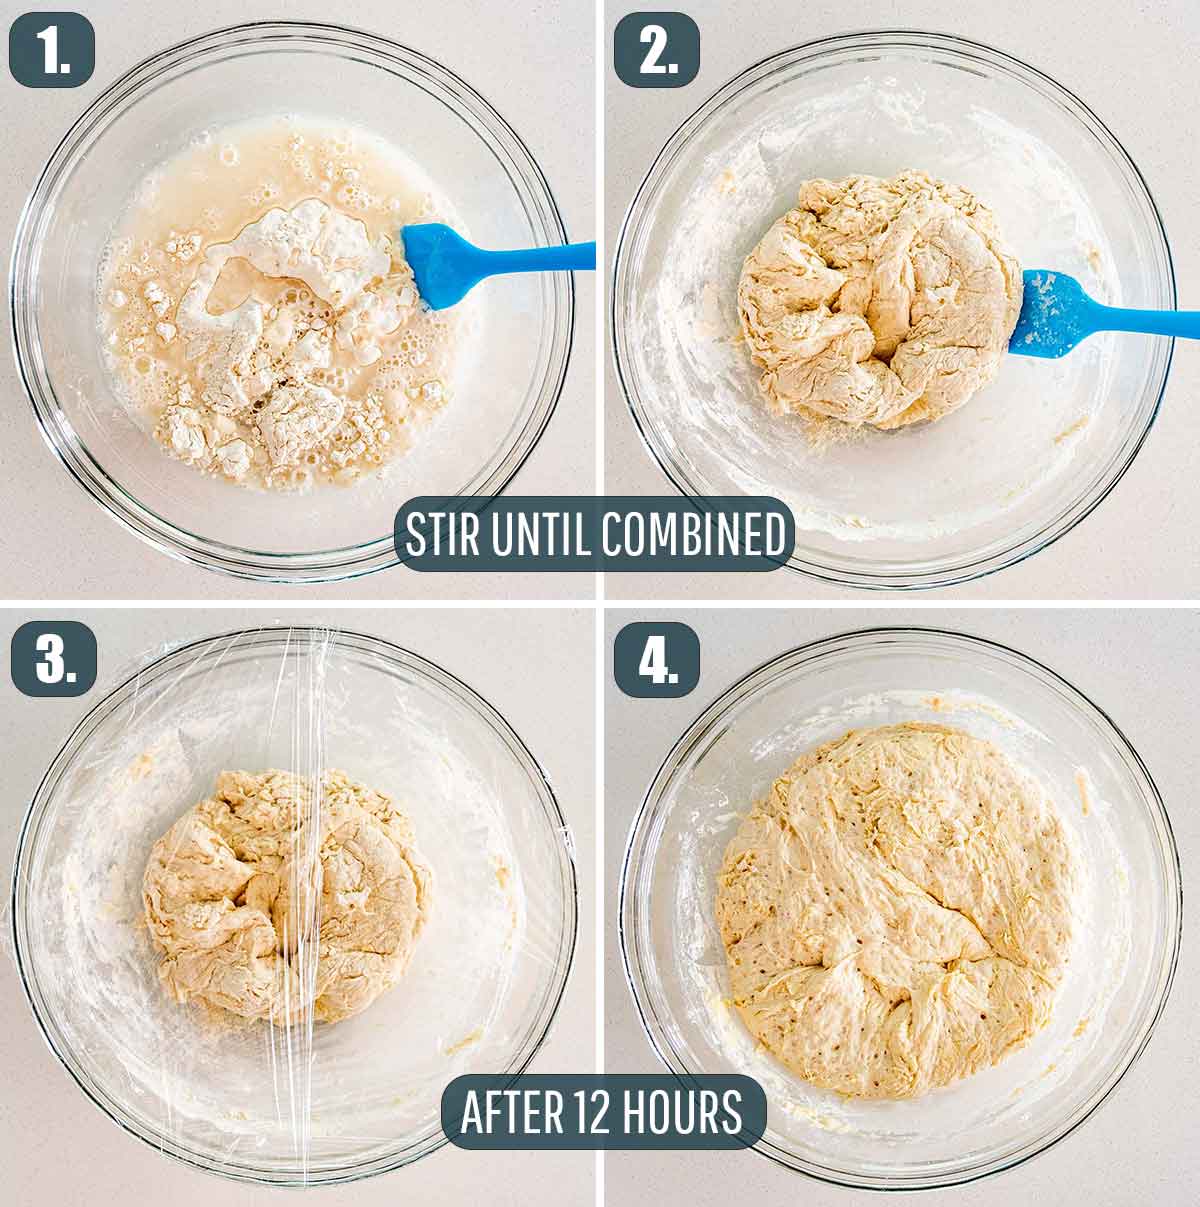
First, you’ll need a big bowl. To it, add the flour, yeast and salt and mix until combined. Pour in the water and using a wooden spoon or plastic spatula, mix everything until well incorporated. For this bread, we do not need to activate the yeast first, even though we’re using active dry yeast. The slow rising process will do the trick.
Many people have asked me if the salt will kill the yeast. While typically that’s true, in this case it won’t. We have very little yeast in this recipe, so the magic happens during the slow rising process. You can use more yeast to speed up the rising process, if you don’t want to wait overnight.
Do not be tempted to add more flour, this is quite a sticky, shaggy dough, so just trust the process and yes, the ratio of water to flour is correct. Simply cover the bowl with plastic wrap or a clean cotton towel and let it sit on your counter or inside your unheated oven for 12 to 24 hours.
You’ll notice that after 12 to 24 hours the dough has risen and may look even stickier than before. Before starting to work with your dough, preheat the oven to 450°F. At the same time, add a 4 or 5-quart Dutch oven to the oven as it’s heating and heat it as well for 30 minutes.
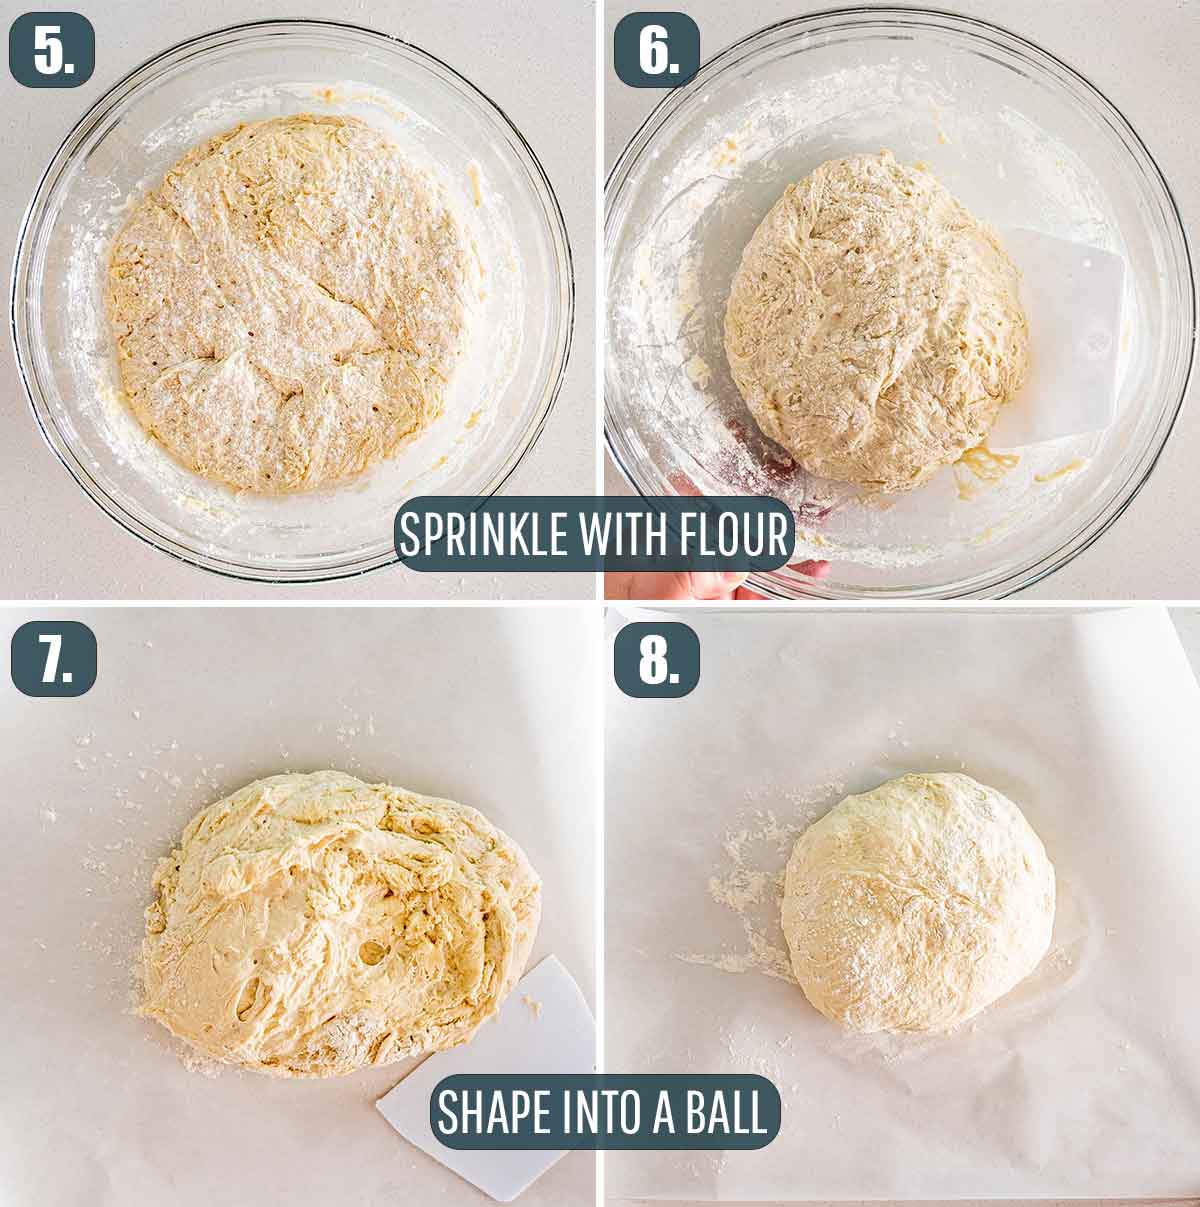
The easiest way to do this is to place a piece of parchment paper on your work surface and sprinkle a bit of flour over it. Using a bench scraper, scrape the dough from the bowl onto the parchment paper. Sprinkle a bit more flour over the dough and also flour your hands really well. Quickly shape the dough into a round ball, by folding it over on itself a couple times. Place it back on the parchment paper, seam side down and the smooth side up and let it rest until the Dutch Oven is ready.
You can also score the top of the dough with a sharp knife. This will not only make your bread look pretty, but it can also prevent it from cracking.

Use oven mitts to remove the lid from the Dutch oven. Lift the parchment paper with the dough and drop it into the pot with the parchment paper. Place the lid back on the Dutch Oven and close the oven door. Bake covered for 30 minutes, carefully remove the lid and bake for another 15 to 20 minutes until golden brown.
Remove the bread from the Dutch oven by lifting it by the parchment paper and transfer it to a wire rack to cool. Let it cool for at least 15 minutes before slicing and serving.
I have made this without parchment paper and the result was the same for me, however, some readers complained that the bread stuck to the bottom of the pot. To avoid this, always use parchment paper, NOT WAX PAPER!
How Do I Know When My Bread Is Done Baking?
Tap the bottom! Take the bread out of the Dutch oven, turn it upside down and give the bottom a firm thump with your thumb, or a knock – if it sounds hollow, it’s done. You can also use a thermometer to check the internal temperature of the bread, when it reaches between 190°F and 200°F, your bread is done.
Can I Use Bread Flour?
The difference between bread flour and all-purpose flour is that bread flour has more protein, so yes you can use it, but keep in mind that the crust will be a bit thicker. If you do use bread flour, you’ll need to increase the amount of water by 2 teaspoons per cup of flour.
When Can I Add Other Ingredients To The Bread?
You can add different herbs such as rosemary or thyme to your bread when first mixing all the ingredients together. Other ingredients you can add are dried cranberries, nuts or seeds or different cheeses.
Why Did My Bread Stick To The Pot?
To prevent your bread from sticking to the pot, make sure your pot is hot enough before adding the dough. If the pan is very hot at the bottom, you bread will instantly begin to cook, letting it rise smoothly. To prevent your bread from sticking, you can sprinkle some cornmeal on the bottom of the pot, or use parchment paper.
Why Is My Bread Chewy?
Usually your bread will be chewy when there isn’t enough gluten formation or you’re using a low-protein flour. Make sure you let your bread dough rest for at least 12 hours to give it enough time for gluten formation.
Why Is My Bread Dense?
Usually bread will be dense when there is too much flour. Keep in mind this dough will be sticky and shaggy, do not add any more flour than specified. Other factors that come into play are humidity and age of flour. Little yeast, long rise, sticky dough are keys to a good, light loaf. Also, do not over mix the dough in the beginning, there really is no kneading required.
Can I Double The Recipe?
Yes, you can! You’ll need a bigger pot though and you’ll need to bake it a little bit longer. For detailed instructions check out my Fast and Easy No Knead Bread where I doubled the recipe ingredients.
Can I Freeze The Dough?
Yes you can, the bread will still be crusty and delicious, it will just be a bit denser.
Can I Use Instant Yeast?
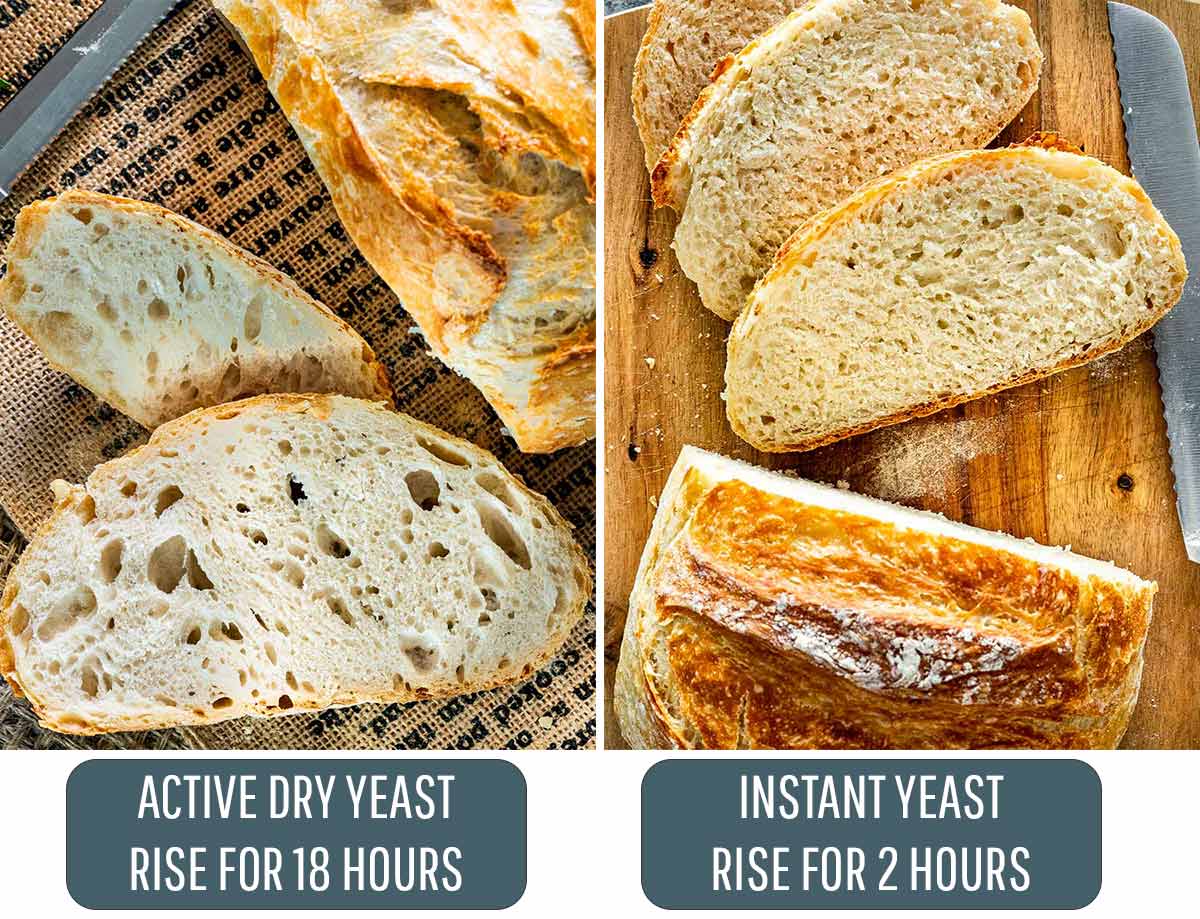
Yes, you can! There will be a slight difference in how your bread turns out as seen in the above pictures. If choosing to use instant yeast, use a bit more. For example I used 1 teaspoon of instant yeast for 3 cups of flour. You’ll also notice that the dough will rise much faster. The dough will be ready anywhere from 2 to 4 hours. If you’re in a rush this is the way to go. The difference between the two is that the bread with active dry yeast and a slower rising time, will have more holes. Taste-wise, it’s the same.
Expert Tips
- If you want to make sure your bread doesn’t stick to the pot you can sprinkle some flour or cornmeal on the bottom of the pot. Also, as mentioned above you could use parchment paper.
- Do not refrigerate the dough as it rises, yes it will be safe on your counter for 18 hours.
- Want an easy way to know if your bread is done without an instant-read thermometer? Take the bread out of the Dutch oven, turn it upside down and give the bottom a firm thump with your thumb, or a knock and if it sounds hollow it’s done.
- The slow rise at room temperature is what gives no knead bread its power. I’ve been asked many times if it needs to sit around for that long and the answer is simply, yes! The yeast needs time to perform its magic.
What’s Yeast Got To Do With It?
- Always check the expiration date on your yeast and make sure it hasn’t expired. All your yeast products whether it’s in a jar or a package should be stamped with a “Best if Used by” date. Always make sure you check this date, even when you purchase the yeast.
- To keep your yeast fresh and longer lasting, unopened yeast packages or jars should be stored in a cool or dry place such as your cupboard.
- However, you can also store your yeast in the fridge or freezer. If you do store it in the freezer and need to use yeast for your baking, make sure you take out the amount you need and let it sit at room temperature for at least half hour before using.
- Once your yeast package or jar has been opened, you must refrigerate the yeast or freeze it in an airtight container.
- One thing to remember about your yeast, is that it is a living organism and over time it will lose activity, even if you’ve never opened the jar or package. So if you don’t bake often, buy the smaller yeast packages rather than a big jar of yeast.
Make Ahead
This bread can dry out a little easily so it is best to store it tightly wrapped in plastic wrap or in an airtight container to preserve it longer. You can store it like this for about 3 to 4 days right on the counter or freeze it for up to 3 months.
Various No Knead Breads I’ve Made Over The Years

More No Knead Recipes To Try
- No Knead Skillet Bread Ready in less than 3 hours, Start to Finish!
- Fast and Easy No Knead Bread in less than 3 hours, Start to Finish!
- No Knead Dutch Oven Whole Wheat Bread
- Sunflower and Flax Seeds Whole Wheat Cast Iron Bread
- No Knead Hot Cross Buns
- No Knead Cinnamon Rolls
Before You Begin! If you make this, please leave a review and rating letting us know how you liked this recipe! This helps our business thrive & continue providing free recipes.
No Knead Bread
Video
Ingredients
- 3 cups all-purpose flour
- 1 ¾ teaspoon salt
- ½ teaspoon active dry yeast
- 1 ½ cups water (110°F to 115°F (43°C to 46°C))
Before You Begin! If you make this, please leave a review and rating letting us know how you liked this recipe! This helps our business thrive & continue providing free recipes.
Instructions
- Form the dough: In a big bowl mix the flour, salt and yeast together. Pour water into the bowl and using a spatula or a wooden spoon mix it until well incorporated. You do not need to activate the yeast before, even though we're using active dry yeast. The slow rising process will do the trick.
- Allow it to rise: Cover the bowl with plastic wrap and let it sit on your counter or inside your unheated oven for 12 to 24 hours.
- Preheat your oven: Preheat oven to 450°F. Add your cast iron pot to the oven as it's heating and heat it as well until it's at 450°F. Usually when the oven is done preheating your pot should be hot enough as well. Remove the pot from the oven and remove the lid from it. Use oven mitts, as to not burn yourself.
- Shape the dough: Flour your hands really well and also sprinkle a bit of flour over the dough. With your floured hands gently remove the dough from the bowl and roughly shape it into a ball. Sprinkle some extra flour directly into the bottom of the pot. Take the ball of dough and drop it into the pot. Cover the pot with the lid and place it back in the oven. Alternatively, you can also place the ball of dough onto a piece of parchment paper, then lift the parchment paper and drop it in the pot, with parchment paper and all. This could also ensure that your bread doesn't stick at all to the bottom of the pot. I have found that if I use parchment paper, the bread doesn't brown so much on the sides, but otherwise it's still crusty and delicious.
- Finish the bread: Bake for 30 minutes with the lid on, after which remove the lid and bake for another 15 to 20 minutes until golden brown. Remove the bread from the pot, it should fall out easily. Let cool completely before slicing into it and serving.
Notes
- I used a small 3.5 qt Dutch oven. A small Dutch oven is better here so that the bread rises upwards, whereas if you were to use a big Dutch oven the bread would spread out over the entire surface of the pot.
- If the dough mixture is too dry, add a bit more water, the dough should be sticky, as seen in the video.
- To add other ingredients to the bread such as dried fruit, seeds, herbs or cheeses, add them in step 1 when mixing everything together.
- Why is my bread chewy: Usually your bread will be chewy when there isn’t enough gluten formation or you’re using a low-protein flour. Make sure you let your bread dough rest for at least 12 hours to give it enough time for gluten formation.
- Why is my bread dense: Usually bread will be too dense when there is too much flour. Keep in mind this dough will be pretty sticky, do not add more flour than specified. Other factors that come into play are humidity and age of flour. Little yeast, long rise, sticky dough are keys to a good, light loaf.
- I don’t have a Dutch oven, what can I use instead: If you don’t have a Dutch Oven, a covered metal pot would work as well, just make sure it can stand up to 450°F heat. A 4 quart Calphalon soup pot with lid would work as well. If your pot doesn’t have a lid, you can cover the pot with heavy-duty aluminum foil, just make sure you seal the pot well.
- How do I know when my bread is done baking: Tap the bottom! Take the bread out of the Dutch oven, turn it upside down and give the bottom a firm thump with your thumb, or a knock and if it sounds hollow it’s done. If using an instant thermometer, the internal temperature should be around 200°F.
- Nutrition: Nutritional information assumes 10 slices per bread and is per slice.
Nutrition Information
Notice: Nutrition is auto-calculated for your convenience. Where relevant, we recommend using your own nutrition calculations.
This recipe was originally shared Nov 10, 2012.
