No Knead Skillet Bread
This post may contain affiliate links. Please read my disclosure policy.
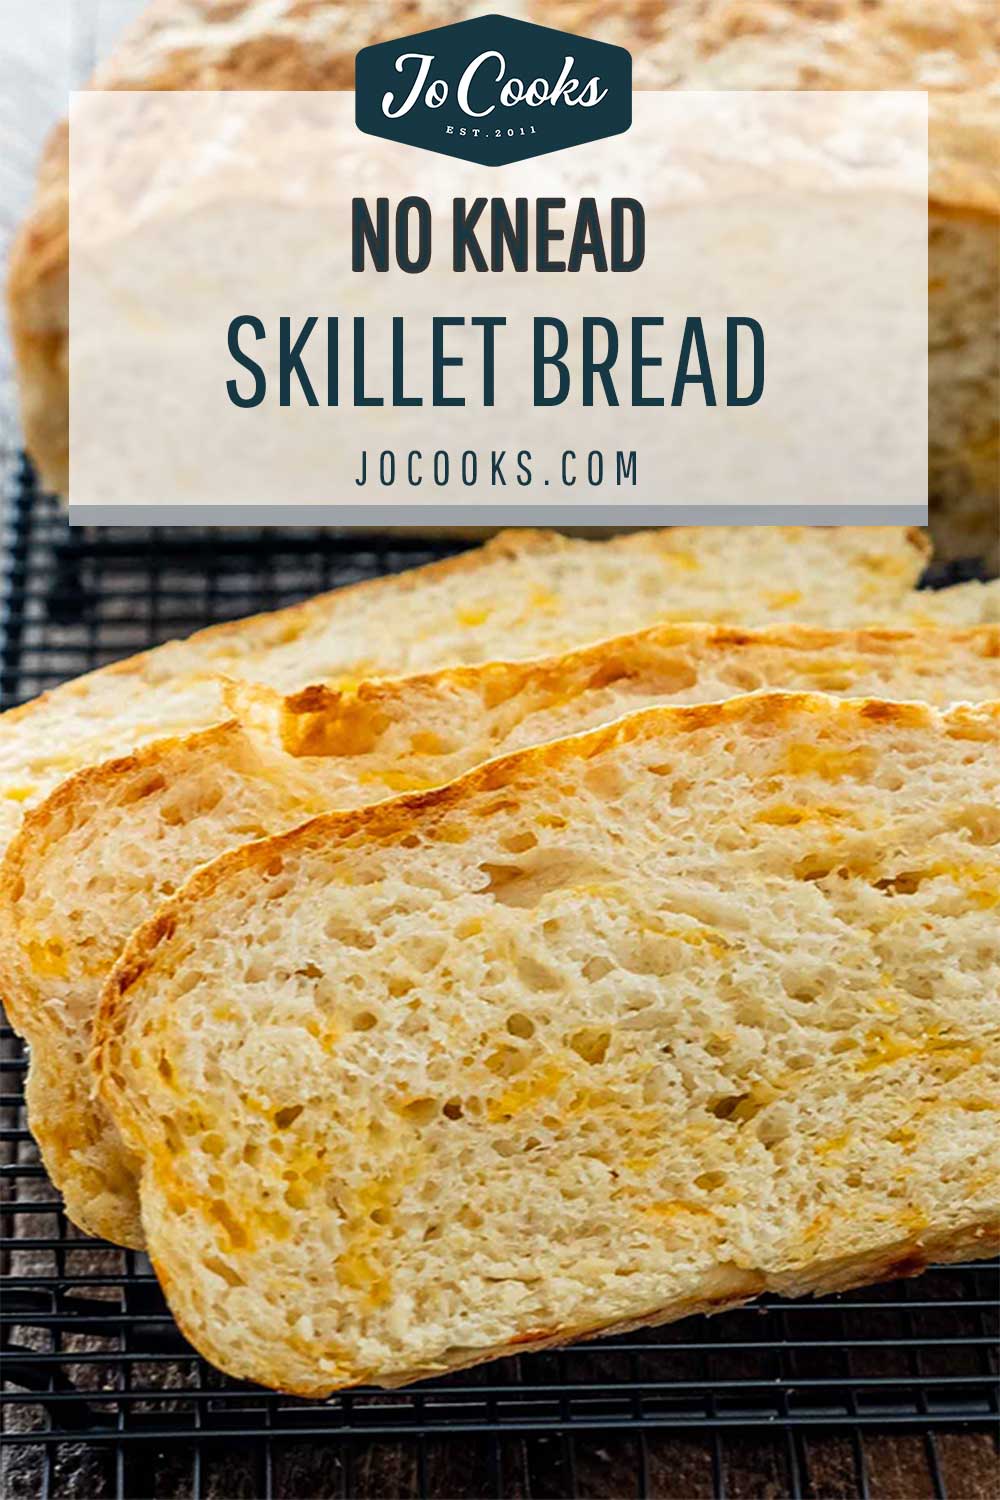
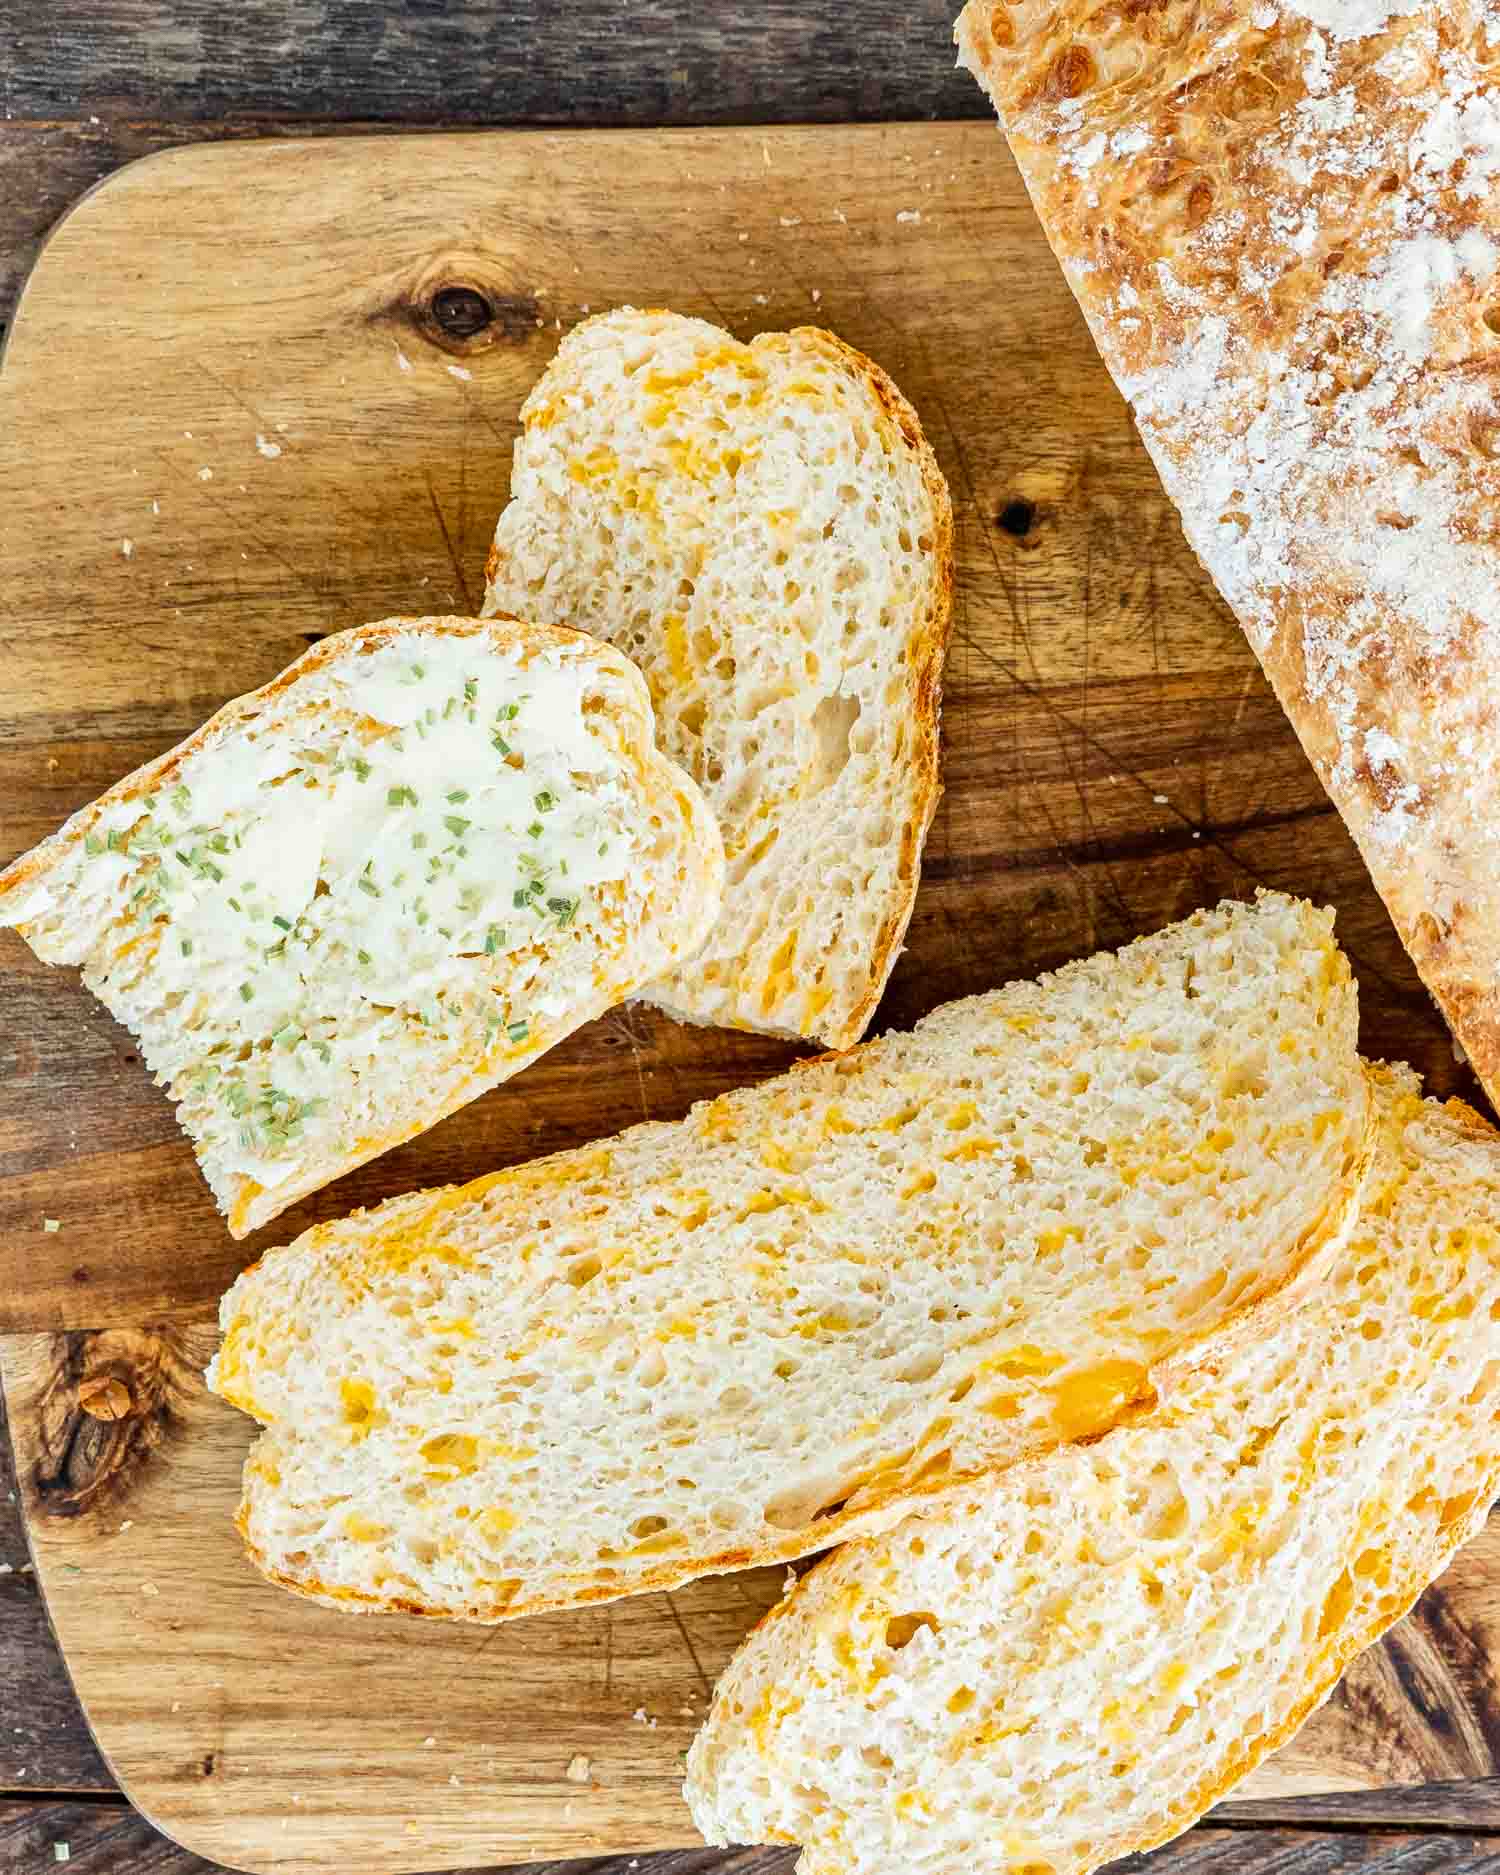
This No Knead Skillet Bread is pillowy soft with a delicious crust, and only 5 ingredients. You’ll never want to go back to store-bought bread after you try this simple recipe!
Easy No Knead Skillet Bread Recipe
You don’t need to be a professional baker to make incredible homemade bread! Especially with a recipe so simple like this one. Better yet, you don’t even need to tire yourself out kneading the dough. Using ingredients that you already have hanging out in your kitchen, I’m here to show you how to make the easiest recipe for bread that’s so soft and delicious.
In the past couple weeks, I’ve been experimenting some more with no knead bread, since my no knead bread is one of the most popular recipes on the blog. Many of the questions I get is in regards to different pots and pans you can use. While Dutch Ovens can be quite pricey, you can get a good cast iron skillet for a very decent price.
Why You’ll Love This No Knead Skillet Bread
- Perfect for Beginners! This easy 5-ingredient cast iron bread requires no kneading! It’s one of my most foolproof bread recipes as well as one of my favorites.
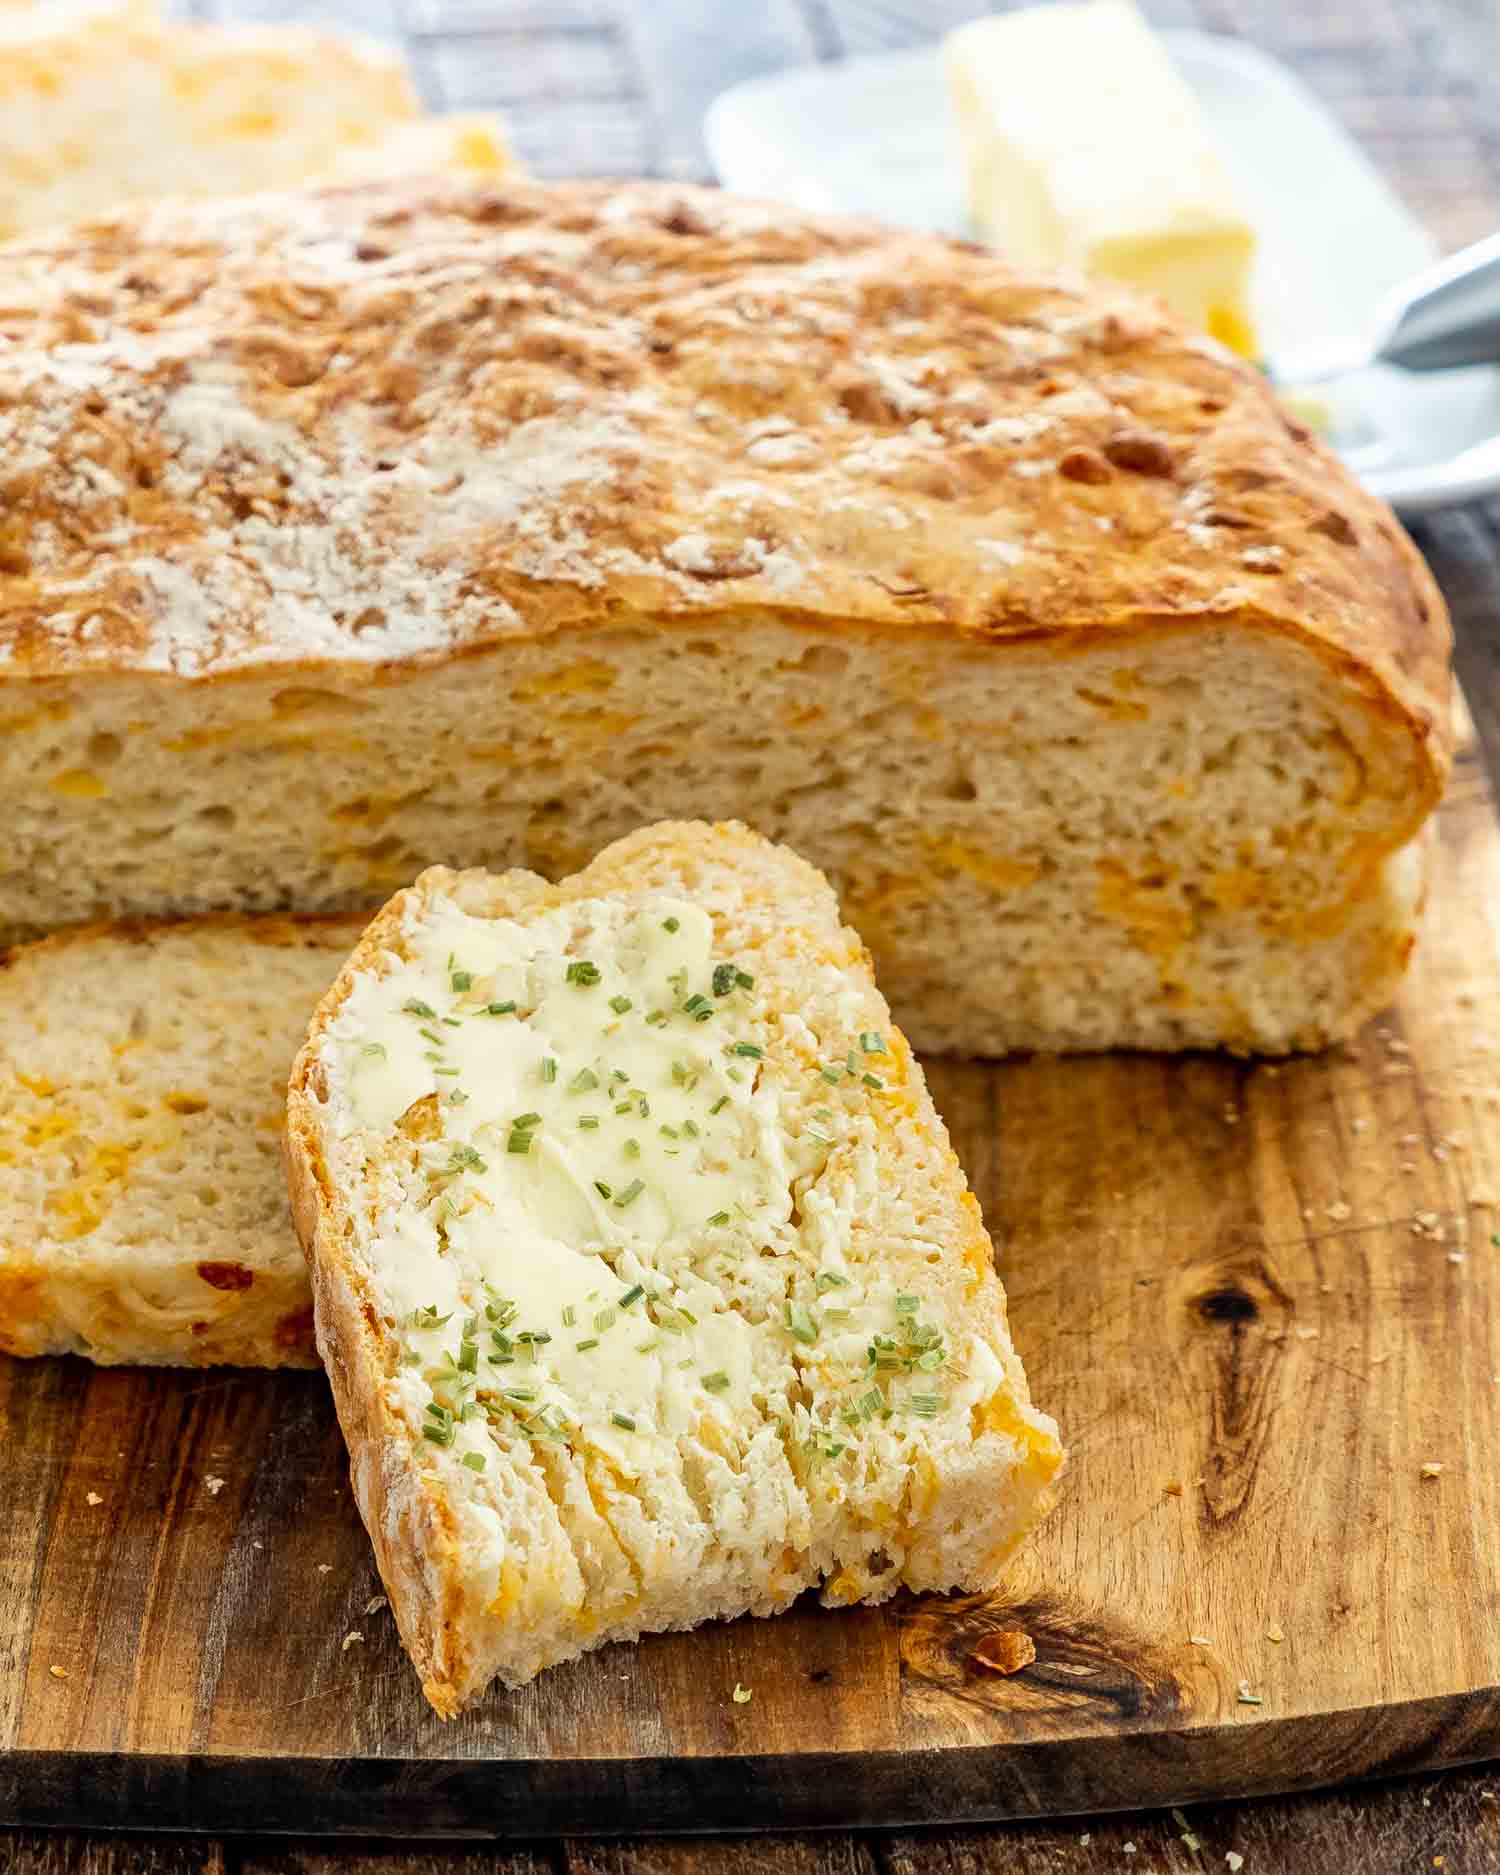
- Soft and Cheesy! The delicious cheesy bread comes out of the oven perfectly golden brown with a super soft texture on the inside and a crispy crust on top.
- Family Favorite! Perfect with a bowl of chili along with dinner or dipped in some marinara sauce as a snack, everyone loves cheese bread.
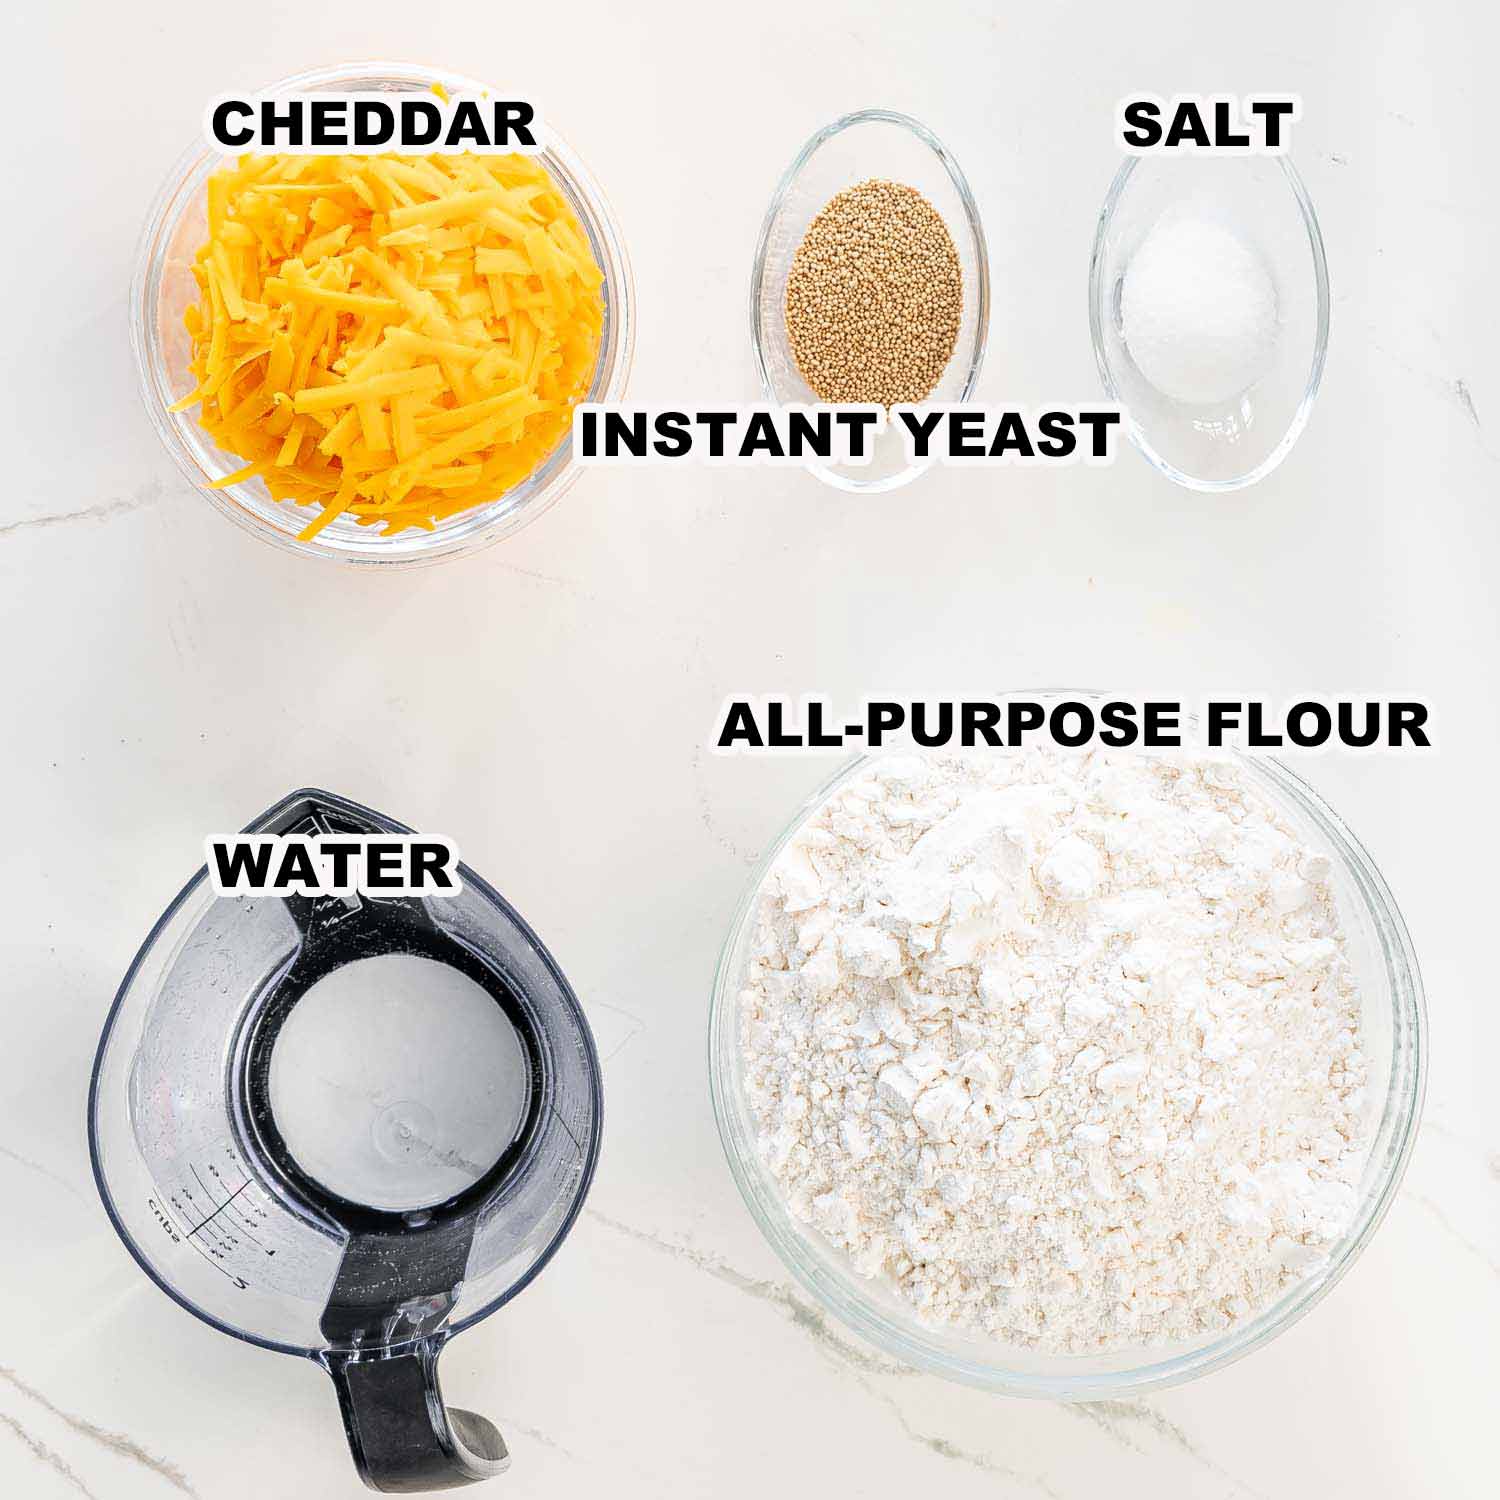
- Water – You need warm water to activate the yeast and bring the dough together. Water should be warm but not hot to activate yeast, generally about 110°F to 115°F (43°C to 46°C). If the water is too hot, it can kill the yeast, and if it’s too cold, it won’t activate the yeast.
- Instant Yeast – The leavening agent used to give the bread rise. Make sure to check the expiration date on your yeast before starting the dough.
- Flour – Basic all purpose flour is all you need to make this recipe.
- Salt – A touch of salt is important to help develop the flavor of the dough.
- Cheddar Cheese – Makes the bread nice and cheesy. Any type of cheddar can be used.
This bread recipe requires just a few basic ingredients and so little effort! Just make sure to activate your yeast properly and it is sure to come out perfect!
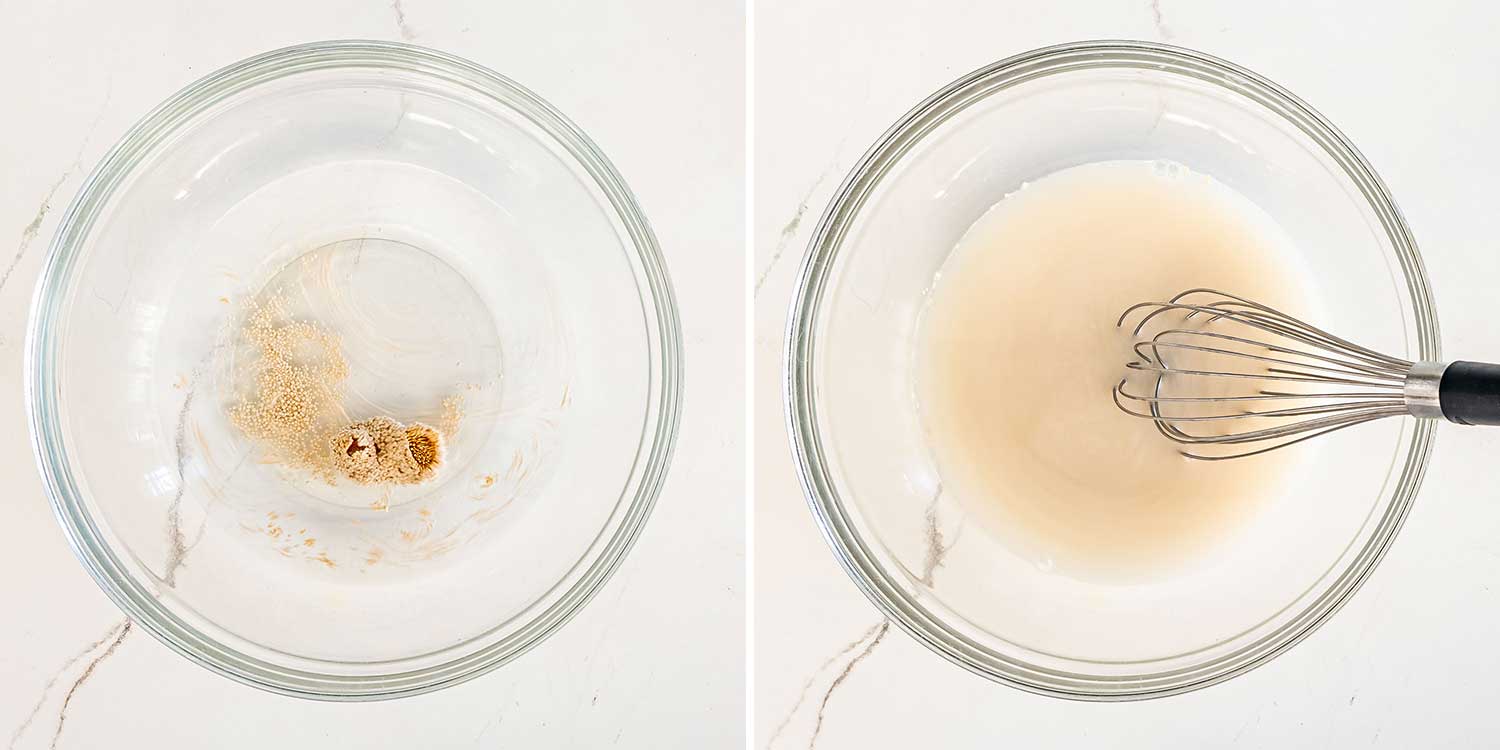
To begin, let’s prepare the yeast! To do this, mix the yeast together well with the warm water in a large bowl. For the best results, it’s important that the water is within the (95°F-105°F) temperature range, so you may even want to test it with a digital cooking thermometer. Then set it aside for now.
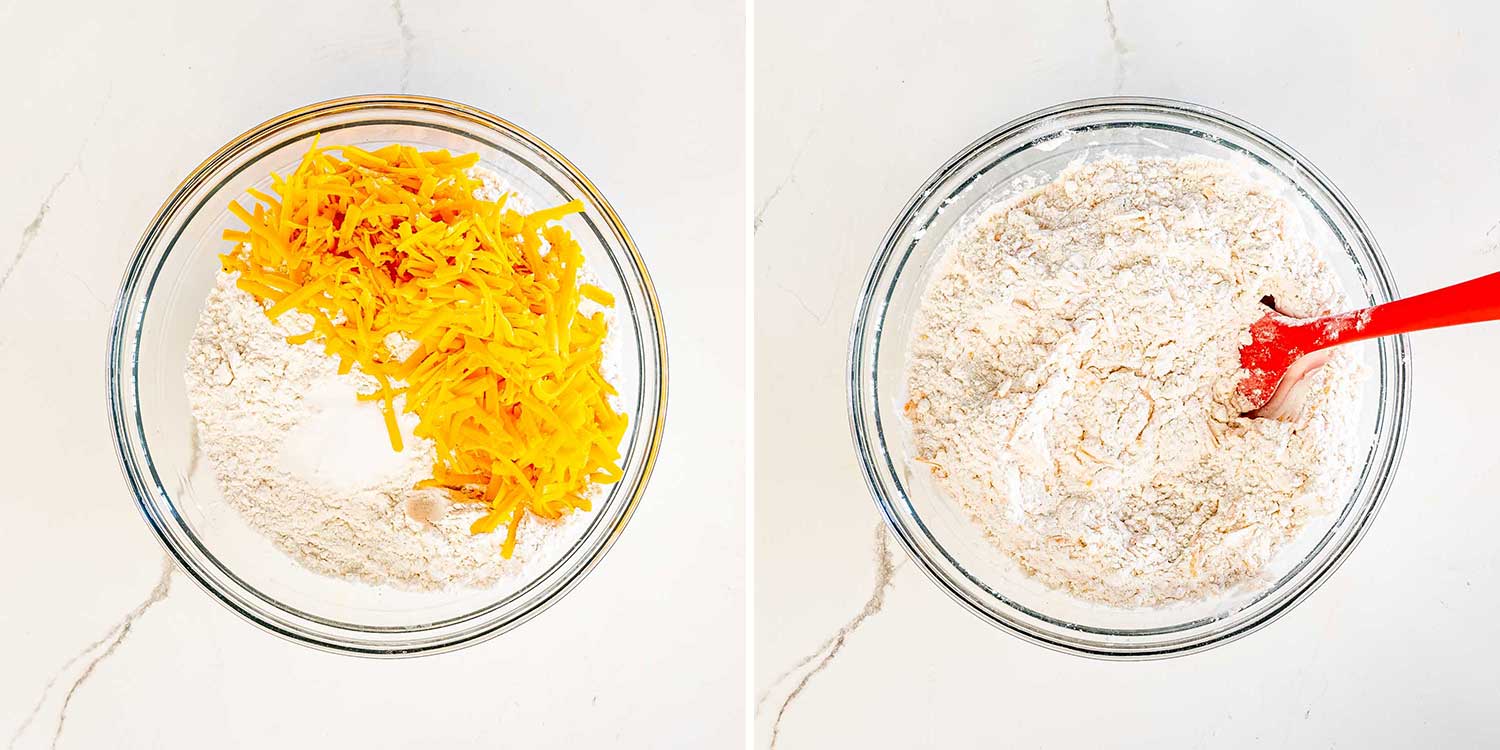
It’s time to start making the dough. Stir the flour, salt, and shredded cheddar cheese together in a separate medium bowl until it’s well combined.
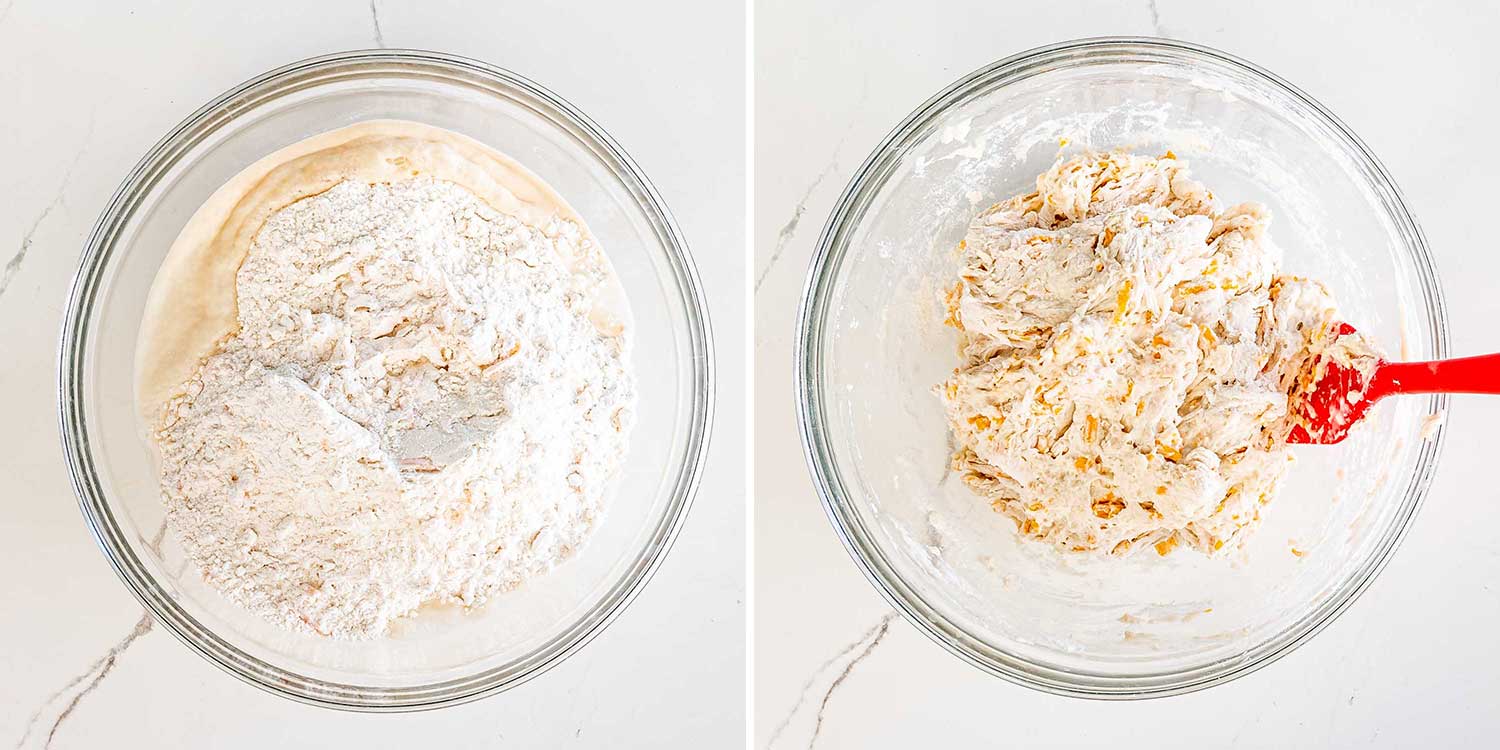
Then add the flour mixture to the yeast in the large bowl. Now mix everything together with a wooden spoon until a sticky dough forms.

Now, the dough needs time to rise. Cover the bowl with a kitchen towel. Then set it in a warm environment for about an hour. The dough is done rising when it has doubled in size.
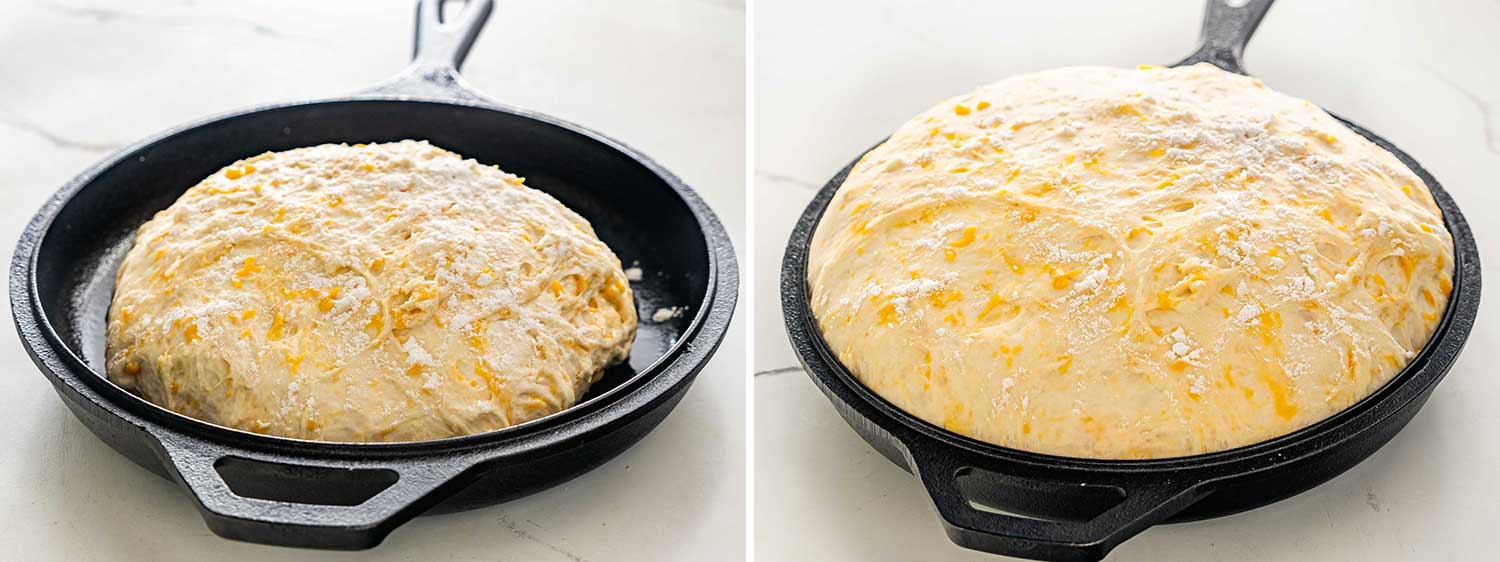
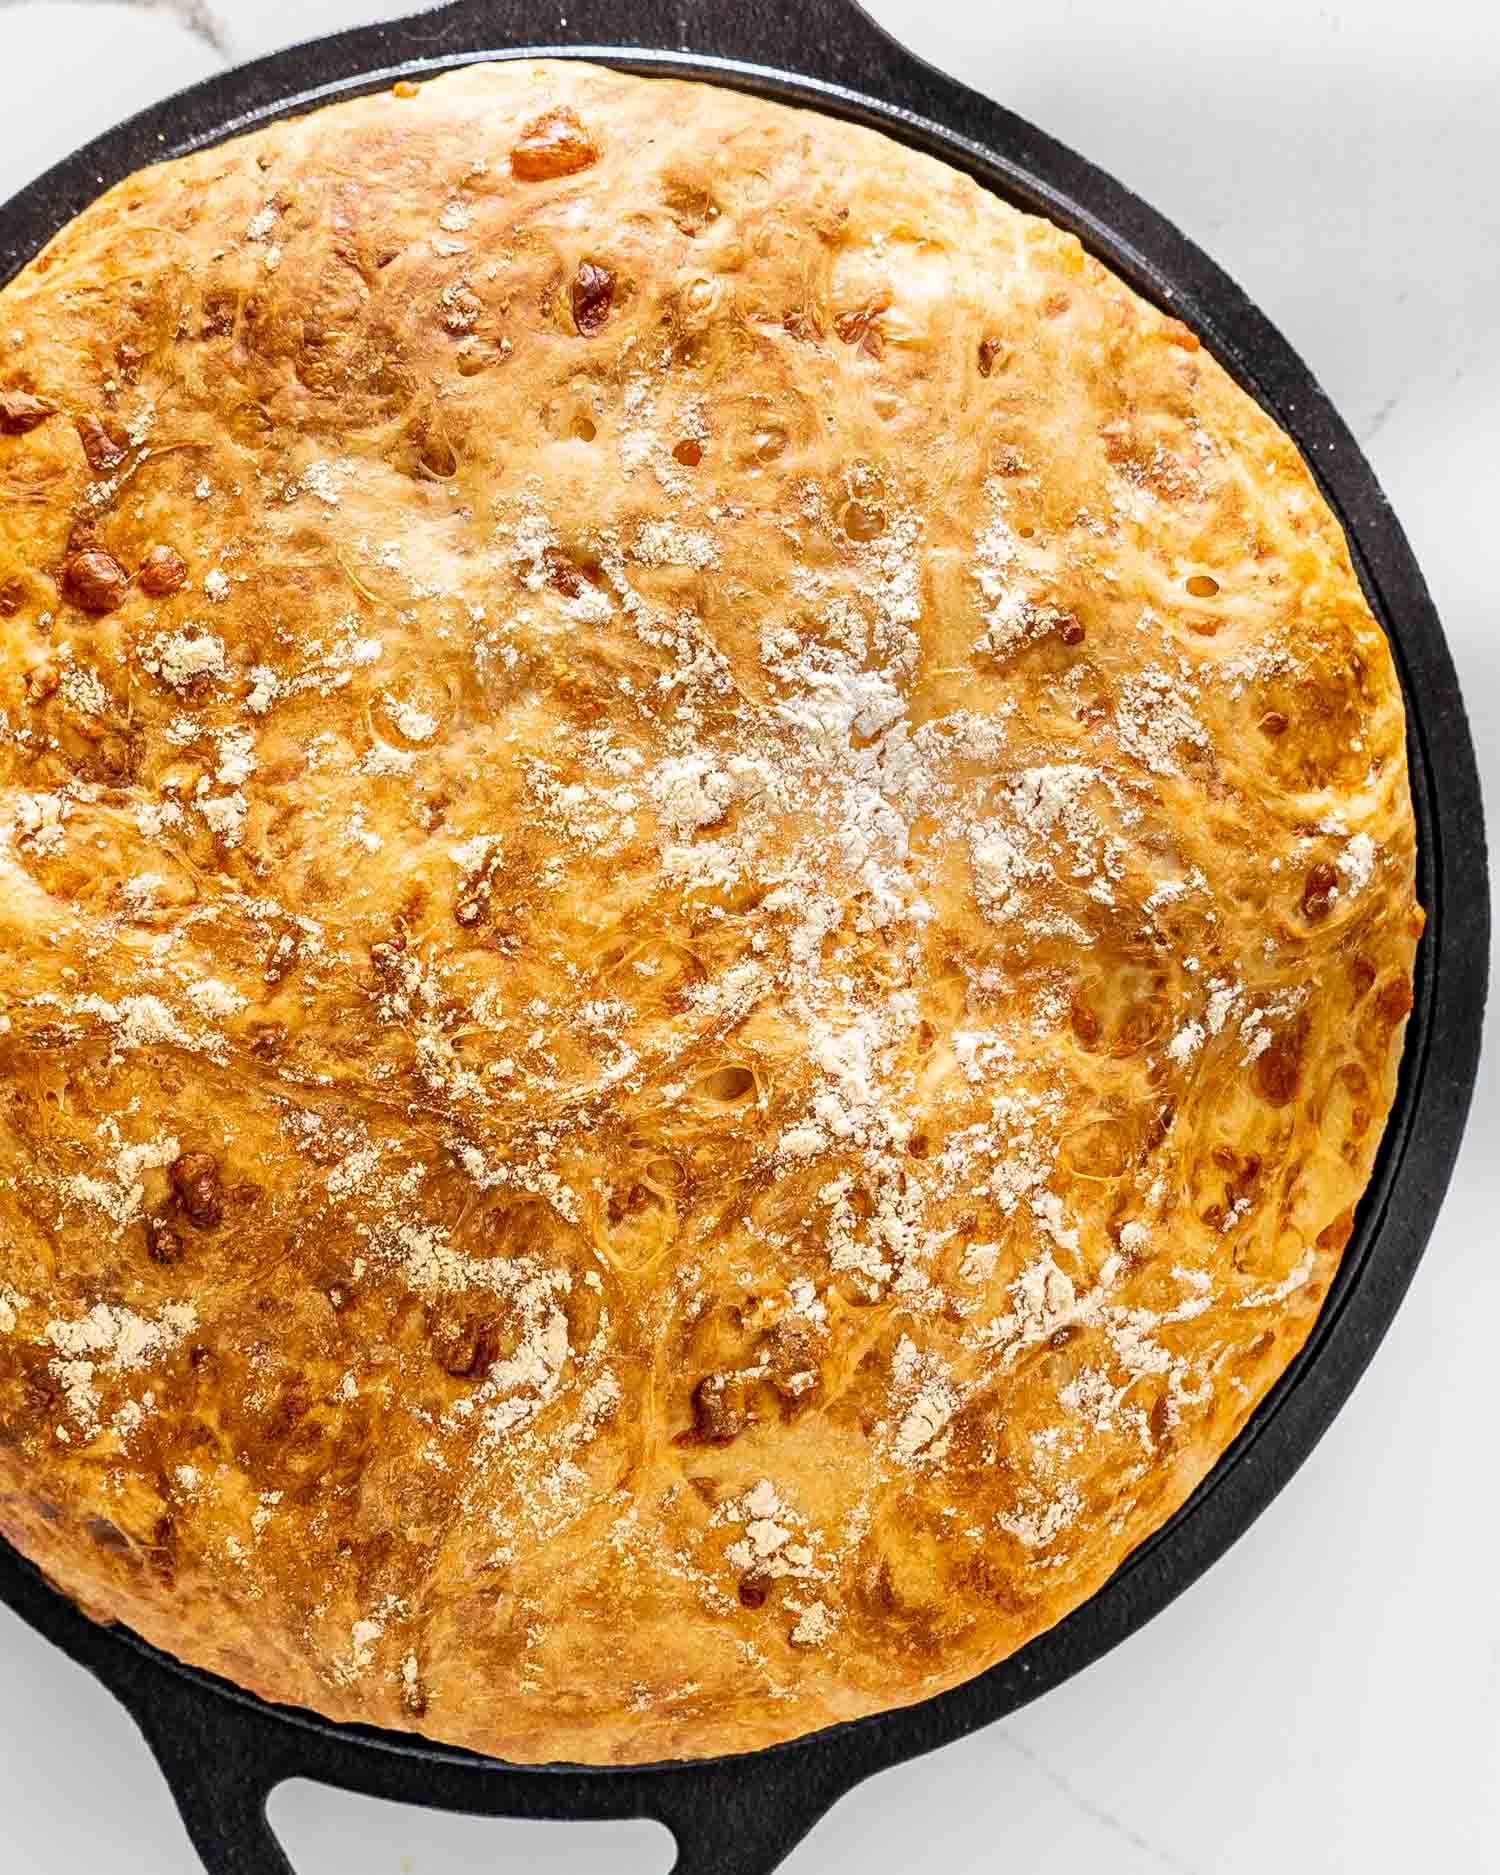
Once the dough has doubled in size, generously grease a 8″ to 10” cast iron skillet with olive oil or vegetable oil. Now, use a spatula to loosen the dough from the sides of the bowl and transfer it to the skillet. Then use the spatula to evenly distribute the dough in the skillet. Finally, cover the bread once more with a kitchen towel and set it aside for another 30 minutes to rise again.
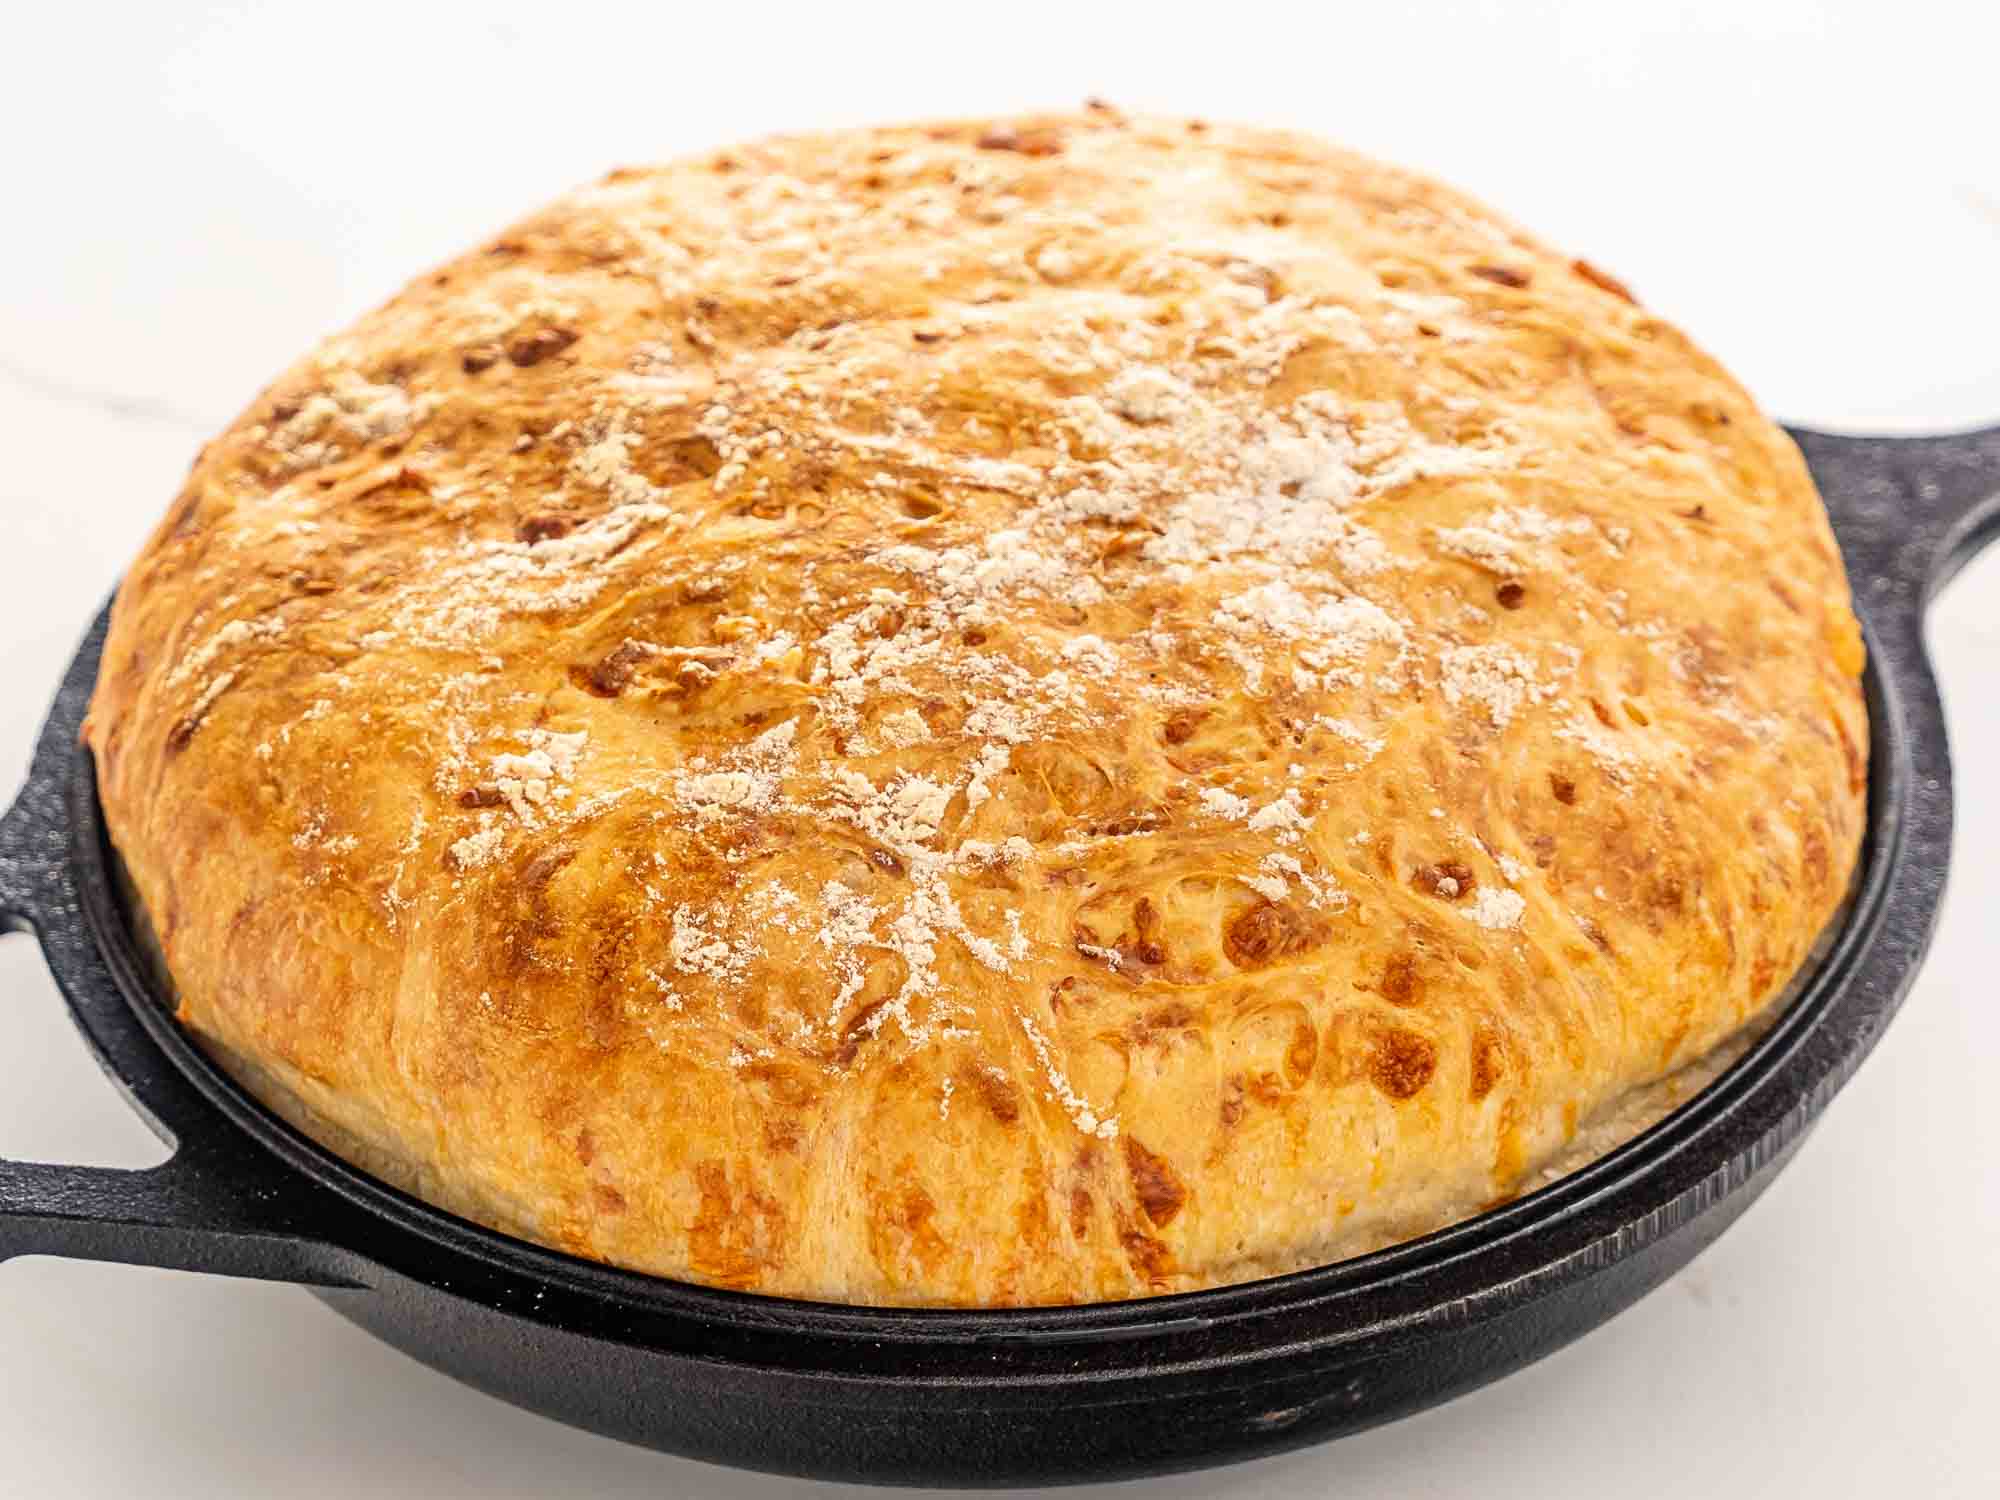
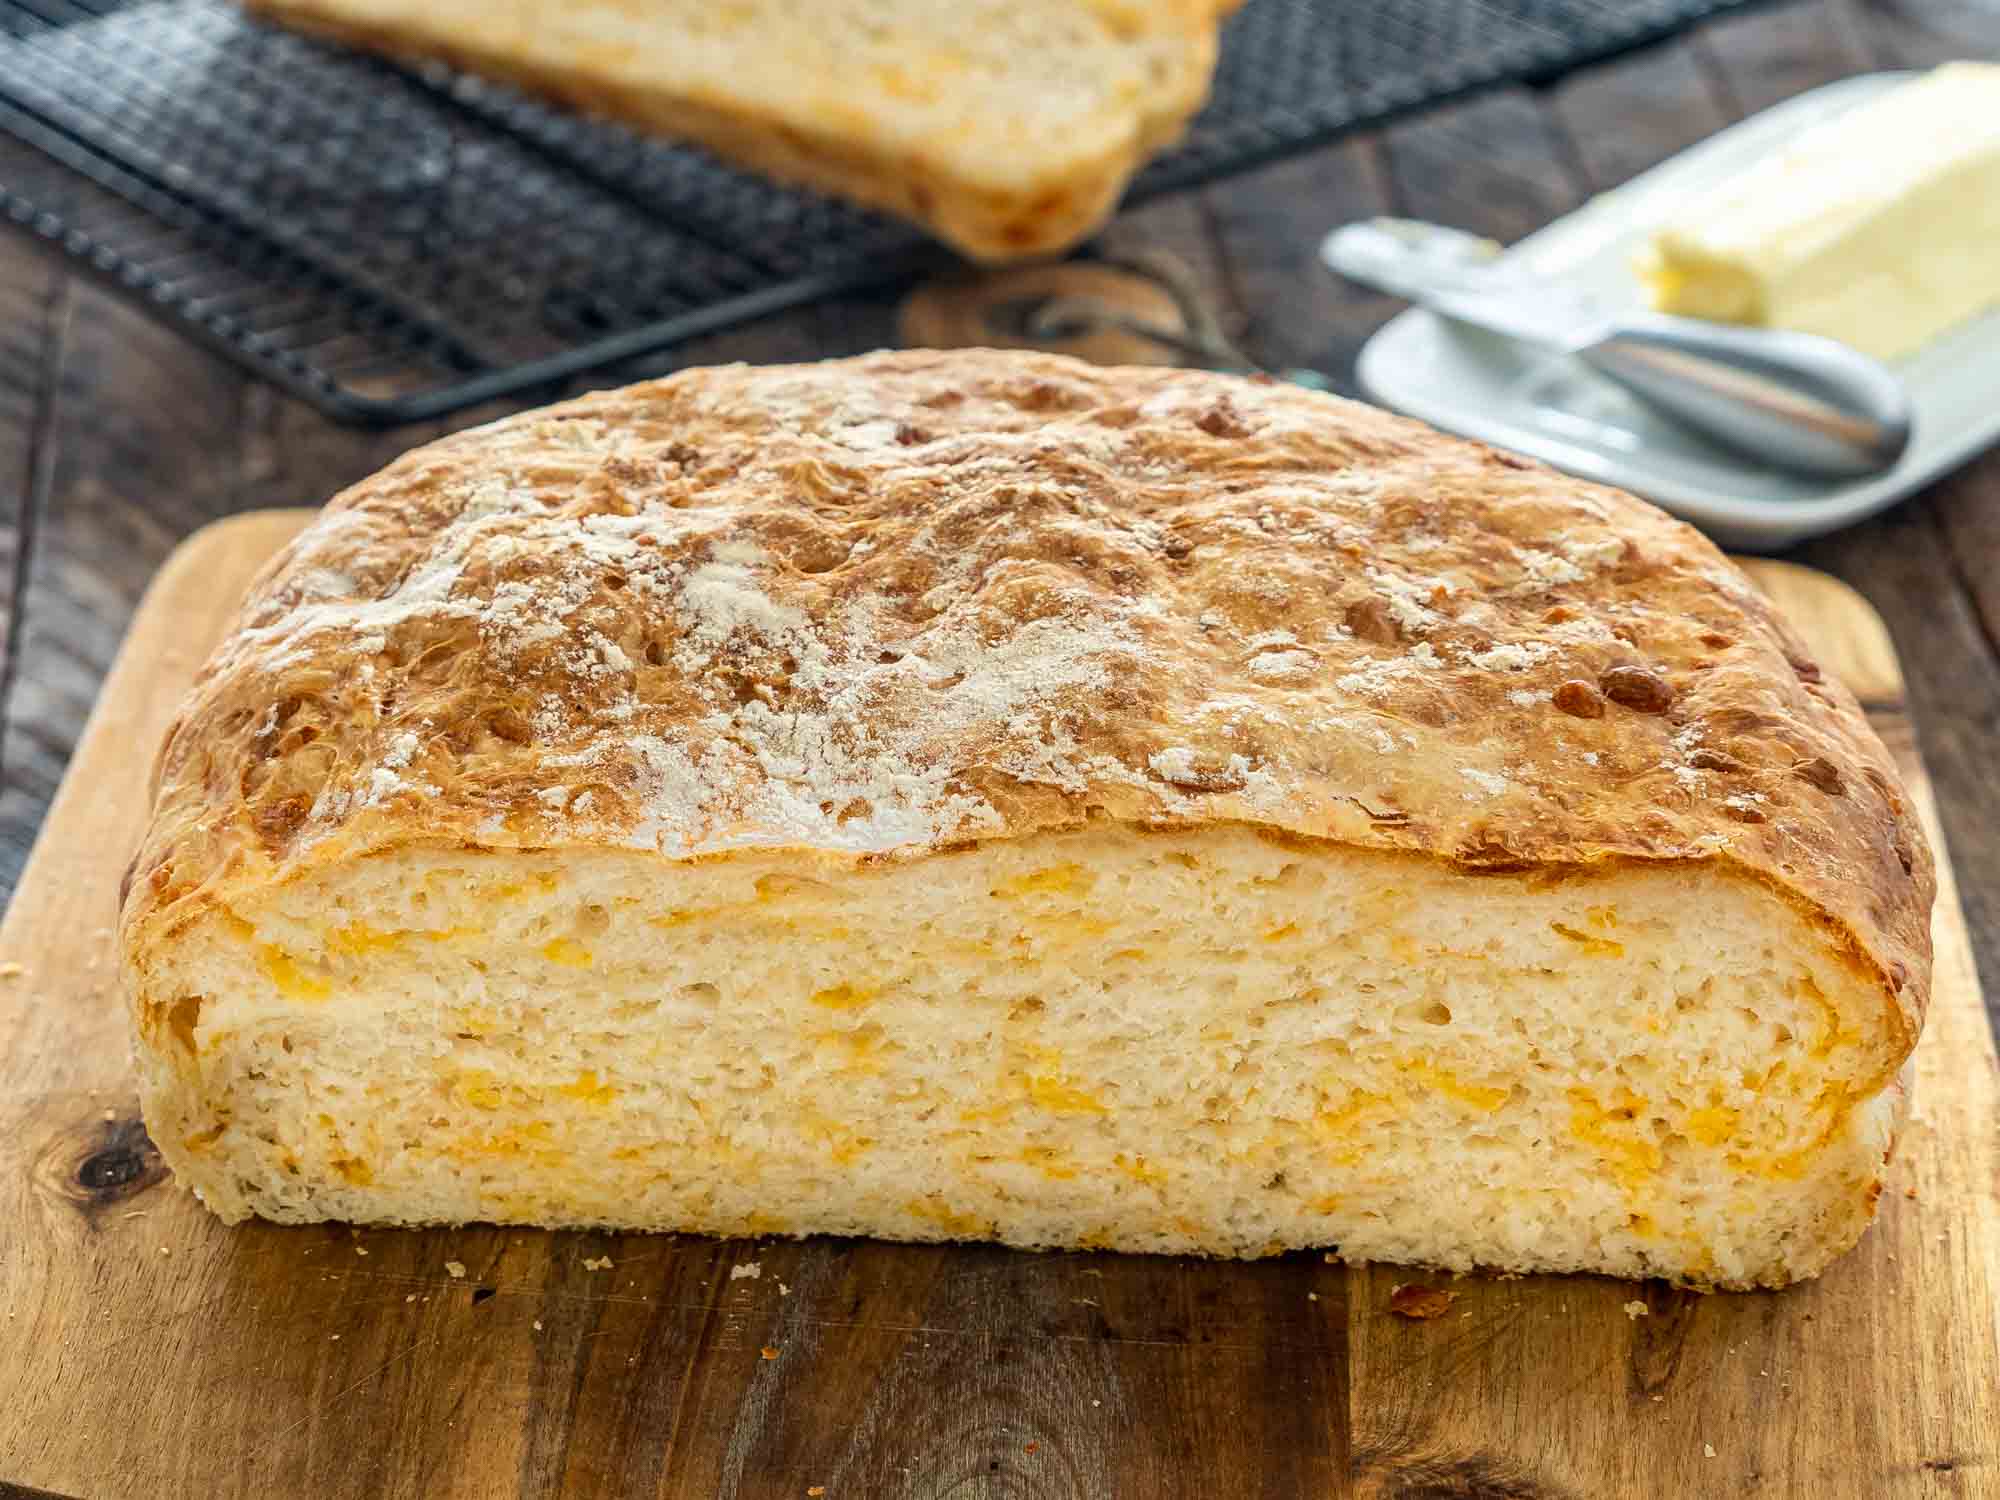
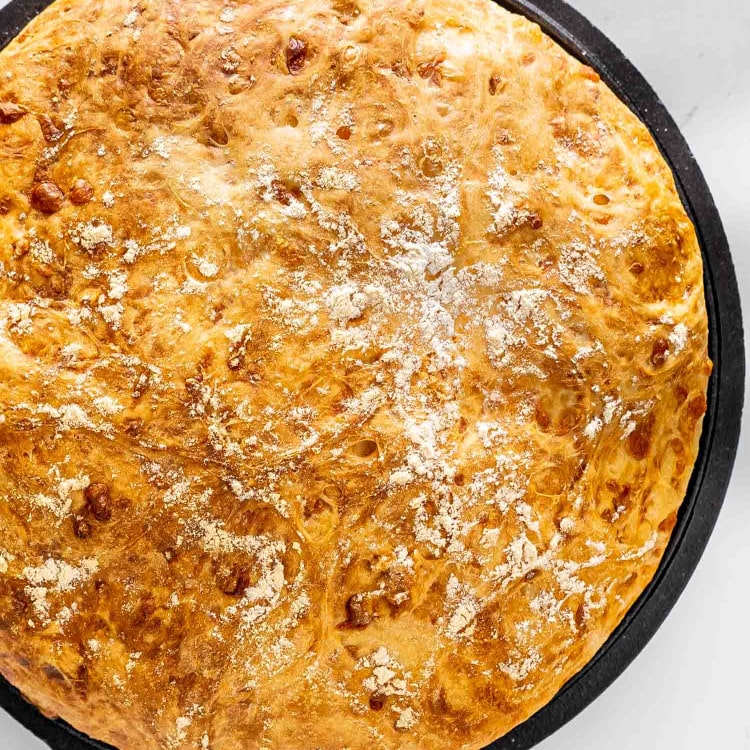
While the dough is rising, preheat your oven temperature to 450°F (232°C) to get it ready for baking. Then when the dough has doubled in size once more, put the skillet into the hot oven and bake the bread for 30 to 45 minutes or until golden brown on top. You can also use a digital cooking thermometer to make sure that your bread has come to 200°F (93°C), which means it’s fully cooked. Then when it’s done, allow the bread to cool for 10 minutes in the skillet before carefully transferring it to a cutting board to finish completely cooling. Then once it’s totally cooled off slice and serve.
What Is No Knead Bread?
The process of kneading bread helps form gluten, which gives bread its strength and elasticity. After a recipe for no-knead Dutch oven bread surfaced in 2006, the secret for easy bread making went viral!
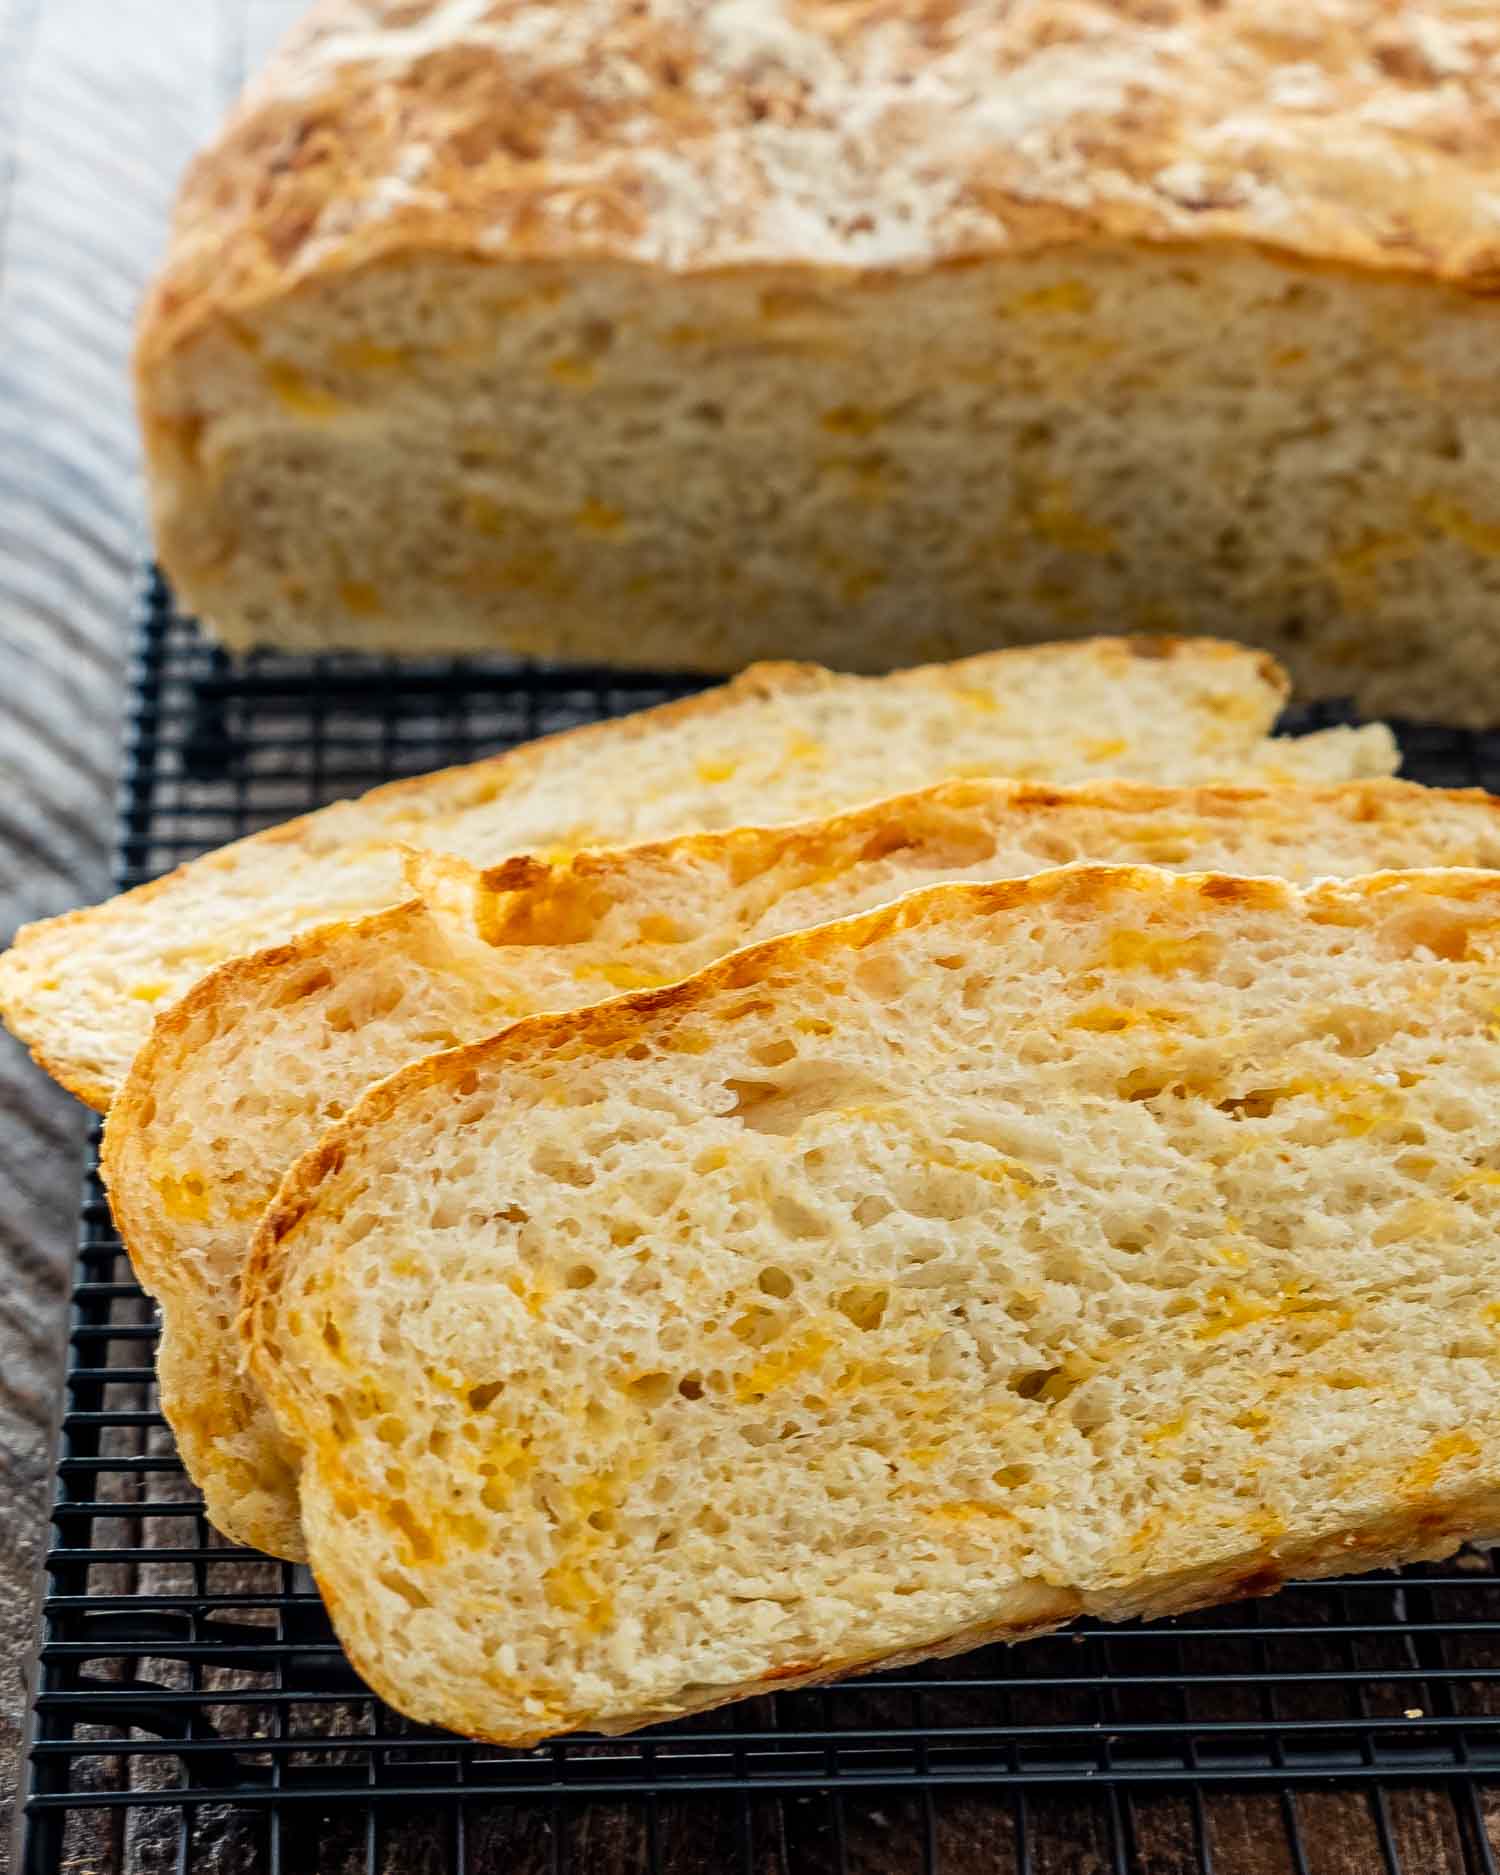
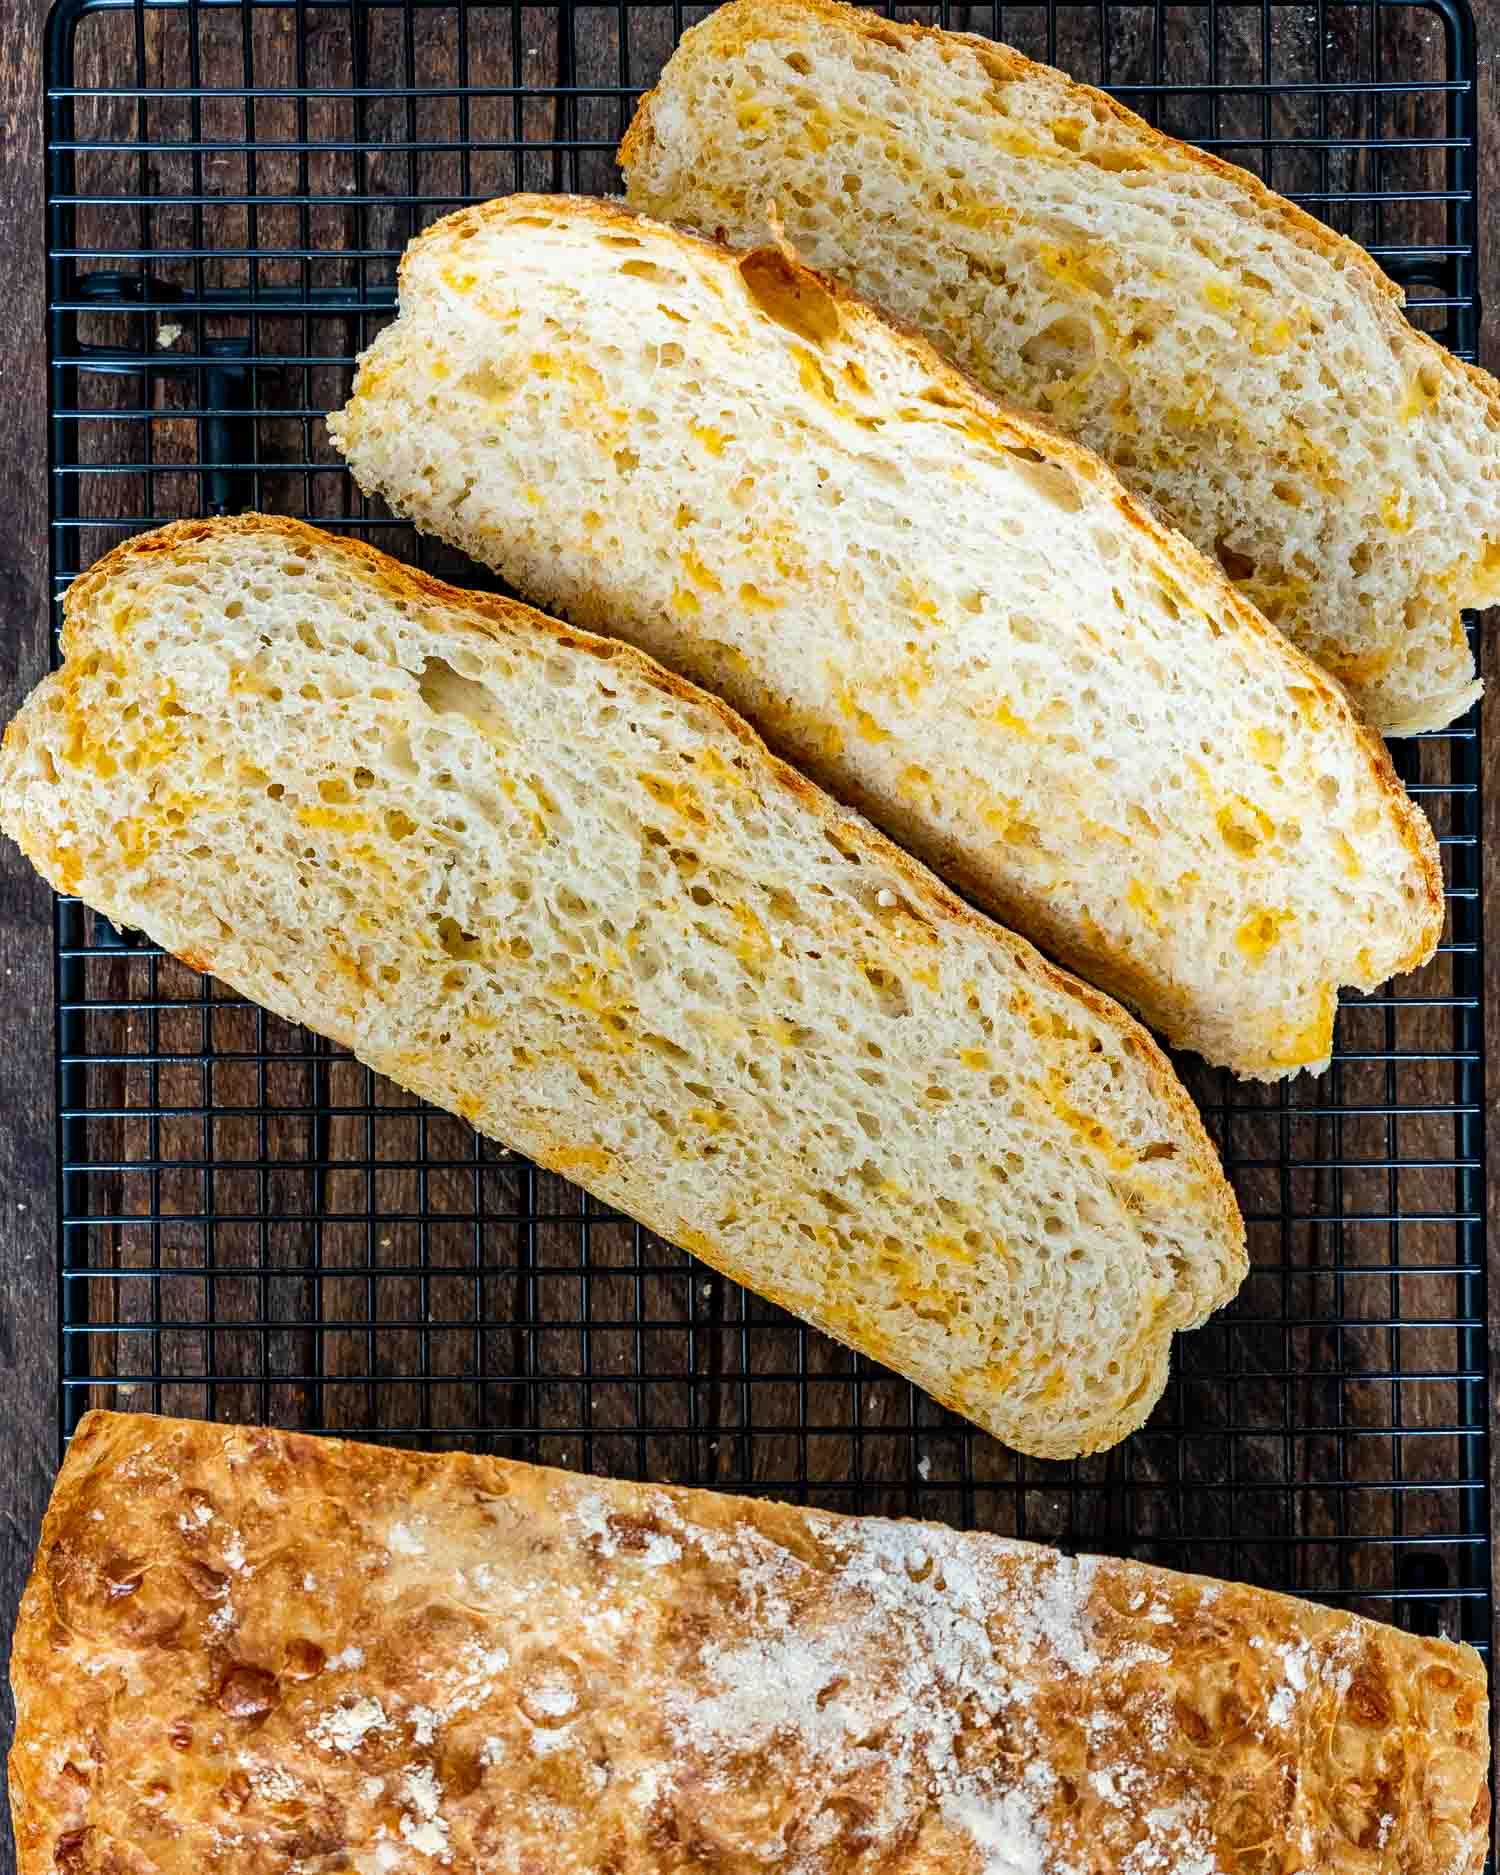
Traditionally, no-knead breads are given very long rising times to allow the gluten to form properly. In this recipe, I have found that with two quick rising periods, I got a gorgeous loaf of bread. It is so soft on the inside, with an addictive cheese speckled crust! The entire loaf of bread was gone by the end of the day.
How Long To Bake No Knead Skillet Bread
While you’re waiting for the dough to rise, preheat your oven to 450°F (232°C). Once your dough is ready to go, bake it for 45-50 minutes, or until the top of the bread turns golden brown. If you’d like to use a thermometer to be sure your bread is fully cooked, it should read 200°F (93°C). Let the bread cool in your skillet for about 10 minutes, and then transfer it to a cutting board to cool fully before slicing.
Can I Double This Recipe?
You can definitely double this recipe! You will need a bigger skillet, preferably 12″ so that the dough doesn’t rise and bulge over the edges of your skillet. Add another 10-15 minutes onto the baking time. You can make sure the bread is completely done by taking its internal temperature at the thickest part. The thermometer should read 200°F (93°C).
My Dough Is So Sticky!
This dough is meant to be pretty sticky! If you check out the video, you can see the consistency of my dough. If you feel that yours is too sticky, you can add a little bit more flour. Every environment is different. If you live somewhere with a lot of humidity, you might need to add a bit more flour to get the perfect dough.
What Is the Difference Between No Knead Bread Baked in a Dutch Oven Vs a Skillet
The difference is big. When baked in a Dutch oven, you’re baking the bread with the lid on for the first 30 minutes. During this time, steam forms inside the Dutch oven, resulting in the wonderful crust we all know and love.
In a skillet, since we bake the bread uncovered, this skillet bread doesn’t really get the chance to develop that super crispy crust. The texture for this skillet bread is also a bit different, because of the rising process as well. The original No Knead Bread takes about 12 to 18 hours to rise giving the bread plenty of time to form gluten.
Expert Tips
- Check the date on your yeast. Make sure that your yeast has not expired. The main reason that bread recipes fail is due to old yeast.
- Warm water is a must. The water must be warm for the yeast to activate properly. Water that is too cold or too hot can cause issues with the activation process.
- Doubled in size. It’s important that you give the dough the time it needs to double in size. This can take a longer or shorter period of time depending upon the temperature of your home.
- Allow it to cool. Do not attempt to slice the bread until it has cooled completely. Doing so too soon can smush the bread and alter its texture.
Storage
No knead skillet bread will keep at room temperature for up to 4 days in a container or bag. You can also store it in the freezer for up to 3 months in a sealed freezer bag or wrapped well in plastic wrap. Then when ready to eat, just allow the bread to thaw out at room temperature for a few hours.
Other Delicious No Knead Recipes To Try
- Fast and Easy No Knead Bread in less than 3 hours, Start to Finish!
- Dutch Oven No Knead Bread
- No Knead Honey Oat Bread
- Dutch Oven Whole Wheat No Knead Bread
- No Knead One Hour Cinnamon Rolls
- No Knead Hot Cross Buns
- No Knead Potato Bread
- No Knead Jalapeno Cheddar Bread
- No-Knead Baguette
Before You Begin! If you make this, please leave a review and rating letting us know how you liked this recipe! This helps our business thrive & continue providing free recipes.
No Knead Skillet Bread
Video
Ingredients
- 2 cups water (110°F to 115°F (43°C to 46°C))
- 2¼ teaspoon instant yeast ((1 packet))
- 3½ cups all-purpose flour
- 1 teaspoon salt (or to taste)
- 2 cups cheddar cheese (shredded, at room temperature)
Before You Begin! If you make this, please leave a review and rating letting us know how you liked this recipe! This helps our business thrive & continue providing free recipes.
Instructions
- In a large mixing bowl, mix the warm water with the yeast. Set aside.
- In a separate bowl, mix together the flour, salt and cheese until well combined. Dump the flour mixture into the large bowl with water and yeast. Using a wooden spoon or spatula, mix the dough until everything is well combined. Cover with a kitchen towel and set aside to rise for about one hour, or until doubled in size.
- Generously oil your skillet, including the sides. Use a spatula to loosen the dough from the sides of the bowl and transfer the dough to the skillet. Use the spatula to even out the dough so that it fills the skillet. Cover the skillet with a kitchen towel, and set it aside to rise for another 30 minutes.
- Preheat your oven to 450°F (230°C). Bake the bread for 30-45 minutes, or until the top is golden brown. Let the bread cool in the skillet for 10 minutes, then carefully remove it from the skillet and allow it to cool fully on a cutting board before slicing.
Notes
- I used a 10″ cast iron skillet to make this recipe. If you use a smaller size, the loaf will end up taller. If you use a bigger size, the loaf will end up thinner.
- You can make this bread without cheese for a plain loaf. You can also get creative and use ingredients that you would like in your bread. Spices, garlic, onion, hot peppers, dried fruit, etc are all great examples of ingredients you can use in your bread.
- Always check the expiration date on your yeast and make sure it hasn’t expired. All your yeast products whether it’s in a jar or a package should be stamped with a “Best if Used by” date. Always make sure you check this date, even when you purchase the yeast, who knows it could have been on the shelf past its expiry date.
- Why is my bread chewy: Usually your bread will be chewy when there isn’t enough gluten formation or you’re using a low-protein flour.
- Why is my bread dense: Usually bread will be too dense when there is too much flour. Keep in mind this dough will be pretty sticky, do not add more flour than specified. Other factors that come into play are humidity and age of flour. Little yeast, long rise, sticky dough are keys to a good, light loaf.
- I don’t have a cast iron skillet, what can I use instead: If you don’t have a cast iron skillet, you can use a Dutch Oven lined with parchment paper. A 4 quart Calphalon soup pot would also work.
- How do I know when my bread is done baking: Tap the bottom! Take the bread out of the skillet, turn it upside down and give the bottom a firm thump with your thumb, or a knock and if it sounds hollow it’s done. If using an instant thermometer, the internal temperature should be around 200°F.
Nutrition Information
Notice: Nutrition is auto-calculated for your convenience. Where relevant, we recommend using your own nutrition calculations.
