No Knead Honey Oat Bread
This post may contain affiliate links. Please read my disclosure policy.

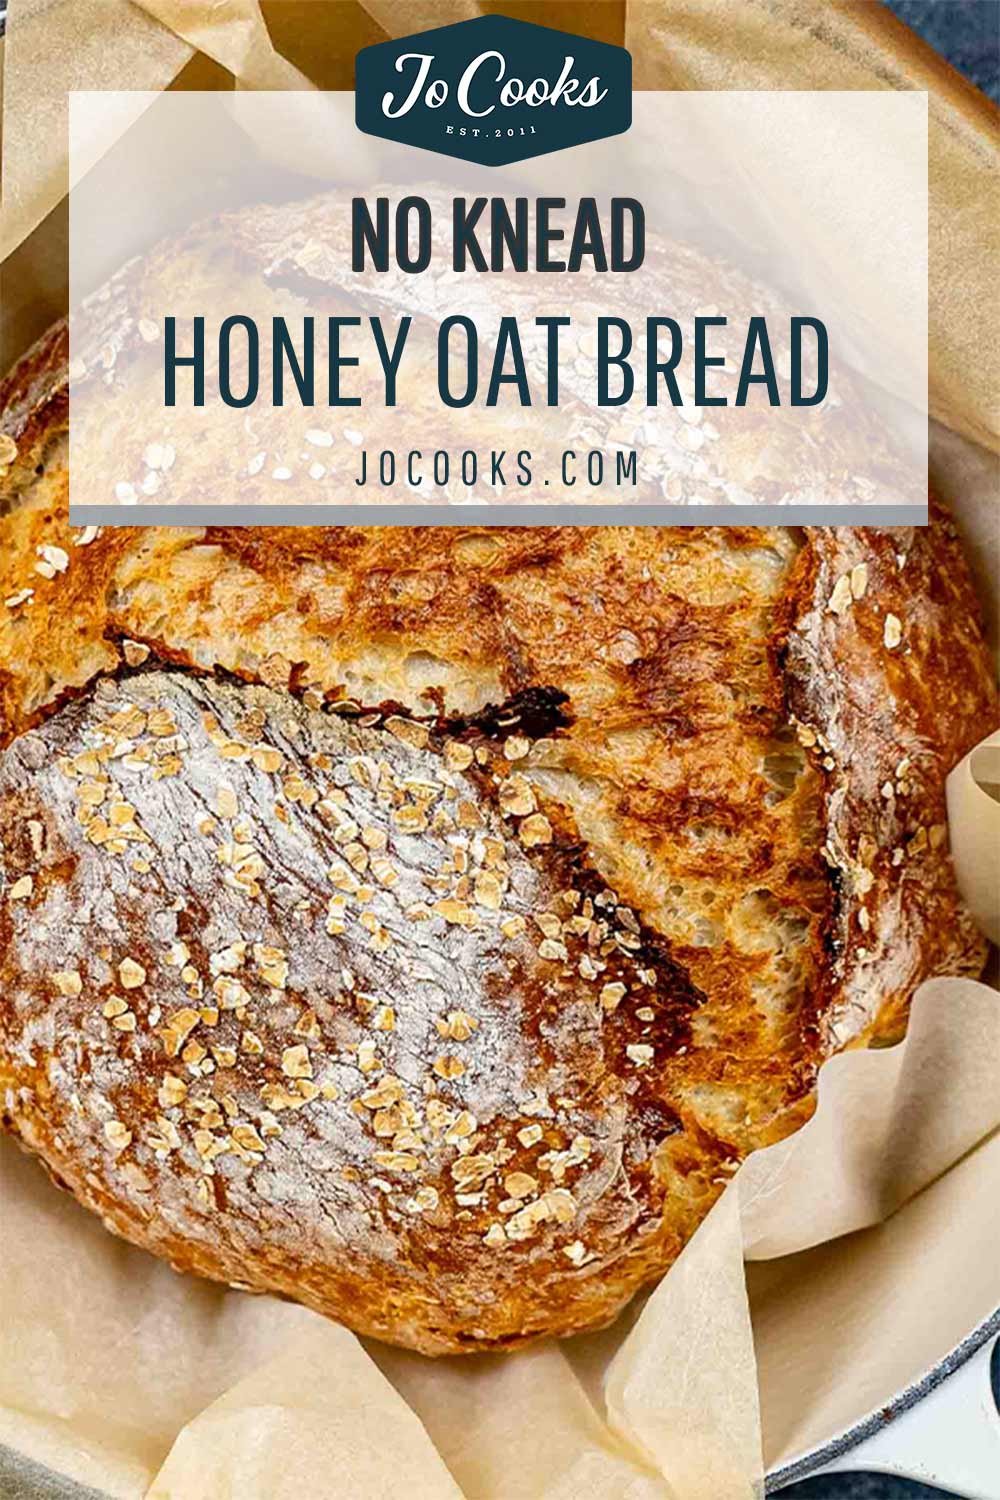
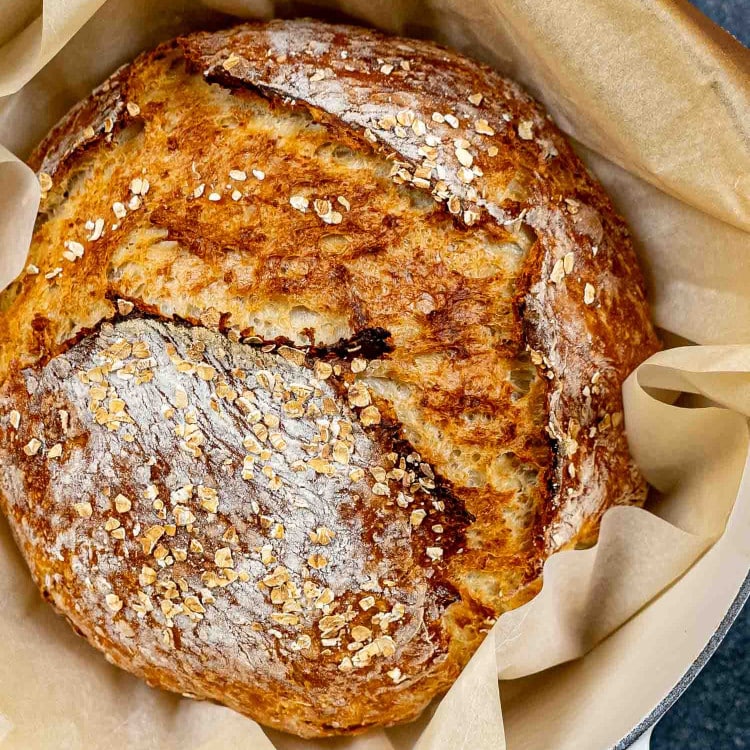
No Knead Honey Oat Bread – soft, lightly sweet, and crusty in all the right places. Just stir, rest, and bake.

Oats, Honey, and a Whole Lot of Comfort
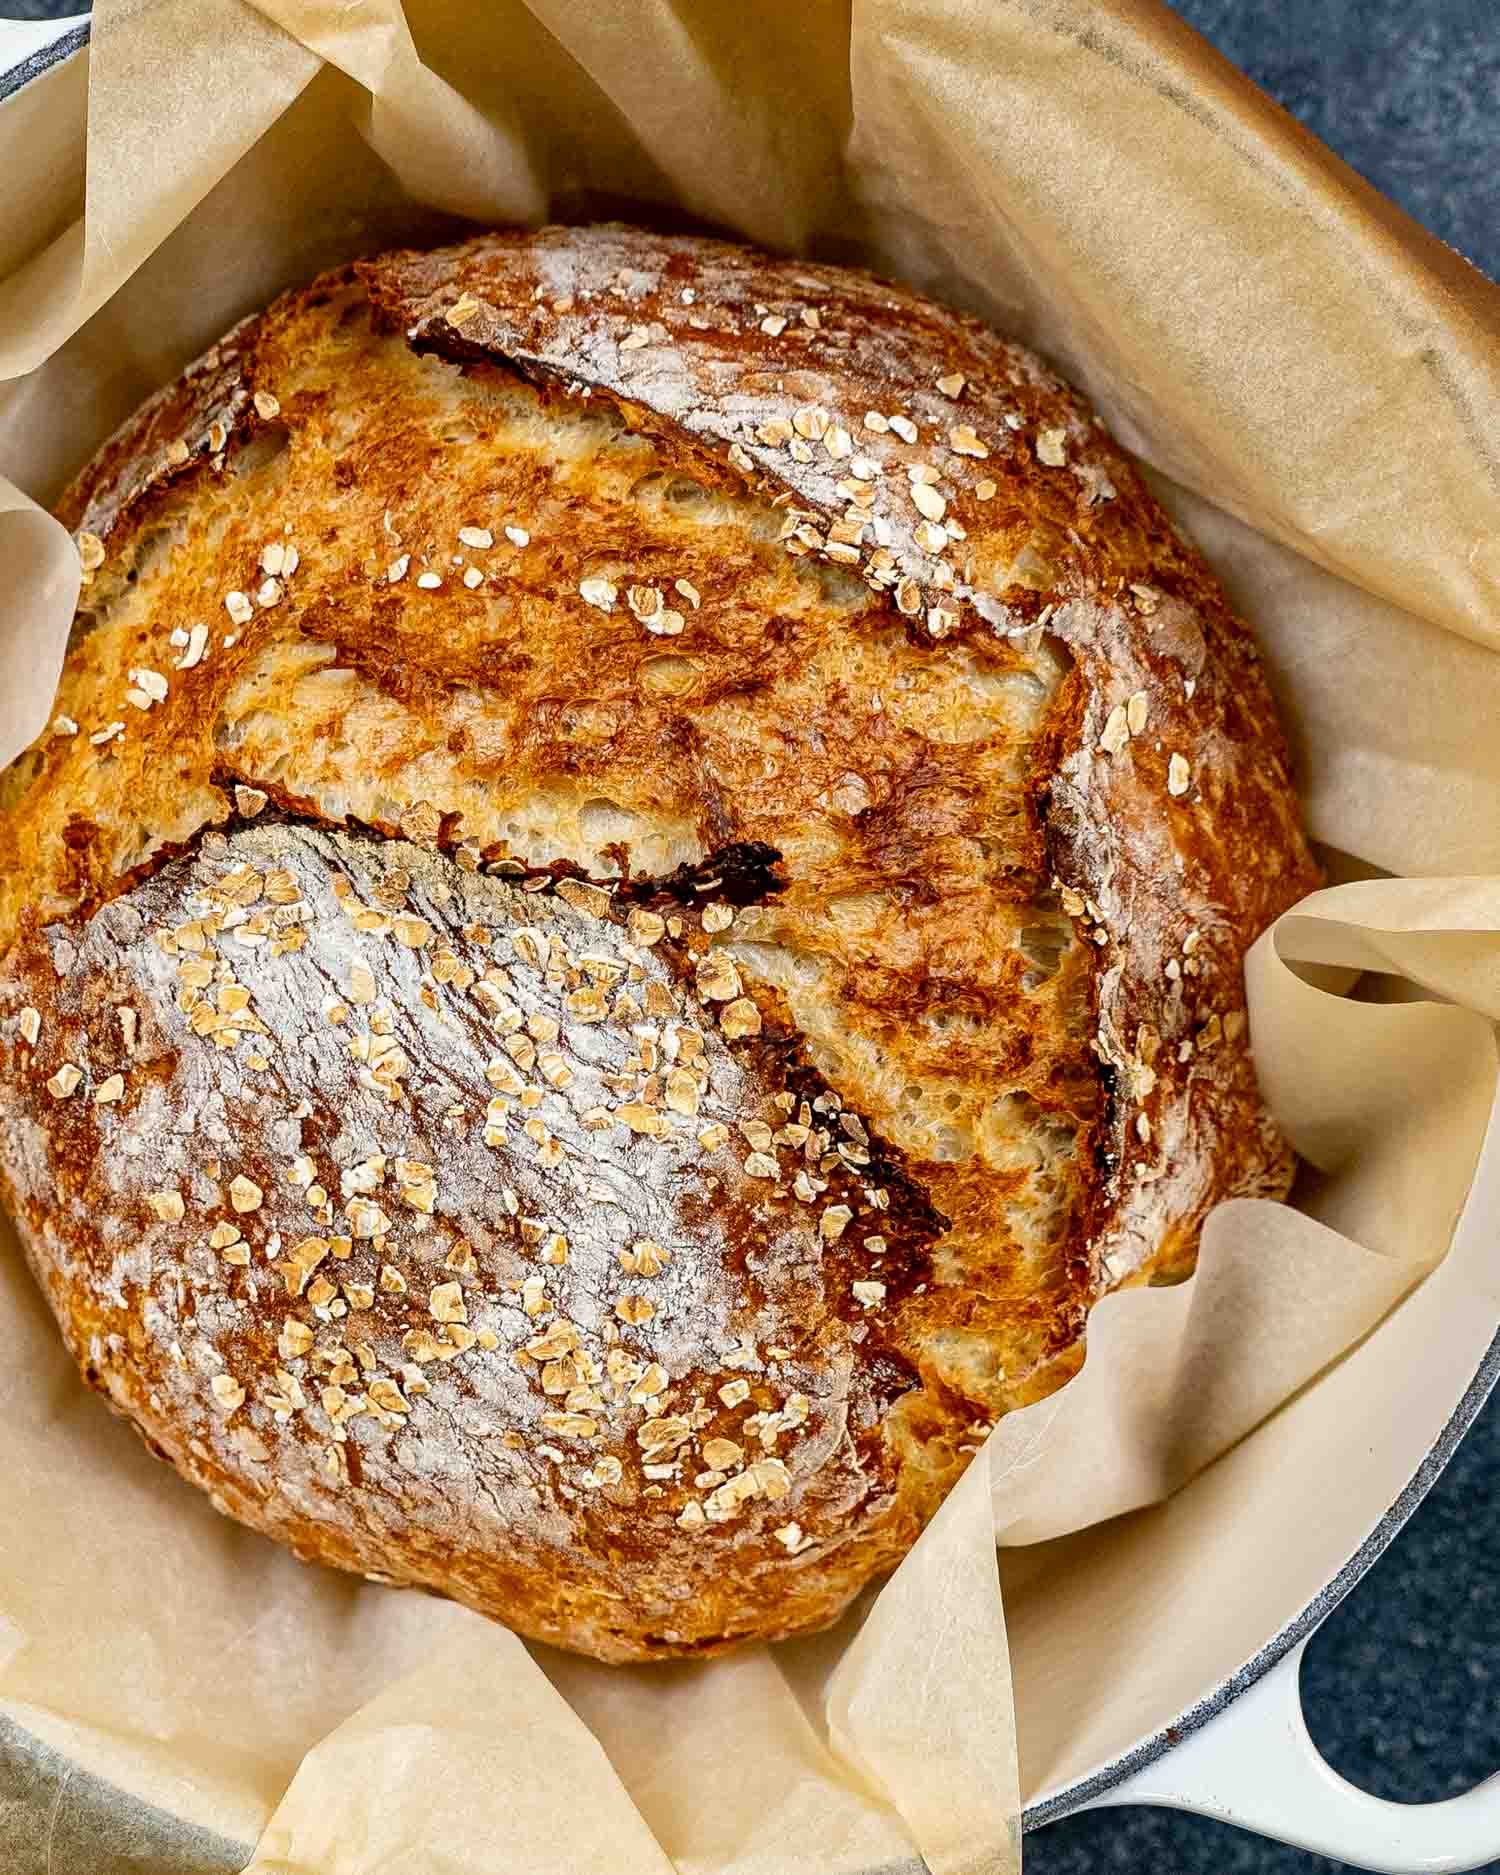
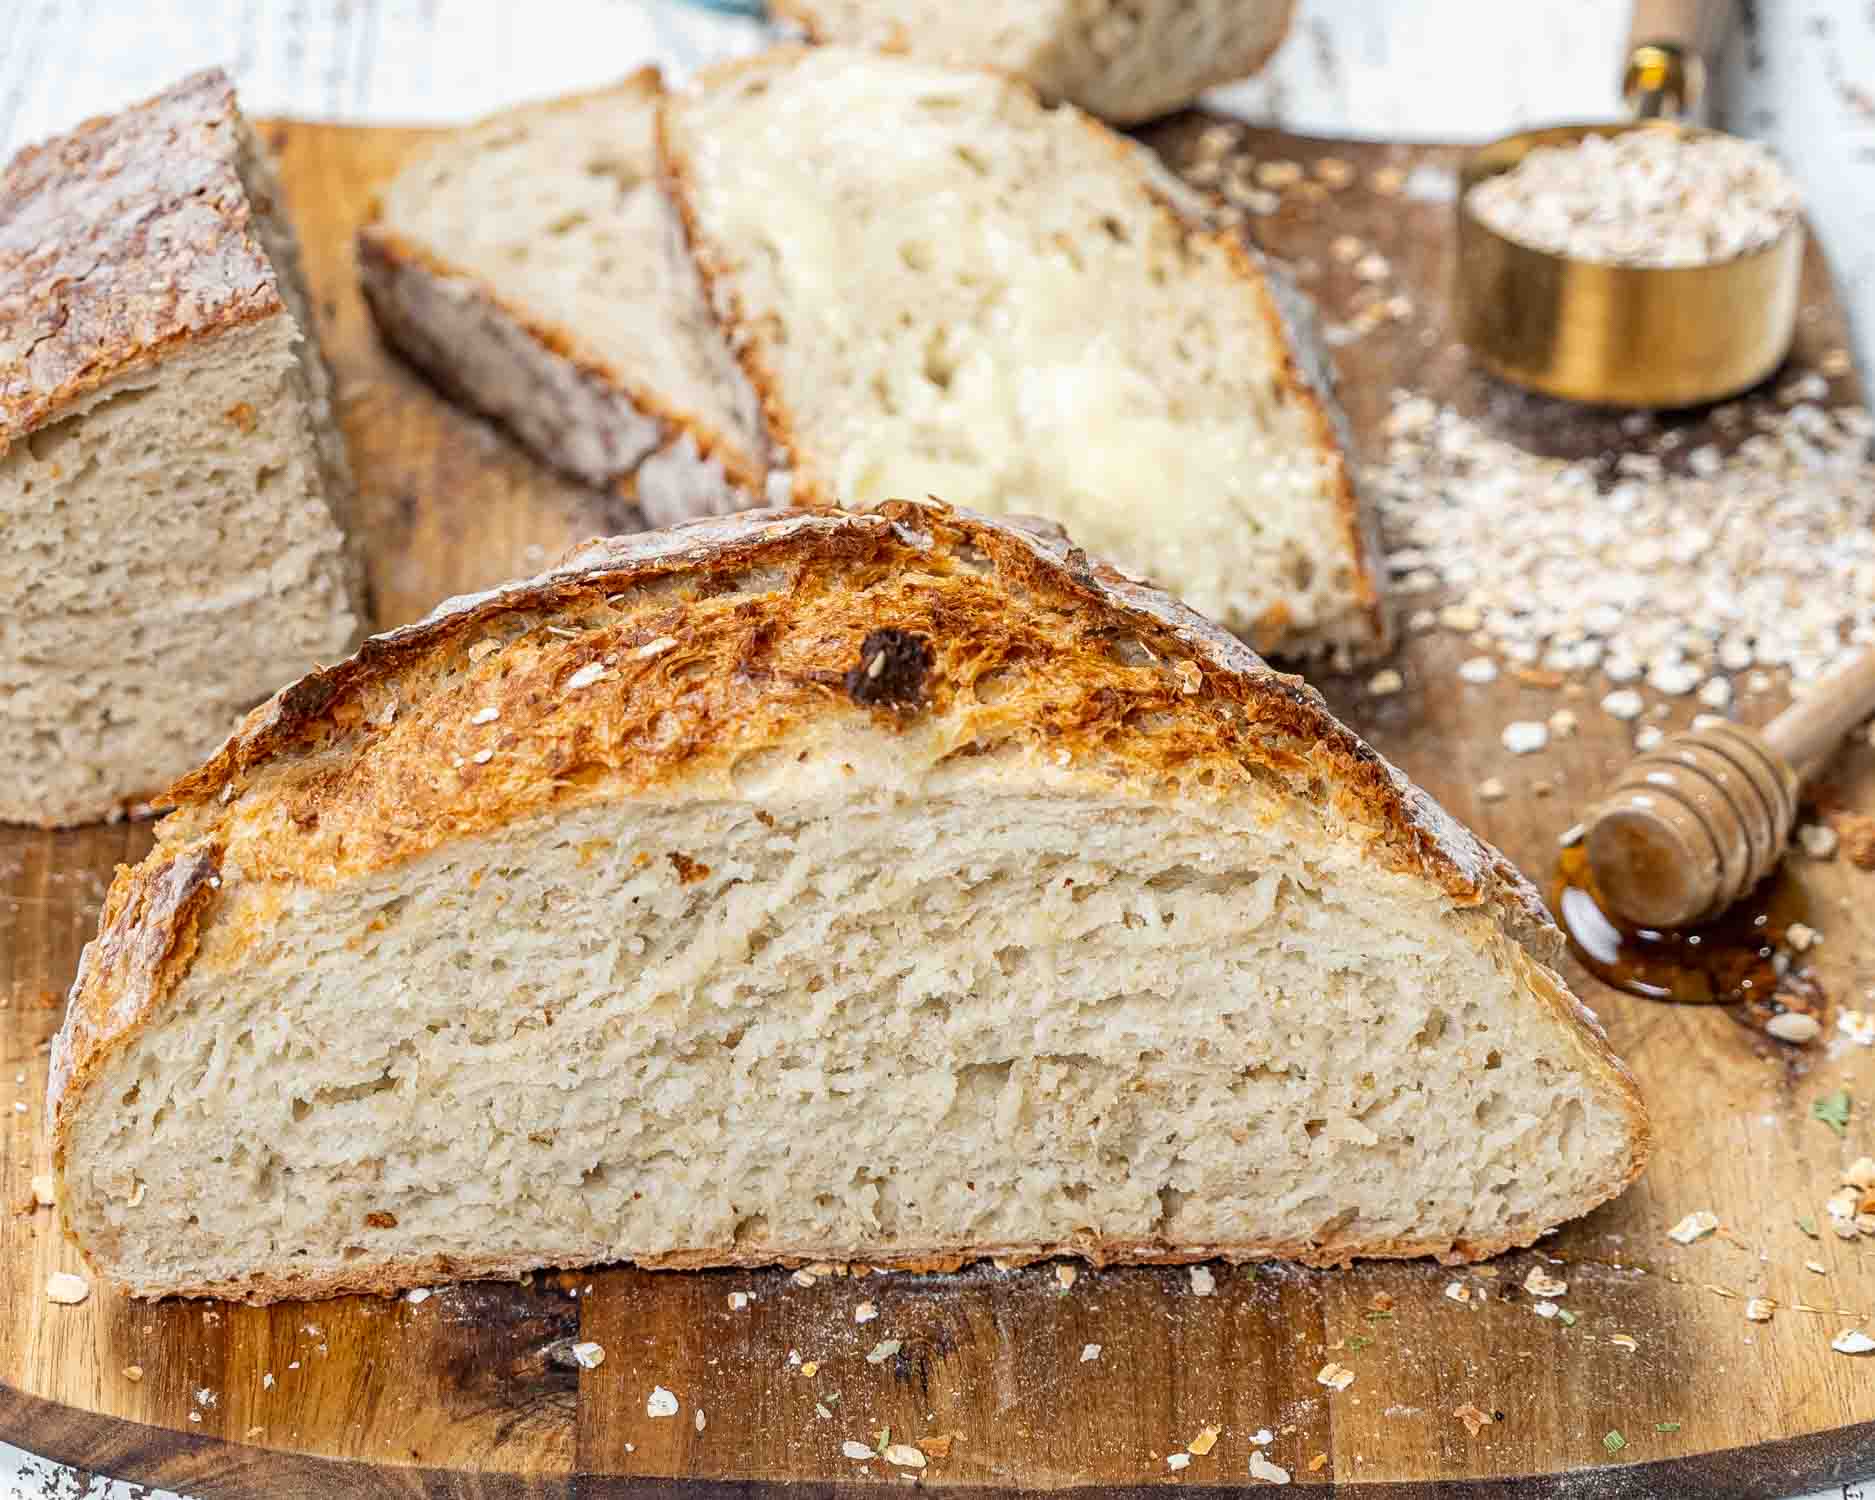
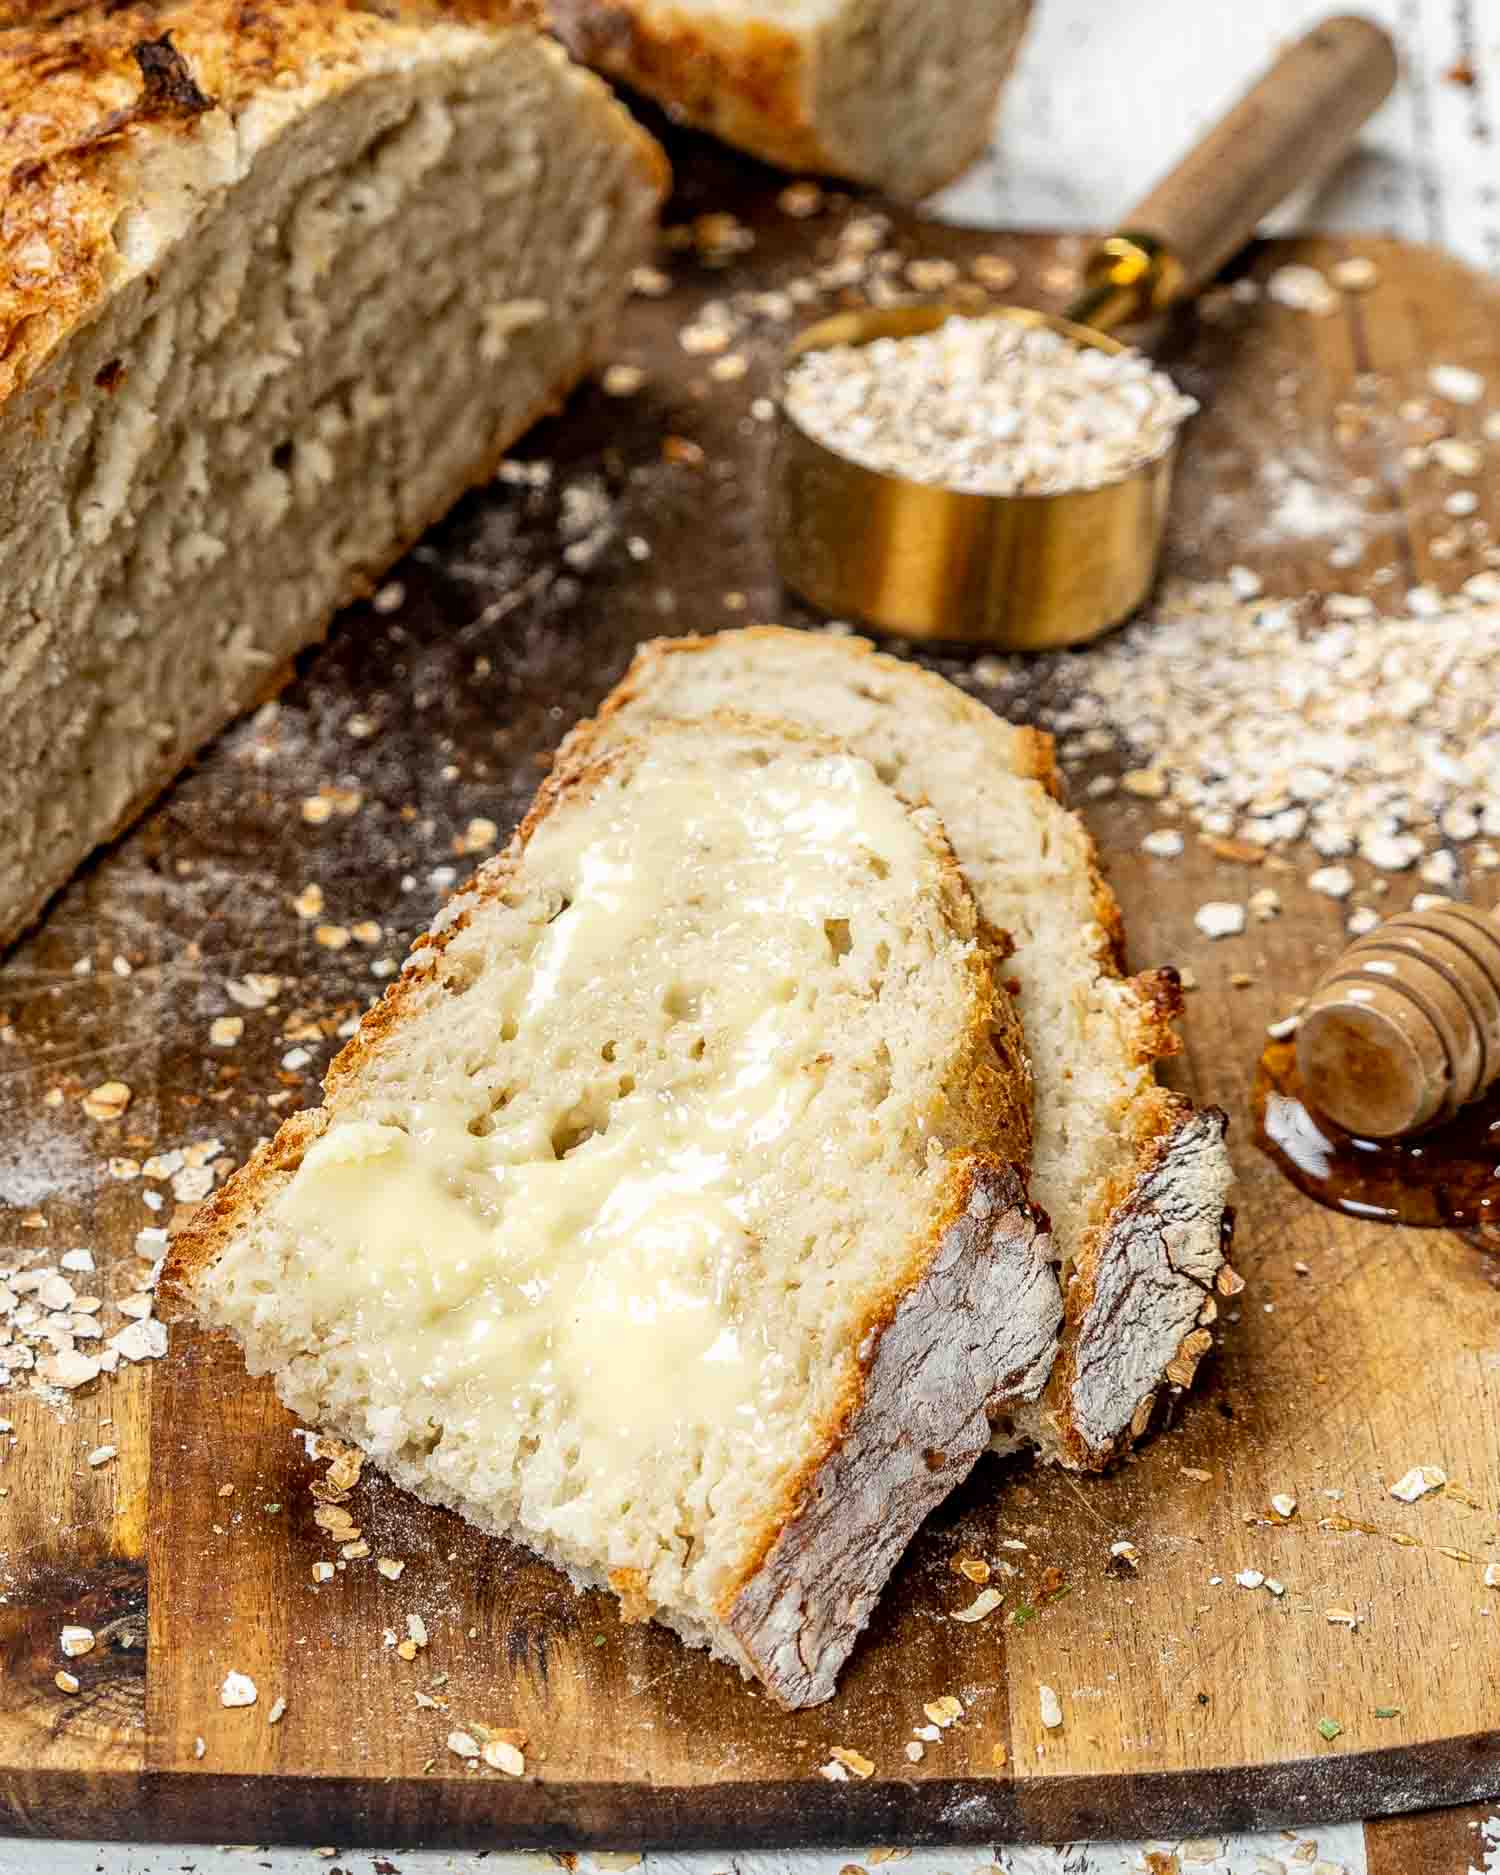
If there’s one no knead bread I make when I want something warm and wholesome to go with my morning coffee or slathered in butter with soup, it’s this one. It’s soft and pillowy inside, with that cozy oat chew, a golden crackly crust, and just enough honey to keep things interesting, not too sweet, just right.
This is the bread I bake when I’m craving homemade without the hassle. No kneading, no fuss, and the oats give it that rustic, homemade vibe that makes it look like you tried way harder than you did. I’ve played with the ratios over the years and this version always works. It’s simple, dependable, and yes, makes the best toast.
Why You’ll Love This No Knead Honey Oat Bread
- No kneading, no mixer: just stir, wait, bake. That’s the whole deal.
- Lightly sweet, hearty, and soft inside with a golden crust that crackles when you slice into it.
- Just 6 pantry ingredients, including oats and honey, nothing fancy, nothing fussy.
- Makes killer toast. Like, butter-melting-in-the-cracks kind of toast.
- Easy enough for a weeknight bake, cozy enough for weekends and brunches.
Before You Start: Tips & Ingredient Notes
- Use old-fashioned oats. Quick oats work in a pinch, but whole oats give better texture. Skip steel-cut, too tough and chewy.
- Check your yeast. If it’s expired or hasn’t been stored properly, your dough won’t rise. I always buy mine in small jars and keep it in the fridge.
- Use lukewarm water. Aim for 105°F to 115°F (41°C to 46°C). Too hot? You’ll kill the yeast. Too cold? It’ll just sit there sulking.
- Don’t add more flour. The dough is supposed to be sticky. Resist the urge, sticky dough = lighter bread.
- Let it rest. This one needs a solid 12–24 hour rise. That time gives the yeast what it needs to build flavor and strength.
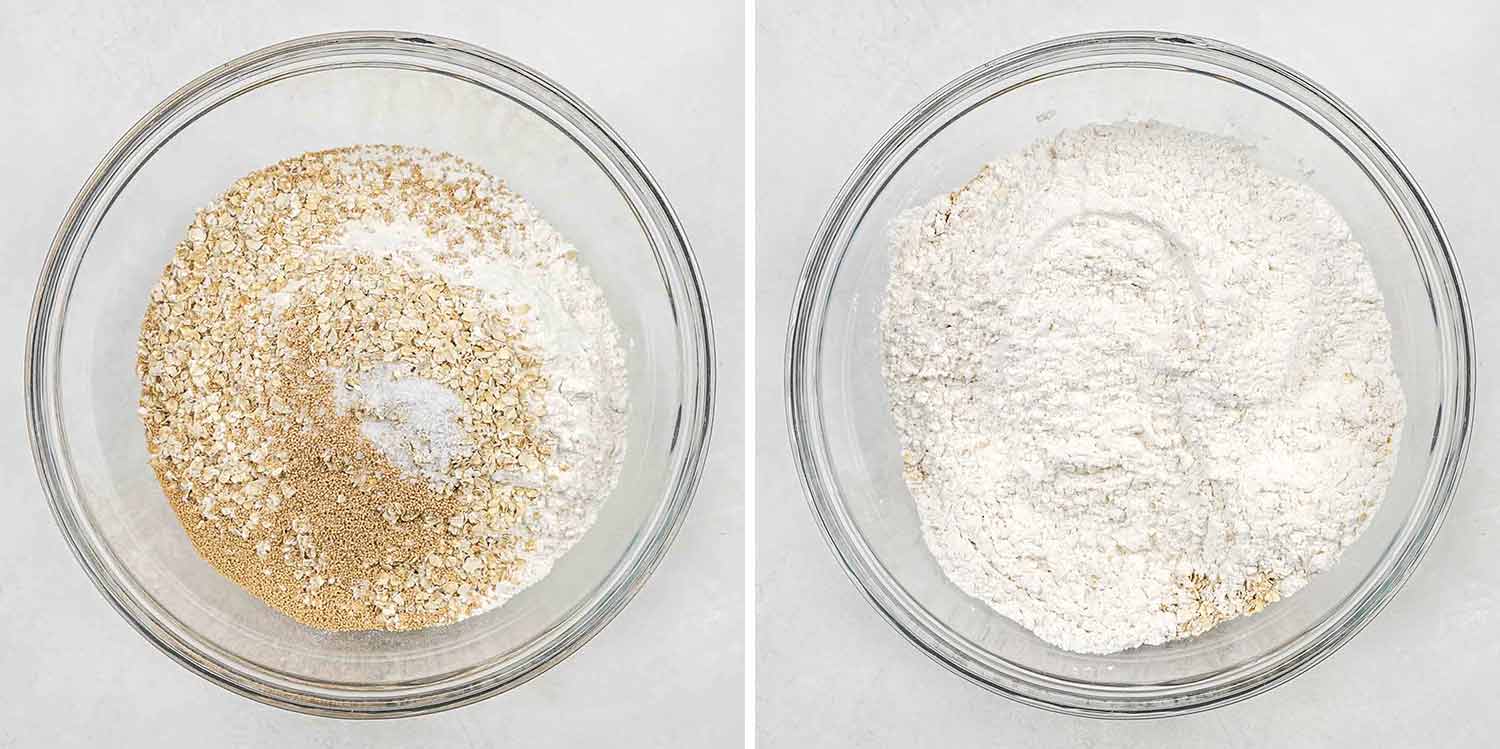
In a big bowl, stir together the flour, oats, salt, and yeast.
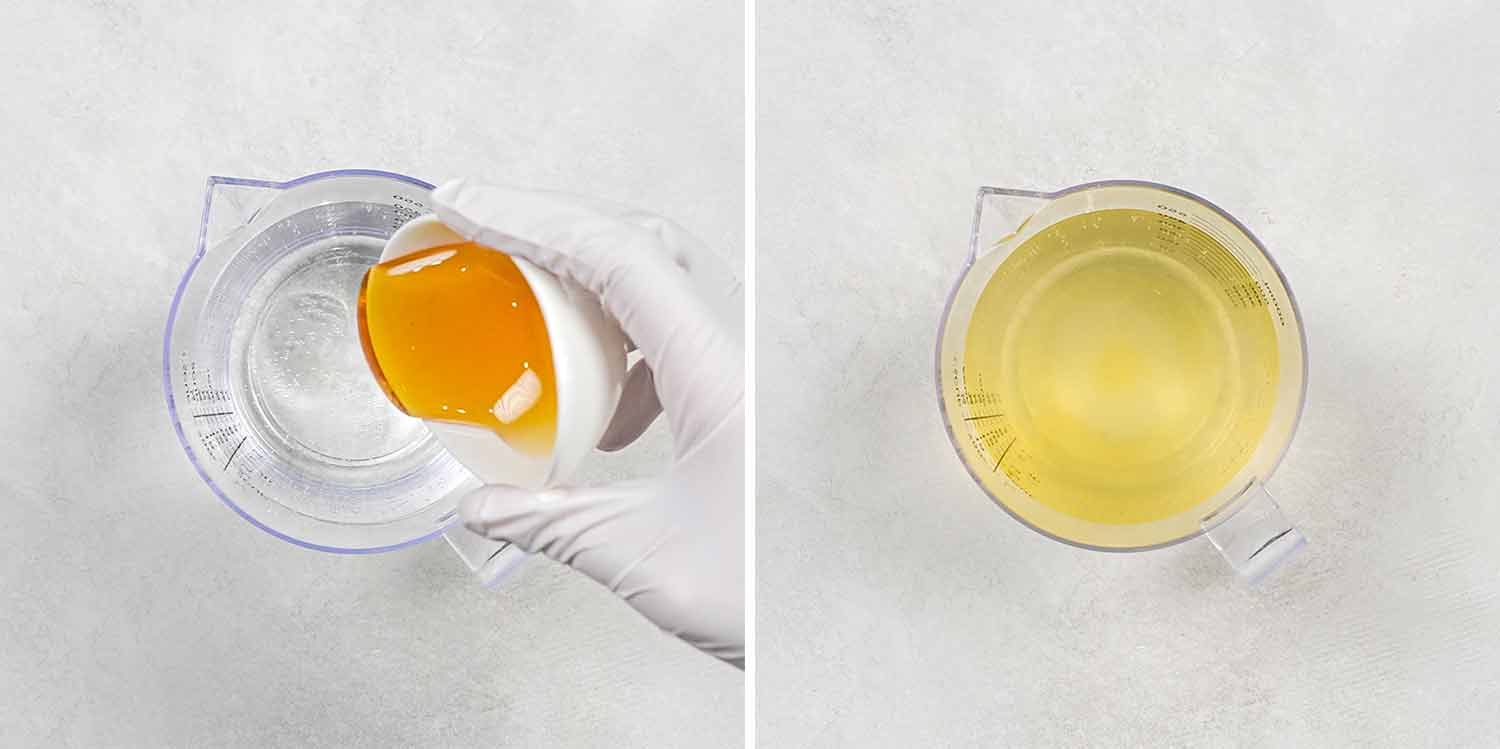
In a separate bowl or measuring cup, mix the warm water and honey until combined.
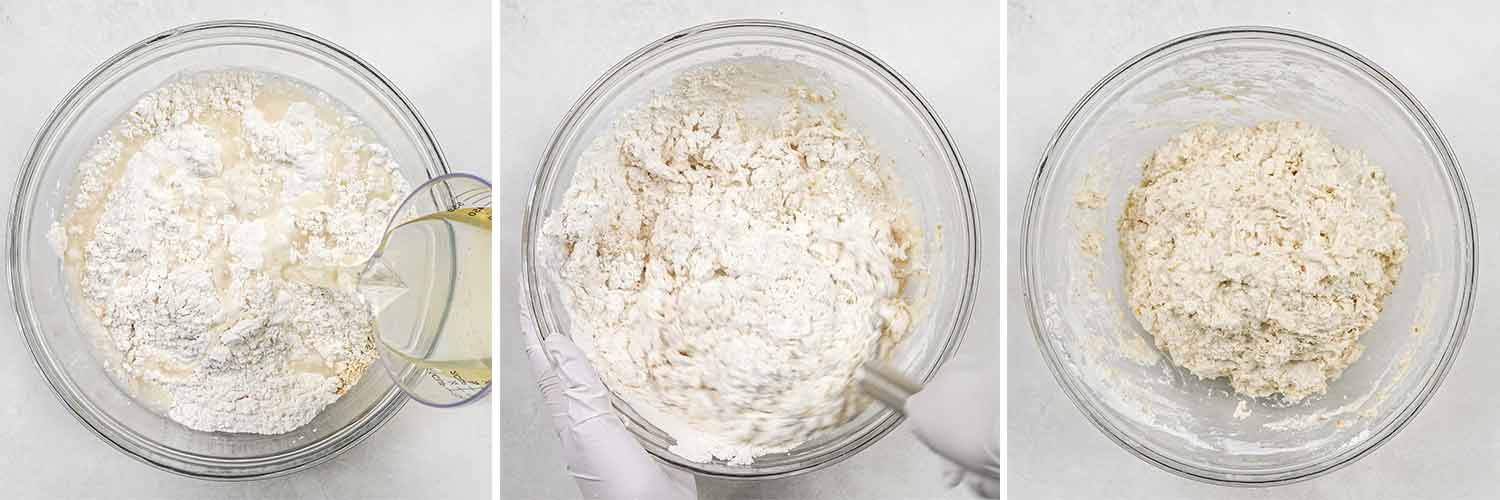
Pour the honey water into the dry ingredients and stir with a wooden spoon or spatula until you’ve got a sticky, shaggy dough. That’s it. No kneading needed.
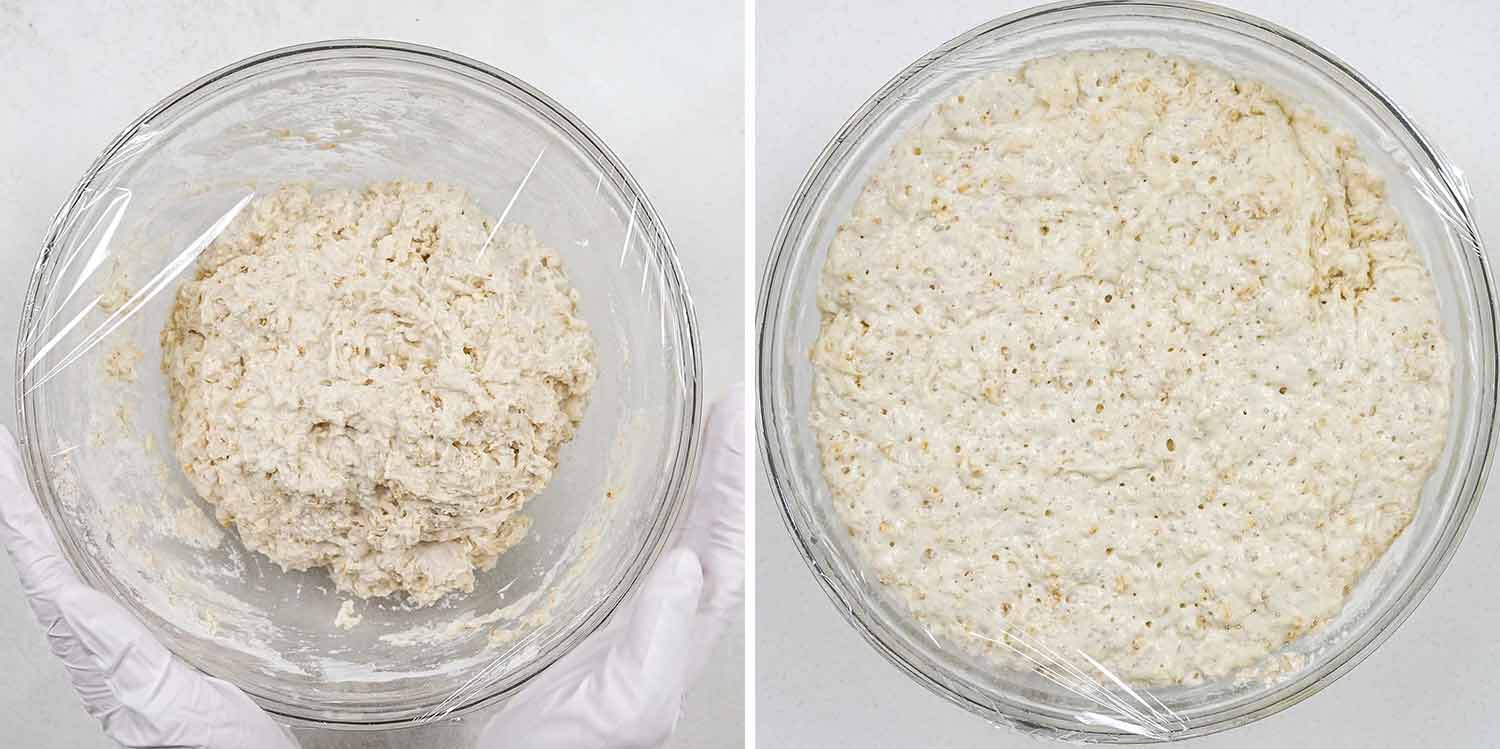
Cover the bowl with plastic wrap and let it hang out at room temperature for 12 to 24 hours. I usually mix mine the night before and bake it sometime the next day. It’s low effort and very forgiving, the longer it sits, the better the flavor and texture.
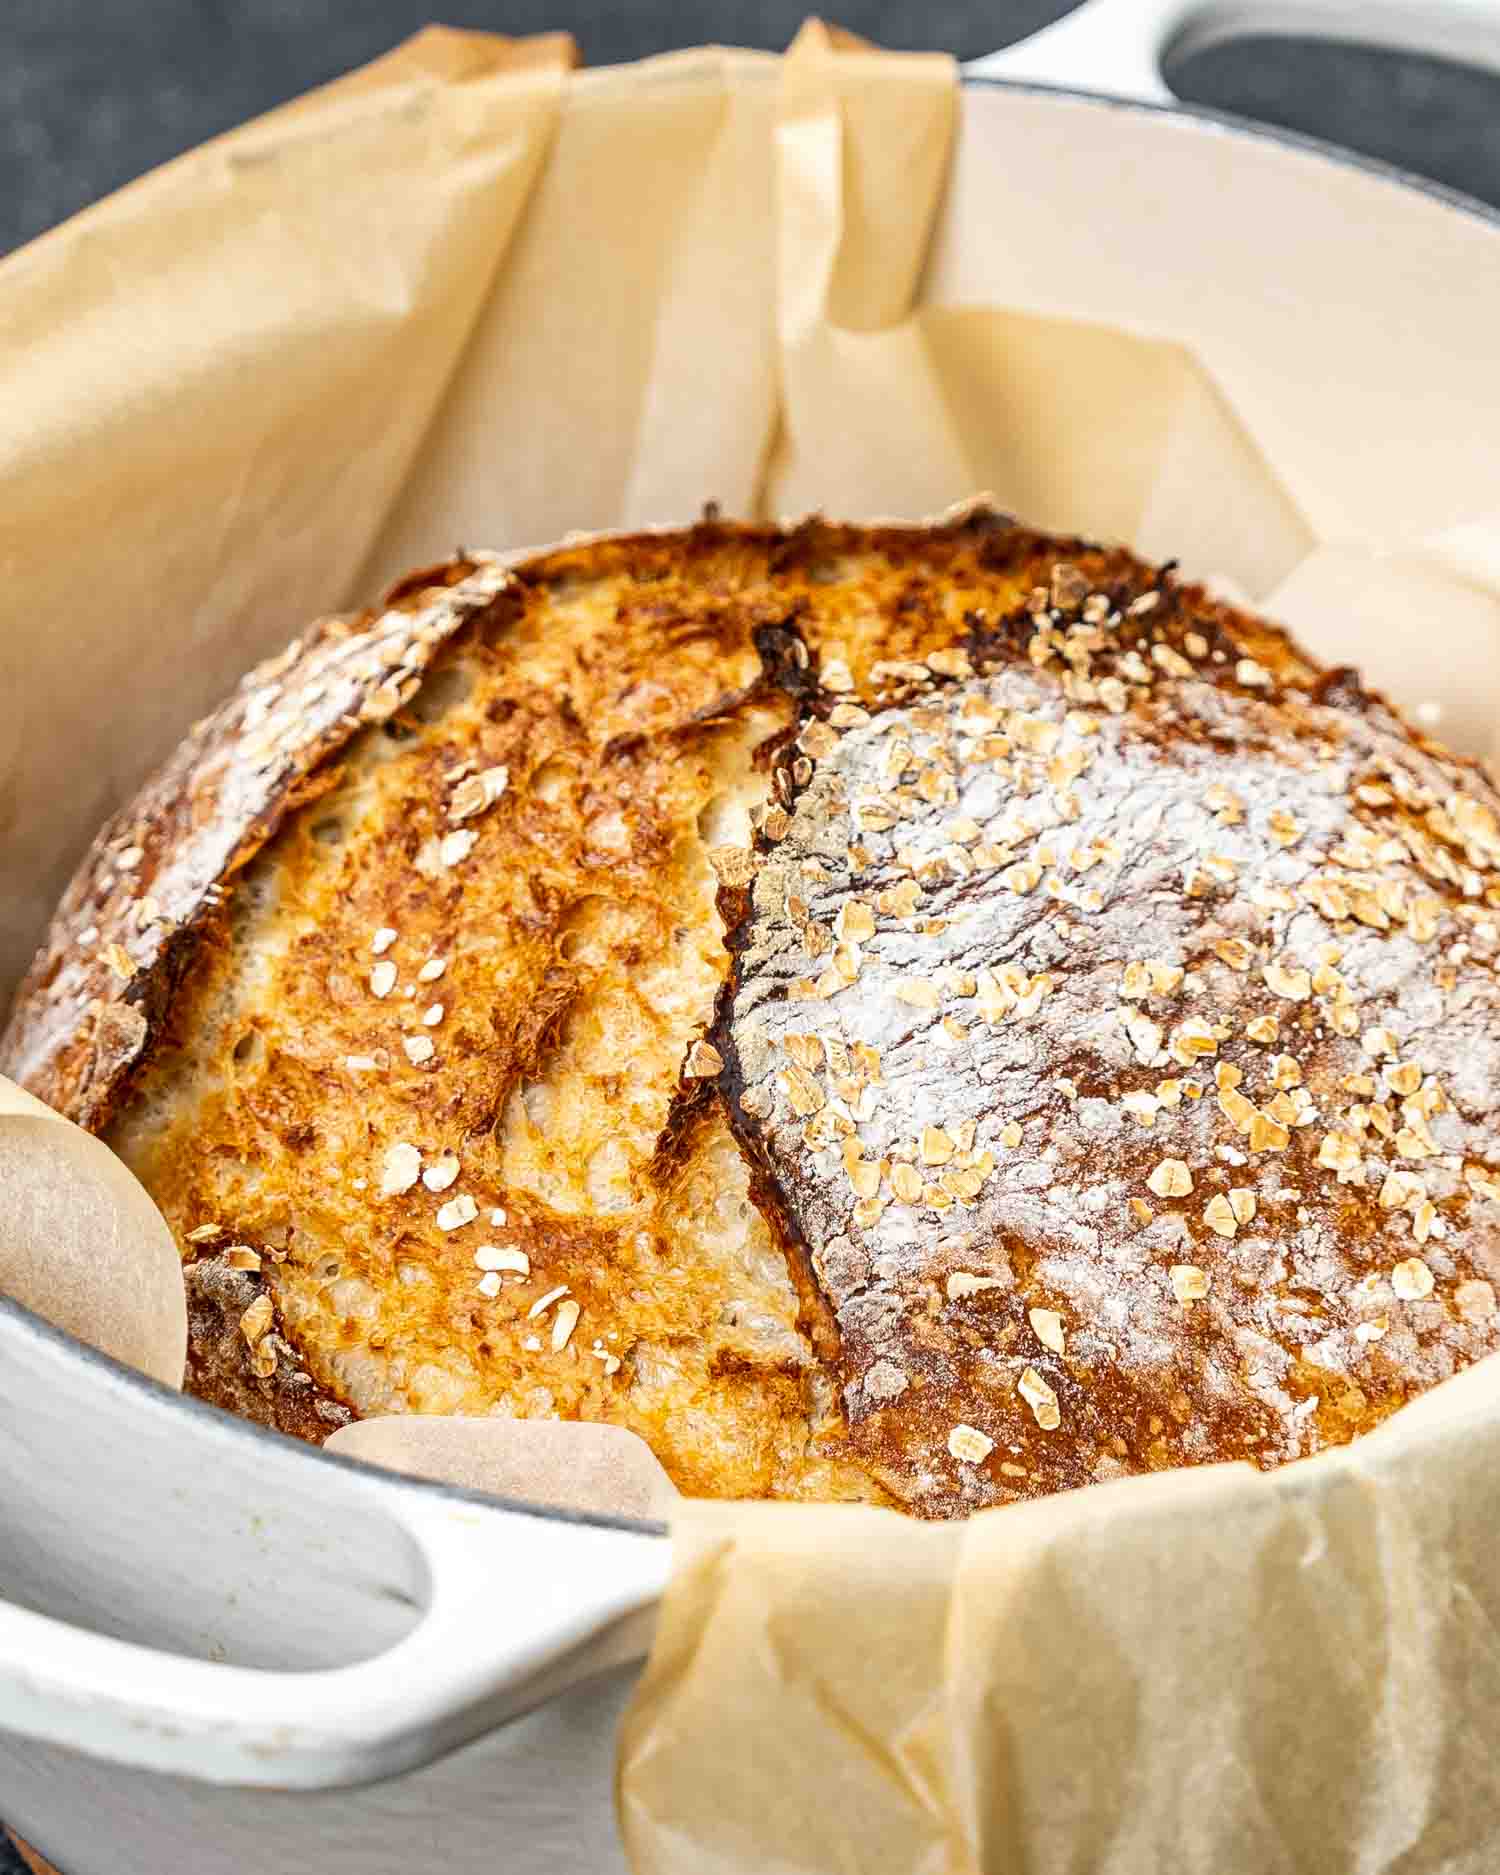
When you’re ready to bake, preheat your oven to 450°F (232°C). Place your Dutch oven (with the lid on) inside to heat up along with it. You want that pot blazing hot.
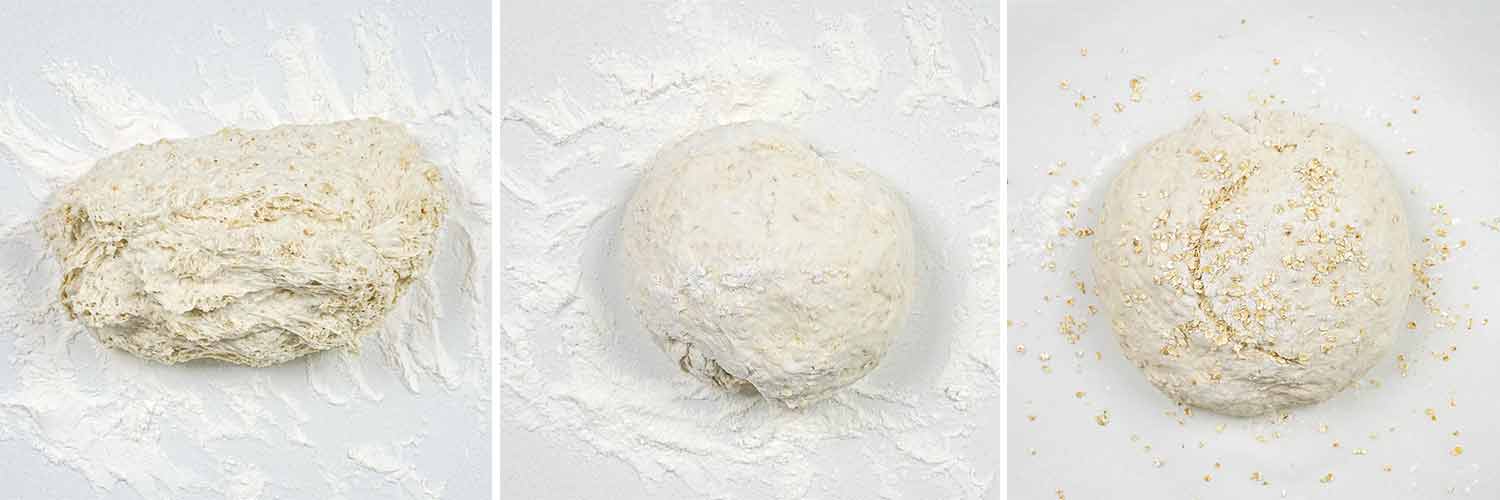
Flour your hands and your surface really well, this dough is soft and sticky. Gently scoop it out, shape it into a rough ball, and plop it onto parchment paper. You can sprinkle a few extra oats on top for flair and lightly score the top with a sharp knife if you’re feeling fancy.

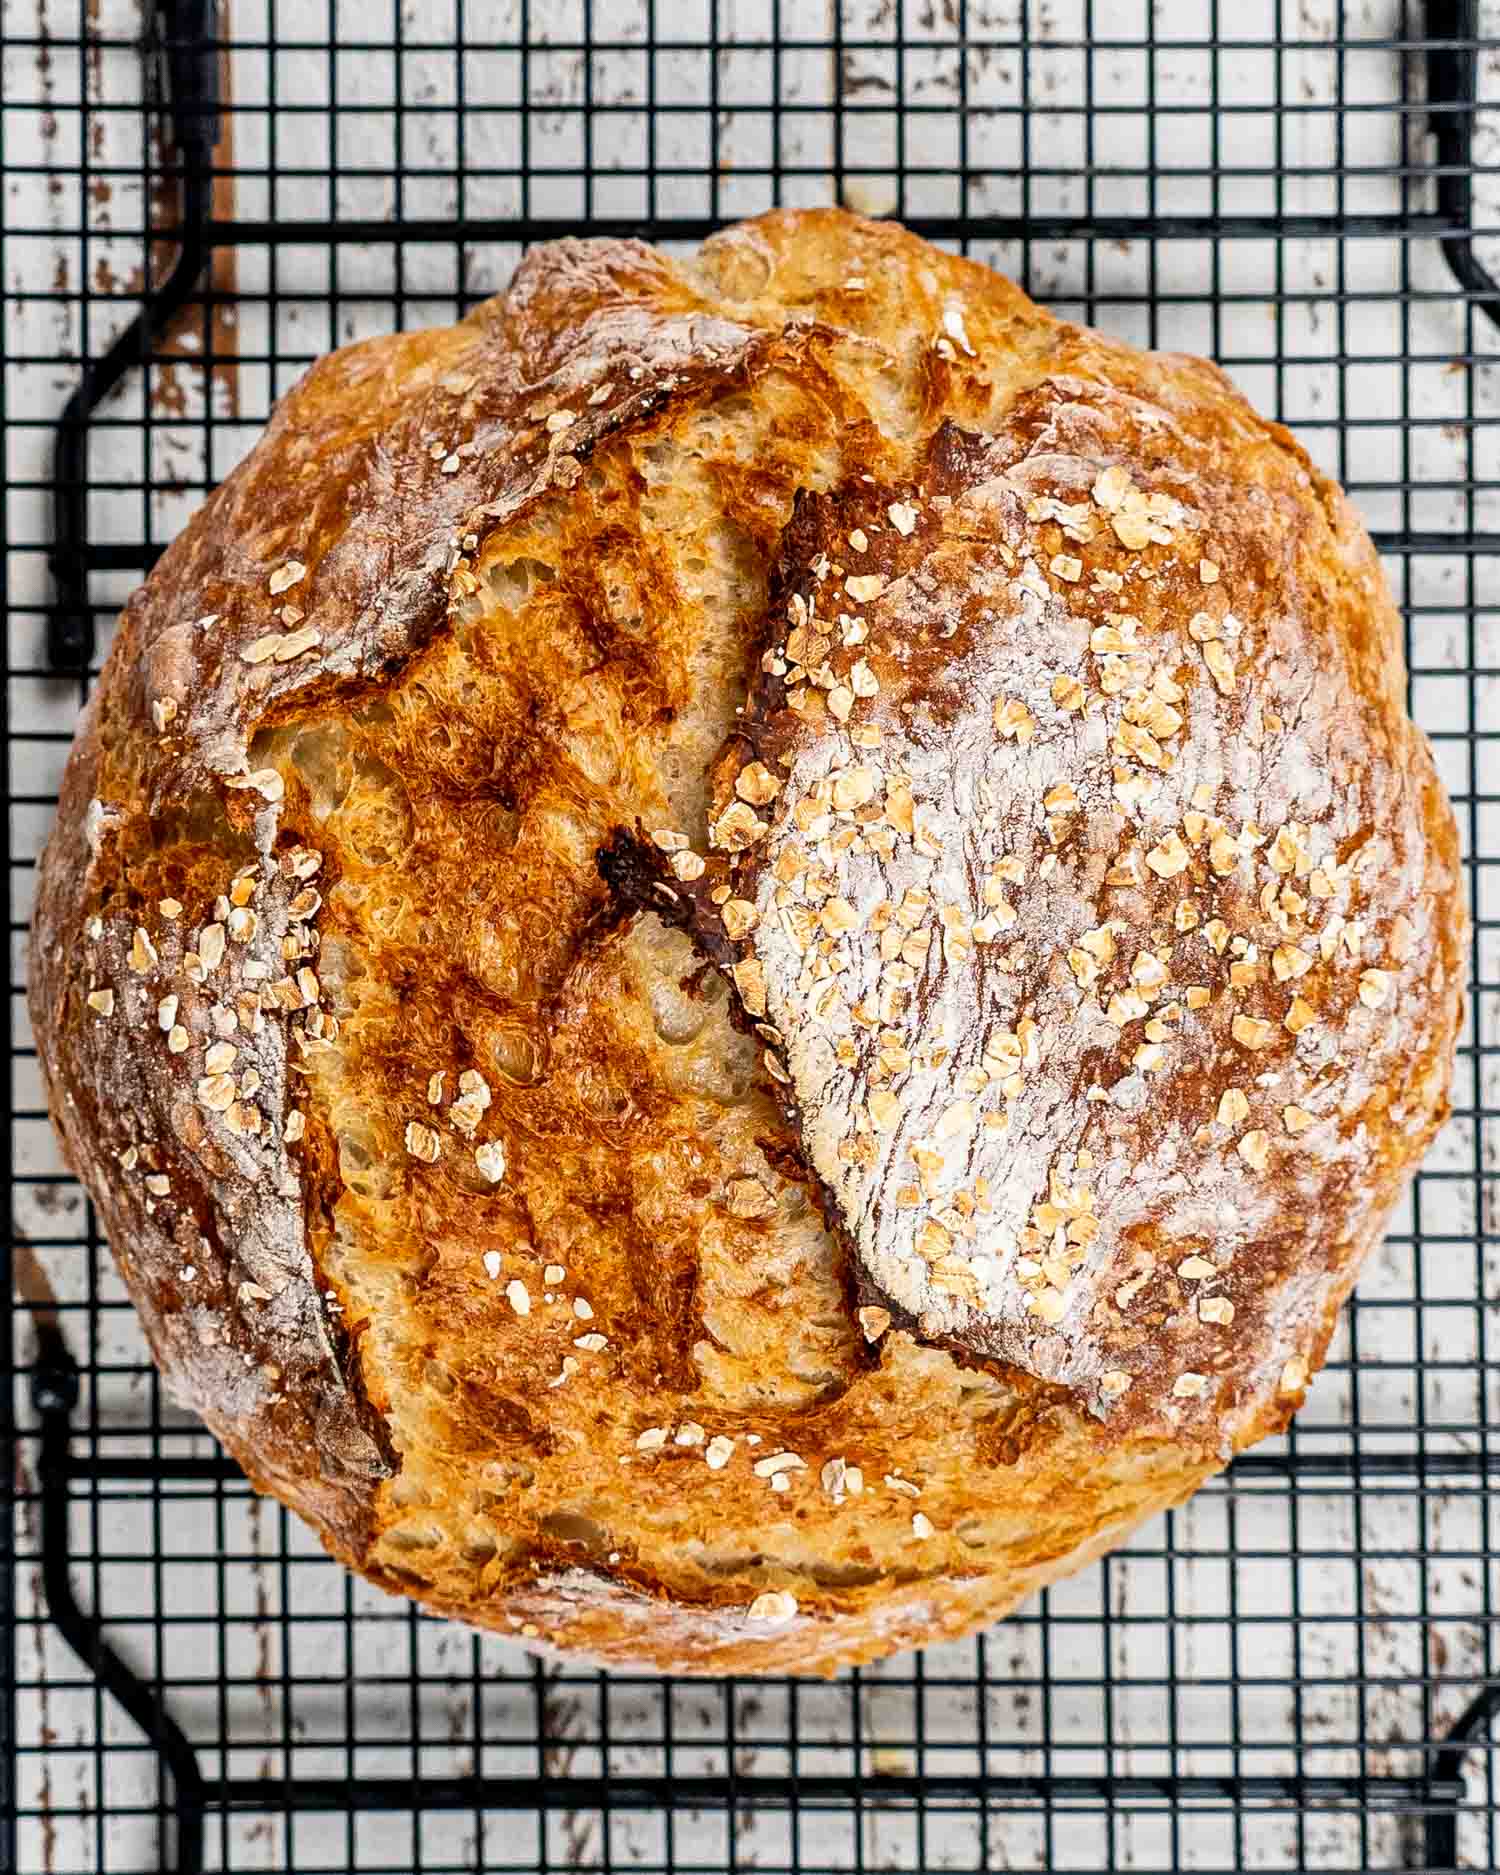
Lift the parchment with the dough into the hot pot. Cover and bake for 30 minutes, then uncover and bake for another 15 to 20 minutes until golden and crusty. It should sound hollow when tapped or register around 200°F (93°C) in the center.
Don’t slice into it right away, I know it’s hard. Let it cool completely so the crumb can set and the crust holds. Then go nuts.
Frequently Asked Questions
Can I use quick oats or steel-cut oats?
Quick oats work fine, but they’ll blend more into the dough and give you a softer texture. Steel-cut oats are a no-go, they won’t soften enough and will make the bread chewy in a not-so-great way.
Why is my dough so sticky?
That’s how it’s supposed to be. Sticky dough = open, airy crumb. Don’t add more flour or you’ll end up with a heavy loaf. Just flour your hands and surface generously when shaping.
Why is the bottom of my bread so hard?
Your Dutch oven is likely too close to the heating element. Try putting a baking sheet on the rack below it, it acts like a heat shield and keeps the bottom from getting too crusty (or burnt).
Why is my bread dense or heavy?
Old yeast, not enough rise time, or using too much flour are the usual suspects. Make sure your yeast is fresh, water is warm (not hot), and you give the dough a full 12–24 hour rest.
Do I need to activate the yeast first?
Nope! In no knead recipes, the long rest time does all the heavy lifting. Just mix it in with the dry ingredients and let time do the work.
Can I use whole wheat flour instead of all-purpose?
You can sub in about 1 to 1½ cups of whole wheat flour, but don’t swap it all or your bread may turn out dense and dry. Start small and adjust from there.
Can I double the recipe?
Technically yes, but I’d recommend baking two loaves separately for best results. A single loaf already fills most Dutch ovens, and doubling can throw off the bake.
Storage + Reheating
- Room Temp: Wrap the loaf in foil or stash it in a bread bag and keep it on the counter for up to 4 days. Skip the fridge, it’ll just dry it out faster.
- Freezer: Once cooled, wrap it tightly in plastic wrap or foil and pop it into a freezer bag. It freezes well for up to 3 months. I like to slice mine first so I can pull out just what I need.
- To Reheat: Let frozen bread thaw at room temp, then warm it in the oven at 350°F (175°C) for 10–12 minutes to bring back that crispy crust. For slices, just toast ’em, works like a charm.
Other No Knead Bread Recipes To Try
- No Knead Potato Bread
- No Knead Whole Wheat Bread
- Air Fryer No Knead Bread
- No Knead Cinnamon Raisin Bread
- Fast and Easy No Knead Bread
- No Knead Jalapeno Cheddar Bread
- No-Knead Challah Bread
- No Knead Olive Bread
Before You Begin! If you make this, please leave a review and rating letting us know how you liked this recipe! This helps our business thrive & continue providing free recipes.
No Knead Honey Oat Bread
Video
Ingredients
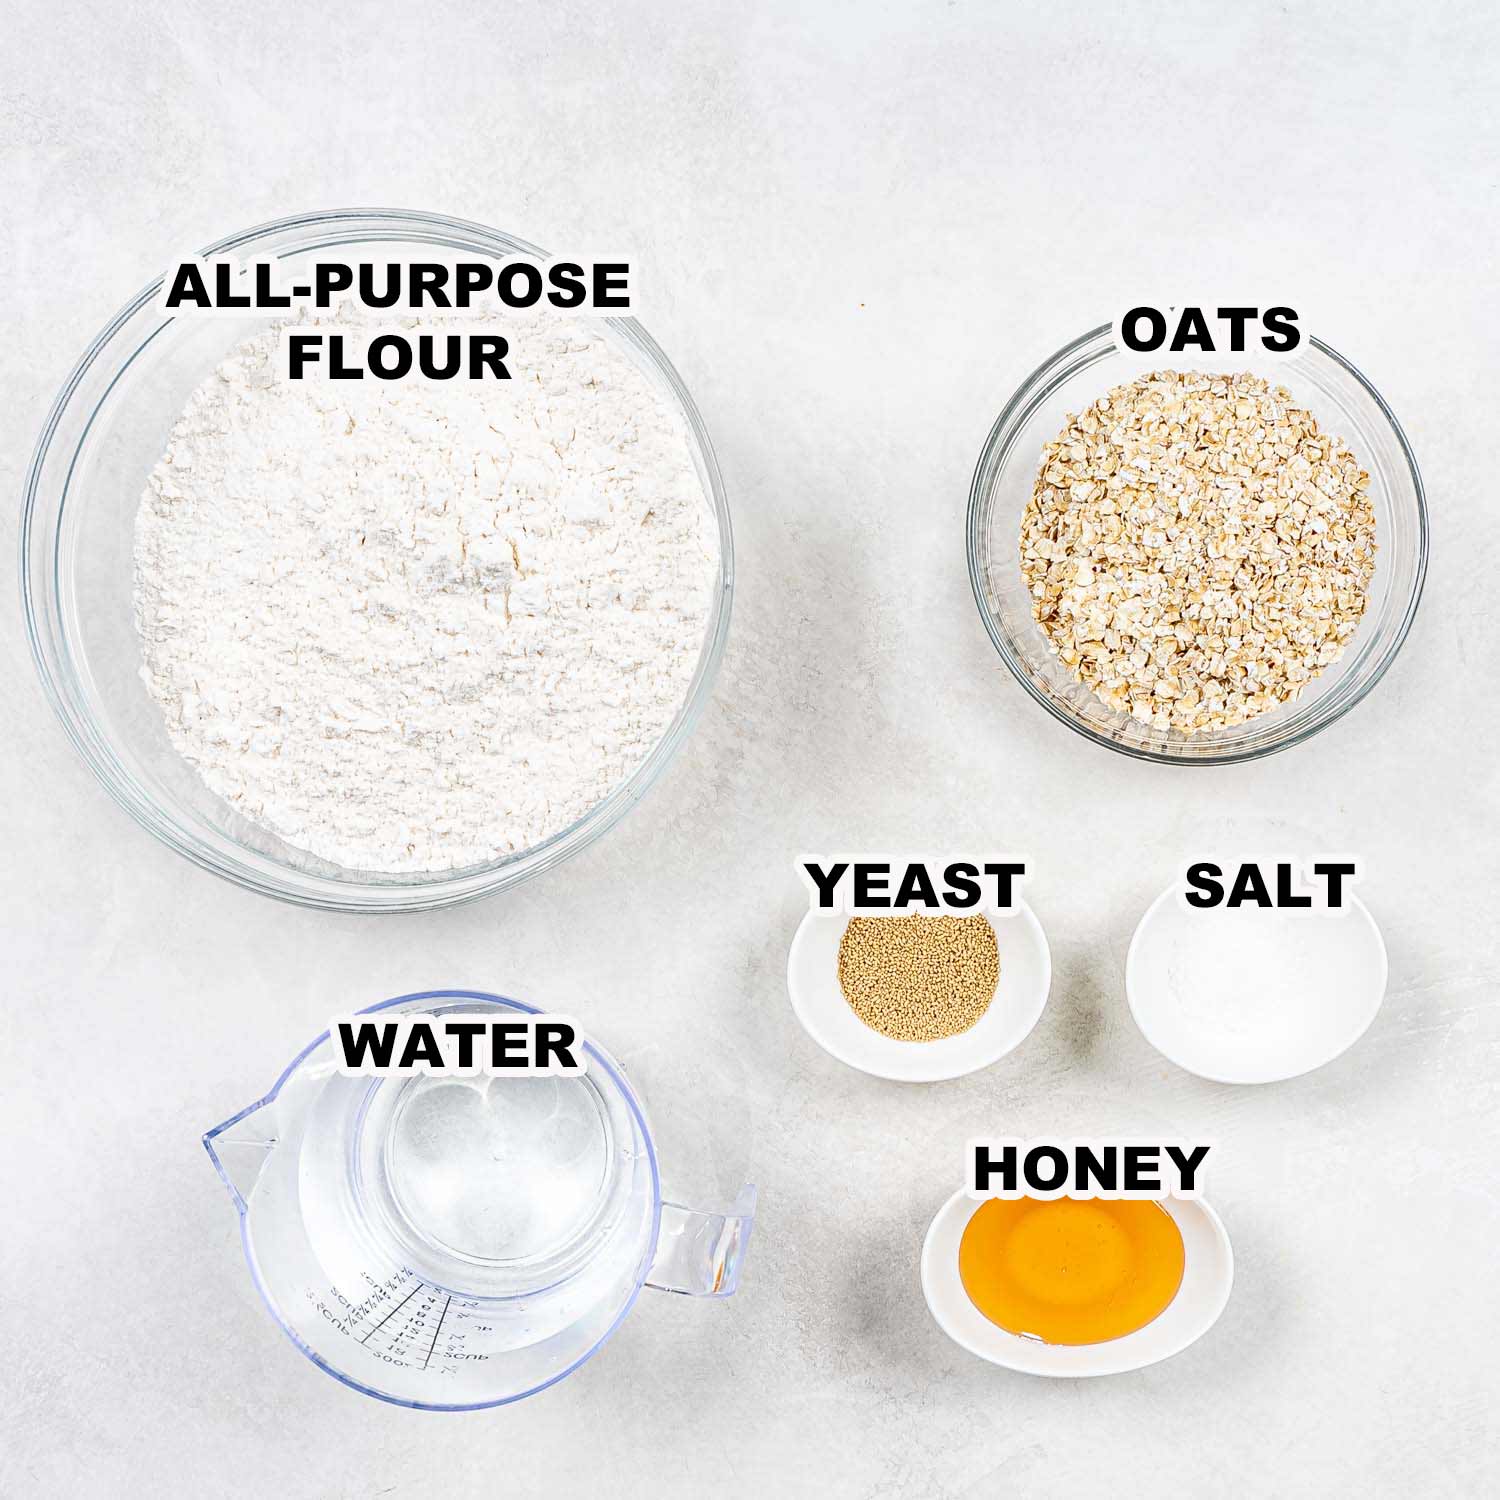
- 3¾ cups all-purpose flour
- 1 cup oats
- 1 teaspoon salt
- 1 teaspoon active dry yeast
- 2 tablespoons honey
- 2 cups warm water
Before You Begin! If you make this, please leave a review and rating letting us know how you liked this recipe! This helps our business thrive & continue providing free recipes.
Instructions
- In a big bowl mix the flour, oats, salt and yeast together. Combine the warm water with the honey then pour into the bowl and using a spatula or a wooden spoon mix it until well incorporated.
- Cover the bowl with plastic wrap and let it sit on your counter or inside your unheated oven for 12 to 24 hours.
- Preheat oven to 450°F. Add your cast iron pot to the oven as it's heating and heat it as well until it's at 450°F. Usually when the oven is done preheating your pot should be hot enough as well. Remove the pot from the oven and remove the lid from it. Use oven mitts, as to not burn yourself.
- Flour your hands really well and also sprinkle a bit of flour over the dough. With your floured hands gently remove the dough from the bowl and roughly shape it into a ball. Place the dough over a piece of parchment paper.
- I like to score the top of the bread with a sharp knife, this will make the bread look pretty and prevent it from cracking. You can also sprinkle some more oats over the top of the bread. Take the ball of dough with the parchment paper and drop it into the hot Dutch oven. Cover the pot with the lid and place it back in the oven.
- Bake for 30 minutes with the lid on, after which remove the lid and bake for another 15 to 20 minutes until golden brown. Remove the bread from the pot, it should fall out easily. Let cool completely before slicing into it and serving.
Equipment
Notes
- Dough will be sticky: don’t add extra flour! Use floured hands and parchment when shaping.
- Let the dough rise at least 12 hours for best texture and flavor.
- Use old-fashioned oats for best texture; avoid steel-cut oats.
- For easier freezing, slice the bread first, then wrap tightly.
- A preheated Dutch oven gives you that signature crackly crust.
Nutrition Information
Notice: Nutrition is auto-calculated for your convenience. Where relevant, we recommend using your own nutrition calculations.
