No Knead Cinnamon Raisin Bread
This post may contain affiliate links. Please read my disclosure policy.

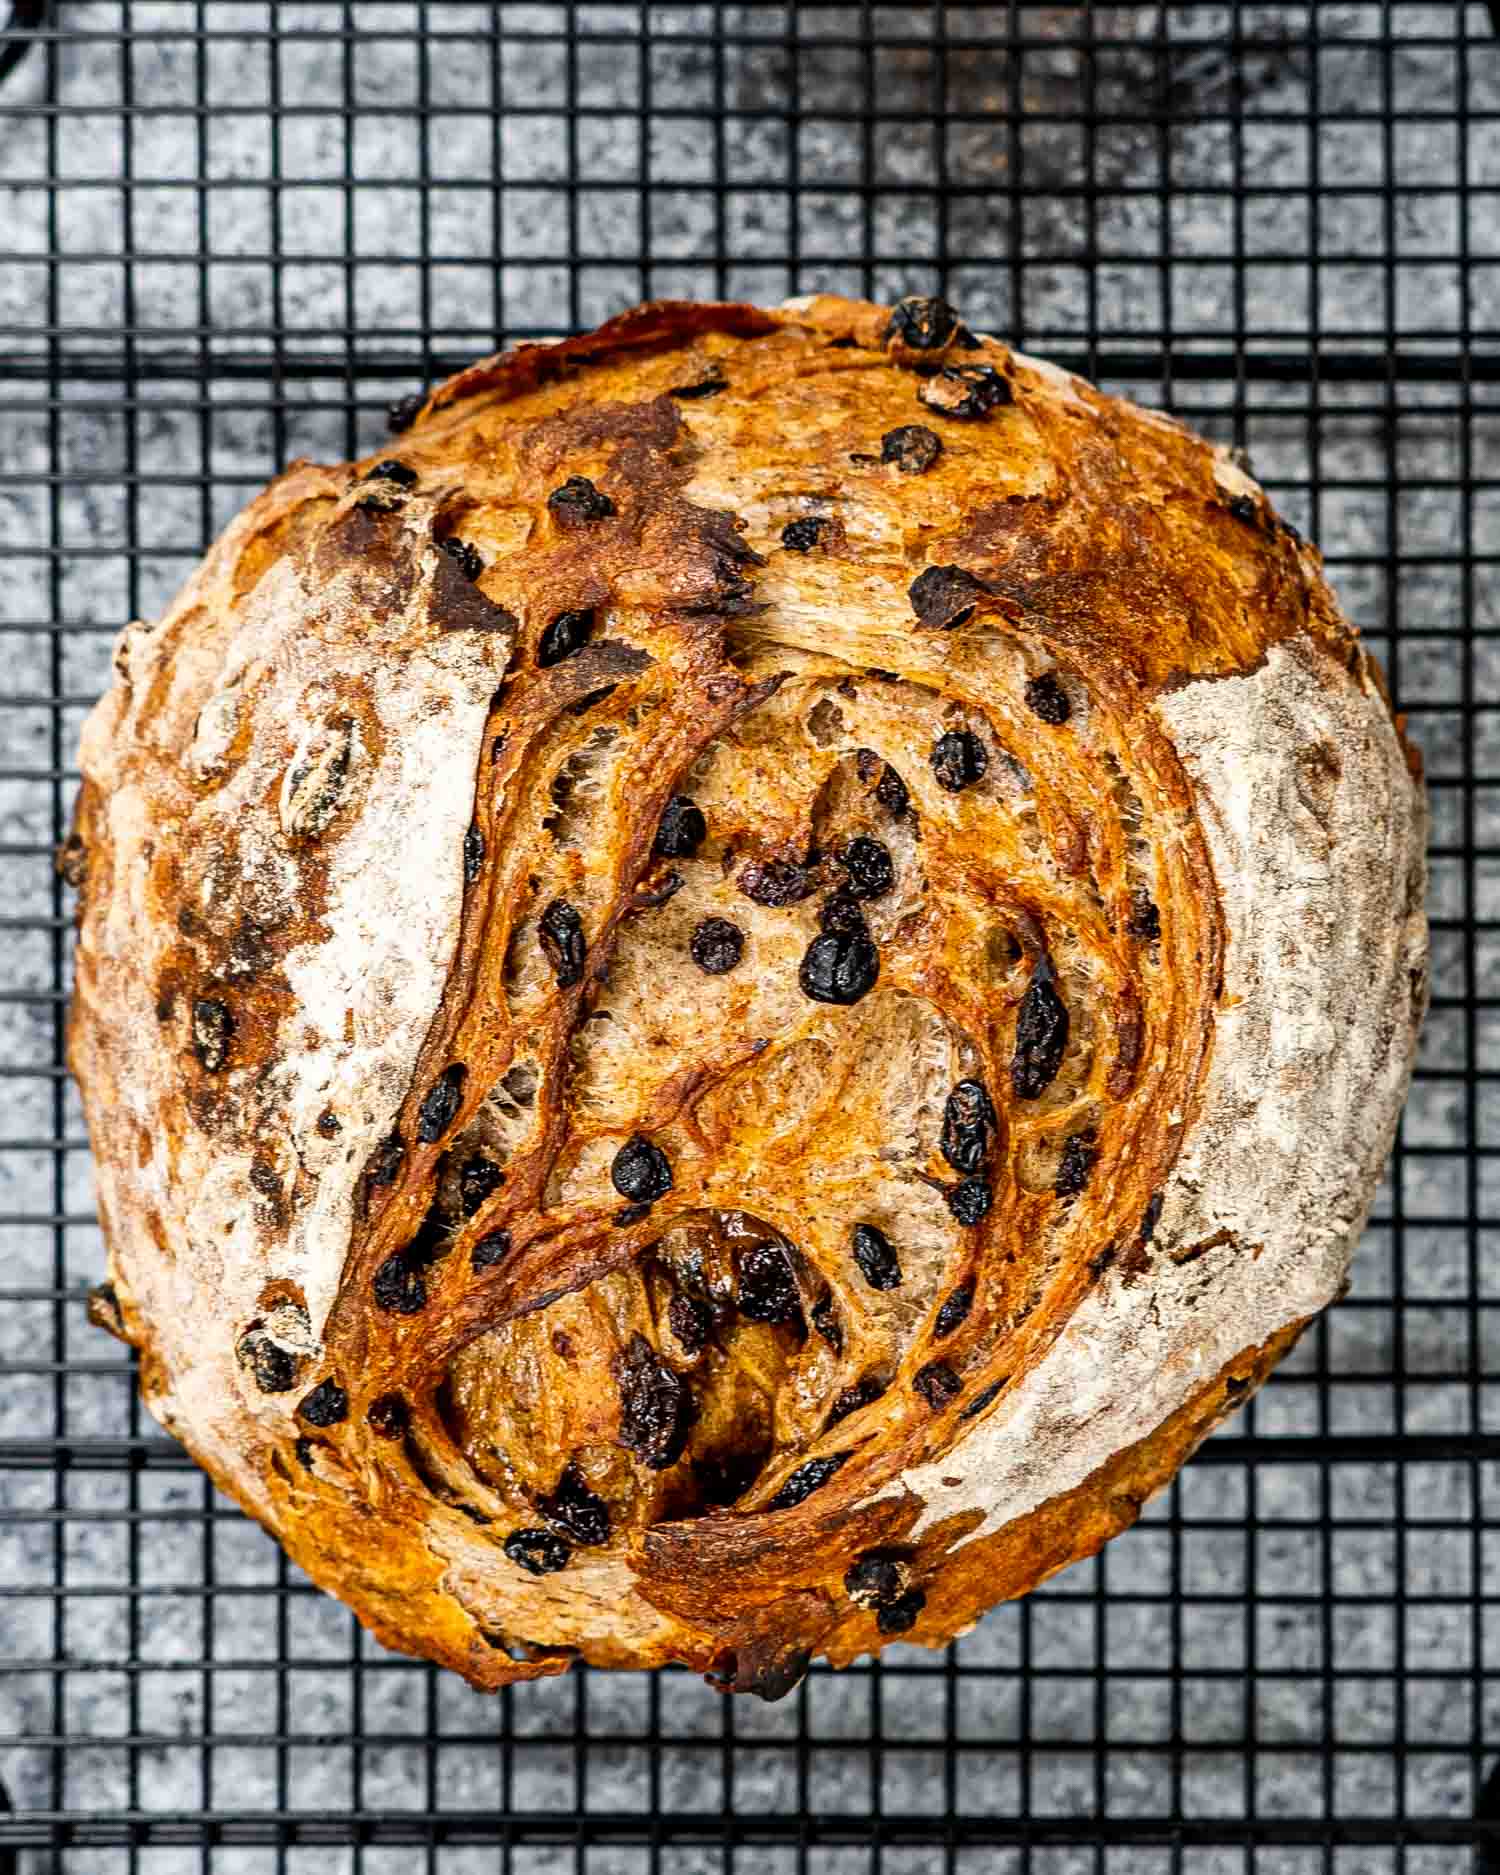
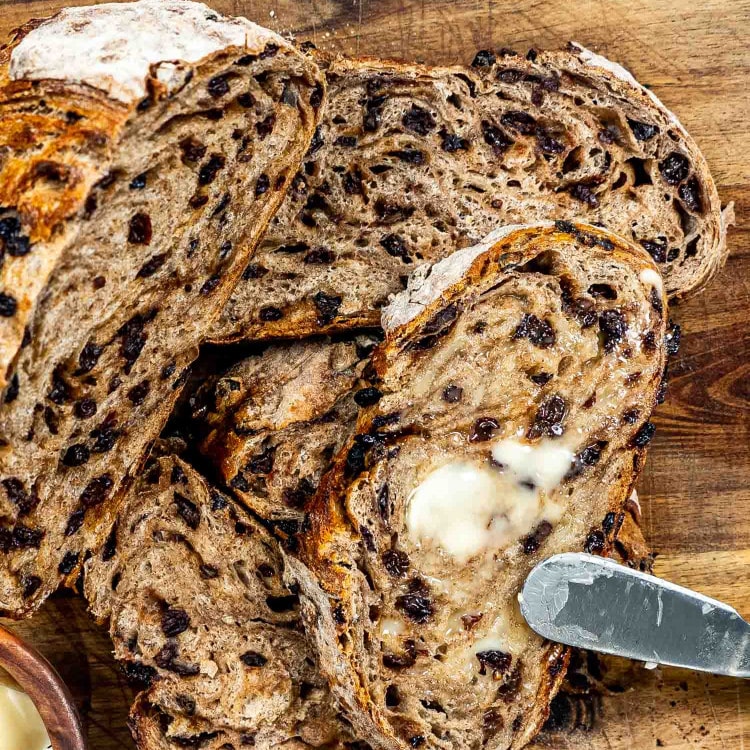
No Knead Cinnamon Raisin Bread – Soft, chewy, full of warm spice and sweet raisins. Bakery worthy with none of the elbow grease.

A Loaf That Takes Me Back
I still remember my first job, 14 years old, working the early shift at a local bakery. Every morning I’d sneak a whiff of the cinnamon raisin bread as it came out fresh, warm, and golden. That smell? It stuck with me. And to this day, nothing makes my kitchen feel more like home than this loaf.
This no knead cinnamon raisin bread is my low effort, high reward version of that memory. No kneading, no special tools, no bakery training required, just a dough that practically makes itself while you go about your day. Fold in a little brown sugar, bake it in your trusty Dutch oven, and boom, that same warm, toasty smell fills the house. Minus the 3 a.m. alarm.

Why You’ll Love This No Knead Cinnamon Bread
- Soft, chewy, and crusty in all the right ways: This loaf checks every texture box. Crispy crust, springy interior, and juicy little pockets of raisin.
- Just sweet enough: The cinnamon and brown sugar give it warmth and depth without making it dessert. (Unless you slather it with butter. Then… fair game.)
- Low effort, high payoff: Stir, wait, bake. That’s it. The dough does the work while you sleep, run errands, or binge old episodes of Friends.
- Nostalgic in the best way: It smells like childhood, weekends, cozy kitchens, and tastes even better toasted with a swipe of salted butter.
- Beginner friendly, but bakery worthy: No kneading, no stress, no dough drama. Just a loaf that’ll make you feel like you’ve been baking for years.
Delicious!!!! So easy to make and so yummy I have to make myself put it away so I stop nibbling on it! Thanks for my NEW favorite recipe❤️ ~Jill

Before You Start: Tips & Ingredient Notes
- No kneading, but yes patience: This dough needs a good 12–18 hours to rise, so plan ahead. Overnight is perfect.
- Use lukewarm water: Aim for 105°F to 115°F (41°C to 46°C). Too cold and your yeast snoozes. Too hot and you’ll kill it.
- Don’t stress about perfect folding: When it’s time to add the brown sugar, just give the dough a few gentle turns. You’re not laminating croissants here.
- Cinnamon matters: Use a fresh, warm cinnamon you actually like. This bread’s all about that cozy spice.
- Brown sugar goes in late on purpose: Folding it in just before shaping gives little swirls of sweetness throughout the loaf.
This recipe is amazing. I’ve made it probably 4 times in 2 weeks and it’s perfect every time. I screwed up and added the brown sugar in the beginning but it turned out great. Best raisin bread I’ve ever had and so easy. ~Dina
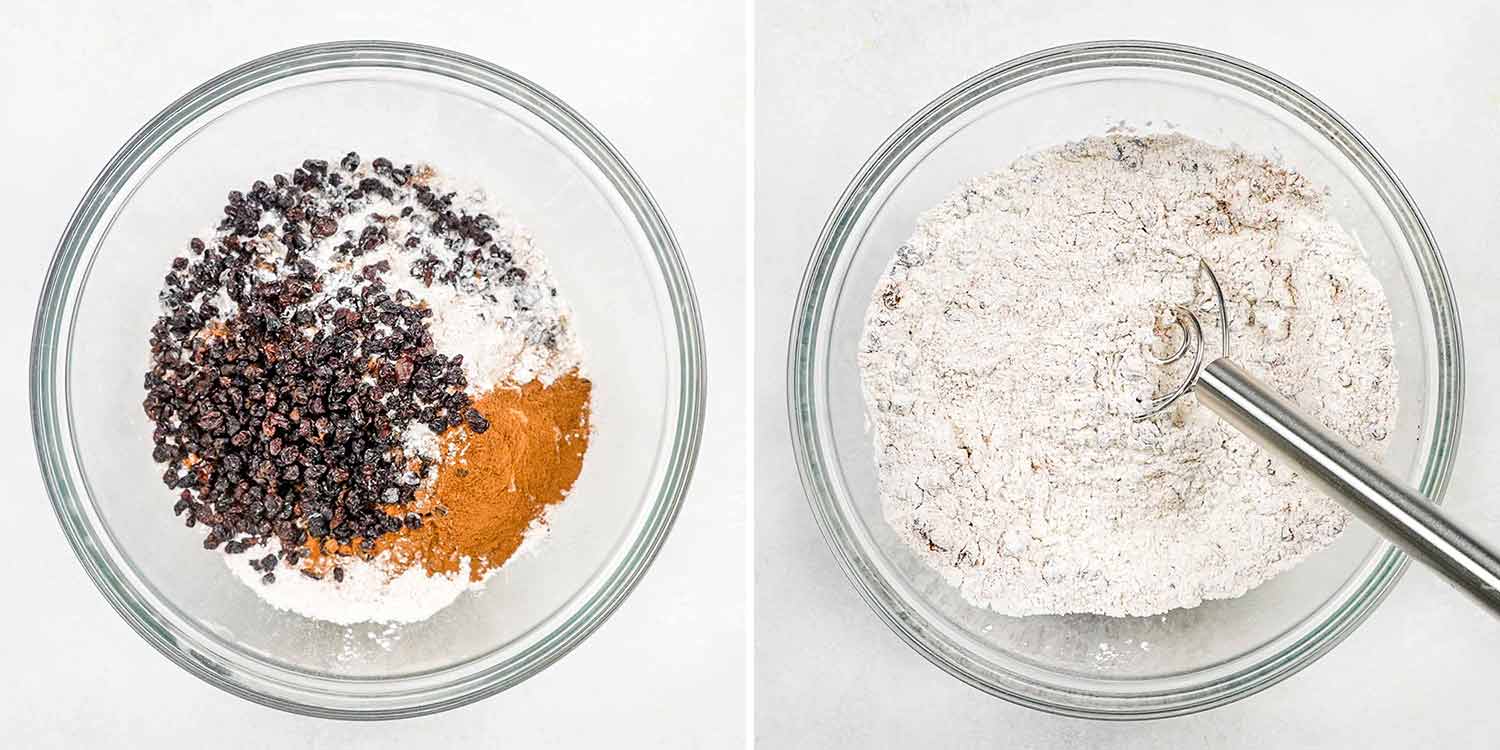
In a large bowl, stir together the flour, salt, yeast, cinnamon, and raisins.
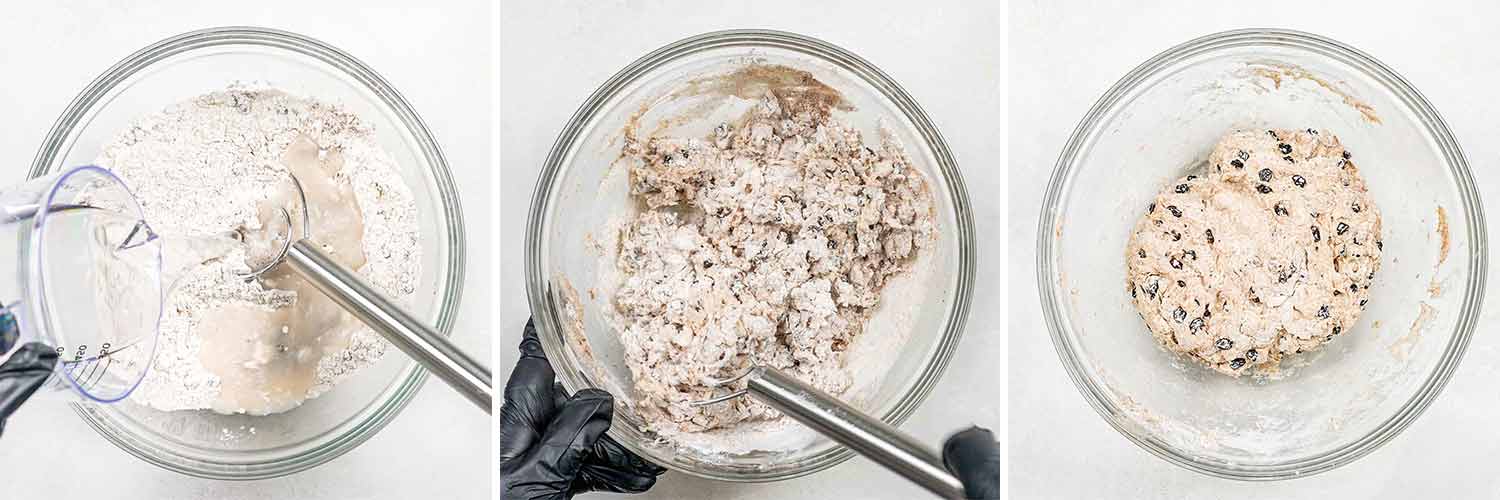
Pour in the lukewarm water and mix with a wooden spoon or spatula until it’s all fully combined and there’s no dry flour left. That’s it, dough’s done. No kneading. No stress.

Cover the bowl with plastic wrap or a clean kitchen towel and let it sit on your counter for 12 to 18 hours. Yes, it takes time, but that’s how you get all that flavor and those lovely air pockets. Minimum 5 hours if you’re in a rush, but longer is better.
When your dough’s good and bubbly, preheat the oven to 450°F (232°C). Pop your Dutch oven (with the lid on) inside to heat up too, about 30 minutes should do it. The pot needs to be hot.
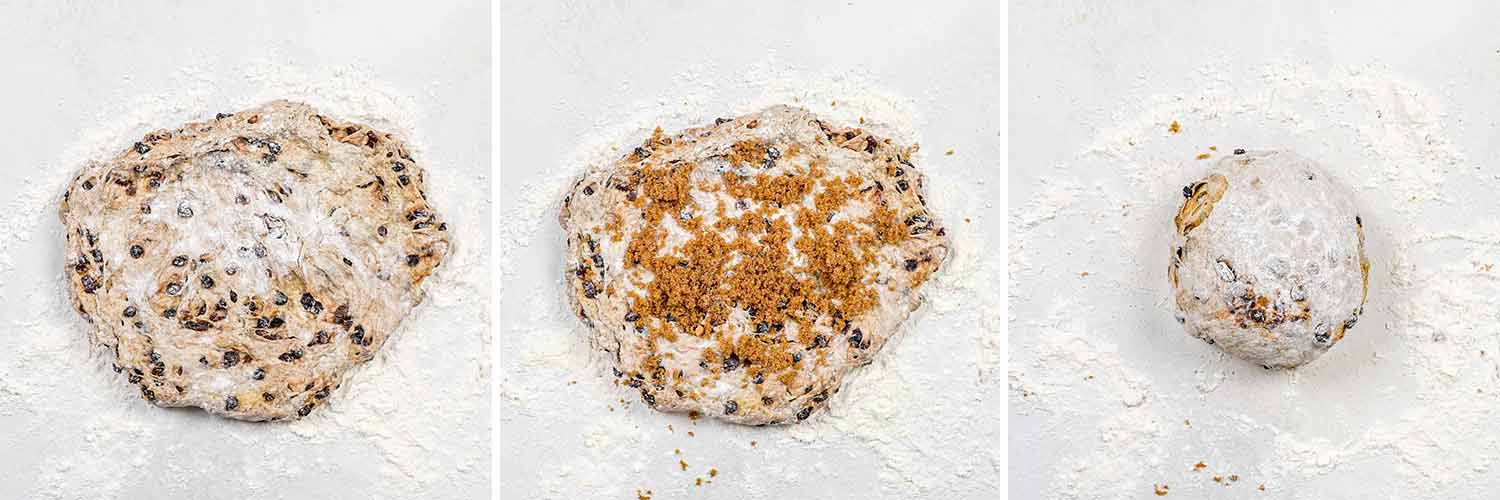
Flour your hands and sprinkle some flour over the dough. Gently lift it out onto a floured surface. Flatten it slightly, then sprinkle the brown sugar on top. Fold the dough over itself a few times to tuck that sugar in, then shape it into a rough ball. Don’t overthink it.
Place it on a piece of parchment paper for easy transfer.
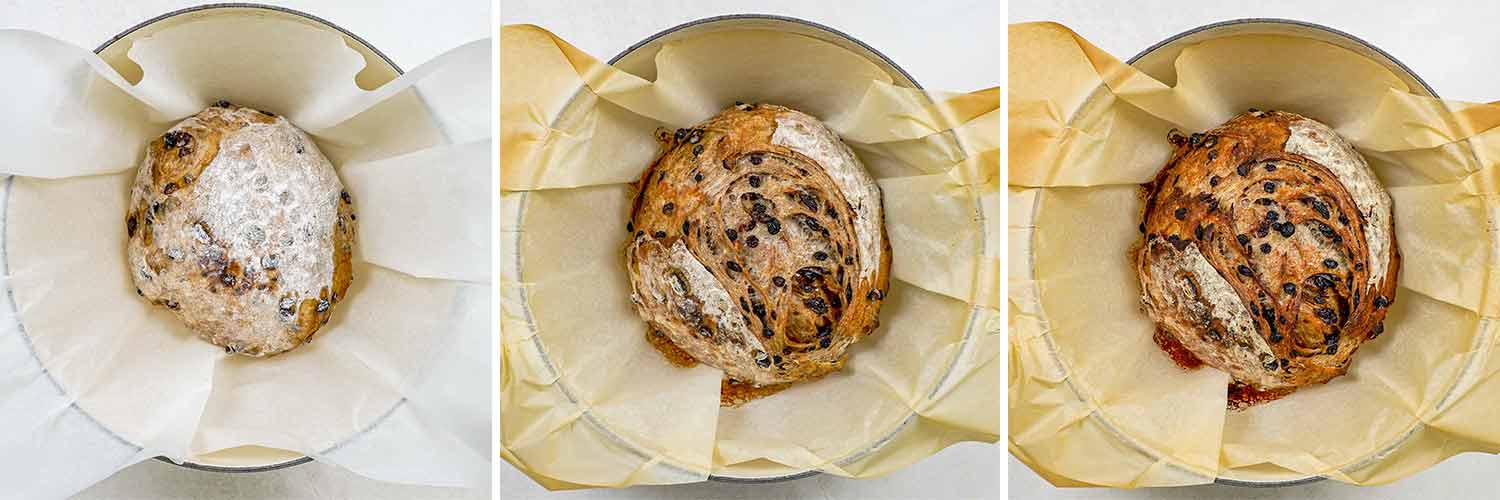
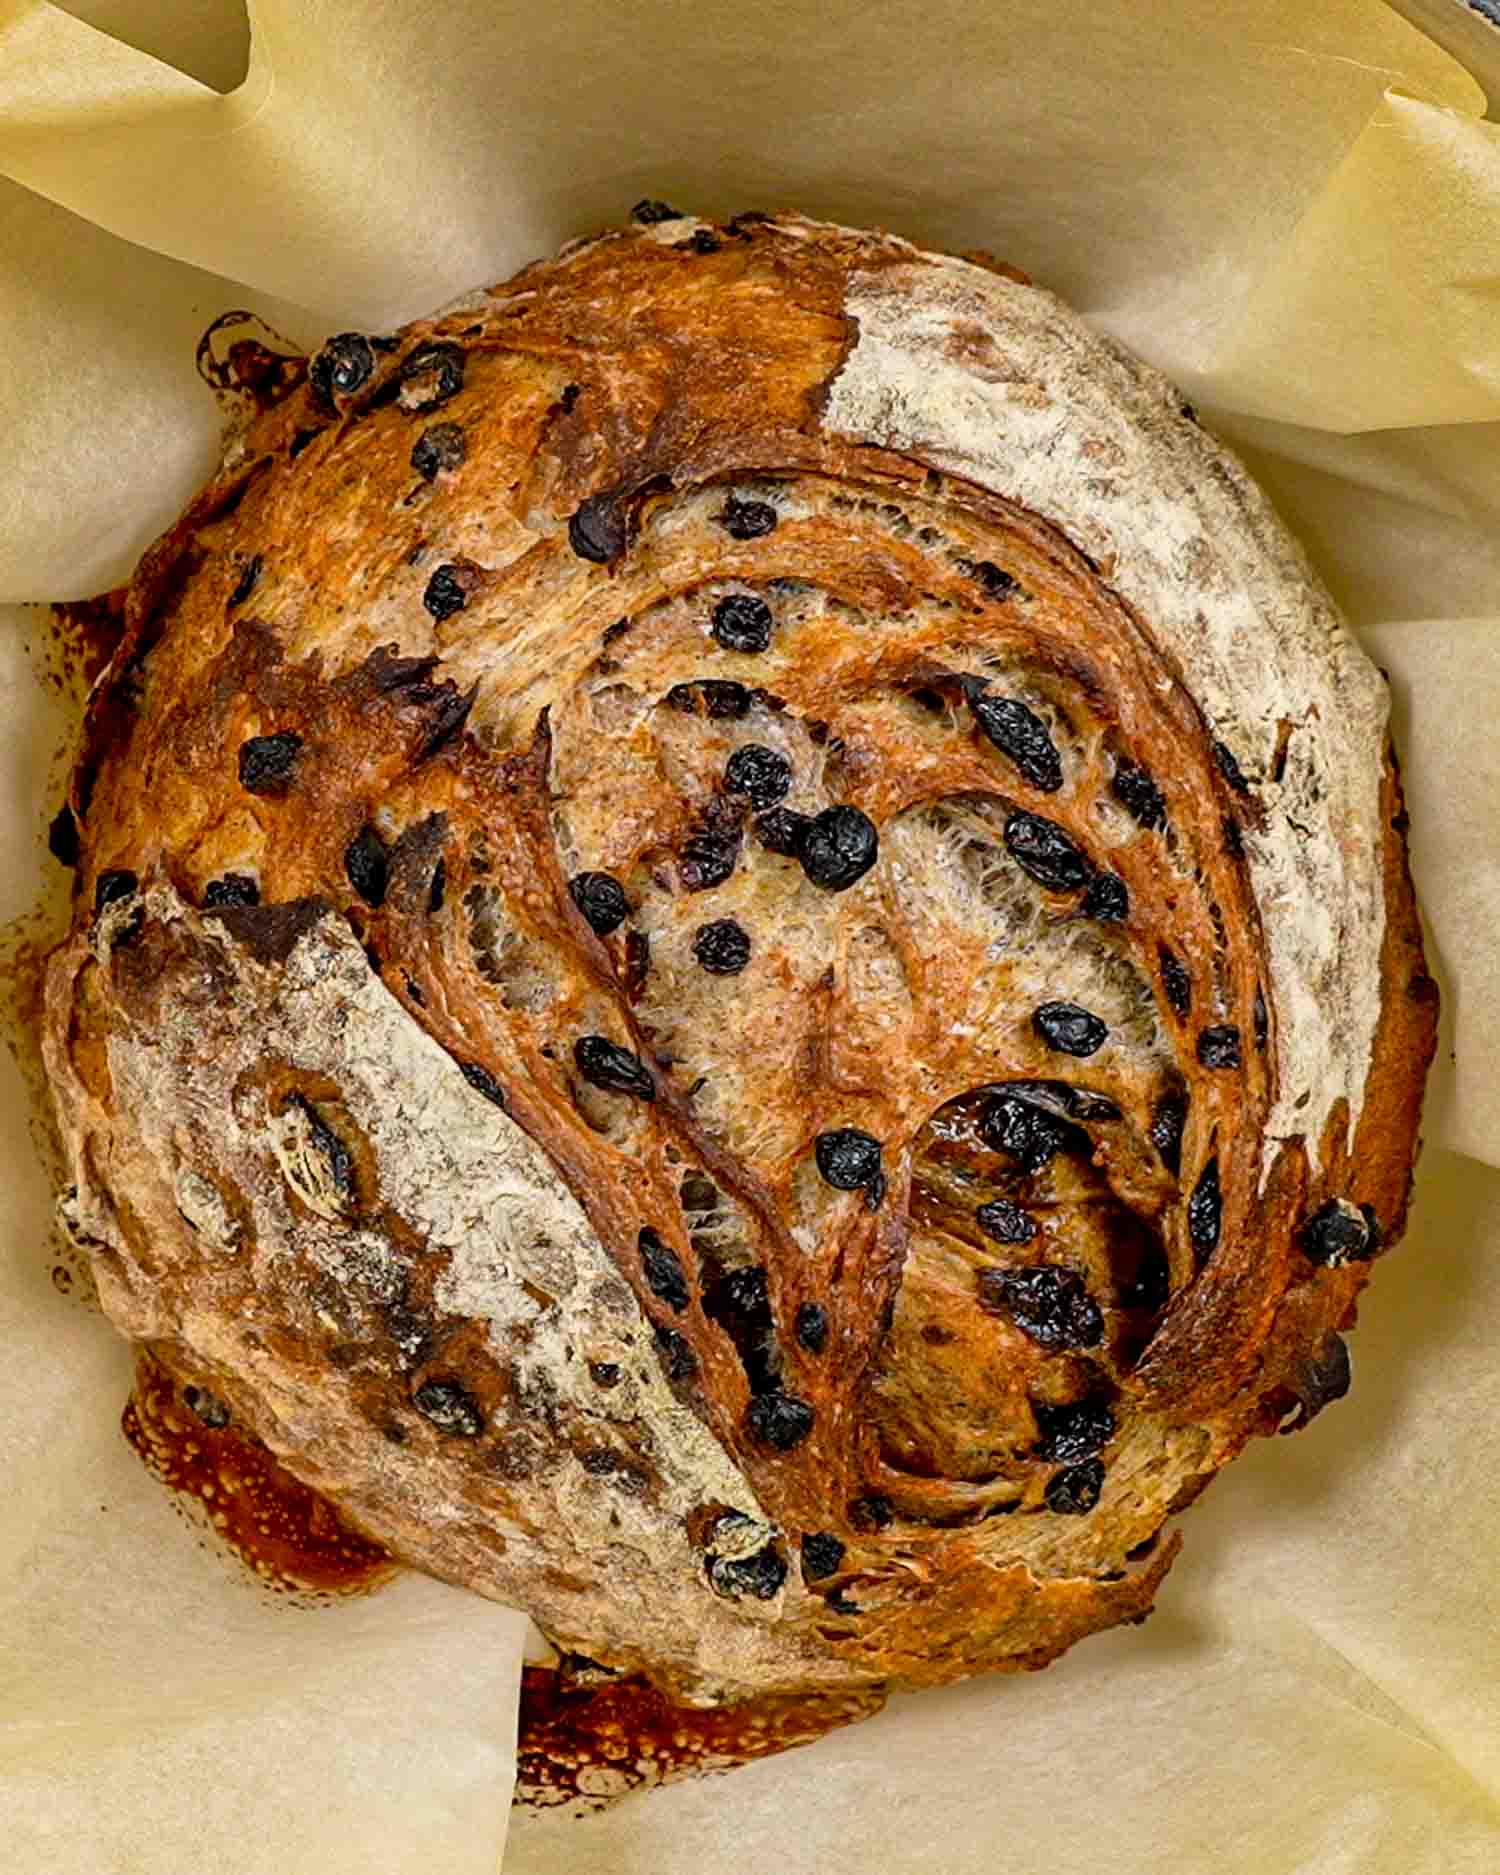
Carefully lift the parchment with the dough and drop it into the hot Dutch oven. Cover and bake for 30 minutes. Then uncover and bake for another 15–20 minutes, or until golden brown and the loaf sounds hollow when tapped on the bottom.
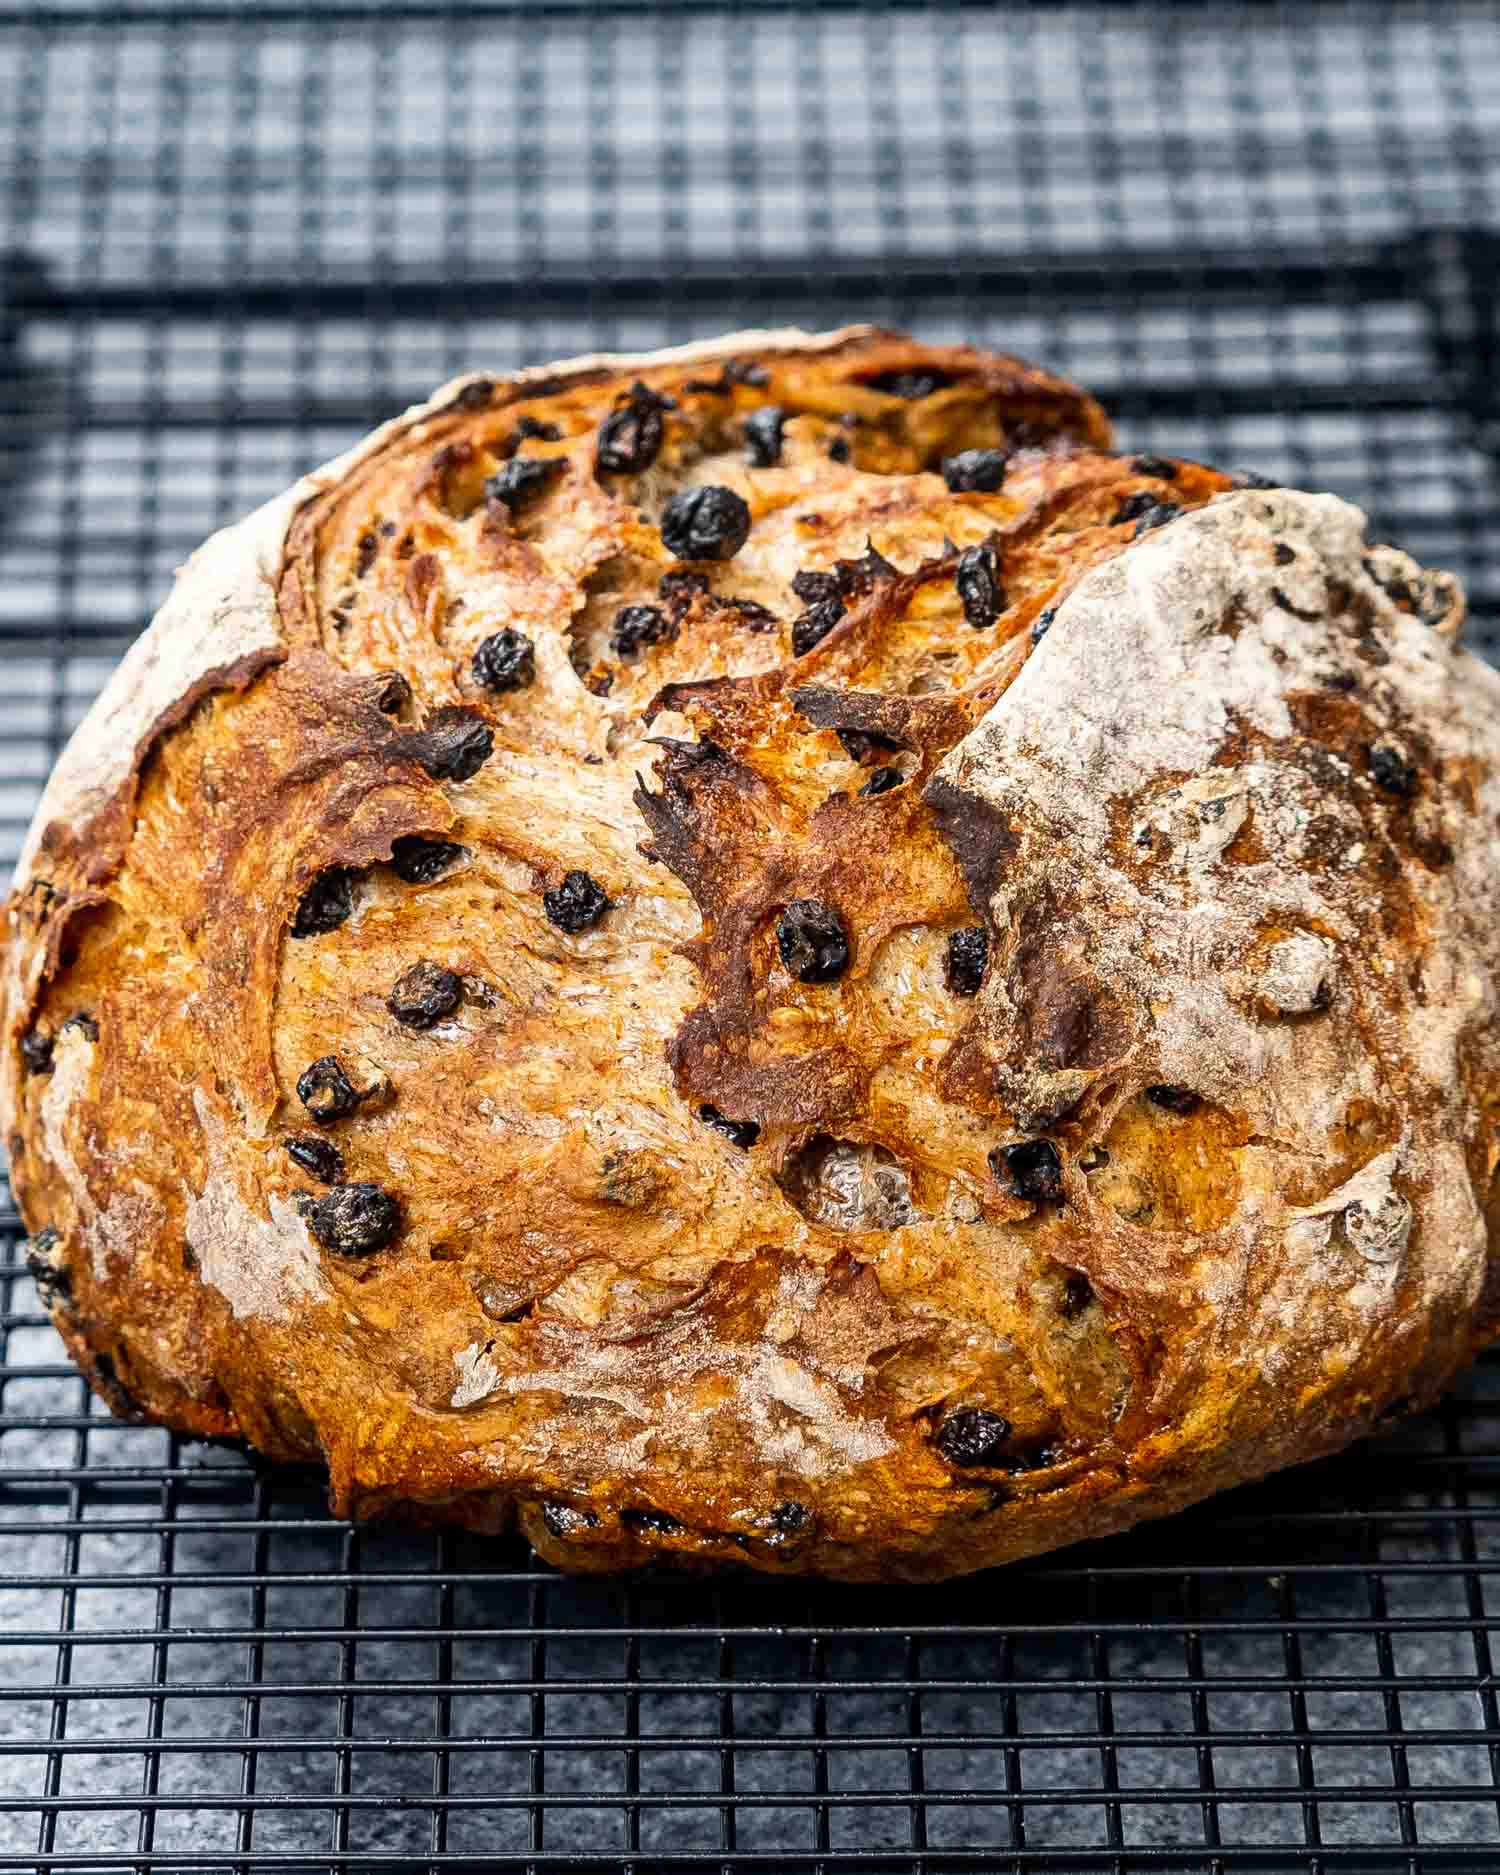
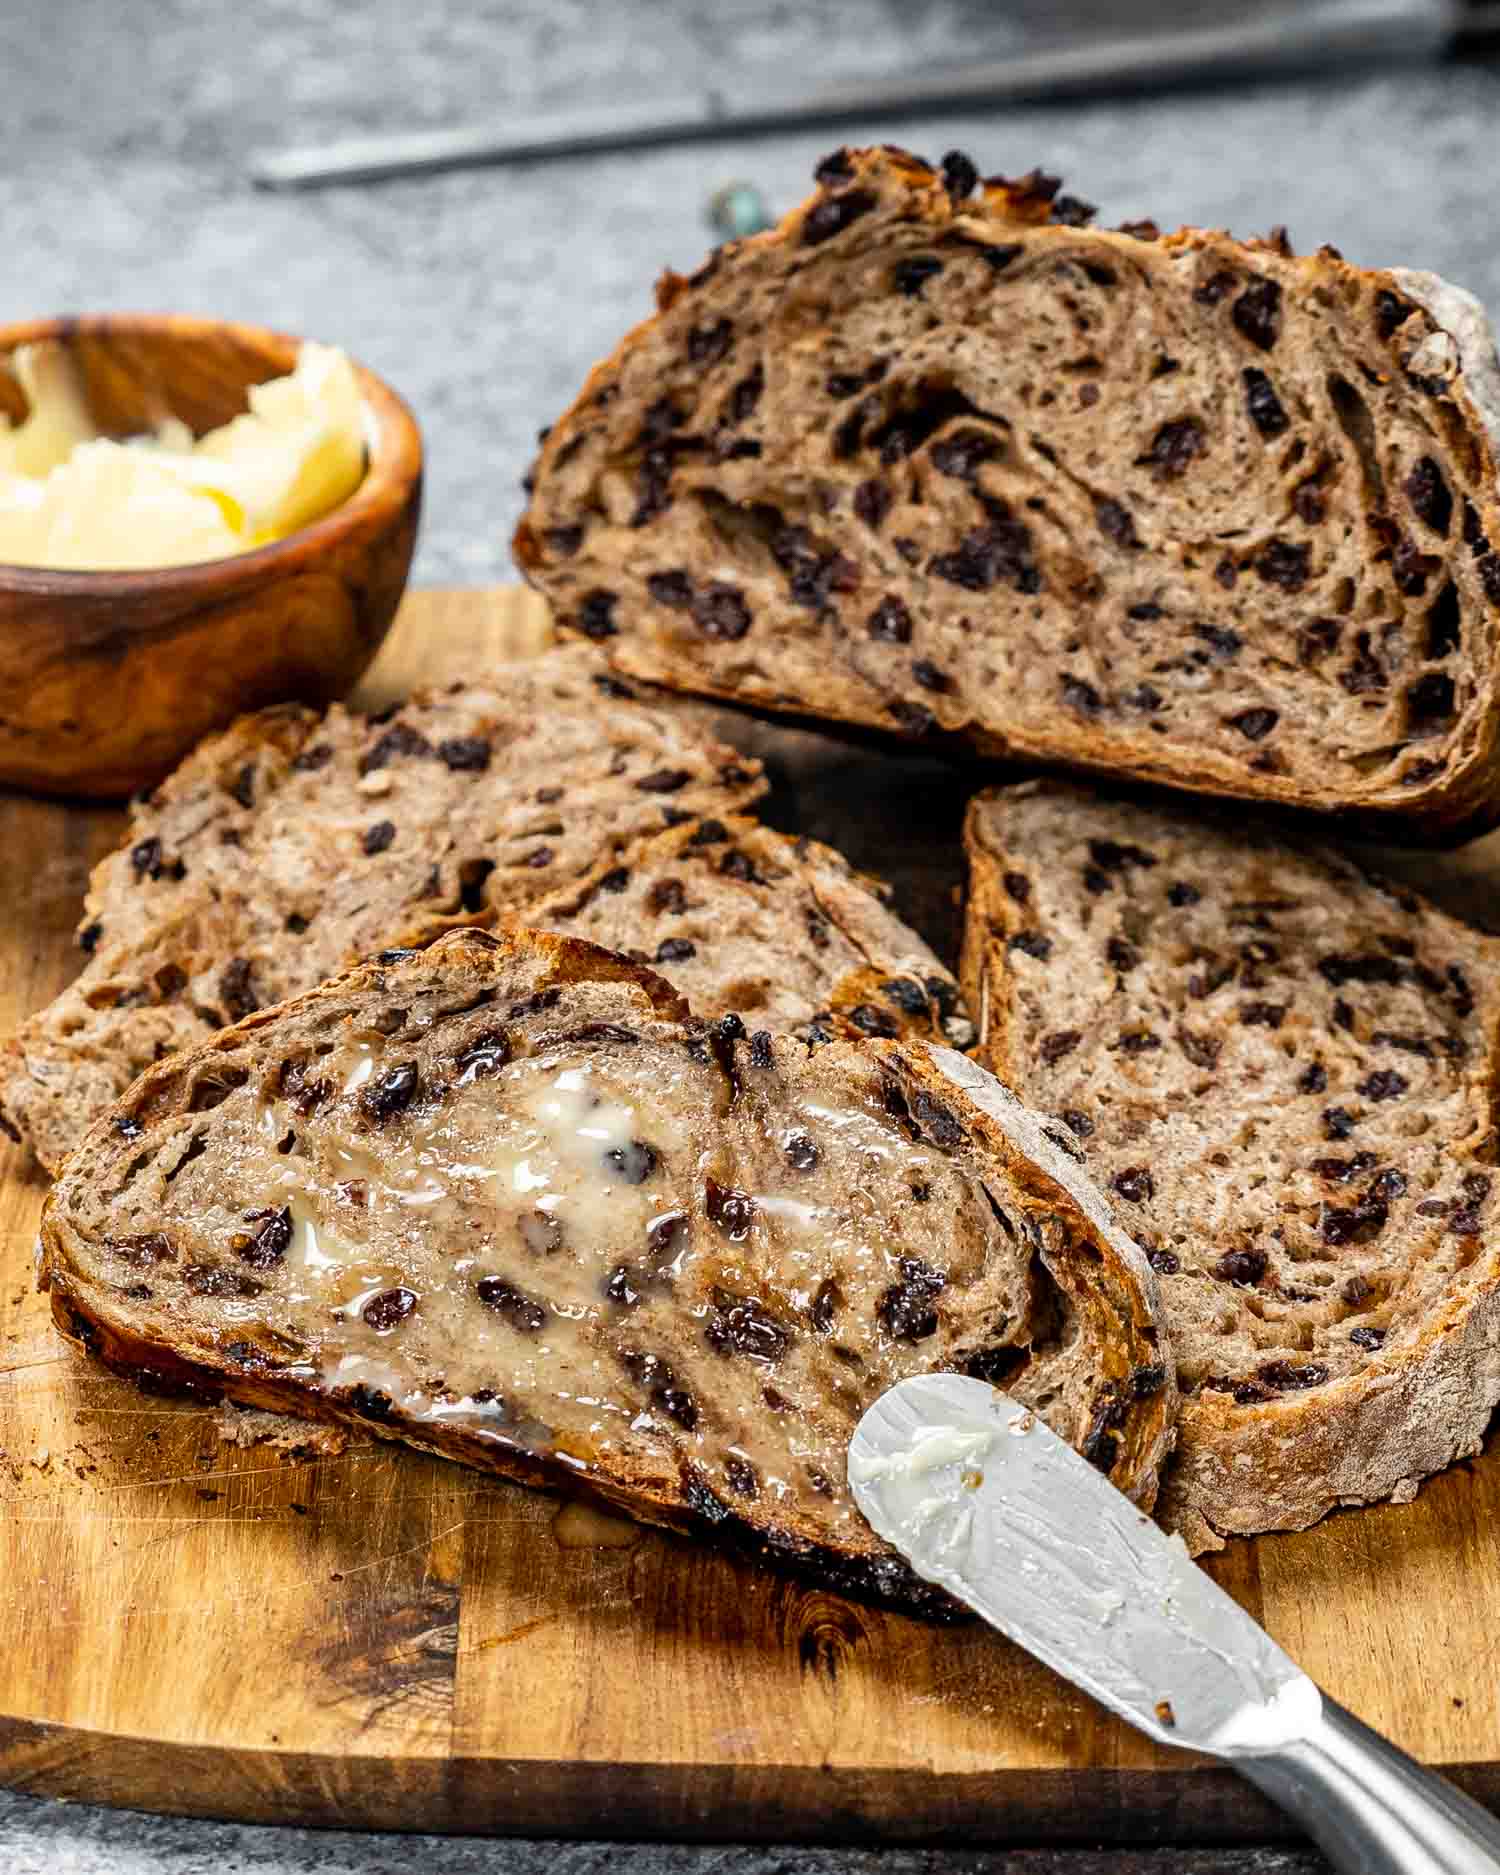
Let the bread cool completely before slicing, I know it’s hard to wait, but trust me. Warm bread = gummy texture. Let it chill, then go wild with the butter.
This bread was one of my first attempts at making bread. I love your in depth explanations and easy instructions! I love making this in the mornings as the smell fills the house with the most amazing smell of cinnamon and fresh bread. Thanks for sharing all your amazing recipes so I can make this delicious bread for my family. My little girl wakes up with a big smile because of it! ~Katie
Frequently Asked Questions
Why do I have to wait so long for it to rise?
This is where the magic happens (well, not magic, just yeast doing its thing slowly and beautifully). That long rise develops flavor and gives you those gorgeous air pockets, no kneading required.
Can I speed it up?
You can! If you’re short on time, use 1 teaspoon of yeast instead of ½ teaspoon, it’ll cut the rise time way down (to around 4–6 hours). Just know the flavor won’t be quite as developed, but the texture will still be great. It’s a solid option when you need cinnamon raisin bread today and not tomorrow.
Why is my bread dense?
It probably didn’t rise long enough, or the yeast was expired. This recipe needs time and a warm-ish environment (think cozy room, not sauna). Also, double check your flour measurements, too much and you’ll end up with a brick.
Do I really need a Dutch oven?
It helps create that perfect steam environment for a crisp crust. But if you don’t have one, use any oven-safe pot with a lid that can handle 450°F (232°C). In a pinch? Heavy duty foil as a lid works too, just seal it well.
Why do we add the brown sugar later?
So you get those little sweet swirls instead of a uniformly sweet loaf. Think of it like a cinnamon bun vibe, pockets of caramel-y goodness instead of just sweet dough.
Can I use whole wheat flour?
You can, but keep it to half whole wheat and half all-purpose or bread flour, otherwise the bread may turn out too heavy and dry.
What if my dough is super sticky?
Totally normal. Just flour your hands and work surface well when shaping. Sticky dough = soft bread. Don’t fight it.
Storage
- Room temperature: This bread keeps well for up to 4 days stored in an airtight container or bread bag. Just make sure it’s fully cooled before sealing it up.
- Freezer-friendly: Yep! Wrap it tightly in plastic wrap, then foil, or pop it in a freezer bag. It’ll keep for up to 3 months. Thaw it at room temp, then give slices a quick toast to bring them back to life.
- Don’t refrigerate it. The fridge will dry it out faster than your kids find snacks you thought were hidden.
Other Delicious No Knead Breads To Try
- No Knead Bread
- Air Fryer No Knead Bread
- No Knead Skillet Bread
- No Knead Whole Wheat Bread
- Fast and Easy No Knead Bread
- No Knead Potato Bread
Before You Begin! If you make this, please leave a review and rating letting us know how you liked this recipe! This helps our business thrive & continue providing free recipes.
No Knead Cinnamon Raisin Bread
Video
Ingredients
- 3 cups all-purpose flour
- 1 teaspoon salt
- ½ teaspoon active dry yeast
- 1 tablespoon cinnamon (ground)
- 1 cup raisins
- 1½ cup water (lukewarm (105°F to 115°F))
- 3 tablespoons brown sugar
Before You Begin! If you make this, please leave a review and rating letting us know how you liked this recipe! This helps our business thrive & continue providing free recipes.
Instructions
- In a big bowl mix the flour, salt, yeast, cinnamon and raisins together. Pour water into the bowl and using a spatula or a wooden spoon mix it until well incorporated. You do not need to activate the yeast before, even though we're using active dry yeast.
- Cover the bowl with plastic wrap and let it sit on your counter or inside your unheated oven for 12 to 18 hours. You need to let this dough rest for a minimum of 5 hours to allow the yeast to do its job.
- Preheat oven to 450°F. Add your cast iron pot to the oven as it's heating and heat it as well until it's at 450°F. Usually when the oven is done preheating your pot should be hot enough as well. Remove the pot from the oven and remove the lid from it. Use oven mitts, as to not burn yourself.
- Flour your hands really well and also sprinkle a bit of flour over the dough. With your floured hands gently remove the dough from the bowl and place it on a well floured work surface. Flatten the dough a little bit then sprinkle the brown sugar over the dough. Now fold the dough over itself a few times, to make the brown sugar blend a bit into the dough. Form the dough into a ball, use more flour if needed. Place the dough over a piece of parchment paper.
- Take the ball of dough with the parchment paper and drop it into the hot Dutch oven. Cover the pot with the lid and place it back in the oven.
- Bake for 30 minutes with the lid on, after which remove the lid and bake for another 15 to 20 minutes until golden brown. Remove the bread from the pot, it should fall out easily. Let cool completely before slicing into it and serving.
Equipment
Notes
- Use fresh yeast: If your yeast is past its prime, your loaf won’t rise properly. Always double check that expiration date.
- Water temp matters: Lukewarm is key (105°F to 115°F / 41°C to 46°C). Too hot and you’ll kill the yeast.
- Long rise = better bread: Overnight is best, but you can use 1 teaspoon yeast and shorten the rise to 4–6 hours if needed.
- Sticky dough is normal: Resist the urge to add more flour. Just flour your hands when shaping.
- Let it cool completely: Slicing while warm = gummy texture. Let it cool so the crumb sets properly.
Nutrition Information
Notice: Nutrition is auto-calculated for your convenience. Where relevant, we recommend using your own nutrition calculations.
