Roasted Garlic
This post may contain affiliate links. Please read my disclosure policy.
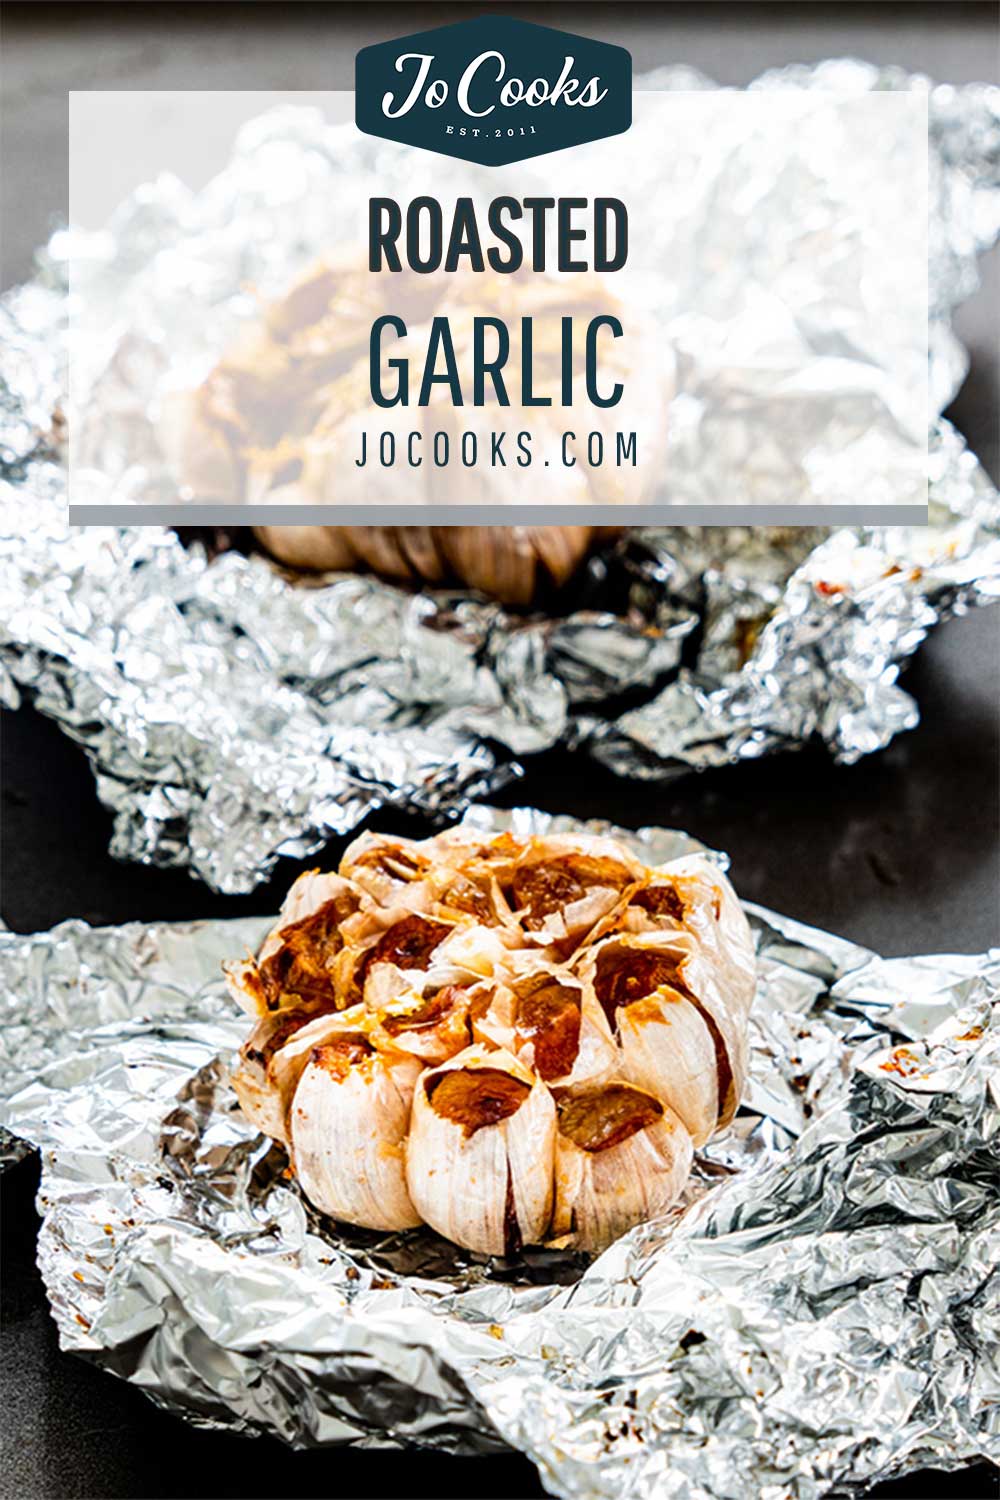
Roasted Garlic: Using 3 ingredients and just 5 minutes of prep, what’s the point of going all the way to the store to buy a jar or roasted garlic anymore? Made fresh in your own home, this classic ingredient featuring deep, roasty, caramelized flavors cooks down to soft and spreadable perfection.
We’re going back to basics today! The complexity of the flavor you get from roasted garlic may make it seem like a hassle to make, but I think you’ll be very surprised with how easy it is. Even the most novice cooking beginners will have no problem throwing this recipe together.
The process of roasting your garlic takes the unpleasant intensity from garlic in its raw form to create a flavor more subtle in bite but so much more powerful in smooth depth and richness. You really could just spread it on a slice of bread and enjoy as is! I managed to use up all the roasted garlic I made in one fell swoop so feel free to double or triple this recipe if you plan on using lots.
Ingredients
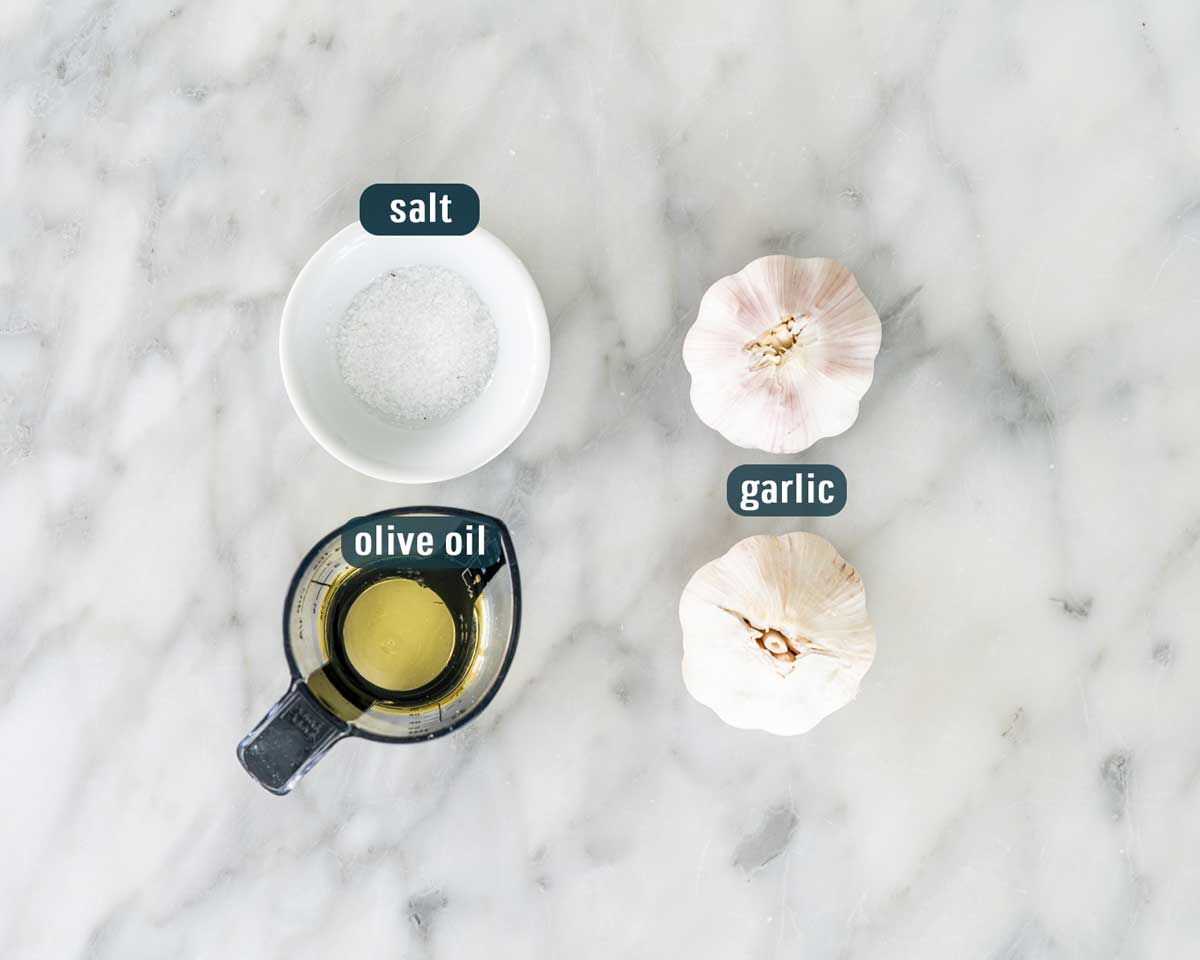
- Garlic – You’ll need a couple full heads of garlic.
- Olive oil – Other oils that will work are grapeseed, canola, vegetable, sunflower, safflower, or avocado.
- Salt – As much or little as you want. You can leave it out completely if preferred.
How to roast garlic
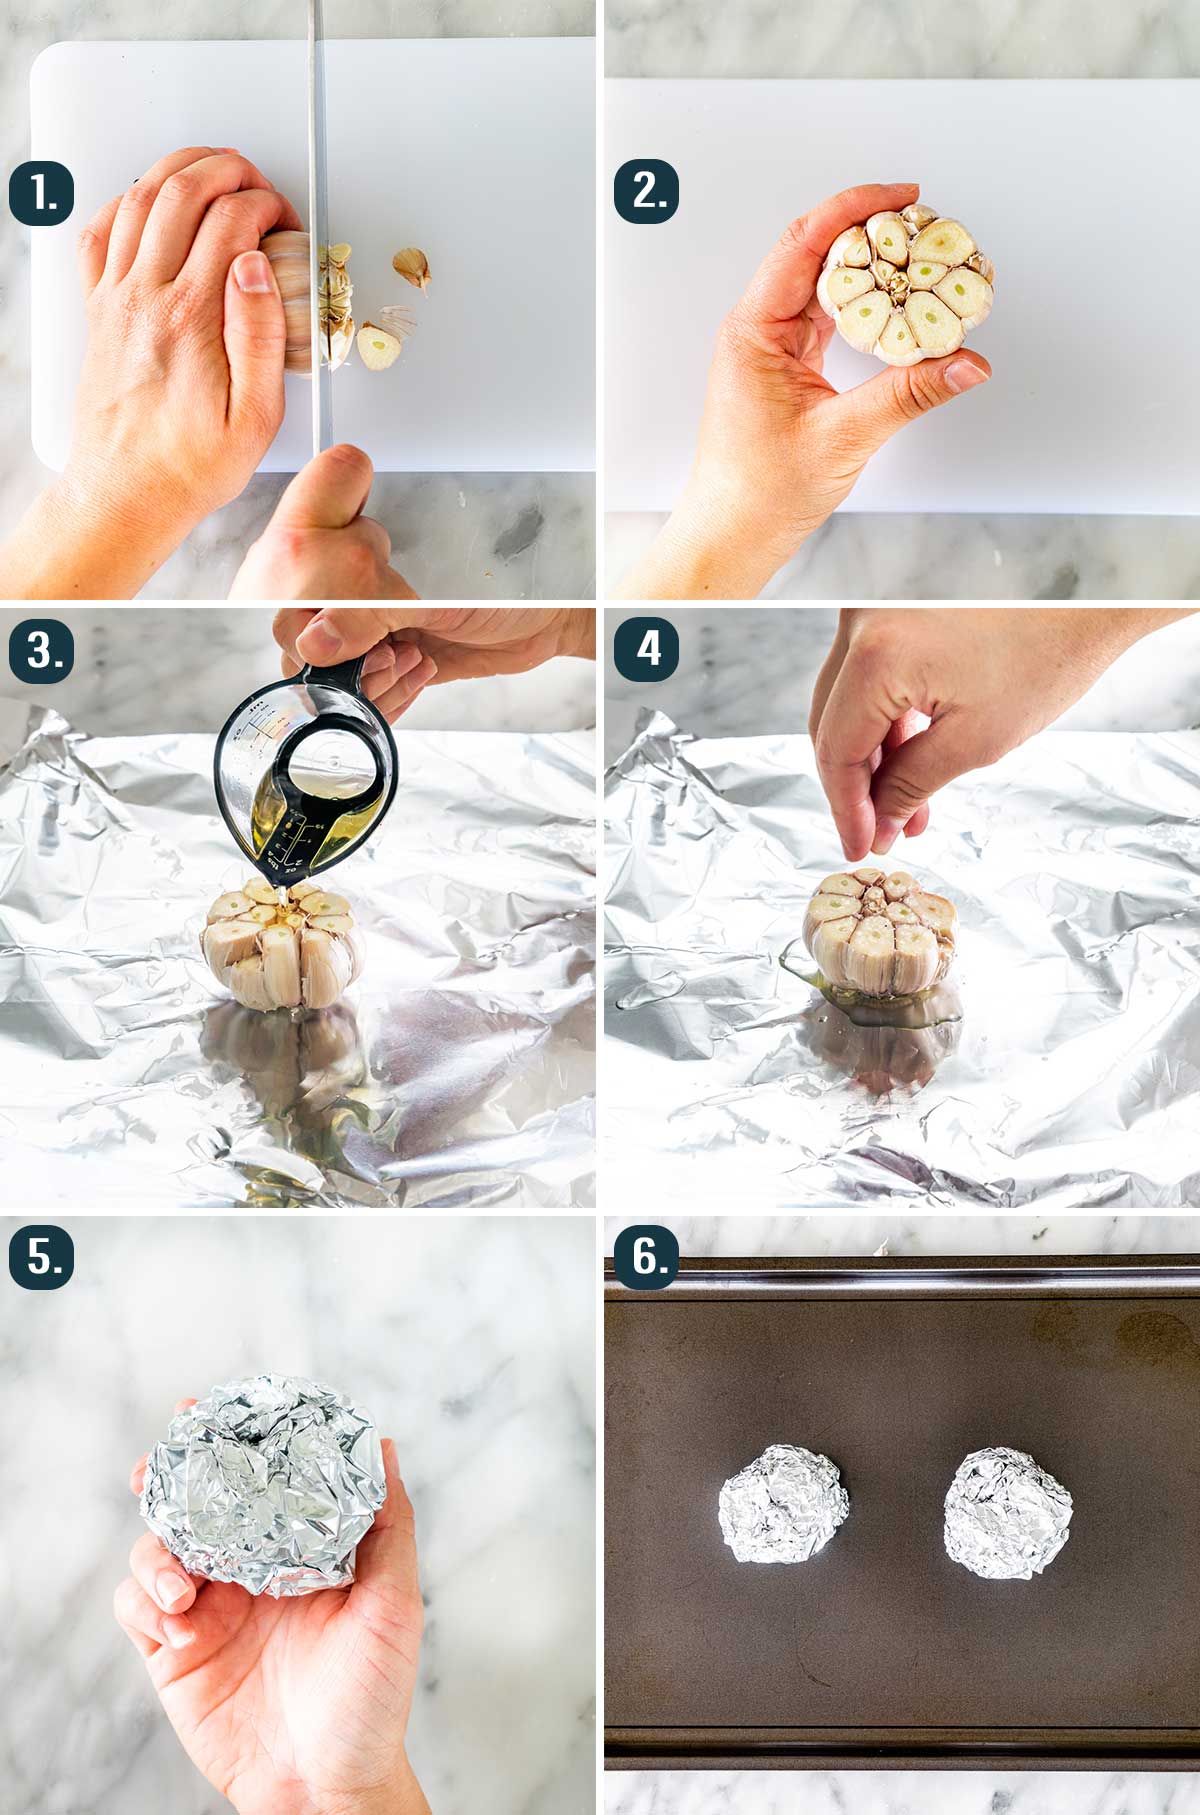
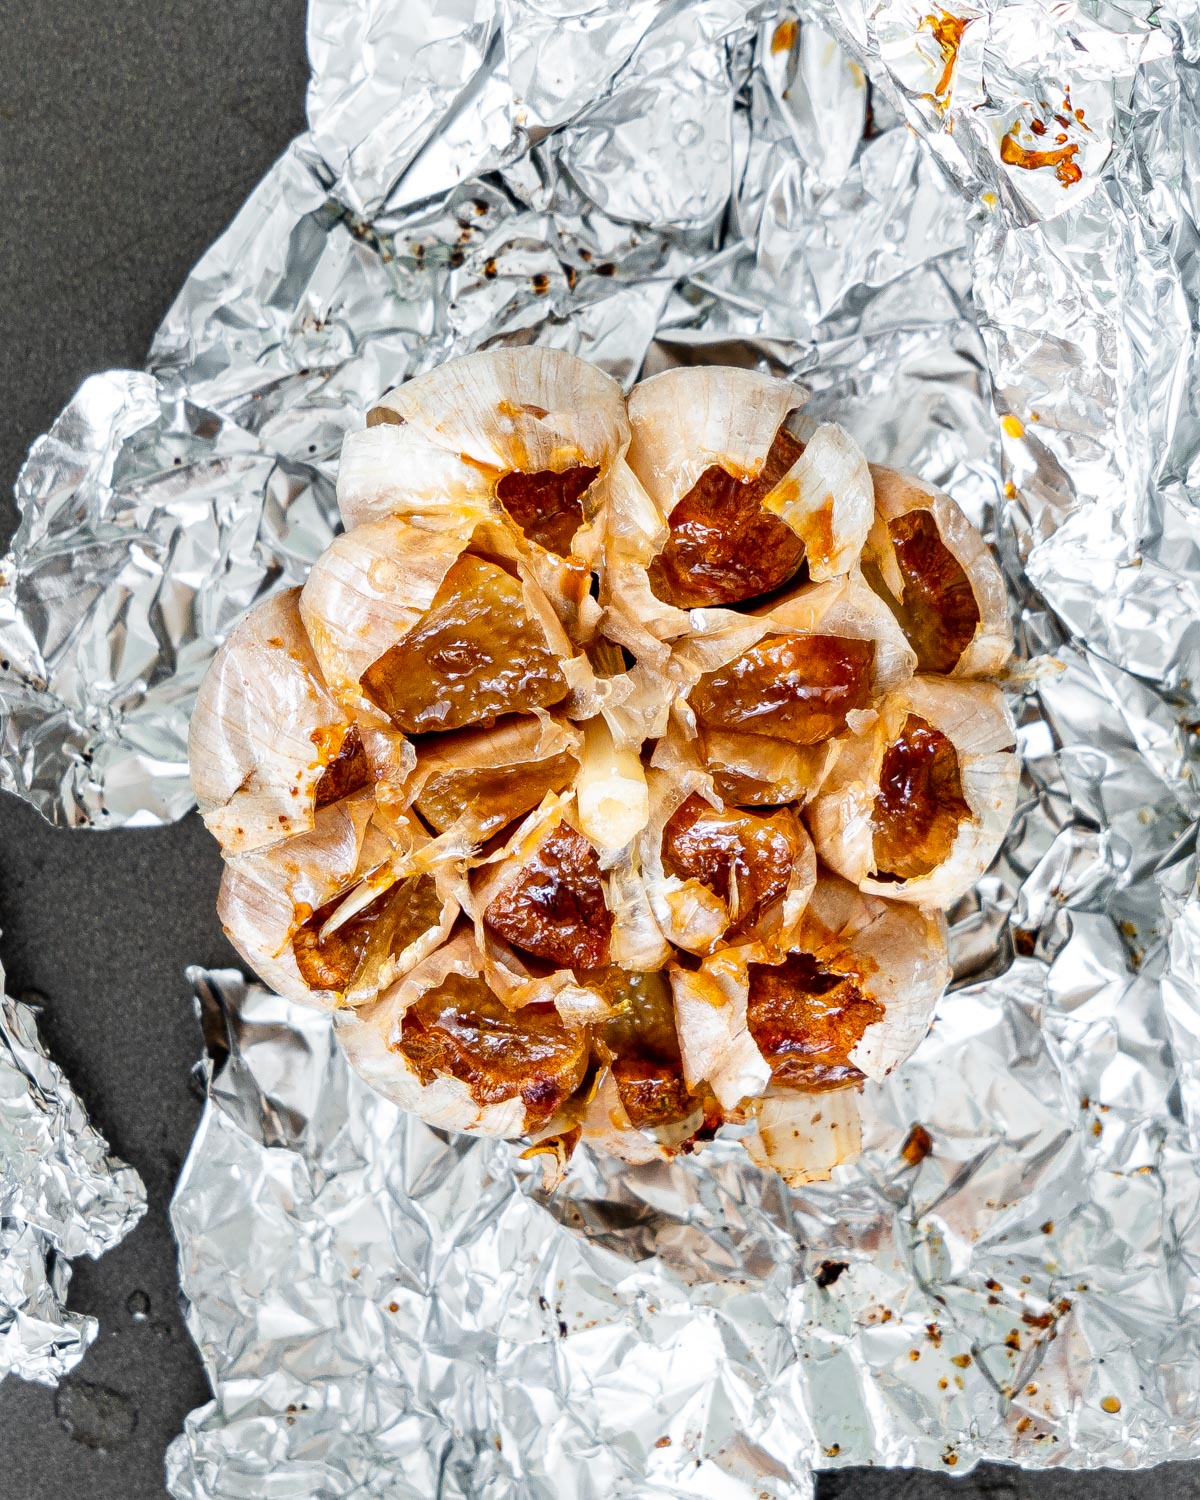
- Prep: Preheat the oven to 400F. Slice about 1/2″ off the top of the heads of garlic; enough to expose each clove.
- Wrap: Place a head on a sheet of foil. Drizzle the olive oil over the head of garlic, then sprinkle the salt over top. Wrap the foil to cover the head of garlic completely. Repeat with the other head.
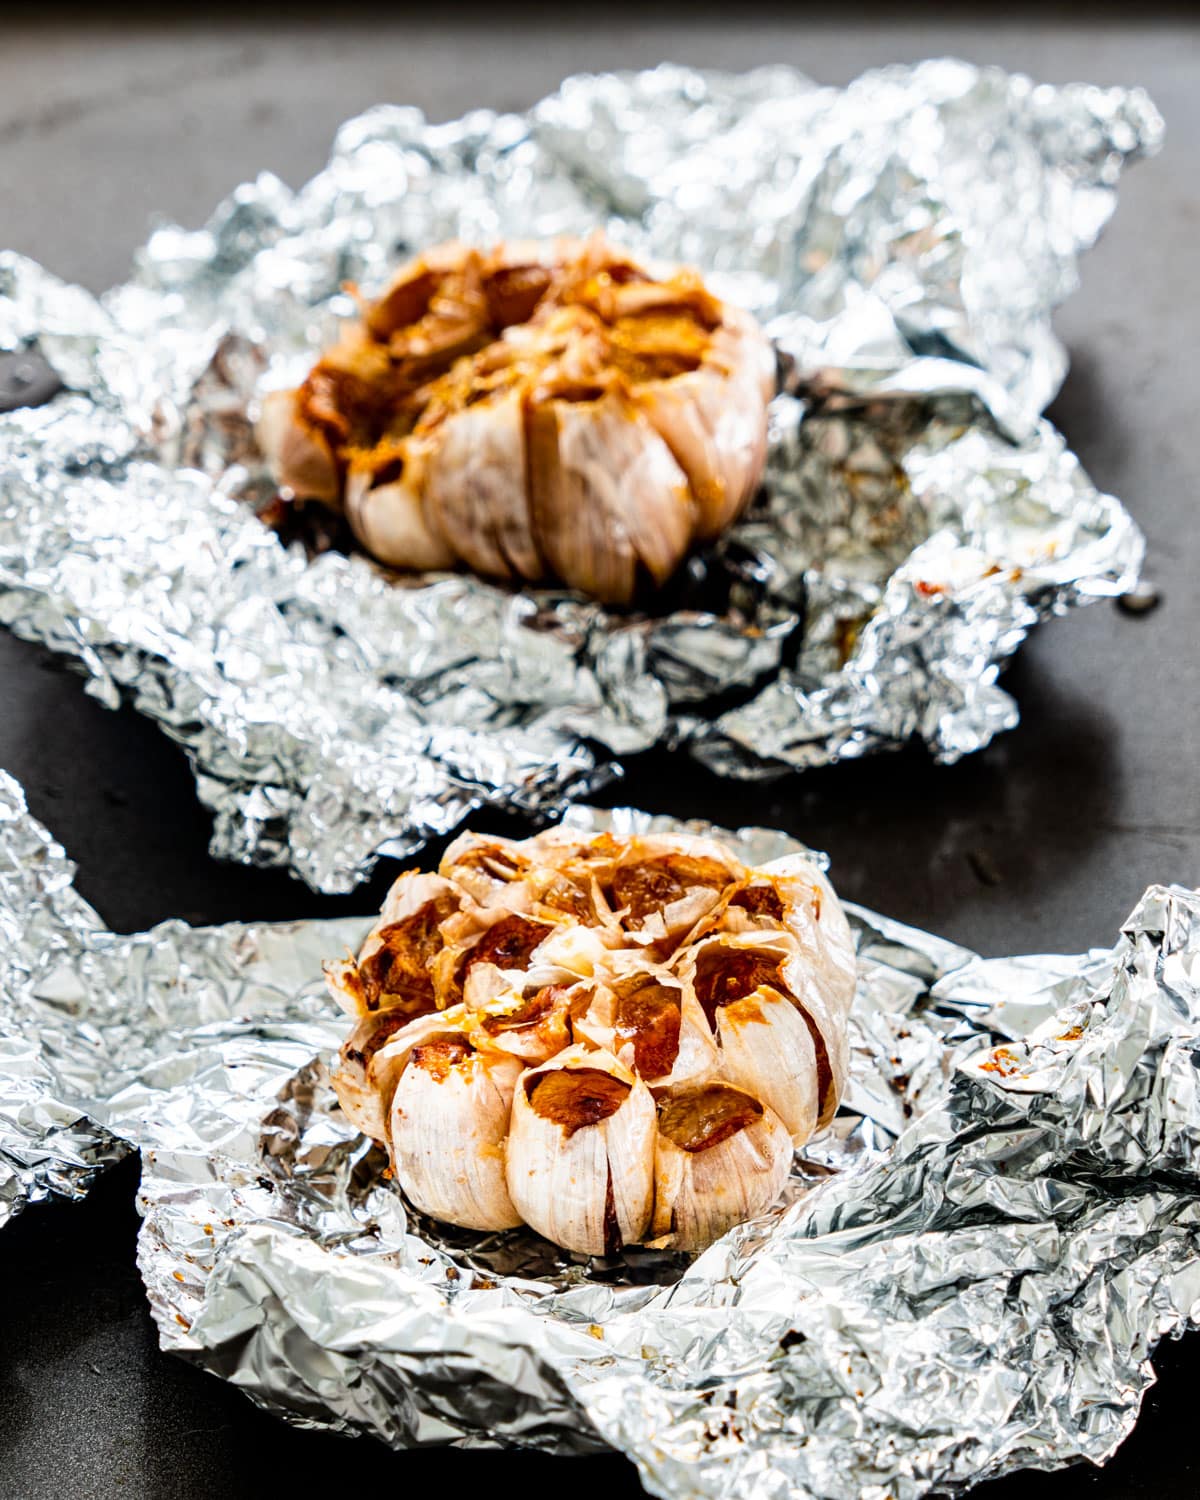
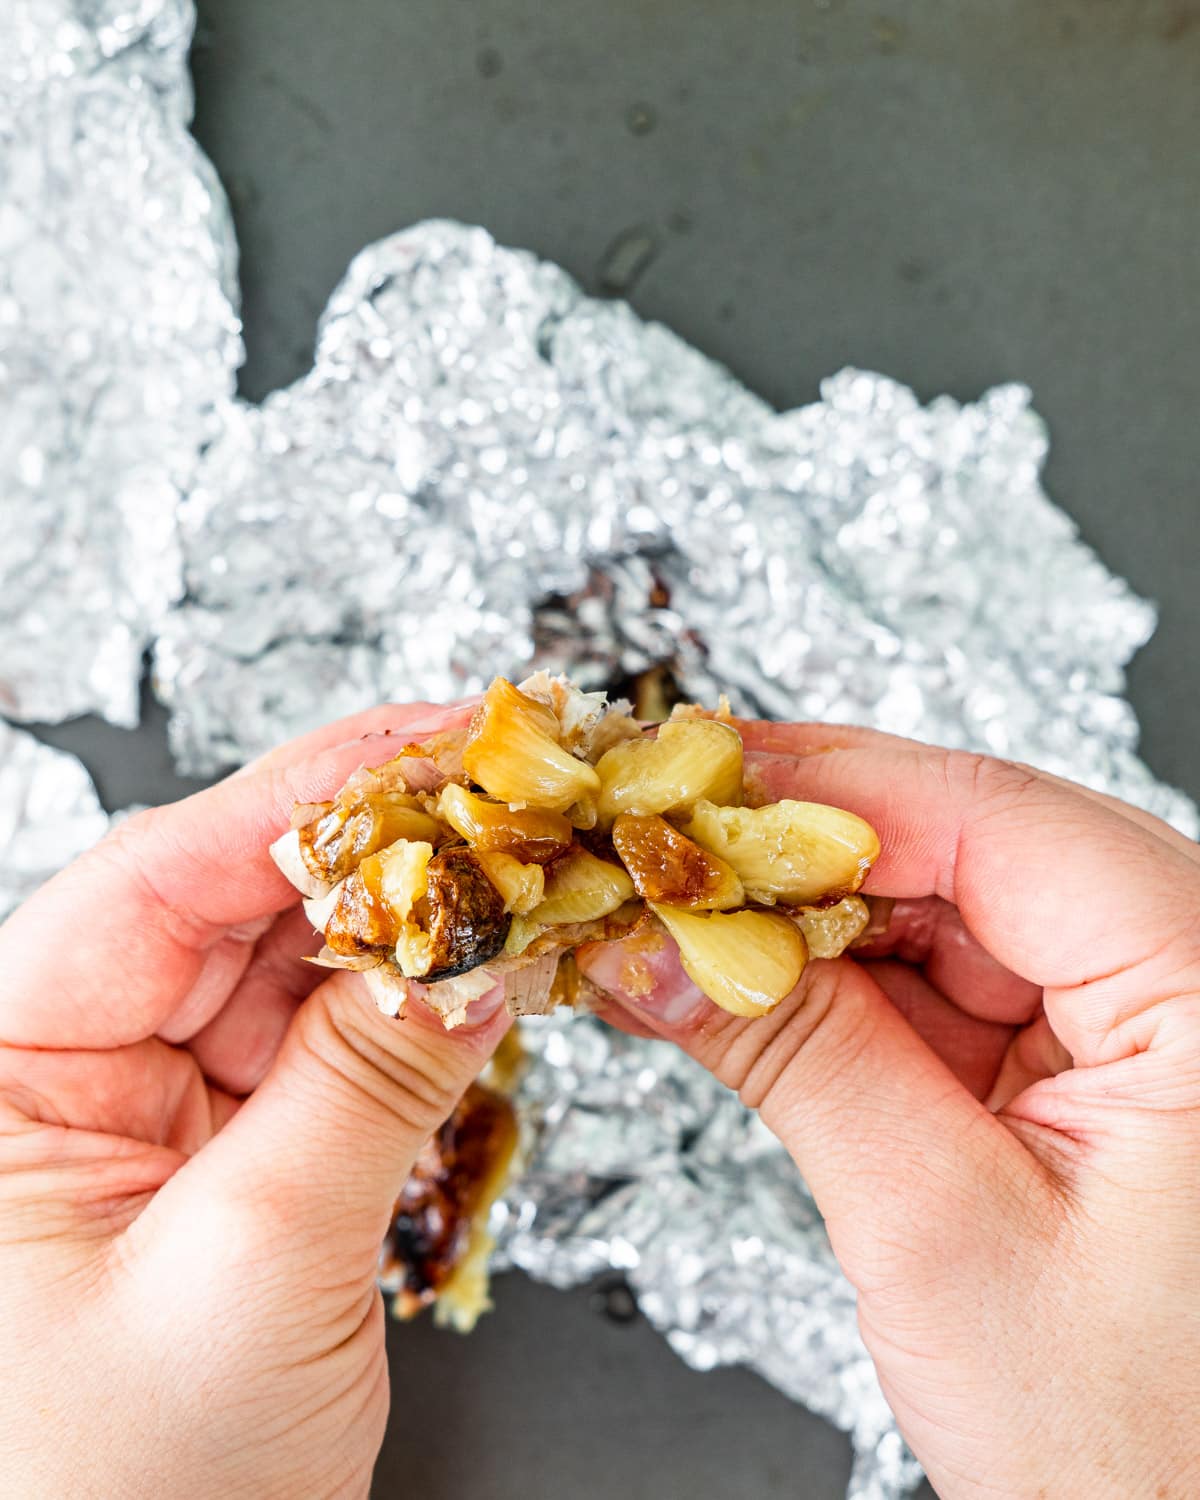
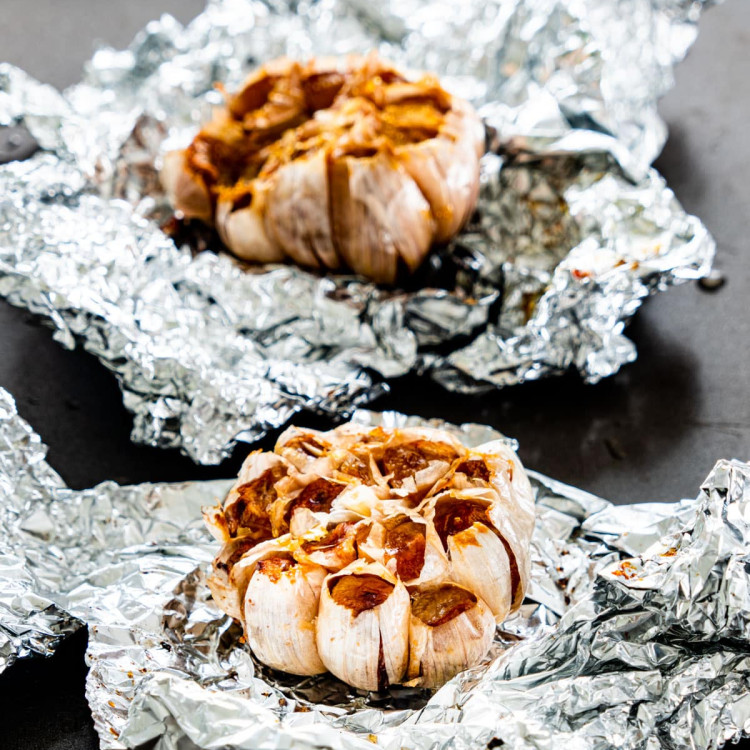
- Roast: Place the foil wrapped head of garlic on a sheet pan and roast for 35-40 minutes, or until the cloves are browned and soft. Let the garlic cool fully, then squeeze the cloves out.
Can I make roasted garlic with individual cloves?
At my local grocery store they sell individual cloves of garlic, peeled so nicely, in a big container. That’s always my go-to! I don’t usually grab heads of garlic anymore. If that’s what you have in your fridge, you can still make yourself some toasty roasty garlic.
It’s best to use a decent amount of the garlic cloves, at least 1/2 cup, to make sure they have an opportunity to steam each other up and create that soft texture.
- Preheat the oven to 400F. Add the garlic to a sheet of foil and toss the cloves with 1-2 tbsp olive oil and a sprinkle of salt.
- Wrap the foil around the cloves rightly, transfer the package to a sheet pan, and roast for 35-40 minutes.
- You can keep the cloves whole or mash them into a paste with a fork. Whole cloves are best kept stored in olive oil to keep them from drying out.
What to make with roasted garlic
You can spread your garlic on a slice of toasted french bread, mix it with some butter and herbs, blend it into dips (like this hummus), sauces, soups, and so much more. Practically anywhere you use regular garlic it can be replaced with your roasted garlic!
How long does roasted garlic last?
Store roasted garlic in an airtight container, jar, or bag. It’ll last 3-4 days in the fridge.
If you want it to last longer, you can freeze it. It’ll last 10-12 months. Portion it into a lightly oiled ice cube tray and freeze for 1-2 hours, or until solid. Then you can transfer the portions to a sealable freezer bag or airtight container. You can toss the roasted garlic straight from the freezer into whichever recipe you’re cooking up, or let it thaw for 10-20 minutes to soften up first.
Looking for more homemade staples? Try these:
- Homemade Mayonnaise
- Easy Homemade Pesto
- Balsamic Glaze
- Enchilada Sauce
- Homemade Poultry Seasoning
- Italian Seasoning
- Taco seasoning
- Garlic Confit
- Roasted Garlic Aioli
Before You Begin! If you make this, please leave a review and rating letting us know how you liked this recipe! This helps our business thrive & continue providing free recipes.
Roasted Garlic
Ingredients
- 2 heads garlic
- 1 tablespoon olive oil
- ¼ teaspoon salt
Before You Begin! If you make this, please leave a review and rating letting us know how you liked this recipe! This helps our business thrive & continue providing free recipes.
Instructions
- Preheat the oven to 400℉. Slice about ½" off the top of the heads of garlic; enough to expose each clove.
- Place a head on a sheet of foil. Drizzle the olive oil over the head of garlic, then sprinkle the salt over top. Wrap the foil to cover the head of garlic completely. Repeat with the other head.
- Place the foil wrapped heads of garlic on a sheet pan and roast for 35-40 minutes, or until the cloves are browned and soft. Let the garlic cool fully, then squeeze the cloves out.
Equipment
Notes
- Store roasted garlic in an airtight container, jar, or bag. It’ll last 3-4 days in the fridge.
- If you want it to last longer, you can freeze it. It’ll last 10-12 months. Portion it into a lightly oiled ice cube tray and freeze for 1-2 hours, or until solid. Then you can transfer the portions to a sealable freezer bag or airtight container. You can toss the roasted garlic straight from the freezer into whichever recipe you’re cooking up, or let it thaw for 10-20 minutes to soften up first.
Nutrition Information
Notice: Nutrition is auto-calculated for your convenience. Where relevant, we recommend using your own nutrition calculations.
