Sticky Buns
This post may contain affiliate links. Please read my disclosure policy.
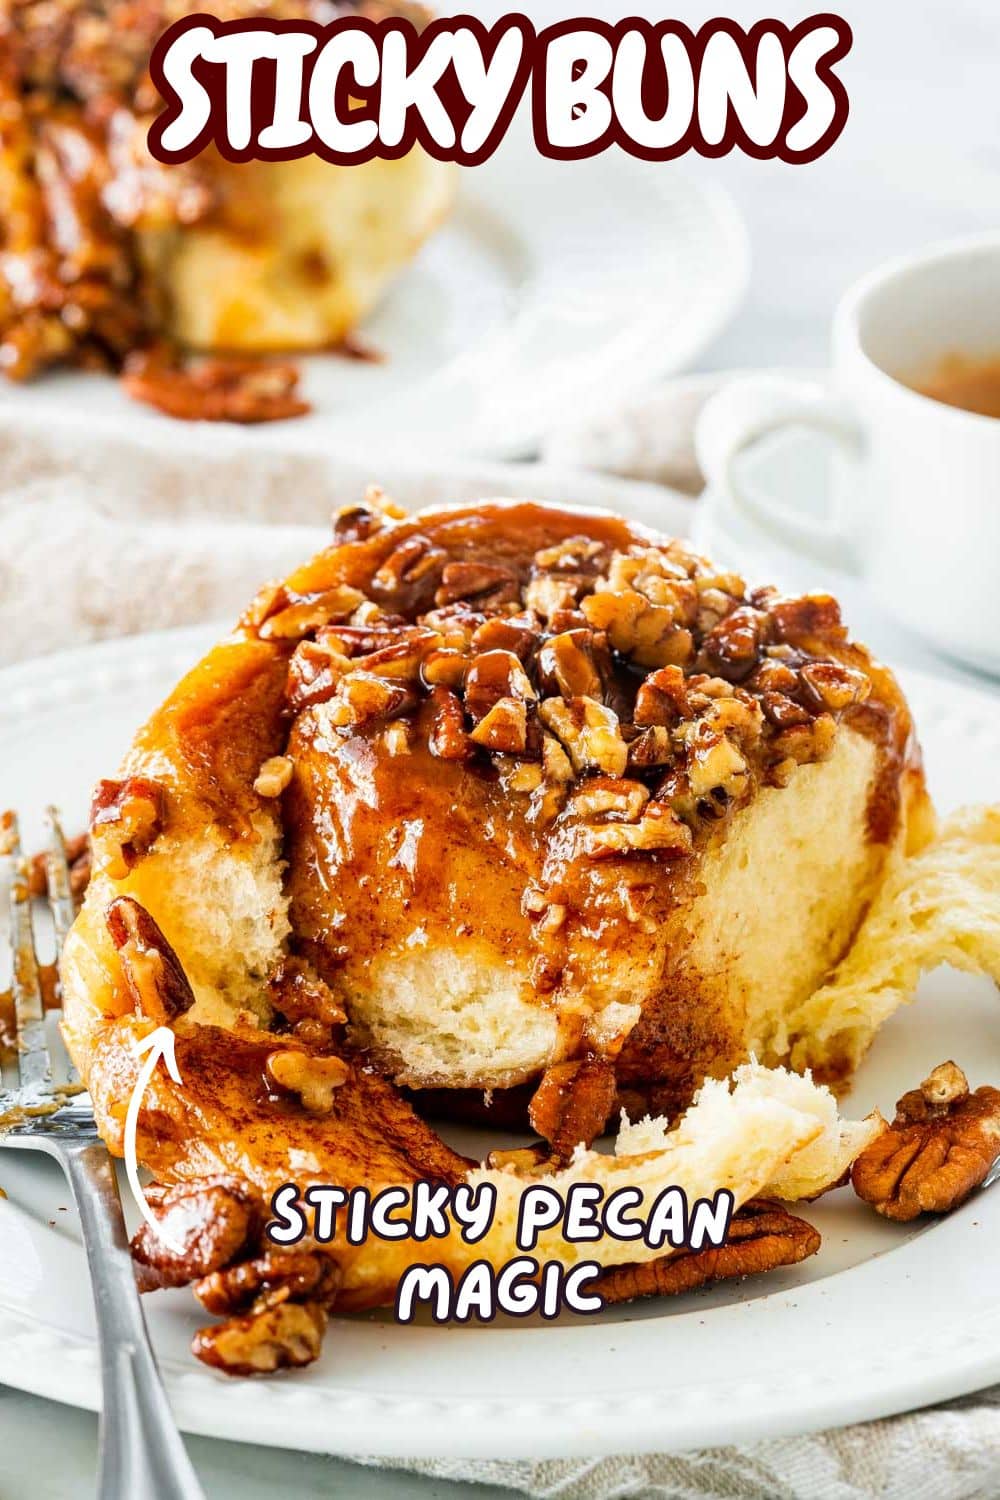

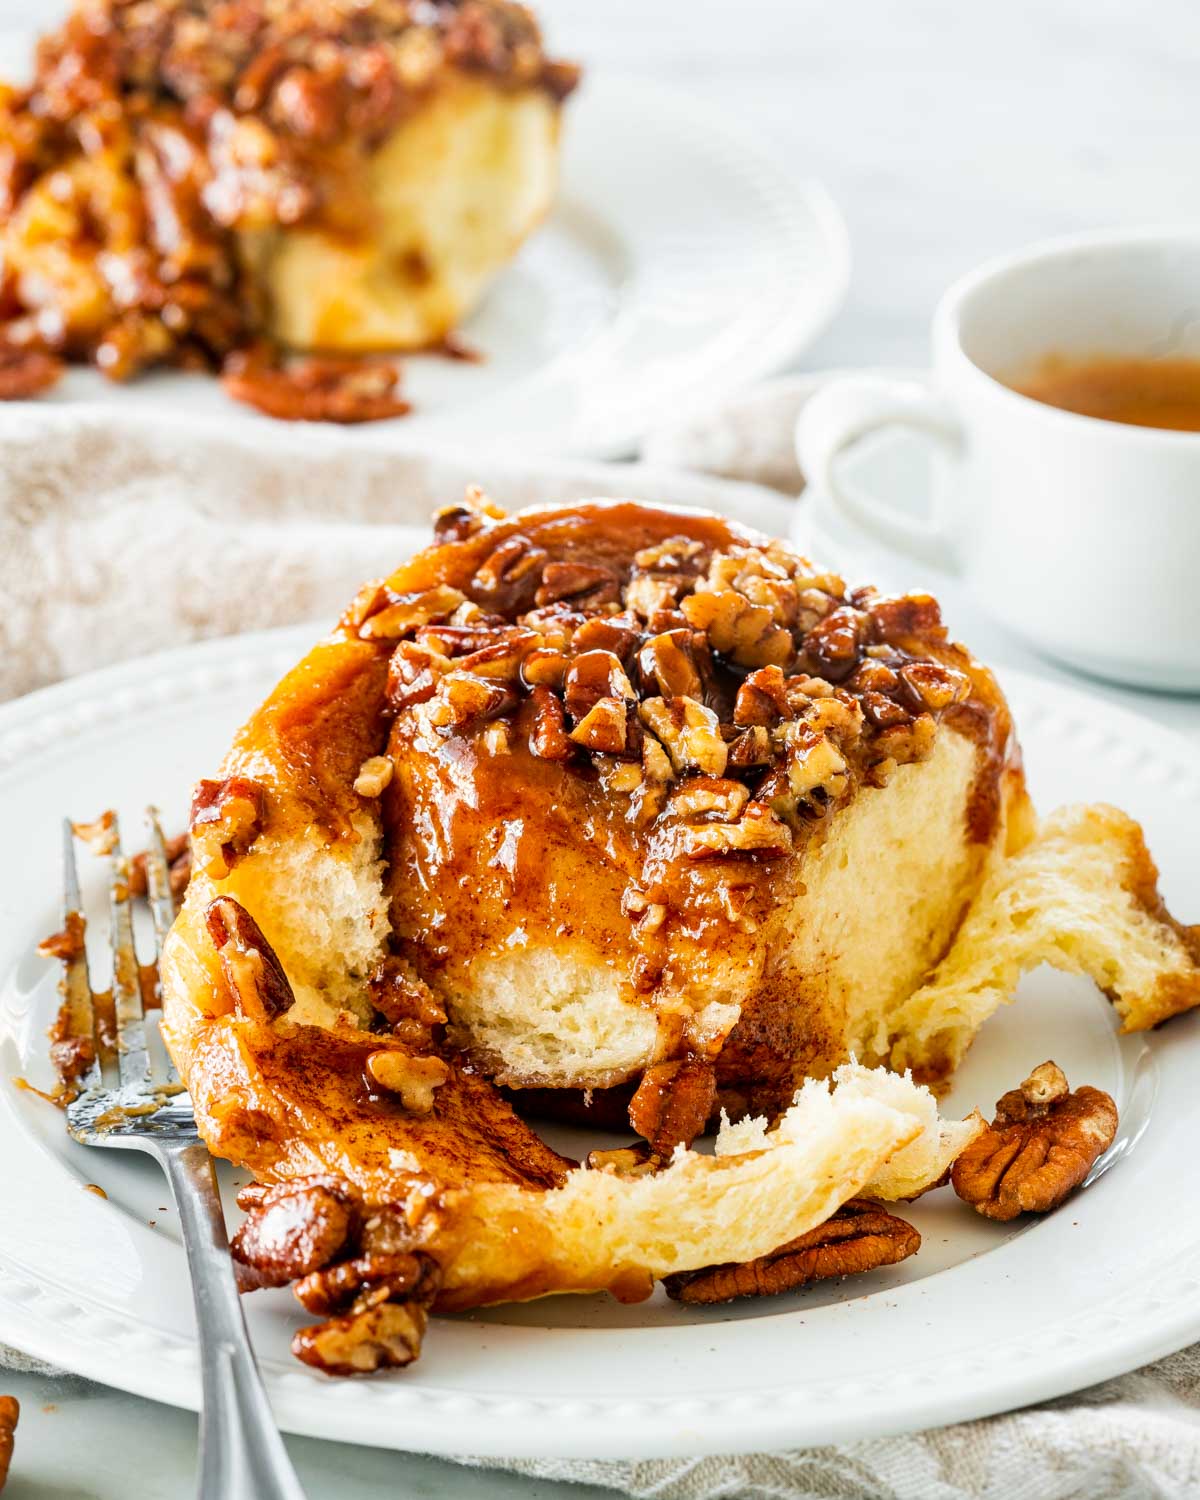
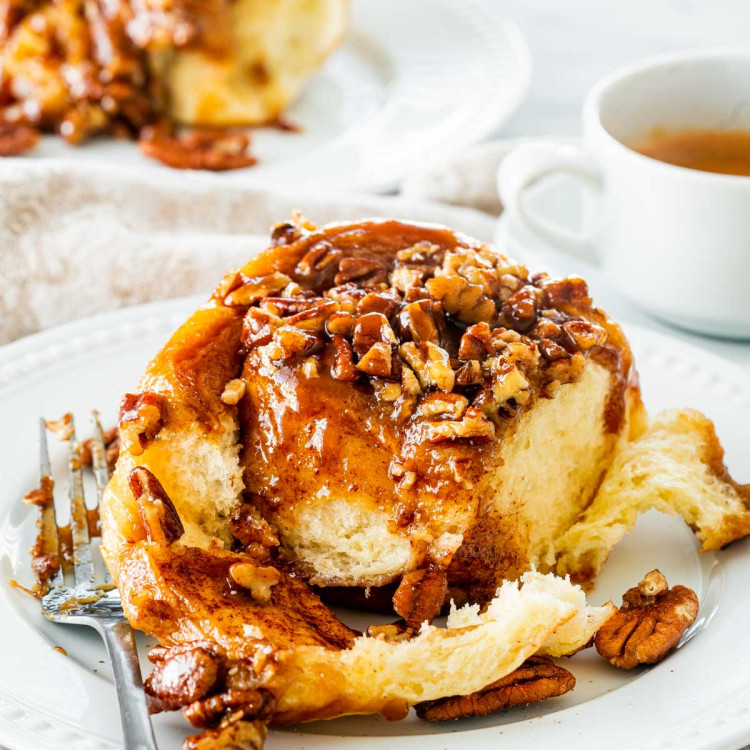
These Sticky Buns are soft, cinnamon filled and covered in a glossy pecan caramel that melts into every corner. Warning. They disappear fast.

A Jo Cooks Classic, Sticky Buns
My very first job was in a bakery and I still remember the smell of the Sticky Buns coming out of the oven. Warm cinnamon, bubbling caramel, toasted pecans and a sweetness that basically wrapped itself around you. These were the buns that made customers line up before the door even opened. They were also the buns I somehow found a way to “test” every single shift.
Making them at home brings that whole feeling rushing back. Soft dough rising on the counter, cinnamon sugar sprinkled everywhere and that moment when you flip the pan and the caramel comes rushing down the sides. There is nothing delicate or polite about a Sticky Bun. They are unapologetically gooey and loud and absolutely worth licking your fingers for.
Why You Should Make These Sticky Buns
- The dough is unbelievably soft. It rises tall, bakes fluffy and soaks up every drop of caramel like it was born for this moment.
- The caramel pecan topping is next level. Brown sugar, butter and honey melt together into a glossy sauce that coats every swirl in pure sticky goodness.
- They smell like a bakery. Warm cinnamon, toasted pecans and bubbling caramel turn your kitchen into the best smelling place in the neighbourhood.
- They look impressive but are easy to make. Most of the work happens in the mixer and the rest is simple rolling and slicing. Very achievable even for beginners.
- Perfect for weekends and holidays. Fresh out of the oven with a cup of coffee is a whole experience. These shine at brunch, Christmas morning or any slow Sunday.
- Leftovers are a dream. A quick warm up and they taste just as gooey and perfect as day one.
- Guaranteed crowd pleaser. People who “don’t like sweets” suddenly take two. It is magic.
Ingredients and Tips
- Check your yeast first. If the yeast does not foam during blooming, stop right there. Dead yeast means sad, flat buns. Fresh yeast gives you that beautiful rise.
- Use warm water for blooming. Aim for water between 95°F and 105°F which is warm to the touch but not hot. Hot water will kill the yeast instantly.
- Use room temperature butter and eggs. Cold ingredients make the dough tight and harder to knead. Softened butter blends into the dough and filling like a dream.
- Flour amounts can vary. Humidity, flour brands and measuring differences all play a part. If your dough sticks heavily to the sides of the bowl, sprinkle in a little more flour until it pulls away cleanly.
- Let the dough rise in a warm spot. Cold kitchens make dough grumpy. If your oven has a proof setting, use it. If not, turn your oven on briefly, turn it off and let the covered dough rest inside.
- Make the caramel topping ahead if you want. That buttery mix of brown sugar, honey and pecans can sit in the pan while your dough rises. It makes assembly incredibly easy.
- Roll the dough gently. You want a soft, even rectangle. Do not press too hard or you will push out all the beautiful air the dough just created for you.
- Cut the rolls with a sharp knife or dental floss. A clean cut keeps the spirals neat and helps them rise evenly.
- Do not skip the second rise. This is what makes sticky buns light and fluffy instead of dense and heavy.
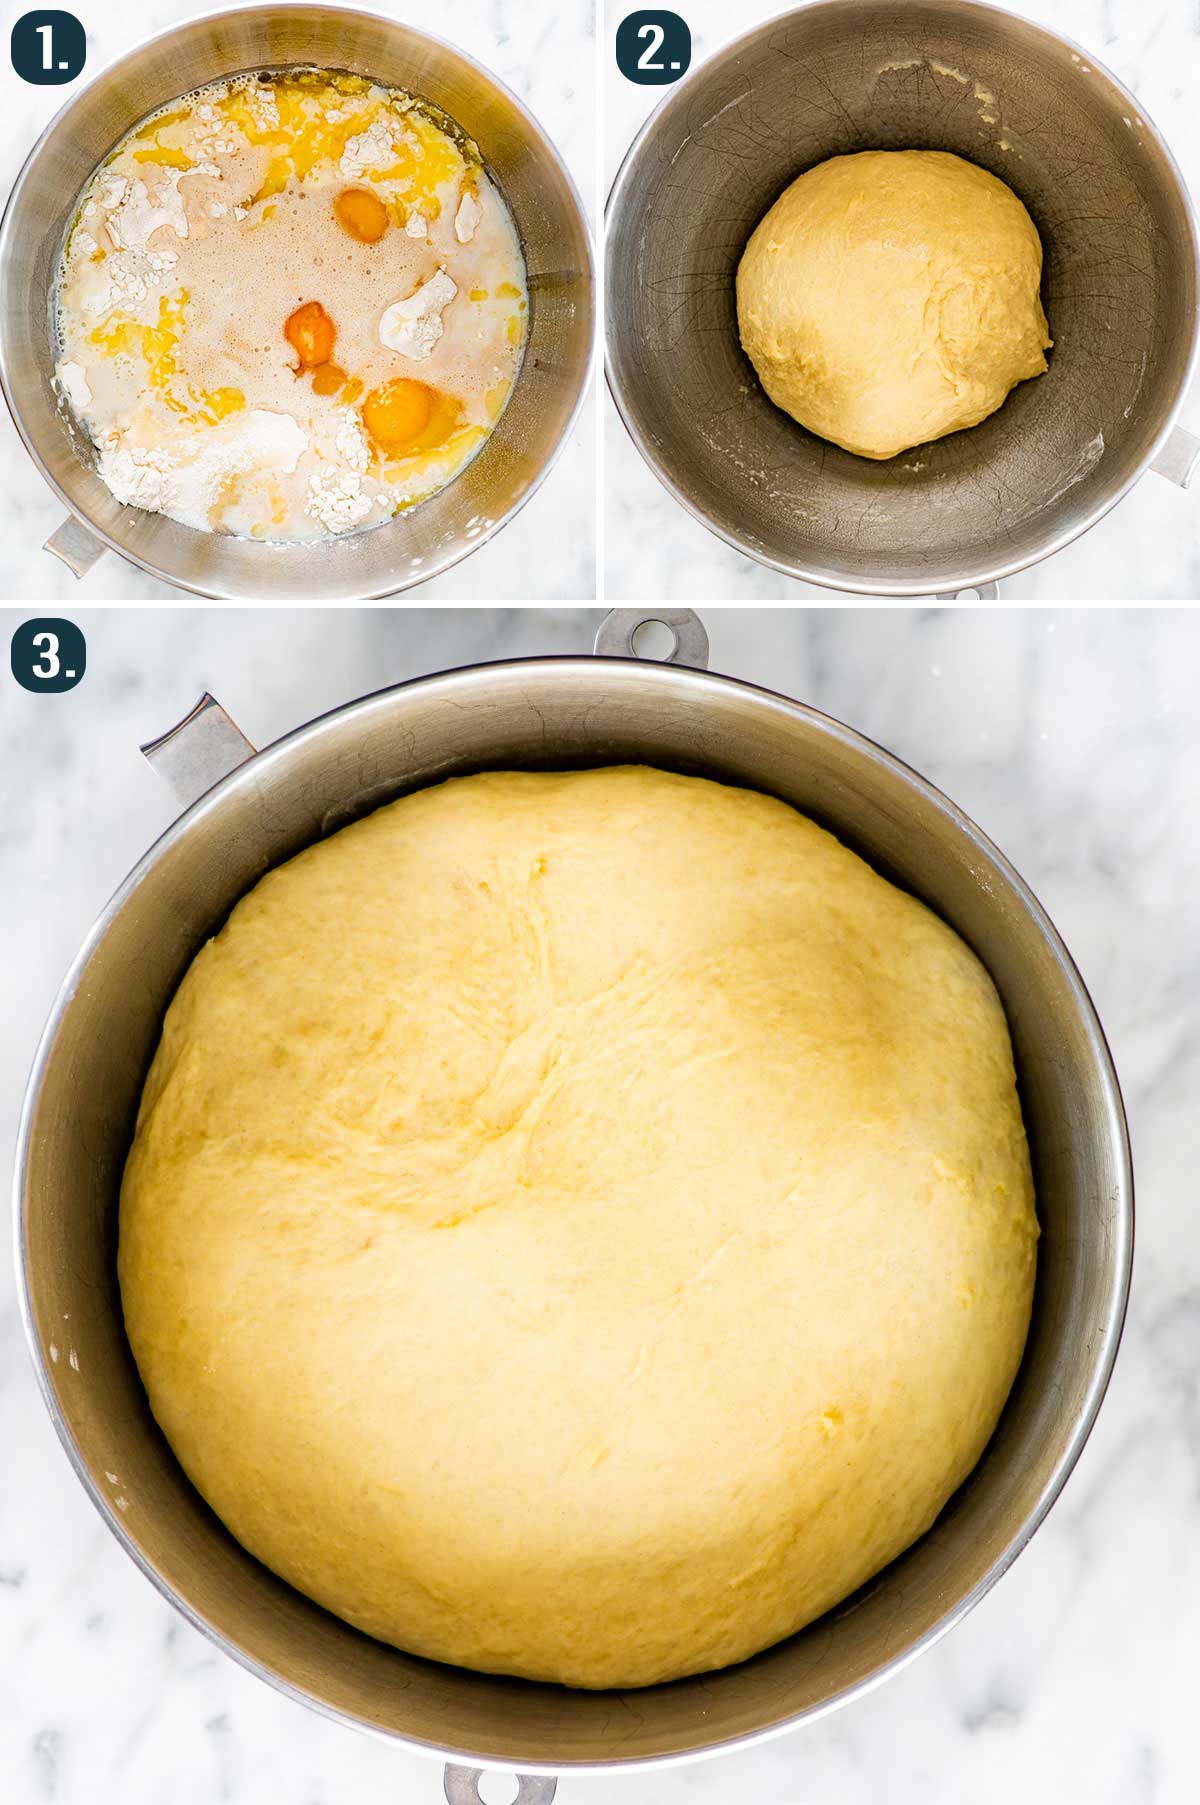
- Bloom the yeast: In a small bowl, whisk together the warm water, yeast and one teaspoon of the sugar. Let it sit for 5 to 10 minutes until it becomes foamy. If it stays flat, the yeast is not alive and you will need a fresh batch before moving on.
- Mix the dough: In the bowl of your mixer, add the flour, warm milk, remaining sugar, melted butter, eggs and salt. Pour in the foamy yeast mixture. Using the dough hook, mix for about 5 minutes. The dough should pull away from the sides of the bowl. If it sticks too much, sprinkle in a little more flour.
- Let the dough rise: Place the dough in a lightly oiled bowl and cover it with plastic wrap or a clean damp towel. Set it in a warm, draft free spot and let it rise until it doubles in size. A warm oven that has been turned off works beautifully.
- Make the cinnamon filling: In a small bowl, mix the brown sugar with the cinnamon. Set aside so it is ready when you roll the dough.
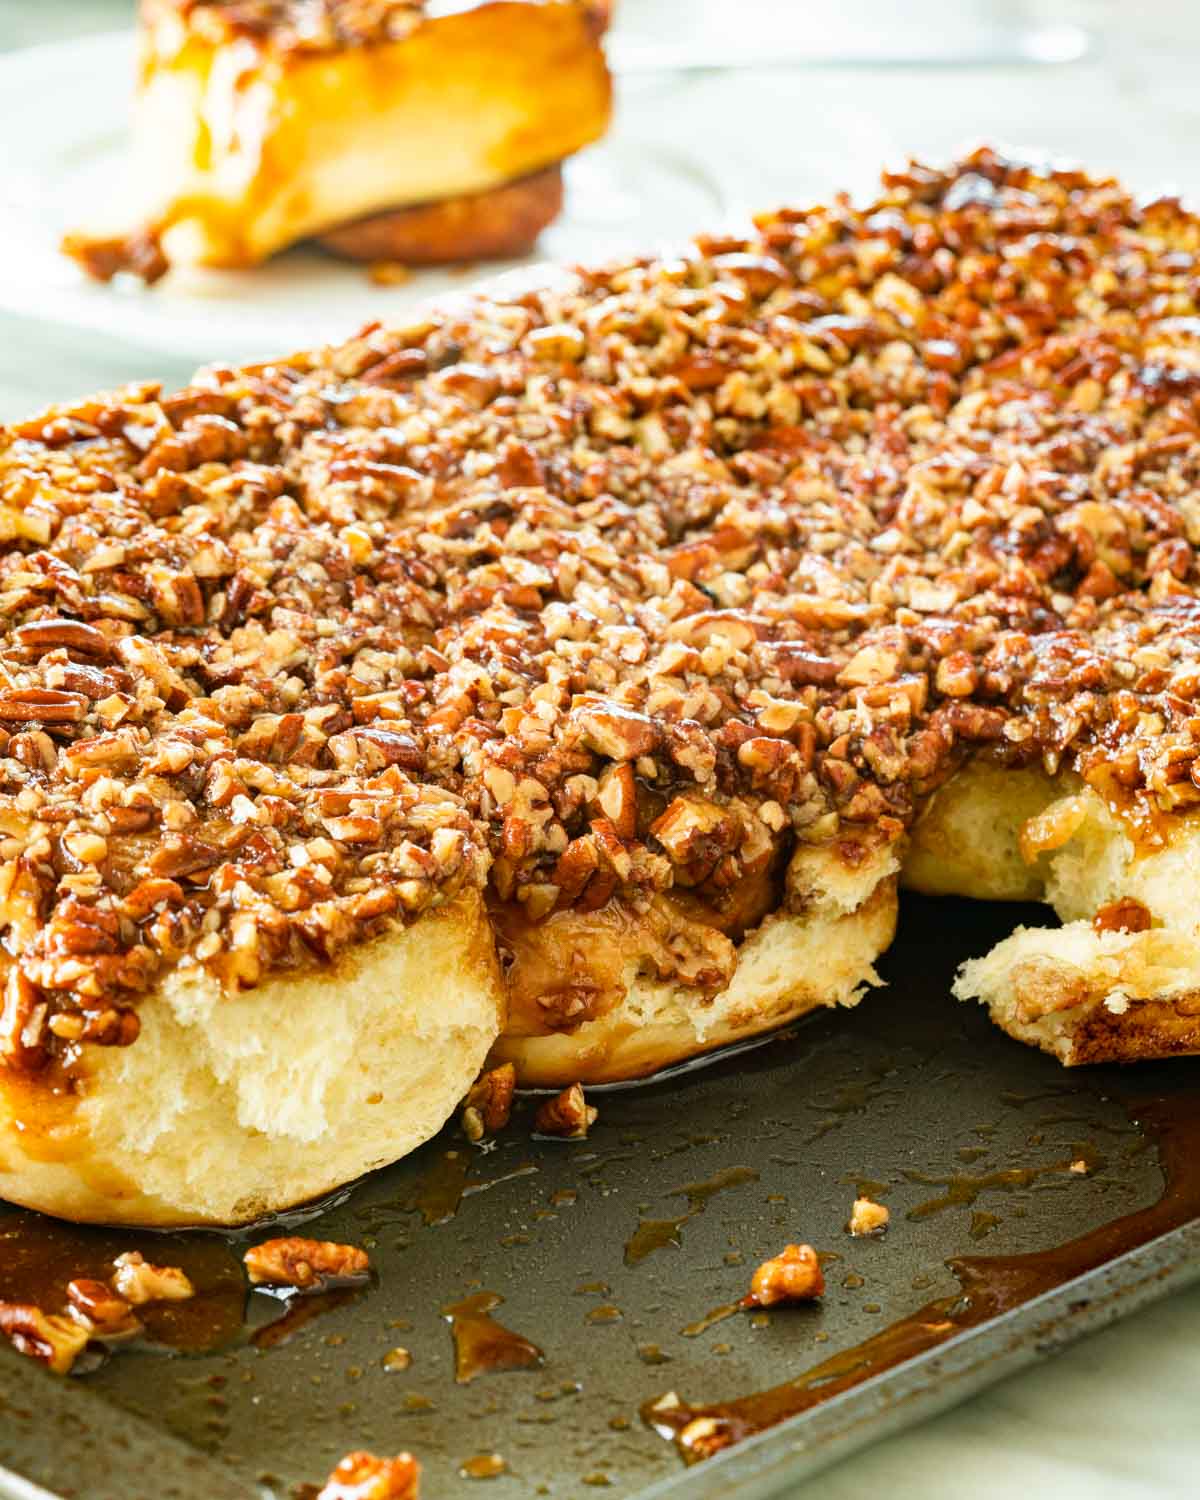
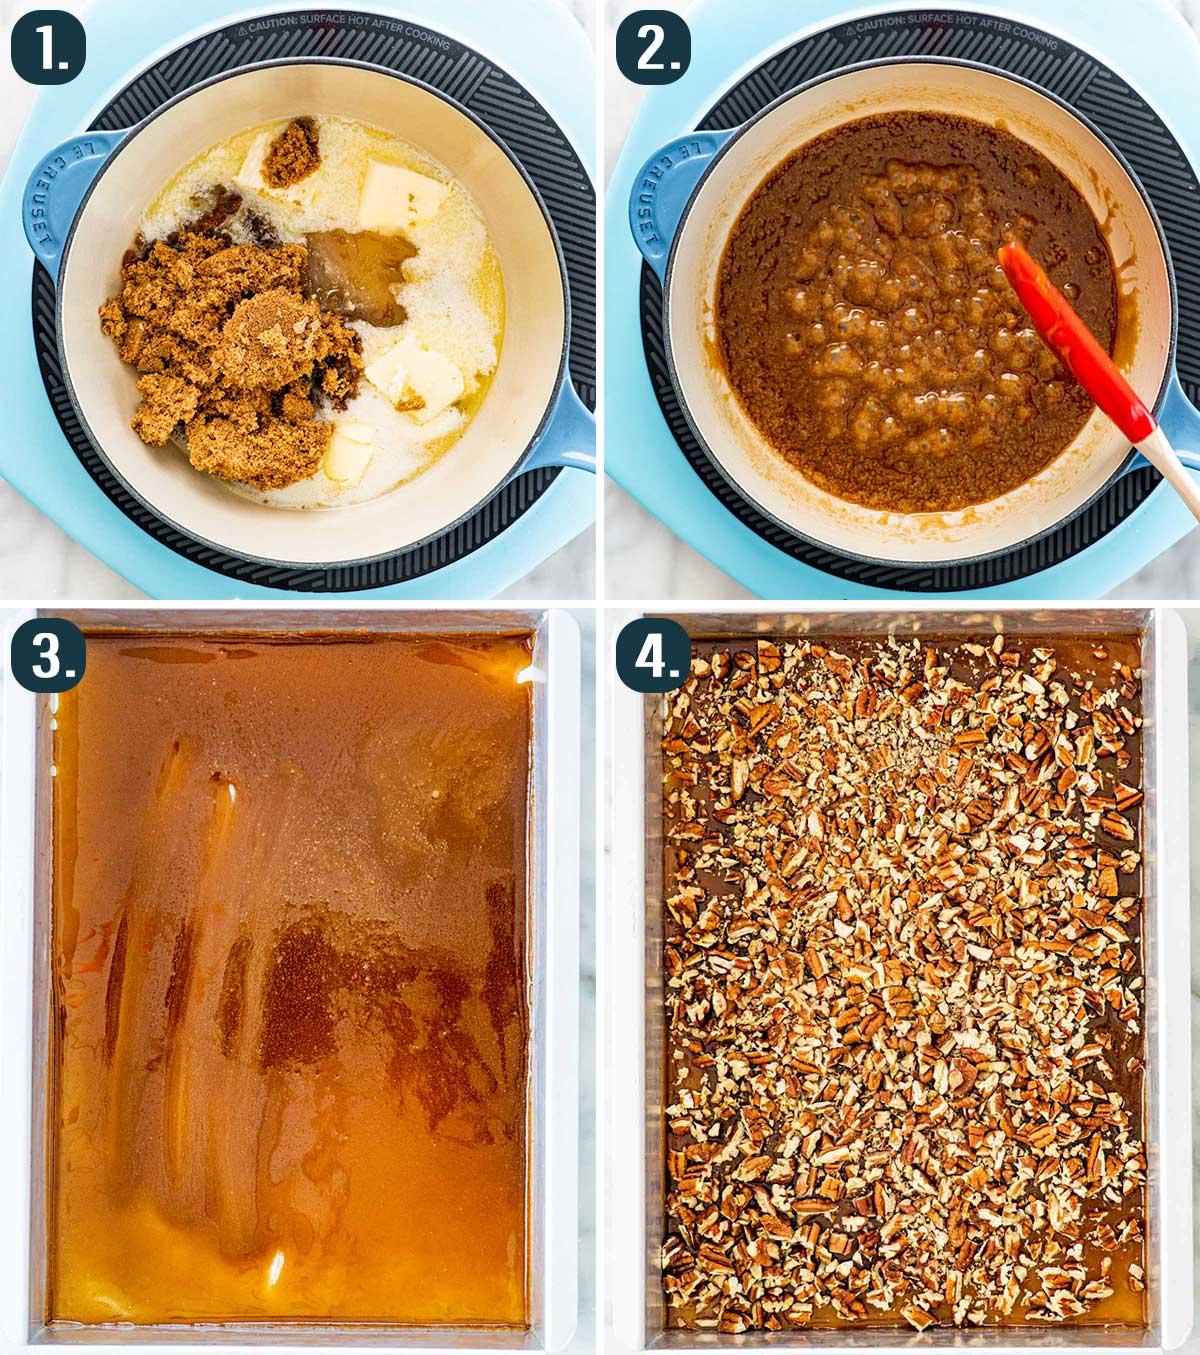
- Cook the caramel pecan topping: In a small saucepan, melt the butter with the brown sugar and honey over low heat until the sugar dissolves. This creates the sticky caramel base. Pour it into a 9 by 13 inch baking pan and sprinkle the chopped pecans evenly over the top.

- Roll out the dough: Once the dough has doubled, transfer it to a lightly floured surface. Roll it into a rectangle about 16 inches long and 12 inches wide. Try to keep the thickness even so the rolls bake uniformly.
- Add the filling: Spread the softened butter over the entire surface of the dough. Sprinkle your cinnamon sugar mixture evenly on top. A nice generous layer is what gives every swirl its flavor.
- Roll and slice: Starting from the long edge, roll the dough into a log. Keep it tight but not too tight so the filling stays inside. Slice the log into 1 and 1 half inch rolls using a sharp knife or dental floss for clean cuts.
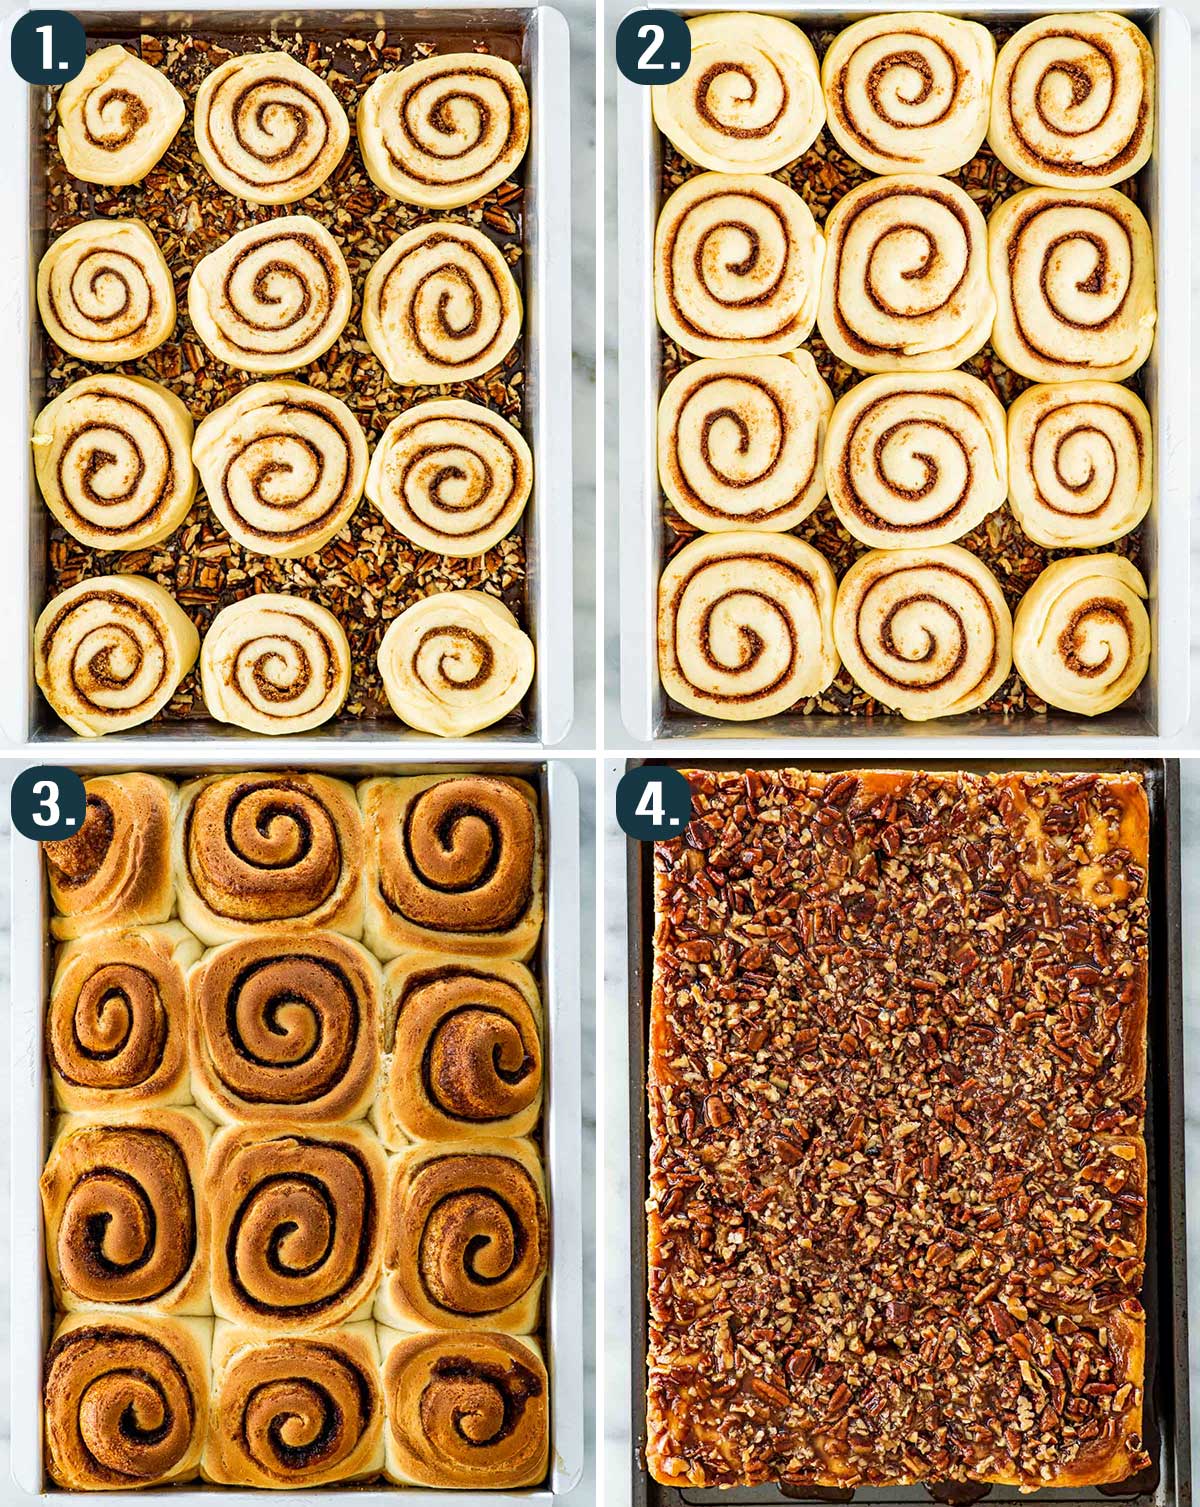
- Arrange and rise: Place the cut rolls into the baking pan on top of the caramel pecan topping. Leave a bit of space between them so they can rise. Cover again with a clean towel or plastic wrap and let them rise for about 30 minutes or until puffy.
- Bake the buns: Preheat your oven to 350°F (175°C). Bake the rolls for 20 to 25 minutes or until they are golden brown and the centers spring back when touched.
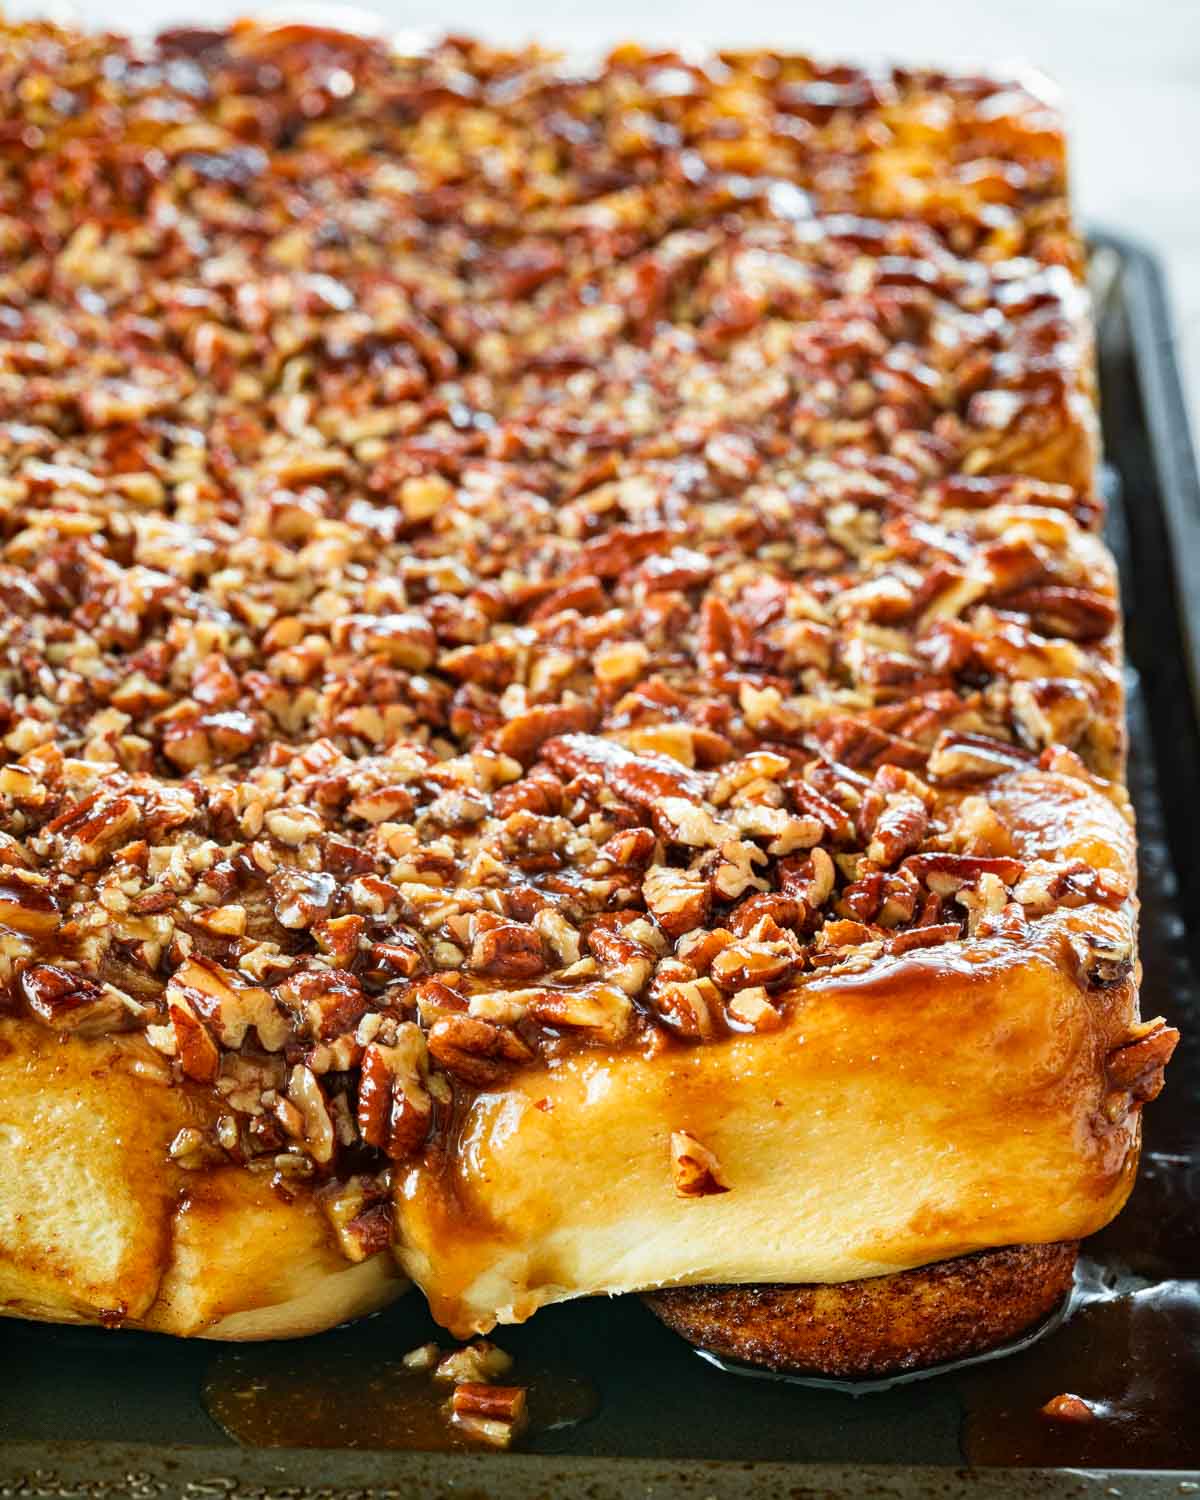
- Invert and serve: Remove the pan from the oven and place a serving platter or baking sheet on top. Carefully flip the entire pan so the sticky caramel pours down over the buns. Let them sit for 5 minutes before lifting the pan off. Serve warm and prepare for compliments.
Frequently Asked Questions
Why did my dough not rise?
Most of the time it is the yeast. If it does not foam during blooming, it is no good. Always test the yeast first before moving on, and make sure your water is warm and not hot.
My dough rose very slowly. What happened?
Cold kitchens slow everything down. Give the dough a warm spot to rest. A turned off oven that was briefly warmed works perfectly.
Why are my buns dense instead of fluffy?
Dense buns usually mean the dough did not rise long enough or the flour measurement was heavy. Add flour slowly and stop as soon as the dough pulls away from the sides of the mixer bowl.
Can I make these with instant yeast?
Yes. Instant yeast can be added straight to the flour. You can skip blooming, although I still recommend blooming it if you want to check that it is alive.
My caramel topping hardened while cooling. Is that normal?
Yes. Caramel firms up as it cools. Warm the buns in the oven or microwave and the topping goes glossy and sticky again.
Can I prep these the night before?
Yes. Assemble the rolls and place them in the pan over the caramel topping. Cover tightly and refrigerate overnight. Let them come to room temperature and rise before baking in the morning.
Can I freeze the unbaked rolls?
You can. Freeze them right after slicing. When ready to use, thaw in the fridge overnight, let them rise and then bake as directed.
My caramel bubbled over the pan. How do I prevent that?
Use a true 9 by 13 inch pan with high sides. If your pan is shallow, place it on a lined baking sheet to catch any drips.
My rolls baked unevenly. What went wrong?
Uneven rolling or inconsistent slicing can cause different rise times. Try to keep the rectangle even and the cuts the same size.

More Great Recipes To Try
Before You Begin! If you make this, please leave a review and rating letting us know how you liked this recipe! This helps our business thrive & continue providing free recipes.
Sticky Buns
Video
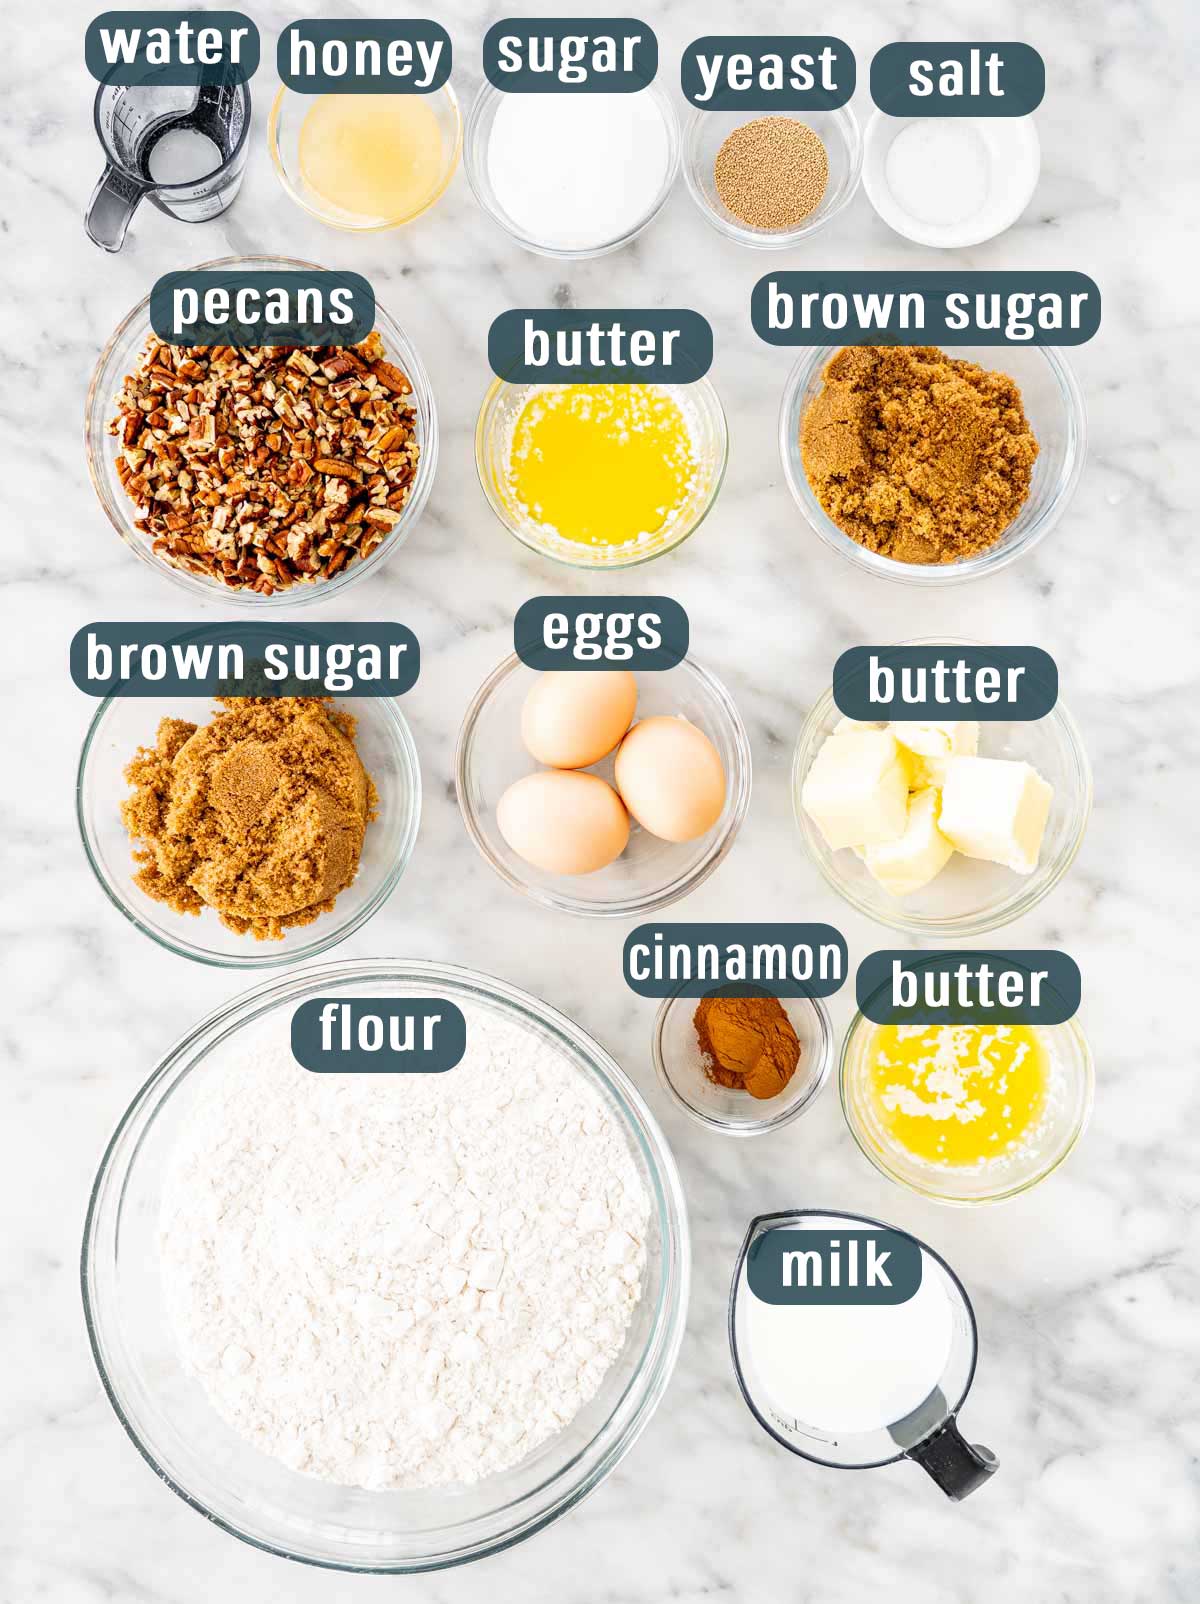
Ingredients
For Dough
- ¼ cup warm water
- 2 ¼ teaspoon active dry yeast ((1 envelope))
- 1/3 cup sugar
- 4 ½ cups all-purpose flour
- ¾ cup milk (warm)
- 4 tablespoon butter (unsalted and melted)
- 3 eggs
- 1 teaspoon salt
For Topping
- ½ cup butter
- ¾ cup brown sugar (packed)
- 4 tablespoon honey
- 2 cups pecans (roughly chopped, or walnuts)
For Filling
- ⅓ cup butter (melted)
- ¾ cup brown sugar
- 2 teaspoon cinnamon
Before You Begin! If you make this, please leave a review and rating letting us know how you liked this recipe! This helps our business thrive & continue providing free recipes.
Instructions
- Bloom the yeast: In a small bowl whisk the warm water, yeast and 1 tsp of the sugar together.Let it sit for 5 to 10 minutes until it has foamed up nicely. If your yeast doesn’t get foamy, don’t move forward. Buy a new jar and store it in the freezer so it lasts longer.
- Make the dough: In the bowl of your mixer add the flour, milk, remaining sugar, melted butter, eggs, salt, and yeast mixture and mix for about 5 minutes using the dough hook. If the dough is sticking to the bowl, add a bit more flour. The dough is done when it comes clean from the side of the bowl. Place the dough in an oiled bowl, cover it with plastic wrap or damp clean kitchen towel and place it in a warm, draft free environment until it doubles in size.
- Make the filling and the pecan topping: In a small bowl combine the brown sugar with the cinnamon. In a small saucepan add the butter, brown sugar and honey. Cook over low heat until the sugar dissolves. Pour the sauce over a 9×13-inch baking pan and sprinkle with chopped pecans.
- Assemble cinnamon rolls: Roll the dough out on a lightly floured surface, until it is approximately 16 inches long by 12 inches wide. It should be approximately ¼ inch in thickness. Spread the ⅓ cup of butter evenly over the dough, then sprinkle with the sugar evenly over the surface of the dough. Working carefully, from the long edge, roll the dough down to the bottom edge. Cut the dough into 1 ½ inch slices, and place in a lightly greased baking pan. Place the cut rolls in the pan over the caramel and pecans topping. Cover with a clean kitchen towel or plastic wrap and let them rise for another 30 minutes, or until doubled in size.
- Preheat the oven and bake: Preheat the oven to 350°F. Place the baking pan with cinnamon rolls in the oven and bake for 20 to 25 minutes or until golden brown.
- Invert the rolls and serve: Remove pan from oven and place a large serving platter or a baking sheet over the rolls. Invert the rolls onto the baking sheet, but wait about 5 minutes before removing the baking pan. Let buns cool slightly and serve warm.
Equipment
Notes
- If your oven has a proof function use it and place your dough in the oven to rise, it will rise much quicker and it’s the perfect warm environment for your dough to rise. If it doesn’t, simply preheat your oven to 200°F, turn off the oven, then place the dough in the oven to rise.
- Leftovers: Store the buns on the counter covered tightly with plastic wrap or foil, or in an airtight container. If you want them to last longer store them in an airtight container in the fridge for up to 5 days.
- Freezing: Baked sticky buns can be frozen for 2-3 months but make sure they are placed in an airtight container. Thaw them overnight in the refrigerator, then warm them up in the microwave and enjoy!
Nutrition Information
Notice: Nutrition is auto-calculated for your convenience. Where relevant, we recommend using your own nutrition calculations.
