Cheesy Cauliflower Breadsticks
This post may contain affiliate links. Please read my disclosure policy.

These Cheesy Cauliflower Breadsticks are gluten free, low carb and so delicious! Perfectly crispy, loaded with cheesy goodness, and made with a cauliflower crust, they’re the ideal guilt-free snack. Update your recipe collection with this fan favorite from 2015.

The Only Cheesy Cauliflower Breadsticks Recipe You’ll Ever Need
These Cheesy Cauliflower Breadsticks are a must-try! They’re perfectly crispy, packed with cheesy goodness, and made with a cauliflower crust that’s both gluten-free and low carb. You’ll love how easy they are to make and how every bite bursts with flavor.
I first shared this recipe back in 2015, and it quickly went viral on Pinterest, becoming a fan favorite. Over the years, it’s remained one of the most popular recipes on the blog. Now, I’m excited to update it with fresh new photos and a video to make it even easier for you to enjoy this delicious, guilt-free snack!

Ingredients You’ll Need
- Cauliflower, riced: Use a food processor to rice it. You can also use store-bought cauliflower rice, if you can find it.
- Eggs: Bind the ingredients together, ensuring the breadsticks hold their shape.
- Mozzarella cheese: I used a Tex-Mex blend but feel free to use your favorite cheese blend.
- Oregano: Brings an earthy, aromatic flavor that complements the cheese and cauliflower.
- Garlic, minced: Adds a burst of savory goodness. You can use garlic powder if you don’t have fresh garlic on hand.
- Salt and pepper: Enhance the overall flavor, making each bite perfectly seasoned.
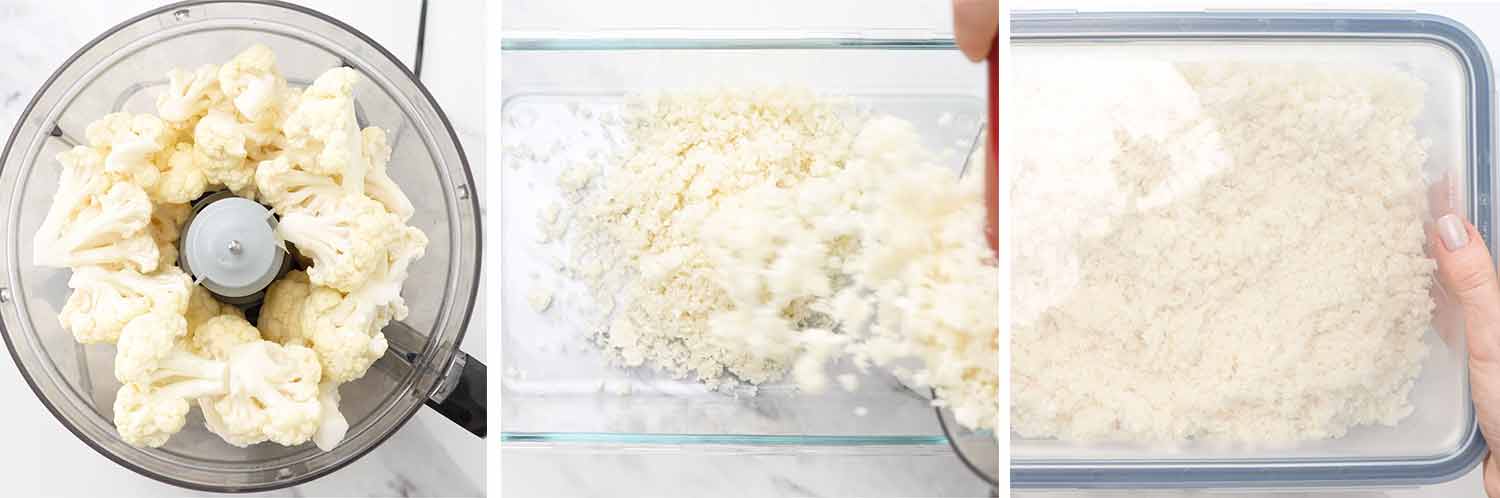
First, preheat your oven to 425℉. Roughly chop your cauliflower into florets. Add the florets to your food processor and pulse until they resemble rice. You can also use store-bought cauliflower rice if you can find it. Place the riced cauliflower in a microwavable container and cover with a lid. Microwave for 10 minutes. Let it cool just until there’s no more steam.
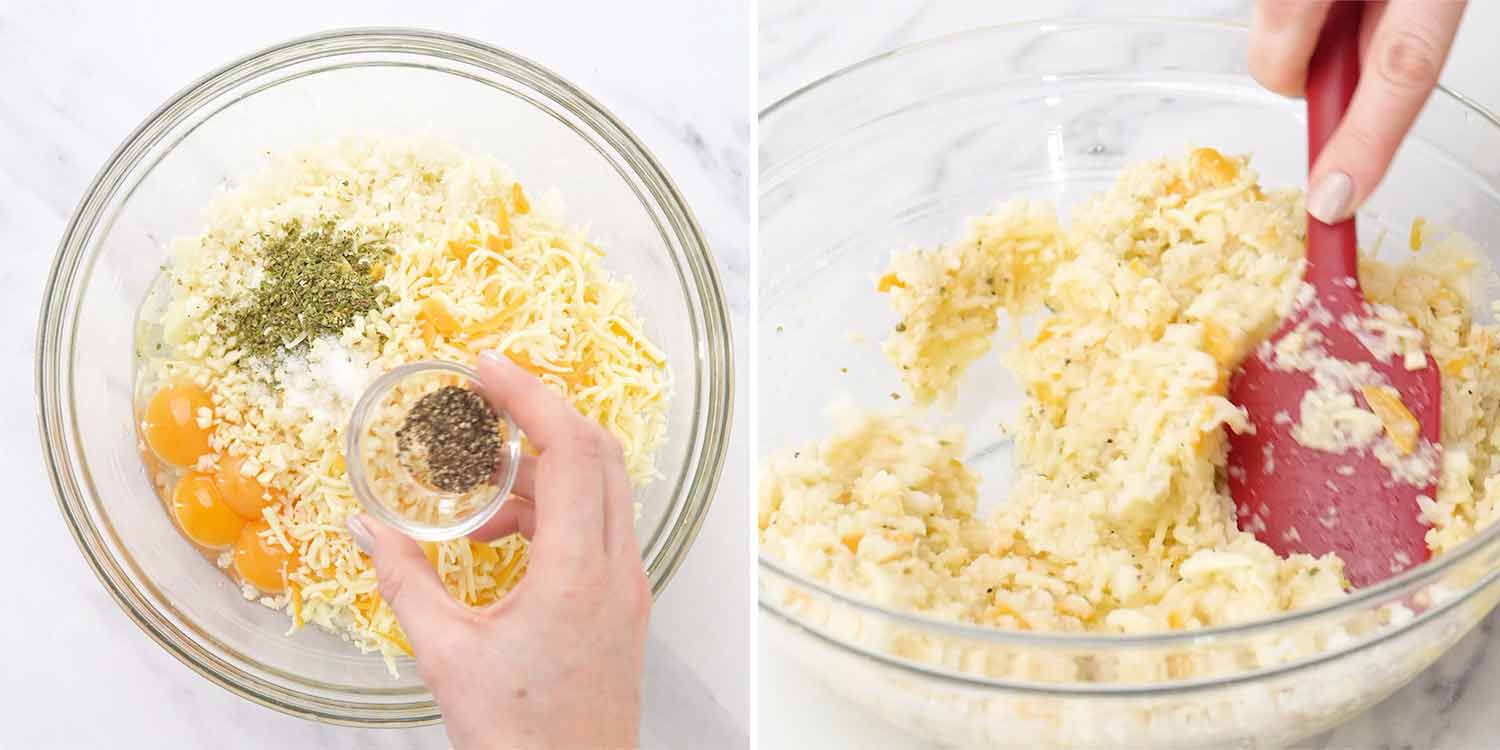
Now, transfer the microwaved cauliflower to a large bowl. Add the eggs, 2 cups of mozzarella, oregano, garlic, salt, and pepper. Mix everything together until well combined.
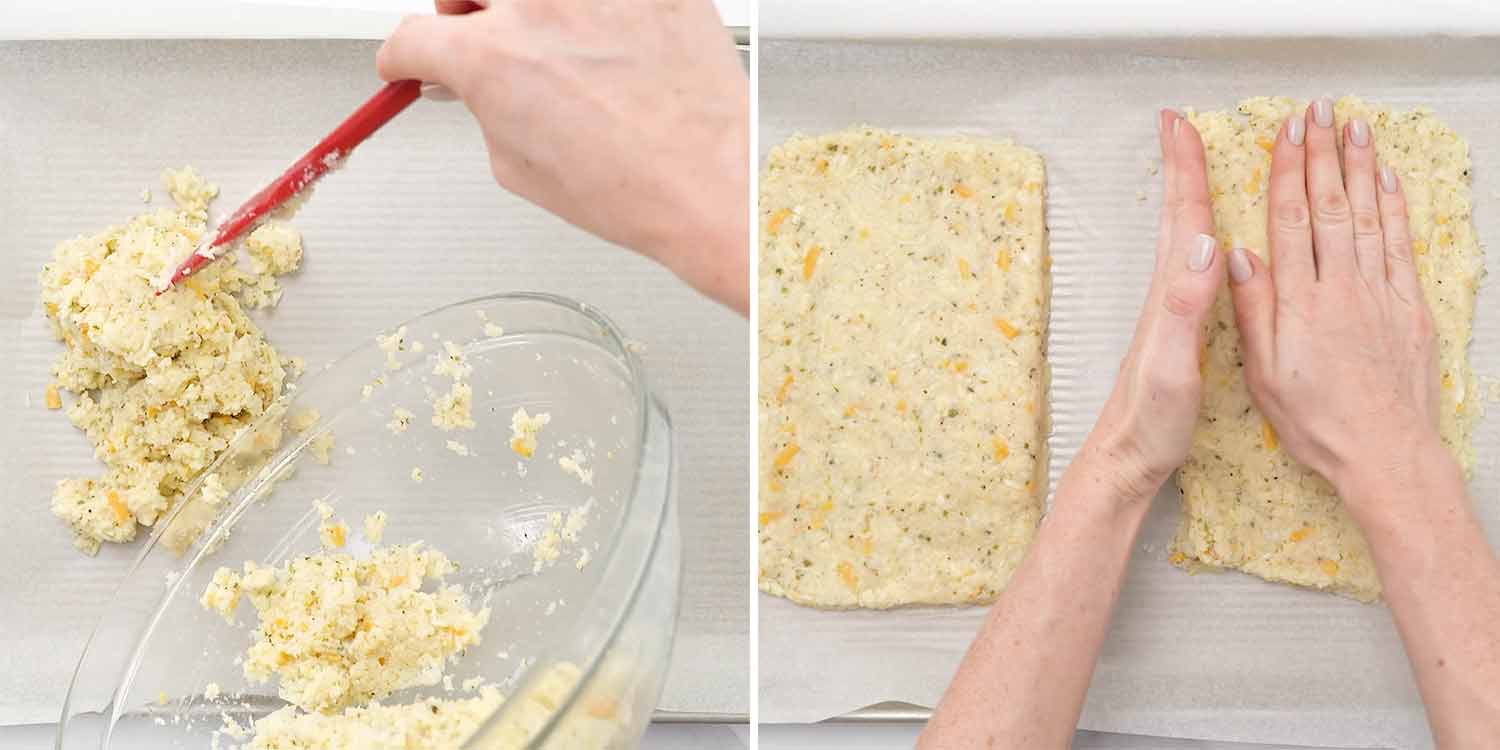
Divide the mixture in two and place each half onto the prepared baking sheets. Shape them into either pizza crusts or rectangles for breadsticks or round pizza crusts.
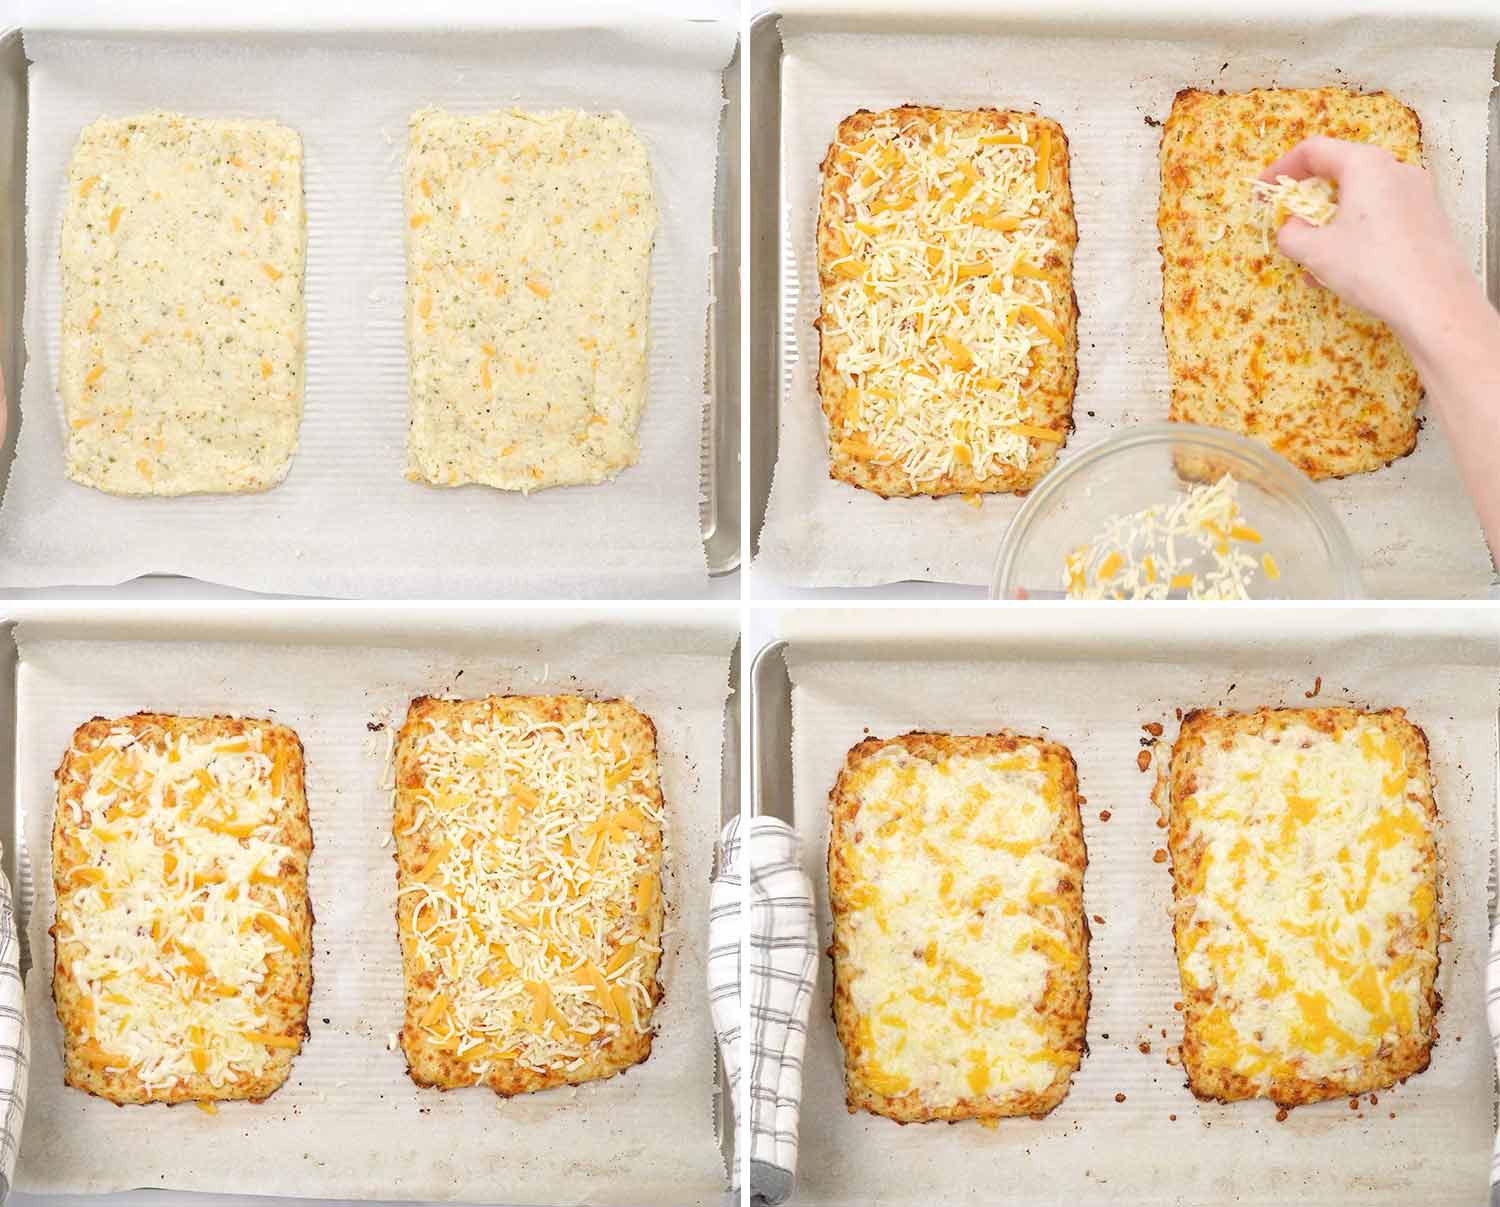
Bake the crusts for about 25 minutes or until they’re nice and golden. Once the crusts are golden, sprinkle them with the remaining mozzarella cheese. Put them back in the oven for another 5 minutes or until the cheese has melted. Slice the breadsticks and serve them warm.

Frequently Asked Questions
How do I prevent my cauliflower breadsticks from being soggy?
Microwaving the cauliflower helps reduce excess moisture. If you still find it too soggy, strain the cauliflower using a fine mesh strainer or cheese cloth after microwaving to remove any remaining moisture.
Can I use frozen cauliflower rice for this recipe?
Yes, you can use frozen cauliflower rice. Just make sure to thaw it completely and squeeze out any excess moisture before using it in the recipe.
What can I use instead of a food processor to rice the cauliflower?
If you don’t have a food processor, you can use a box grater to rice the cauliflower. Just grate the florets until they resemble rice.
I don’t have a microwave, can I still make cauliflower pizza crust?
Yes, you can steam the cauliflower on the stovetop instead. Just make sure to strain it well afterward to remove as much moisture as possible.
Can I make these breadsticks ahead of time?
Absolutely! You can prepare the crusts ahead of time and store them in the refrigerator for up to 2 days. When you’re ready to serve, add the topping and bake as directed.
Can you taste the cauliflower?
The cauliflower flavor is mild and gets masked by the cheese and seasonings. Most people don’t even realize they’re eating cauliflower!

Expert Tips
- Strain the cauliflower well: If after microwaving you find there’s still moisture in the cauliflower, use a cheese cloth or fine mesh strainer to remove excess moisture. This prevents soggy breadsticks.
- Use fresh garlic: Freshly minced garlic adds a more robust flavor compared to garlic powder.
- Don’t skip the parchment paper: It ensures the breadsticks don’t stick to the baking sheet and makes cleanup easier.
- Pre-bake the crust: Baking the crust before adding toppings ensures it gets crispy and golden.
Storage
Store any leftover breadsticks in an airtight container in the refrigerator for up to 3 days. You can also freeze them: place the cooled breadsticks in a single layer on a baking sheet, freeze until solid, then transfer to a freezer-safe bag or container for up to 1 month. Reheat in the oven for best results.

Discover More Cauliflower Recipes
- Cheesy Cauliflower Tots
- Baked Breaded Cauliflower
- Cauliflower Poppers
- Cauliflower Rice
- Instant Pot Mashed Cauliflower
- Cauliflower Au Gratin
Before You Begin! If you make this, please leave a review and rating letting us know how you liked this recipe! This helps our business thrive & continue providing free recipes.

Cheesy Cauliflower Breadsticks
Video
Ingredients
- 4 cups cauliflower (riced, about 1 large head of cauliflower)
- 4 large eggs
- 2 cups mozzarella cheese (I used a Tex Mex blend)
- 3 teaspoons oregano
- 4 cloves garlic (minced)
- salt and pepper (to taste)
- 1 cup mozzarella cheese (or more, for topping)
Before You Begin! If you make this, please leave a review and rating letting us know how you liked this recipe! This helps our business thrive & continue providing free recipes.
Instructions
- Preheat oven to 425℉. Prepare 2 pizza dishes or a large baking sheet with parchment paper.
- Make sure your cauliflower is roughly chopped into florets. Add the florets to your food processor and pulse until the cauliflower resembles rice.
- Place the cauliflower in a microwavable container and cover with lid. Microwave for 10 minutes. Let the cauliflower cool just until there’s no more steam coming from it. Place the microwaved cauliflower in a large bowl and add the eggs, 2 cups of mozzarella, oregano, garlic, salt and pepper. Mix everything together.
- Separate the mixture in two and place each half onto the prepared baking sheets and shape into either a pizza crust, or a rectangular shape for the breadsticks.
- Bake the crust (no topping yet) for about 25 minutes or until nice and golden. Don't be afraid the crust is not soggy at all. Once golden, sprinkle with remaining 1 cup mozzarella cheese and put back in the oven for another 5 minutes or until cheese has melted.
- Slice and serve.
Notes
- If you do not have a microwave, I’d recommend cooking the cauliflower first either in your oven or on the stovetop and then ricing it. Easiest would be to steam it and then ricing it.
- The cauliflower should not be soggy at all after microwaving it. If however, you find that it is soggy, place it on a few paper towels or cheesecloth and squeeze the water out of it.
- The crust can be frozen, already baked, and just thaw it out on the counter or microwave. Or add the cheese and place it back in the oven and bake it for a few minutes until the cheese melts and browns.
Nutrition Information
Notice: Nutrition is auto-calculated for your convenience. Where relevant, we recommend using your own nutrition calculations.
