Nanaimo Bars
This post may contain affiliate links. Please read my disclosure policy.

These Nanaimo Bars are a classic Canadian no bake dessert. They are incredibly decadent, sweet, and rich, bursting with chocolate and custard. So give these bars a try and prepare to feel just a little patriotic – no matter where you’re from!

Some of you may be unfamiliar with the culinary contributions Canada has given to the world, whether it be the Caesar or Poutine. But our best kept secret of all is the Nanaimo Bar, a decadent dessert that combines the richness of vanilla custard with the chew of a nutty coconut crust all topped off with a delightfully thin chocolate top layer. So let’s get down to business because I can promise that after one bite you’ll wish every day was July 1st!
What Are Nanaimo Bars?
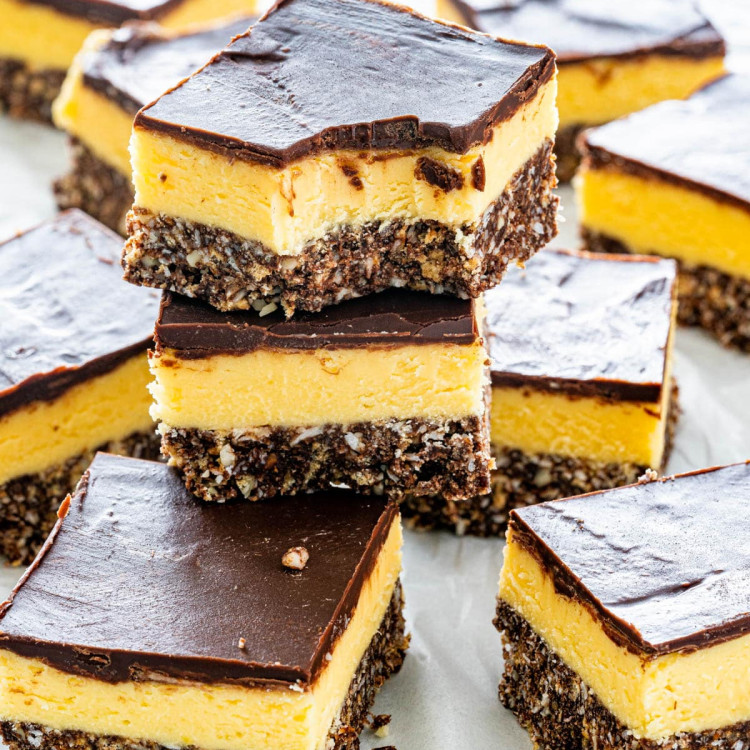
These no bake bars originated in Nanaimo, British Columbia – shocker right? They’re a layered dessert that starts with a chocolatey base packed full of chewy coconut and graham crackers. Next we pour on a rich vanilla custard and top it all off with some sinfully melted semi sweet chocolate, delicious!
Ingredients In Nanaimo Bars

Bottom layer
- Butter – Unsalted or salted, if using unsalted add a pinch of salt.
- Sugar – We’re just using plain white sugar for our base.
- Cocoa powder – The key to the rich chocolate base of our dessert.
- Egg – 1 large egg.
- Graham wafer – We’re just using graham cracker crumbs today to form a little quasi crust. Crush them in a food processor or place them in a ziploc bag and use a rolling pin to crush them.
- Almonds – Finely chop up your almonds before incorporating.
- Coconut – Shredded coconut either sweetened or unsweetened. Unsweetened would be great because the bars are plenty sweet.
Second layer
- Butter – You can use either salted or unsalted. If using unsalted add a pinch of salt to the custard to bring out all the flavors.
- Heavy cream – We want a cream with a high fat content to create a nice firm custard that is fantastically rich.
- Vanilla Custard powder – This is a powdered mix used to make custard and it’s similar to the type of mix used to make instant pudding.
- Powdered sugar – We want this layer to be super smooth so powdered sugar is a must, granulated may produce a grainy texture.
Third layer
- Chocolate chips – I used semi sweet today, if you’d like a less sweet dessert feel free to use dark or no sugar added.
- Butter – You can use either salted or unsalted.
How To Make Nanaimo Bars

Bottom layer
- Prepare the base: Spray a 8×8-inch baking pan with cooking spray then line it with parchment paper, but with the parchment paper hanging off the sides to make it easy to lift out the bars. Melt the first 3 ingredients in the top of a double boiler, a heavy bottom saucepan or Dutch Oven over low heat. Add the egg and stir to cook and thicken before removing from the heat. Stir in the graham cracker crumbs, coconut, and almonds. Press firmly into the prepared pan and place in the fridge.
Second layer
- Prepare the custard layer: Cream the butter, cream, custard powder, and icing sugar together well. Beat until light and airy. Spread this over the bottom layer in the pan. Refrigerate again.
Third layer
- Finish the Nanaimo Bars: Melt chocolate chips and butter over low heat and then allow to cool. Once cooled but still liquid, pour the mixture over the second and third layer in your pan and spread evenly with a spatula. Place in the fridge and allow to cool for at least 3 hours. Cut into squares and serve!

What Do I Need To Make Nanaimo Bars?
Mixer
I used a hand mixer today to cream the second layer of this dessert but a standing mixture will work just fine as well! Just be sure to use th whisk attachment.
Double boiler
A double boiler is used when you are trying to melt down ingredients that are too delicate to be put on direct heat. You fill the bottom pot with water and allow it to boil before placing the second pot over top, this creates consistent but gentle heat to prevent burning.
You can also stack 2 pots that fit atop each other if you have some handy that work! However, if you don’t have a double boiler you can use a heavy bottom saucepan or a Dutch oven, just make sure the heat is on low.

Tips For Making The Best Nanaimo Bars
- Let your Nanaimo bars set in the fridge for as long as possible! It will prevent the layers from melting and bleeding together once you slice them up.
- To ensure you get nice separate layers place the dessert in the fridge after you’ve poured over the custard layer while the top layer melts.
- Tap the pan on your counter gently a few times after you’ve poured on the final chocolate layer, this will ensure the chocolate is level and even.

What Else Can I Use In My Nanaimo Bars?
Feel free to tweak this recipe as you see fit, I’ve included some common substitutes below.
- Don’t have almonds? Feel free to use walnuts or pecans instead in your crust.
- Can’t find custard powder? You can substitute it with cornstarch, a pinch of salt, and some vanilla.
- Is the dessert too sweet? Feel free to use bakers bittersweet chocolate or squares of dark chocolate in place of the chocolate chips in the final layer.
Can I Make Nanaimo Bars Ahead?
Fridge
You can store these delicious little bars in the fridge for 3 – 4 days and they’ll keep just fine. I even find that as those layers get to know each other better they get even better!
Freezer
These bars freeze quite well! You can store these in an airtight container and they’ll keep in the freezer for up to 3 months! Just take out the freezer and allow to thaw in the fridge when you’re ready to eat.

Other Great Canadian Recipes To Try
Craving More Squares? Try These Delicious Recipes:
- Date Squares
- Apple And Almond Squares
- Berry Cheese Cake Squares
- Lemon Bars
- Pecan Pie Bars
- No Bake Peanut Butter Chocolate Bars
- Creme Brûlée Cheesecake Bars
- 3 Ingredient Healthy Energy Bars
- Salted Caramel Apple Pie Cheesecake Bars
Before You Begin! If you make this, please leave a review and rating letting us know how you liked this recipe! This helps our business thrive & continue providing free recipes.
Nanaimo Bars
Video
Ingredients
Bottom Layer
- ½ cup butter (salted, if using unsalted add a pinch of salt)
- ¼ cup sugar (granulated)
- 5 tablespoon cocoa powder
- 1 large egg (beaten)
- 1 ¾ cups graham wafer crumbs
- ½ cup almonds (finely chopped)
- 1 cup coconut (shredded, sweetened or unsweetened)
Second Layer
- ¾ cup butter (salted, if using unsalted add a pinch of salt)
- ¼ cup heavy cream
- 3 tablespoon vanilla custard powder
- 3 cups powdered sugar (same as icing sugar or confectioners sugar)
Third Layer
- 4 ounce semisweet chocolate chips
- 2 tablespoon butter (salted, if using unsalted add a pinch of salt)
Before You Begin! If you make this, please leave a review and rating letting us know how you liked this recipe! This helps our business thrive & continue providing free recipes.
Instructions
Bottom Layer
- Spray a 8×8-inch baking pan with cooking spray then line it with parchment paper, but with the parchment paper hanging off the sides to make it easy to lift out the bars.
- Melt the first 3 ingredients in the top of a double boiler, a heavy bottom saucepan or Dutch Oven over low heat. Add the egg and stir to cook and thicken before removing from the heat. Stir in the graham cracker crumbs, coconut, and almonds. Press firmly into the prepared pan and place in the fridge.
Second Layer
- Cream the butter, cream, custard powder, and icing sugar together well. Beat until light and airy. Spread this over the bottom layer in the pan. Refrigerate again.
Third Layer
- Melt chocolate chips and butter over low heat and then allow to cool. Once cooled but still liquid, pour the mixture over the second and third layer in your pan and spread evenly with a spatula. Place in the fridge and allow to cool for at least 3 hours.
- Cut into squares and serve.
Notes
- You can store these delicious little bars in the fridge for 3 – 4 days and they’ll keep just fine. I even find that as those layers get to know each other better they get even better!
- These bars freeze quite well! You can store these in an airtight container and they’ll keep in the freezer for up to 3 months! Just take out the freezer and allow to thaw in the fridge when you’re ready to eat.
Nutrition Information
Notice: Nutrition is auto-calculated for your convenience. Where relevant, we recommend using your own nutrition calculations.
