• Skip to primary navigation
  • Skip to main content
  • Skip to primary sidebar
Facebook
Instagram
Pinterest
YouTube
TikTok

Jo Cooks

Simple - Easy - Comfort

  • All Recipes
    • Course
      • Breakfast
      • Appetizers
      • Lunch
      • Dinner
      • Desserts
      • Side Dishes
      • Soups
      • Salads
      • Sandwiches
      • Drinks/Cocktails
      • Sauces & Dressings
    • Method
      • Crockpot
      • Instant Pot
      • One Pot
      • Air Fryer
      • Casseroles
    • Season
      • Spring
      • Summer
      • Fall
      • Winter
    • Cuisine
      • Asian
      • Italian
      • Mexican
      • European
      • Indian
      • Romanian
      • Mediterranean
      • Middle Eastern
      • American
    • Ingredient
      • Chicken
      • Pork
      • Beef
      • Seafood
      • Lamb
      • Vegetarian
      • Pasta
      • Spices
    • Holiday
      • Christmas
      • Easter
      • Thanksgiving
      • Game Day
      • Valentine's Day
      • St. Patrick's Day
      • Cinco de Mayo
      • Mother's Day
      • Memorial Day
      • Father's Day
      • 4th Of July
      • Labor Day
      • Halloween
    • Recipe Index
  • Cookbooks
    • The Big Book of Jo’s Quick and Easy Meals
    • 30-Minute One-Pot Meals
  • Shop
  • About Jo
FREE recipe eBook!
Search...
All Recipes
Instant Pot
30 Minute
One Pot Meals
Soups
Dips & Dressings
Baking
Pasta
Sandwiches
Sides
Desserts Squares/Bars
4.6 from 5 votes

Crème Brûlée Cheesecake Bars

Jump to RecipeVideoPrintRate
By: Joanna Cismaru 8 Comments

This post may contain affiliate links. Please read my disclosure policy.

Gourmet has never been easier than these luscious Crème Brûlée Cheesecake Bars! This tasty treat simplifies everyone’s favorite French dessert without sacrificing delicious flavor.
creme brulee cheesecake bars with raspberries and whipped cream

Ahh, crème brûlée! We all know someone with a brûlée obsession. In fact, you might BE that someone! Why does it have to be so much effort to make from home?

I’ve got you covered with these incredibly easy bars! This rich and silky cheesecake is the perfect vessel to satisfy your crème brûlée cravings. Plus, using a kitchen torch to create perfectly bubbly caramelized sugar has to be one of the most satisfying things!
process of making creme brulee cheesecake bars

What Is Crème Brûlée?

Crème Brûlée translates literally to “burnt cream”! This refers to the velvety custard topped with crunchy caramelized sugar. This recipe has been around for hundreds of years, and is still a crowd favorite to this day for a good reason.

Traditionally, crème brûlée is made by pouring the custard into individual dishes, and baking in a water bath. After baking it’s set in the fridge to cool completely. Sugar is sprinkled generously over the custard and caramelized with a torch right before serving to give it optimal crunchiness. Can you say YUM?!
process of making creme brulee cheesecake bars

How to Make Crème Brûlée Cheesecake Bars

Step one: Make the crust
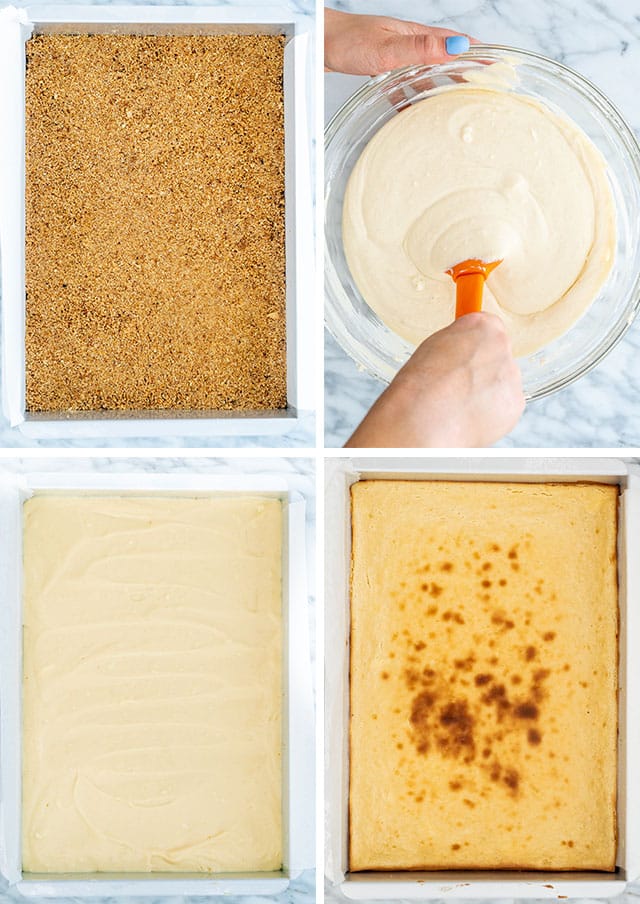
The crust couldn’t get any easier for this recipe! Throw the graham crackers, pecans, and butter into your food processor and pulse until a nice and even texture forms. You might need to run a spatula around the edges a couple times to make sure all the big pieces get mixed in. Line a 9 x 13 pan with parchment paper, and dump out the contents of your food processor right into the pan. Use a spatula to spread the crust evenly. I used the bottom of a one cup measure to compact the crust and make it even.

Step two: Make the cheesecake batter
I used a very simple cheesecake recipe. This one is my go-to for making cheesecake bars! Using a hand mixer, mix the softened cream cheese until smooth. Add the eggs, sugar, vanilla and salt, and continue to mix until the batter is well combined and smooth.

Step three: Bake the cheesecake
Pour the cheesecake batter over the prepared crust and bake for 45 minutes at 350F, or until the top of the cheesecake has browned slightly. Set the cheesecake aside until it fully cools down. You can even leave it in the fridge overnight to make sure it’s firm and easy to slice.

Step four: Assemble the Crème Brûlée Cheesecake Bars
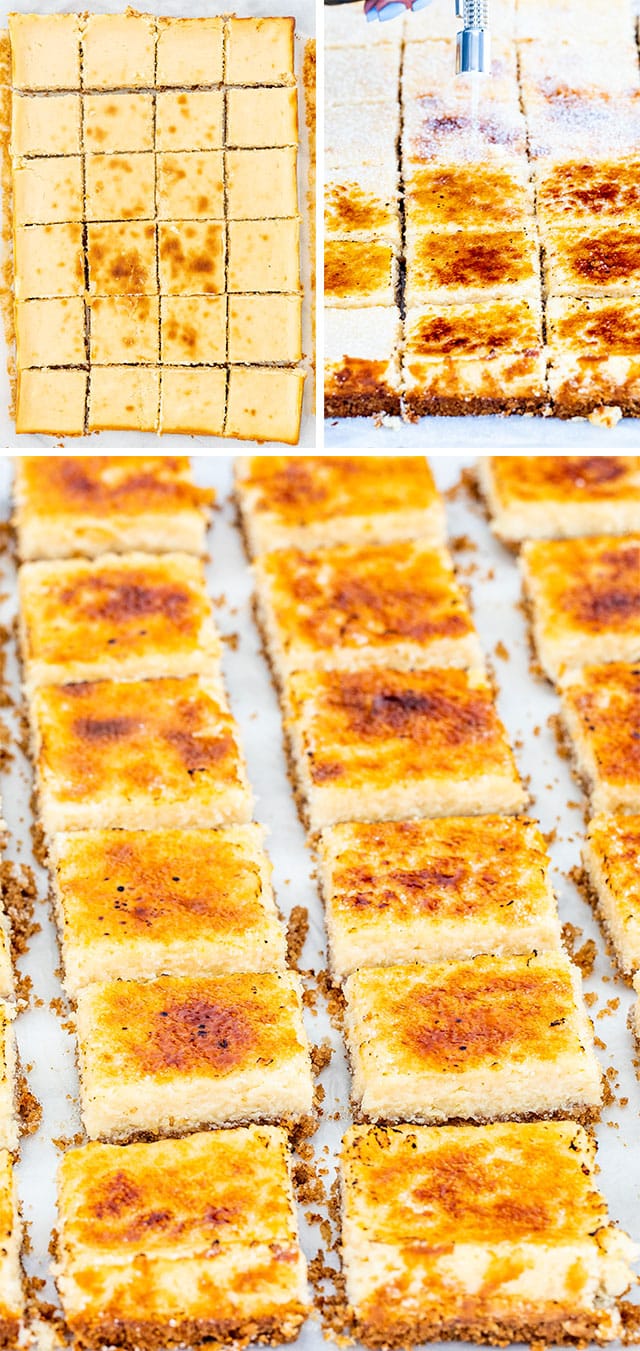
Carefully lift the cheesecake out of the pan and slice it into your desired size bars. We cut it 4 x 6, making 24 bars. Top the bars generously with granulated sugar. Using a kitchen torch, carefully torch the sugar until it becomes brown and bubbles. If you’d like to dress your bars up like ours, you can top each one with a dollop of whipped cream, a raspberry, and a small mint leaf.
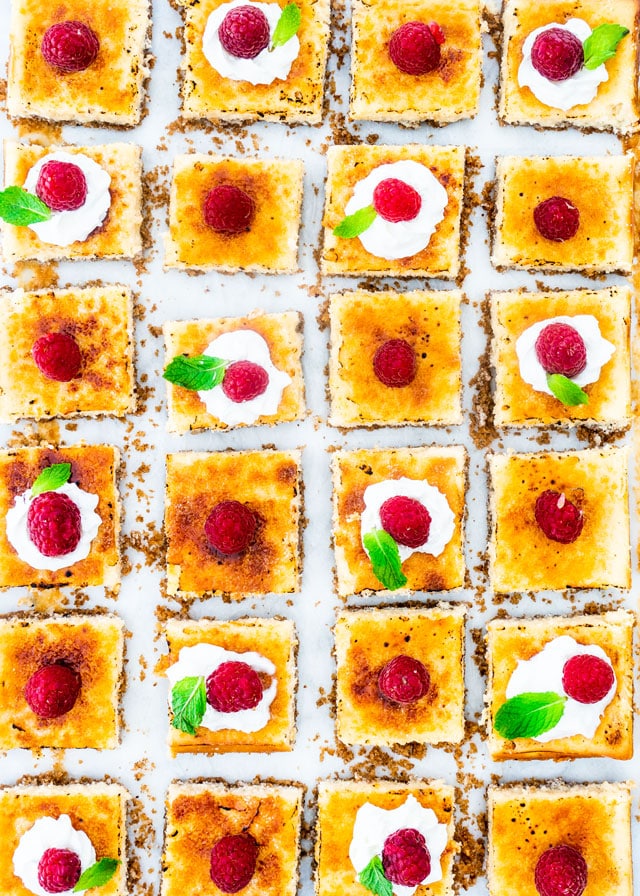
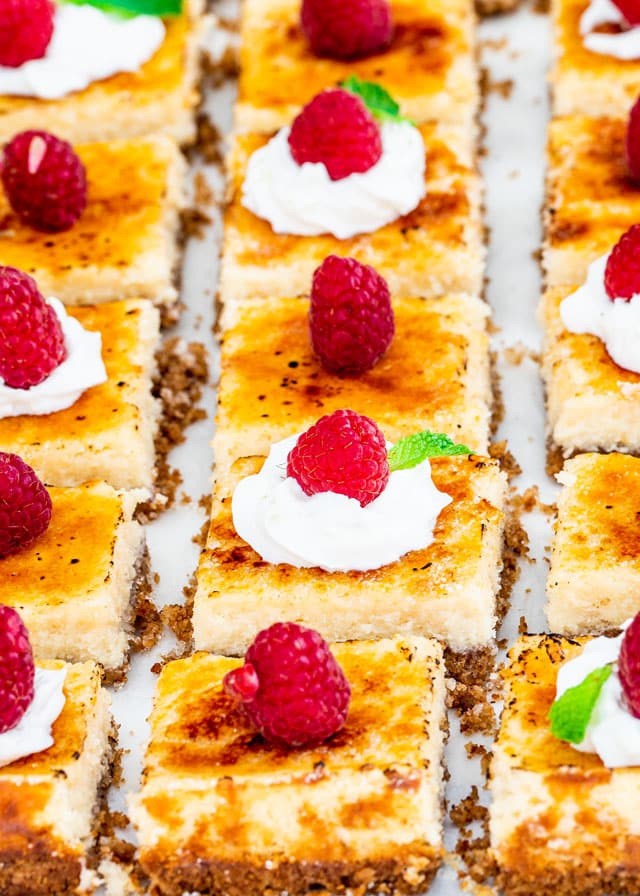
overhead shot of creme brulee cheesecake bars topped with whipped cream and raspberries

Make Ahead

You can do everything except for assembly to make these delicious bars ahead to save you time the day of a potluck, having guests over, an event, etc. Sprinkle the sugar, torch, and garnish right before serving these bars. The sugar will absorb moisture and lose its crunch if done too far in advance.

Want to get creative? Feel free to garnish your bars with your favorite fruits, a curl of chocolate, whatever floats your boat!

How to Store Crème Brûlée Cheesecake Bars

Keep these bars in an airtight container. They can last in the fridge for 5-6 days, or in the freezer for 6-8 months. You will need to let these thaw slowly at room temperature if you choose the freezer.
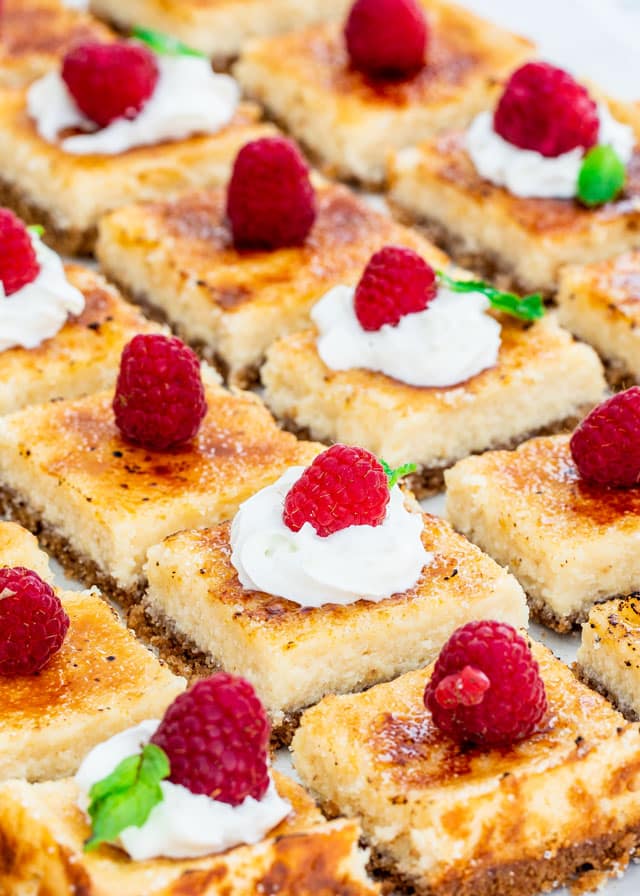
creme brulee cheesecake bars topped with whipped cream and raspberries

Now, who would like to try a piece?

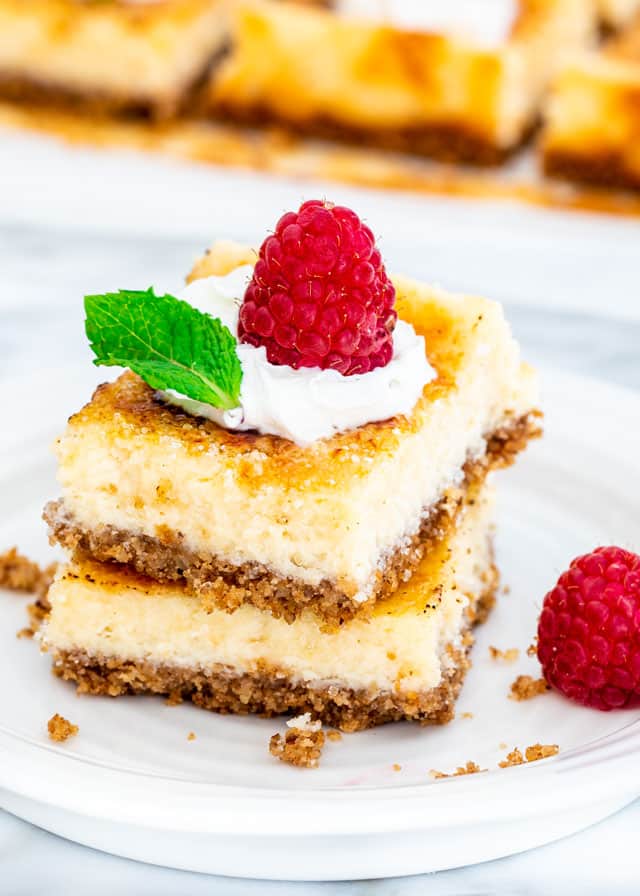
two creme brulee cheesecake bars stacked on each other topped with whipped cream and a raspberry

Craving More Desserts? Try These Recipes:

  • Cheesecake Recipe
  • Hawaiian Cheesecake Bites
  • Mini Salted Caramel Cheesecakes
  • Mini Tiramisu Cheesecakes
  • Matcha Mini Cheesecakes

Before You Begin! If you make this, please leave a review and rating letting us know how you liked this recipe! This helps our business thrive & continue providing free recipes.
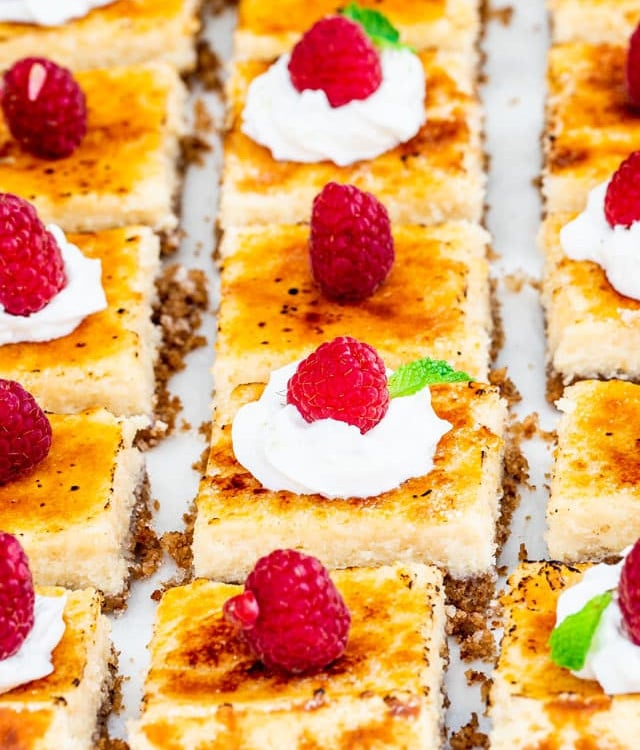
side view shot of creme brulee cheesecake bars topped with whipped cream and raspberries
Print
4.60 from 5 votes

Crème Brûlée Cheesecake Bars

Prep 20 minutes minutes
Cook 45 minutes minutes
Total 1 hour hour 5 minutes minutes
Rate Recipe
Gourmet has never been easier than these luscious Crème Brûlée Cheesecake Bars! This tasty treat simplifies everyone’s favorite French dessert without sacrificing delicious flavor.
24

Ingredients

Crust

  • 5 ounce graham crackers
  • 1 cup pecans
  • ¼ cup butter (unsalted, melted)

Cheesecake

  • 24 ounce cream cheese (3 packages, softened)
  • 3 eggs
  • 1 cup sugar (granulated)
  • ½ cup sour cream
  • 2 teaspoon vanilla extract
  • ⅛ teaspoon salt

To Assemble

  • ½ cup sugar (granulated)
  • whipped cream (for garnish, optional)
  • raspberries (for garnish, optional)
  • mint leaves (for garnish, optional)

Before You Begin! If you make this, please leave a review and rating letting us know how you liked this recipe! This helps our business thrive & continue providing free recipes.

Instructions 

  • Preheat your oven to 350 F degrees. Spray a 9×13-inch baking pan with cooking spray then line it with parchment paper, but with the parchment paper hanging off the sides to make it easy to lift out bars.

Crust

  • Add all the crust ingredients to a food processor and pulse a few times until mixture resembled a dry coarse meal. 
  • Transfer the crumb mixture to the prepared baking dish and press it down evenly into the bottom. Set aside.

Cheesecake

  • Using a hand mixer, mix the softened cream cheese until smooth. Add the eggs, sugar, sour cream, vanilla and salt, and continue to mix until the batter is well combined and smooth.
  • Pour the cheesecake batter over the prepared crust and bake for 45 minutes or until the top of the cheesecake has browned slightly. Set the cheesecake aside until it fully cools down. You can even leave it in the fridge overnight to make sure it’s firm and easy to slice.

To Assemble

  • Carefully lift the cheesecake out of the pan and slice it into your desired size bars. We cut it 4 x 6, making 24 bars. Top the bars generously with granulated sugar. Using a kitchen torch, carefully torch the sugar until it becomes brown and bubbles. If you’d like to dress your bars up like ours, you can top each one with a dollop of whipped cream, a raspberry, and a small mint leaf.

Video

Notes

  1. MAKE AHEAD: You can do everything except for assembly to make these delicious bars ahead to save you time the day of a potluck, having guests over, an event, etc. Sprinkle the sugar, torch, and garnish right before serving these bars. The sugar will absorb moisture and lose its crunch if done too far in advance. Want to get creative? Feel free to garnish your bars with your favorite fruits, a curl of chocolate, whatever floats your boat!
  2. Storage: Keep these bars in an airtight container. They can last in the fridge for 5-6 days, or in the freezer for 6-8 months. You will need to let these thaw slowly at room temperature if you choose the freezer.

Nutrition Information

Calories: 193kcal (10%)Carbohydrates: 20g (7%)Protein: 3g (6%)Fat: 11g (17%)Saturated Fat: 4g (25%)Cholesterol: 43mg (14%)Sodium: 196mg (9%)Potassium: 111mg (3%)Sugar: 15g (17%)Vitamin A: 275IU (6%)Vitamin C: 0.1mgCalcium: 58mg (6%)Iron: 0.5mg (3%)
© Author Joanna Cismaru

Notice: Nutrition is auto-calculated for your convenience. Where relevant, we recommend using your own nutrition calculations.

side view shot of creme brulee cheesecake bars topped with whipped cream and raspberries

Did You Make This?

We love seeing what you made! Tag us on Instagram at @jocooks or hashtag #jocooks so we can see your creations!

Rate Recipe
Add Your Photo!
  • 804
  • 1
Home Recipes
Joanna Cismaru

Joanna Cismaru

I’m Joanna (Jo for short) and this is my blog where I share with you my culinary adventures. Through Jo Cooks, I invite you to join me in my kitchen as we explore delicious recipes from around the globe, celebrate the joy of cooking, and make every meal a memorable one. Happy cooking!

Read More
iPad showing title of ebook 30 recipes from around the world
Subscribe

Get our FREE recipe eBook + weekly newsletter!

Loading

guest
Did you make this recipe? Rate it:


The comment form collects your name, email and content to allow us keep track of the comments placed on the website. Please read and accept our website Terms and Privacy Policy to post a comment.

guest
Did you make this recipe? Rate it:


The comment form collects your name, email and content to allow us keep track of the comments placed on the website. Please read and accept our website Terms and Privacy Policy to post a comment.

This site uses Akismet to reduce spam. Learn how your comment data is processed.

8 Comments
Newest
Oldest Most Voted
Inline Feedbacks
View all comments
Abby
Abby
Posted: 3 years ago

Could you use a different nut or no nuts at all in the crust?

0
Reply
Nicole Beaulieu
Nicole Beaulieu
Reply to  Abby
Posted: 3 years ago

Yes any nut you like! You can keep it at just a graham cracker crust as well.

0
Reply
Gina
Gina
Reply to  Nicole Beaulieu
Posted: 3 years ago

If you don’t use any nuts for the crust, would you still use the same amount of graham crackers or would you add more to compensate for the nuts.

0
Reply
Jo Cooks Team
Jo Cooks Team
Reply to  Gina
Posted: 3 years ago

I would add the same amount in volume.

0
Reply
Jenny Brasser
Jenny Brasser
Posted: 4 years ago

Please send recipes to my email thanks xx

0
Reply
Nicole Beaulieu
Nicole Beaulieu
Reply to  Jenny Brasser
Posted: 4 years ago

You’re all signed up! Check your email for a confirmation 🙂

0
Reply
Dan McEachern
Dan McEachern
Posted: 4 years ago

Please send me recipes to my email address.

0
Reply
Joanna Cismaru
Joanna Cismaru
Author
Reply to  Dan McEachern
Posted: 4 years ago

To subscribe to my free recipes, please fill out this form: https://jocooks.us10.list-manage.com/subscribe?u=5ba57158846b6743ab030d3cb&id=aba32560a5

0
Reply

sidebar

Headshot of Joanna Cismaru

Hey there!

I’m Joanna (Jo for short) and this is the place where I share my passion for easy and delicious recipes. From comforting classics to global flavors, I believe that cooking should be fun, approachable, and most importantly, rewarding. Join me on this culinary journey and let’s get cooking!

Read More
Collage of recipe ebooks
Subscribe

Get our FREE recipe eBook + weekly newsletter!

Loading

Pasta Favorites

baked mac and cheese in a black cast iron skillet.
45 minutes mins

Baked Mac And Cheese

freshly made crack chicken penne with a wooden spoon in a skillet.
40 minutes mins

Crack Chicken Penne

chicken pot pie pasta in a white serving bowl with a wooden serving spoon.
50 minutes mins

Chicken Pot Pie Pasta

freshly made one pot pasta in a dutch oven.
20 minutes mins

One Pot Pasta

tomato spinach chicken pasta in a white bowl.
30 minutes mins

Tomato Spinach Chicken Pasta

homemade hamburger helper lasagna from scratch in a skillet.
30 minutes mins

One Pot Hamburger Helper Lasagna

baked feta pasta in a white bowl garnished with fresh basil.
50 minutes mins

Baked Feta Pasta (Tik Tok Pasta)

sideview shot of chicken fajita pasta in a white bowl with a fork inside
45 minutes mins

Chicken Fajita Pasta

side close up shot of swedish meatball pasta in a beige braised garnished with parsley
30 minutes mins

Swedish Meatball Pasta

overhead shot of a bowl of haluski
40 minutes mins

Haluski (Cabbage and Noodles)

A stack of cookbooks
Grab a copy!

My Cookbooks

Order Now: Amazon | Indigo | Barnes & Noble | Indie Bound | Books-A-Million

Dinner Favorites

smothered pork chops in a skillet garnished with parsley.
1 hour hr 15 minutes mins

Smothered Pork Chops

a wooden spoon lifting a salisbury steak out of the skillet
30 minutes mins

Salisbury Steak

beef lo mein in a black wok.
30 minutes mins

Beef Lo Mein

side shot of beef and broccoli in a skillet
15 minutes mins

Easy Beef and Broccoli Stir Fry

skillet shepherd's pie in a cast iron skillet with a portion taken out.
1 hour hr 25 minutes mins

Skillet Shepherd’s Pie

a serving spoon inside a skillet with chicken broccoli rice casserole.
30 minutes mins

One Pot Cheesy Chicken Broccoli Rice Casserole

side view shot of two italian stuffed peppers in a bowl
2 hours hrs 30 minutes mins

Italian Stuffed Peppers

side view shot of a bowl with a scoop of spaghetti bolognese in it
40 minutes mins

Spaghetti Bolognese

Facebook
Instagram
Pinterest
YouTube
TikTok
Visit our Other Site: Craving Home Cooked

Explore

Recipes
Cookbooks
About Jo
Contact

Legal

Privacy Policy
Accessibility
Disclaimers
No AI
© 2023 Jo Cooks
Site Credits
Designed by Melissa Rose Design Developed by Once Coupled
Back to Top
wpDiscuz