Classic Pumpkin Pie
This post may contain affiliate links. Please read my disclosure policy.
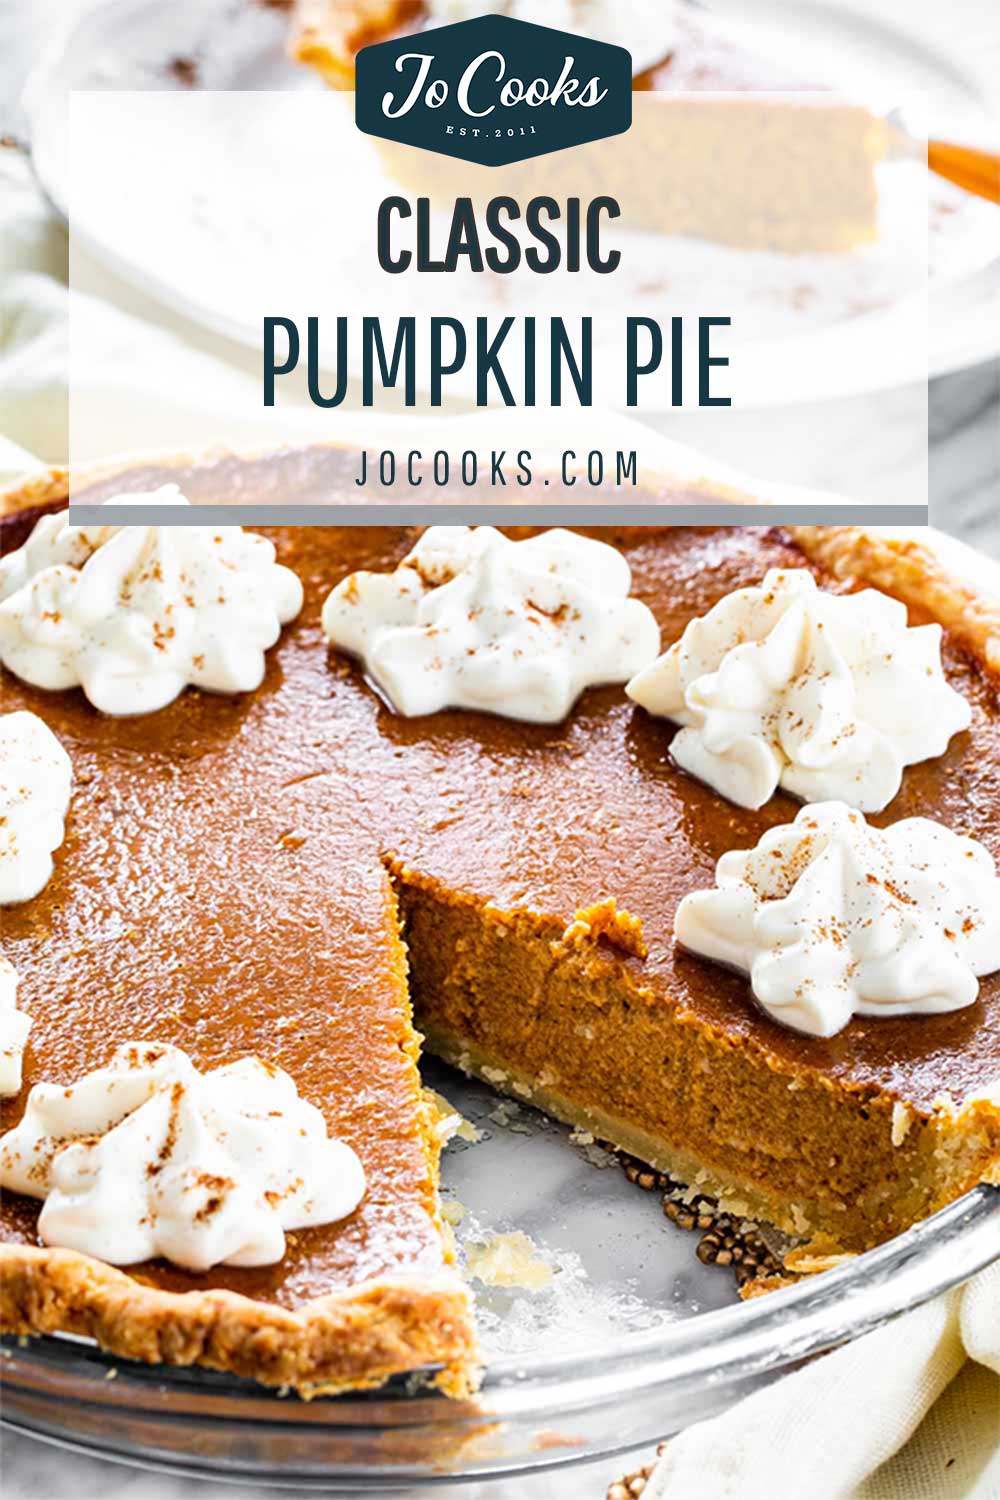
This Classic Pumpkin Pie is creamy, sweet and luscious! Completely homemade from the crust to the creamy filling. It’s utterly delicious and bursting with flavor! It also freezes well! Perfect for your Thanksgiving or Friendsgiving table!
Seriously The Best Pumpkin Pie Recipe
If there’s one recipe that’s a must at every Thanksgiving or Friendsgiving for me is this Pumpkin Pie! I love pumpkin pie. No I really really love pumpkin pie, like starry eyed hopelessly smitten kind of love.
I know some of you must be nodding along as you read this, I mean who doesn’t dream all year of sinking their teeth into a slice of this perfectly crafted and lovingly baked sweet center piece? So yes, out of all the pie recipes, this is my most favorite.
This is a recipe I published quite a few years back so over the years I’ve had time to perfect it in order to give you guys the best pumpkin pie recipe possible. It all starts with the perfect crust!
Homemade Crust Makes The Difference
There’s just something about homemade pie crust, especially mine, I guess I’m a little biased. It’s buttery, flakey, golden perfection – if I do say so myself. I mean I guess you can go with store bought if you want, but it might lack that razzle dazzle.
Why You’ll Love This Pumpkin Pie
- Iconic Thanksgiving Favorite! This classic pumpkin pie is a well-known holiday favorite. It has a super flaky crust and is filled with a delicious custard-like pumpkin filling that is perfectly spiced.
- Easy Recipe! You only need canned pumpkin and basic pantry ingredients to make this pumpkin pie! In fact, the simple recipe only takes a little over an hour and you can even use a store-bought crust if you prefer.
- Make Ahead Perfect! Pumpkin pie keeps really well in the freezer, which means you can literally make it weeks before it’s needed or freeze leftovers!
Pie crust
- Follow my recipe here for the best pie crust recipe with all the tips and tricks you need. If you don’t want to make your own, you can use store bought pie crust.
Filling
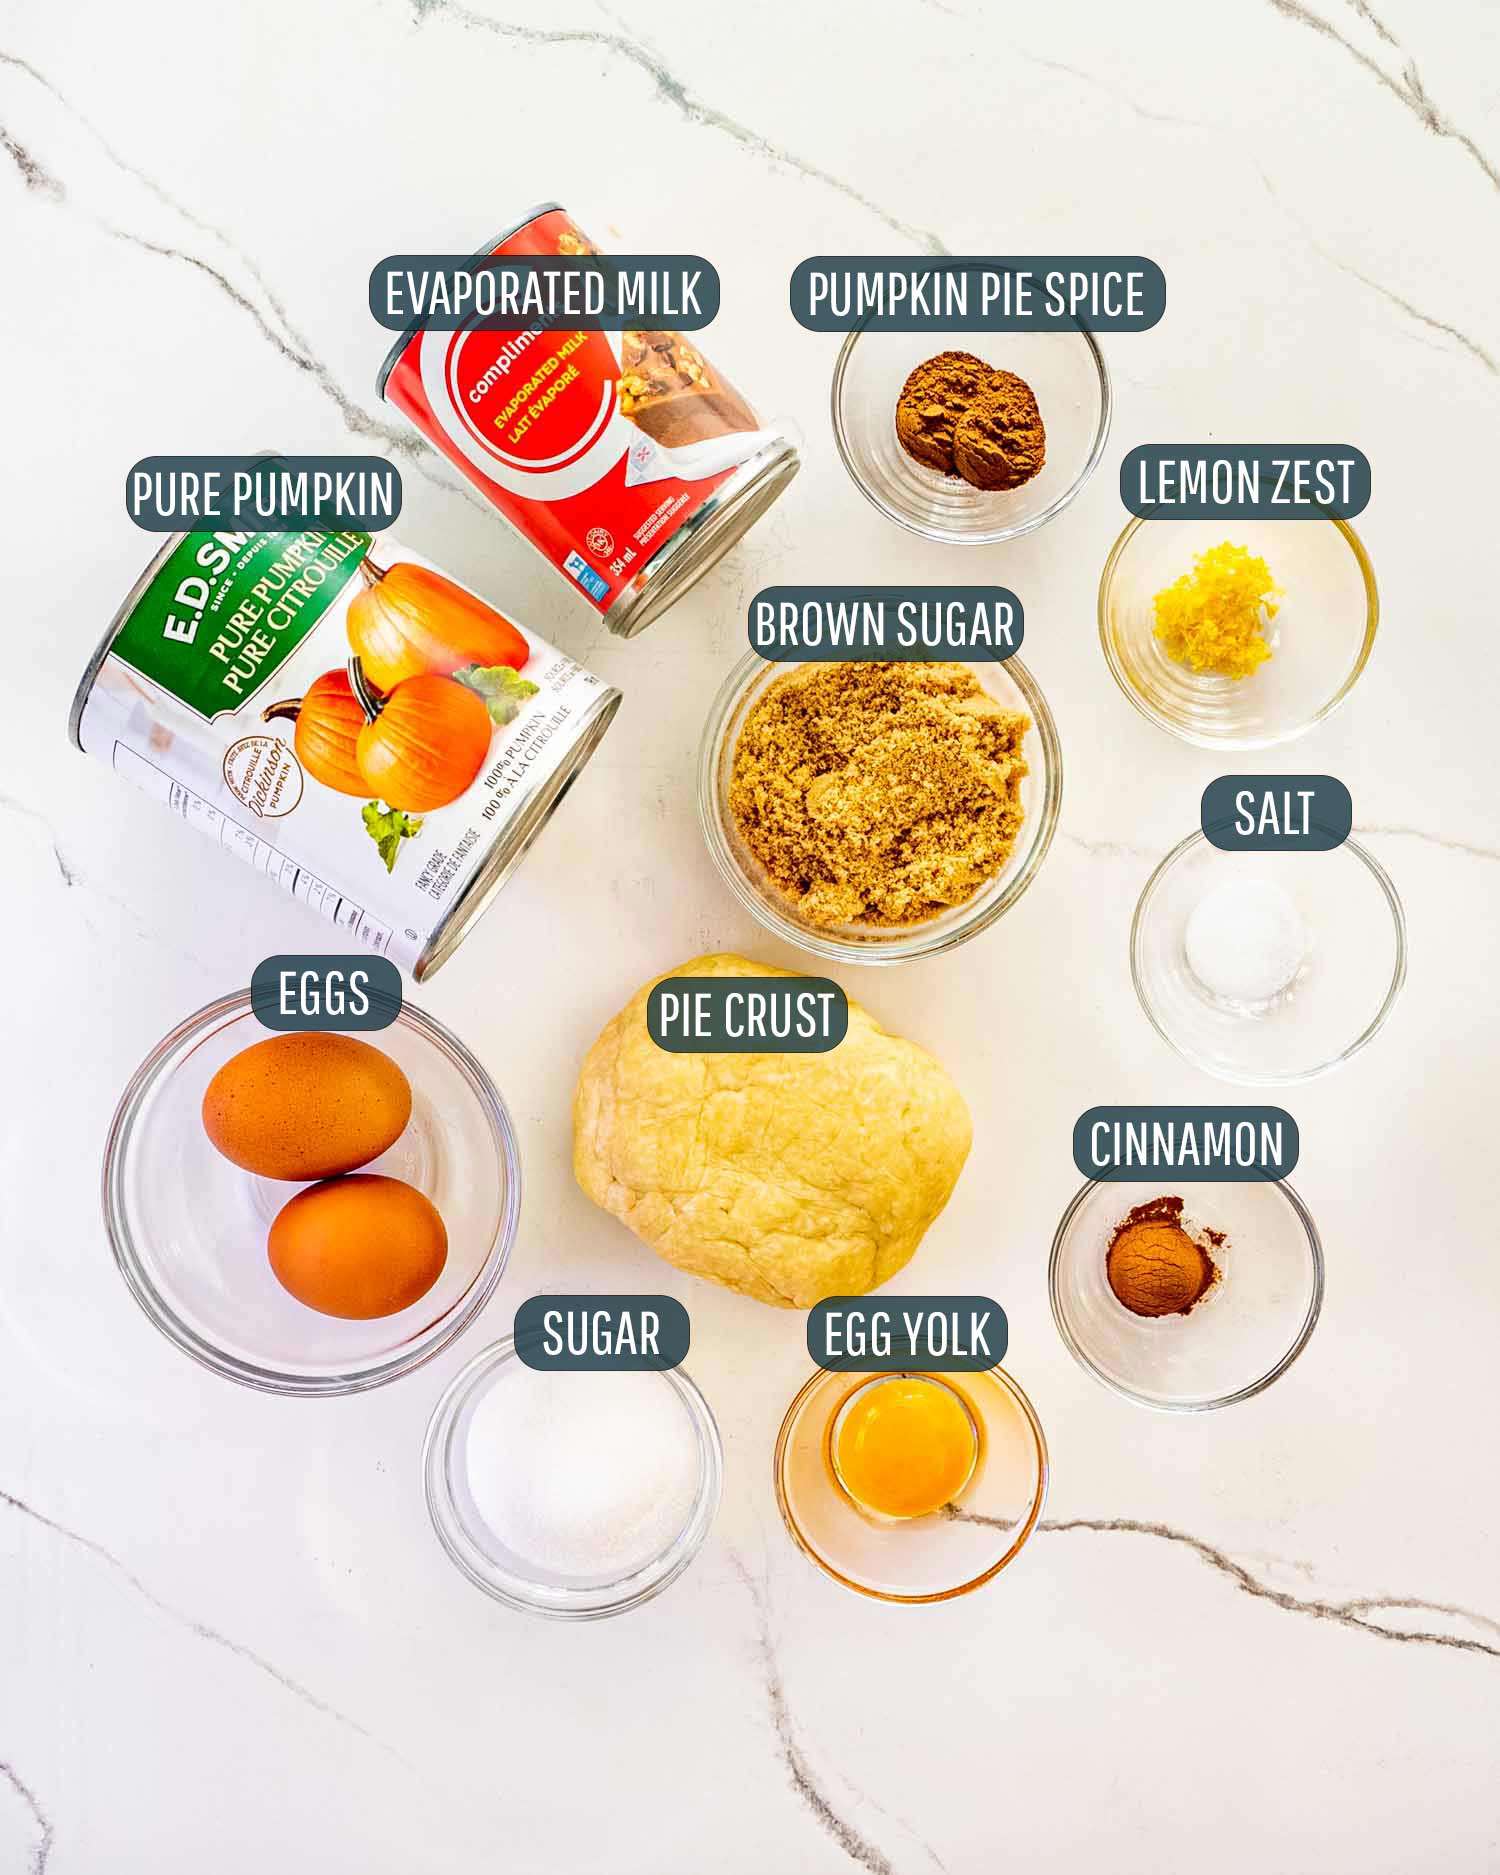
- Sugar – We’re using both granulated white sugar and packed brown sugar today to sweeten up our pie.
- Spices – You can use your favorite pumpkin pie spice, or simply make your own using my homemade pumpkin pie spice recipe here. I also like to add a little extra cinnamon to my pumpkin pie.
- Eggs – We’re using entire eggs and egg yolk to act as a rich binder for our filling.
- Seasoning – Salt is a very important flavor enhancer for our filling, be sure to include it! It really does bring out all the flavors together.
- Lemon – Were using a bit of lemon zest to brighten up and balance the flavors in our filling. Just a bit makes all the difference.
- Milk – Evaporated milk is recommended because it creates a creamier filling. Evaporated milk actually acts as a thickener in pumpkin pie filling so you don’t end up with a runny mess.
- Pumpkin – This is the star ingredient of our pie. You’ll need pure pumpkin purée, one small can. You can definitely make your own, but it’s so much easier to just use the store-bought canned stuff. That’s what I do anyway. Just make sure you’re using pumpkin purée and not pumpkin pie filling because that has some other spices and ingredients in it.
This classic is a really easy pie to make! And while I’ve provided a delicious crust recipe for you to follow, you can totally use a store-bought crust if you are short on time. Just follow my easy instructions and you’ll have a perfect pumpkin pie in a little over an hour!
Make The Crust
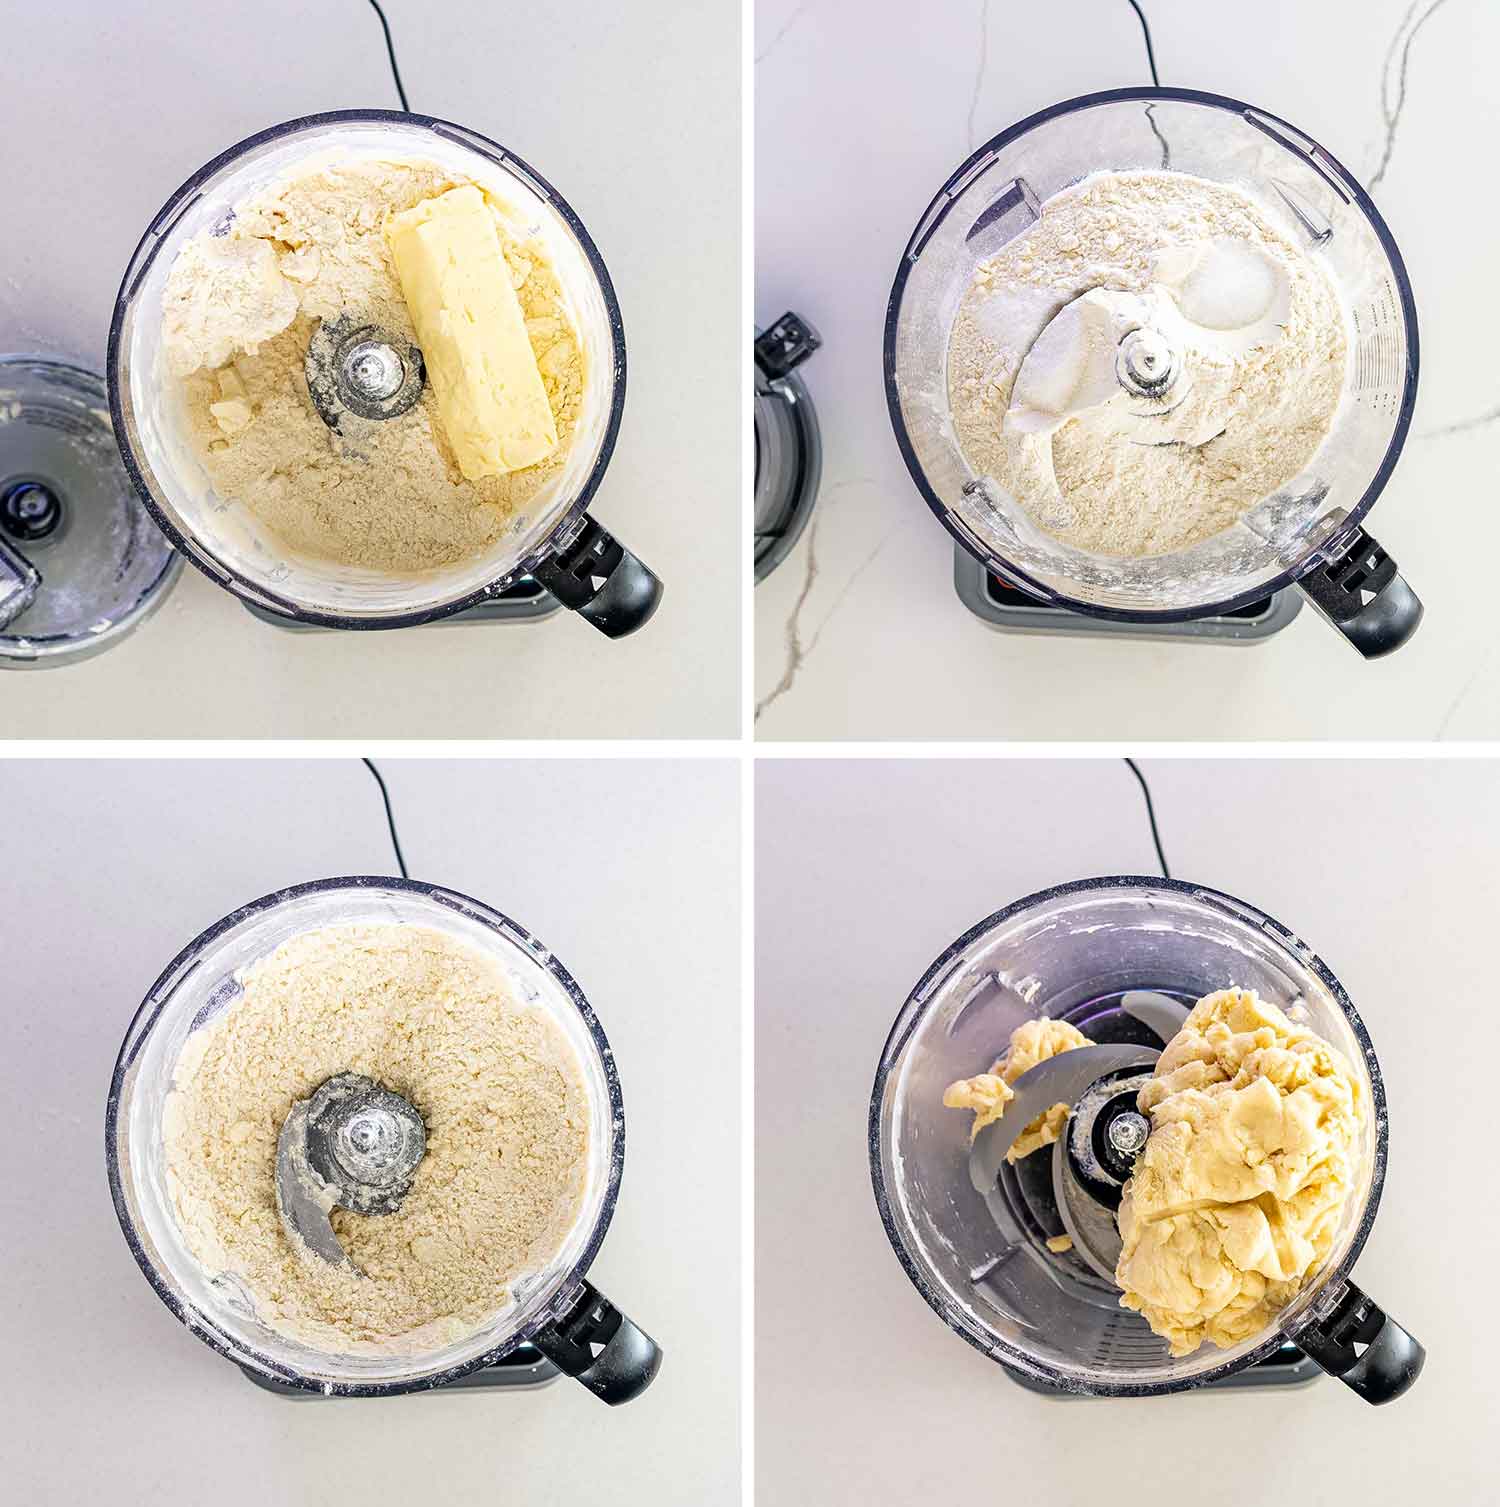
Every pie needs a crust! So to begin, you need to make my easy pie crust recipe. However, it is also possible to use a store-bought pie crust if you prefer or just don’t have the time to make a homemade pie crust. Both options work well.
Preheat The Oven
Next, preheat your oven to 425°F (218°C). The oven needs to be nice and hot to blind-bake your crust. Then get out a 9-inch pie pan and set it aside for a later step.
Make The Filling
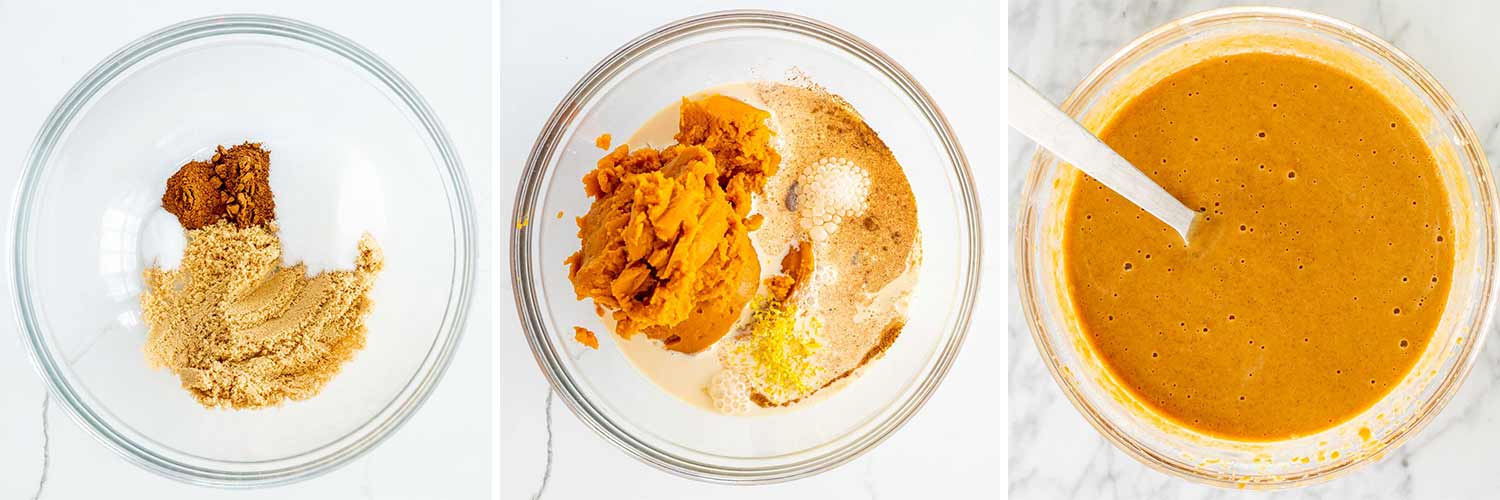
Now you make the yummy filling! First, mix together the sugars, pumpkin spice, cinnamon, and salt in a large bowl. Then add the lemon, egg, evaporated milk, and pumpkin. Now, use a hand mixer or whisk to combine everything together until it’s well incorporated. Then set it aside for now while you finish your crust.
Let The Dough Rest
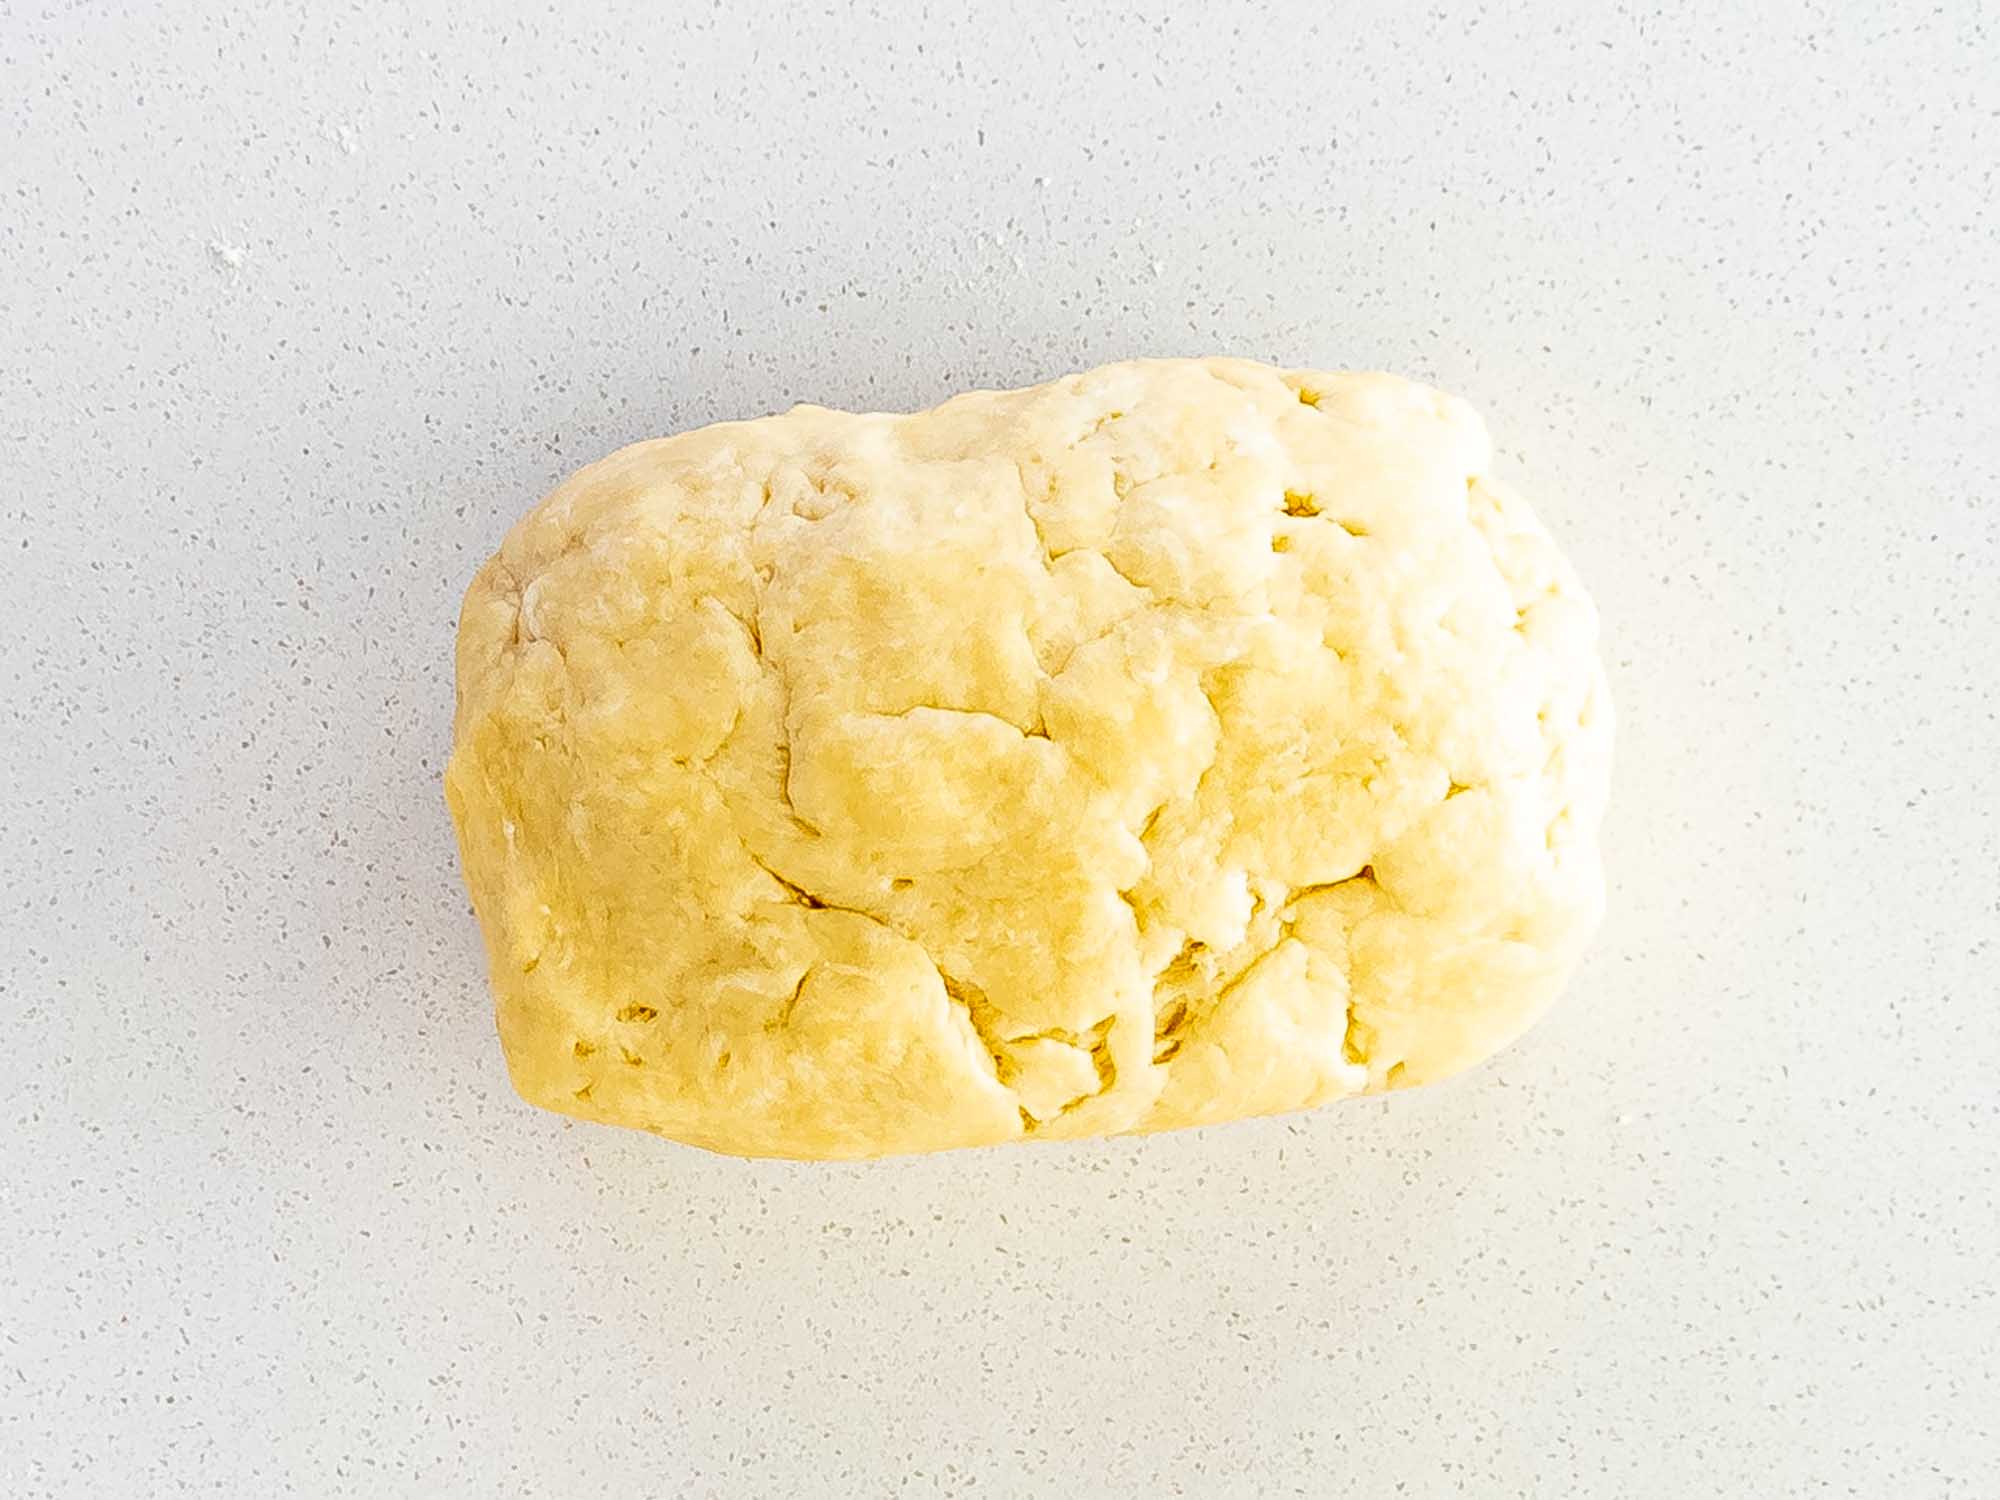
Before you can roll the dough out it needs to rest. So remove the dough from the fridge and set it on a lightly floured surface to rest for up to 10 minutes. This step should not be skipped. The dough must soften up a bit so that it doesn’t tear. However, you only need to do this step if you are making your own crust.
Roll Out The Dough
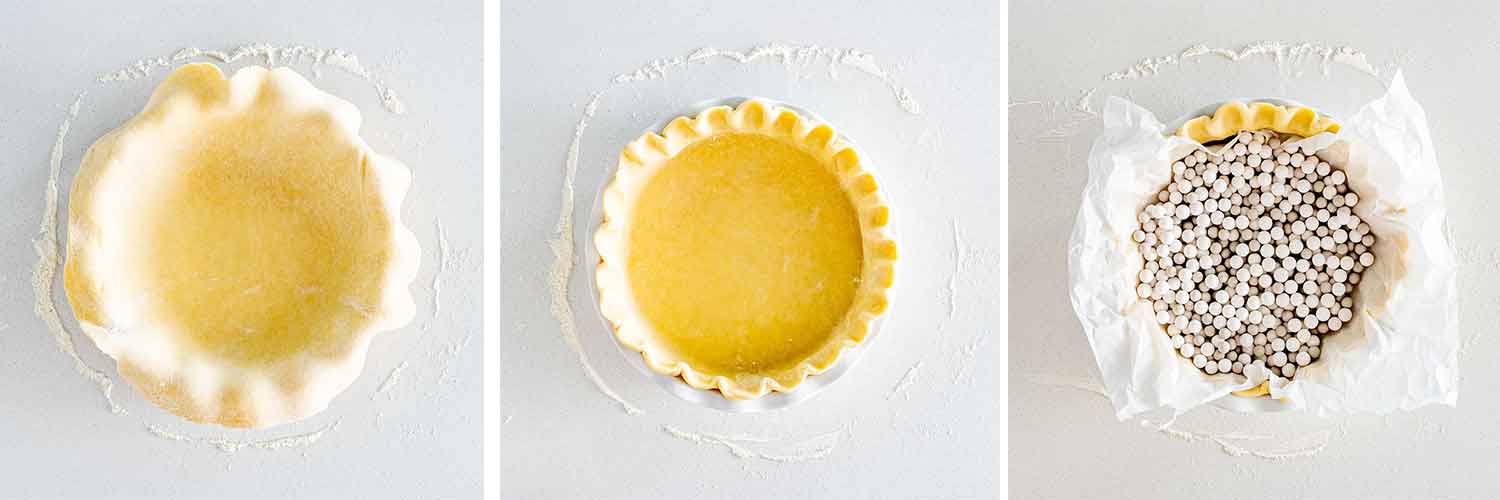
Now that the dough has rested, you can begin rolling the disc of dough out into a circle that is ⅛ of an inch in thickness. When rolling, if the dough starts to stick to the surface or to the rolling pin just add a bit more flour. Then once the dough is rolled out, transfer it to your pie plate by rolling it around the rolling pin and then unrolling it over the pie plate. Now, form the dough into the pie pan, then use your fingers to crimp the edges, and cut off the excess dough.
Blind Bake The Crust
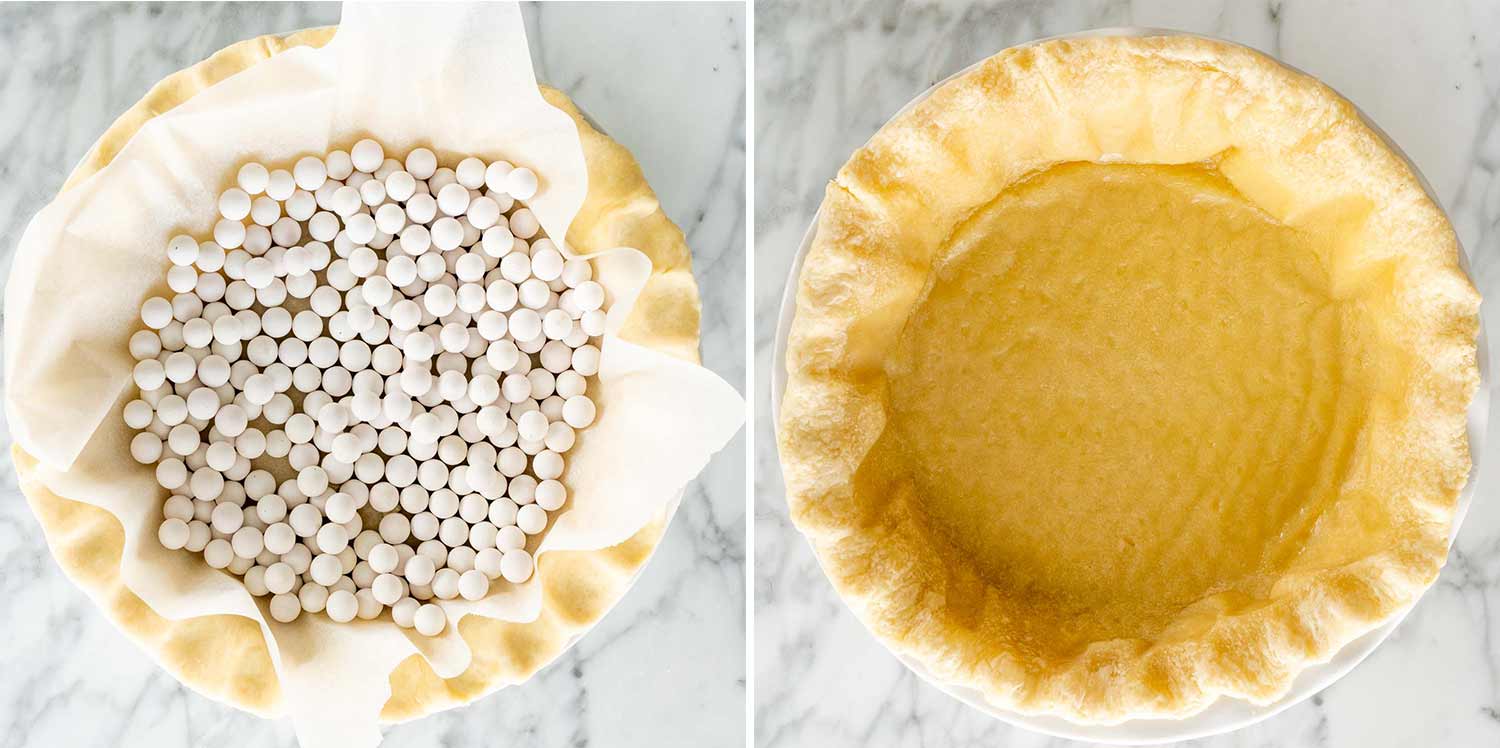
You have to prebake the crust. It ensures that the crust fully bakes and also keeps it from getting soggy. To do this, place a piece of parchment paper over the pie crust and then fill it with pie weights or dried beans. Now, put the crust in the oven to blind bake for15 minutes. Then when it’s done baking, remove the parchment paper and pie weights.
Fill And Bake The Pie

With the crust prebaked it’s time to finish the pie! Pour the pumpkin filling into the crust. Next, transfer the pie to the oven and bake it at 425°F (218°C) for 15 minutes. Then reduce the temperature to 350°F (177°C) and bake it for another 45 minutes or until a knife inserted in the center comes out clean.
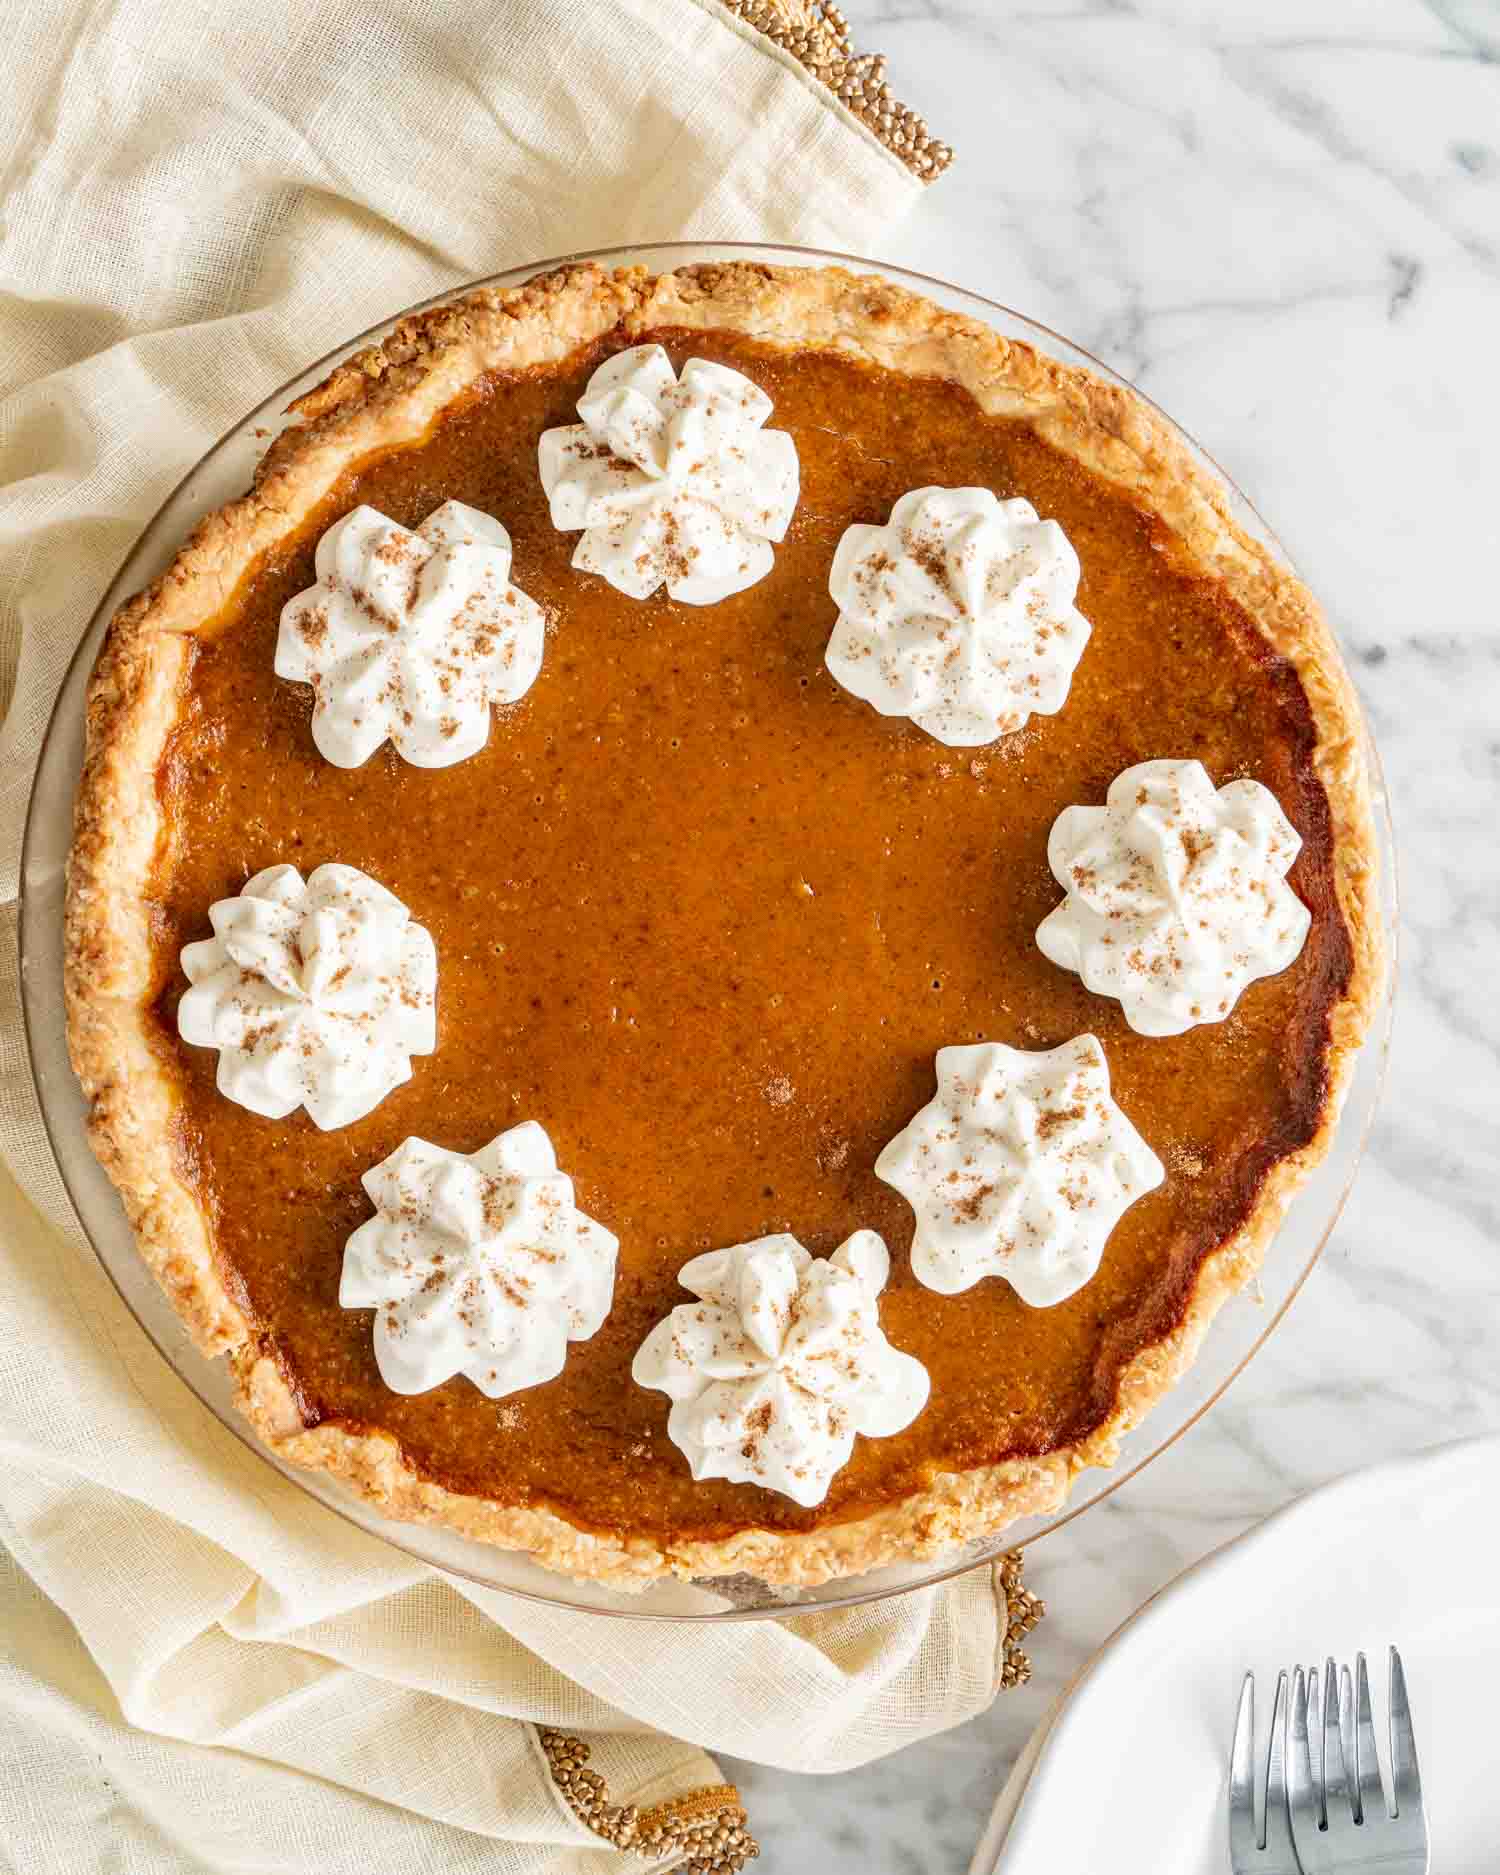
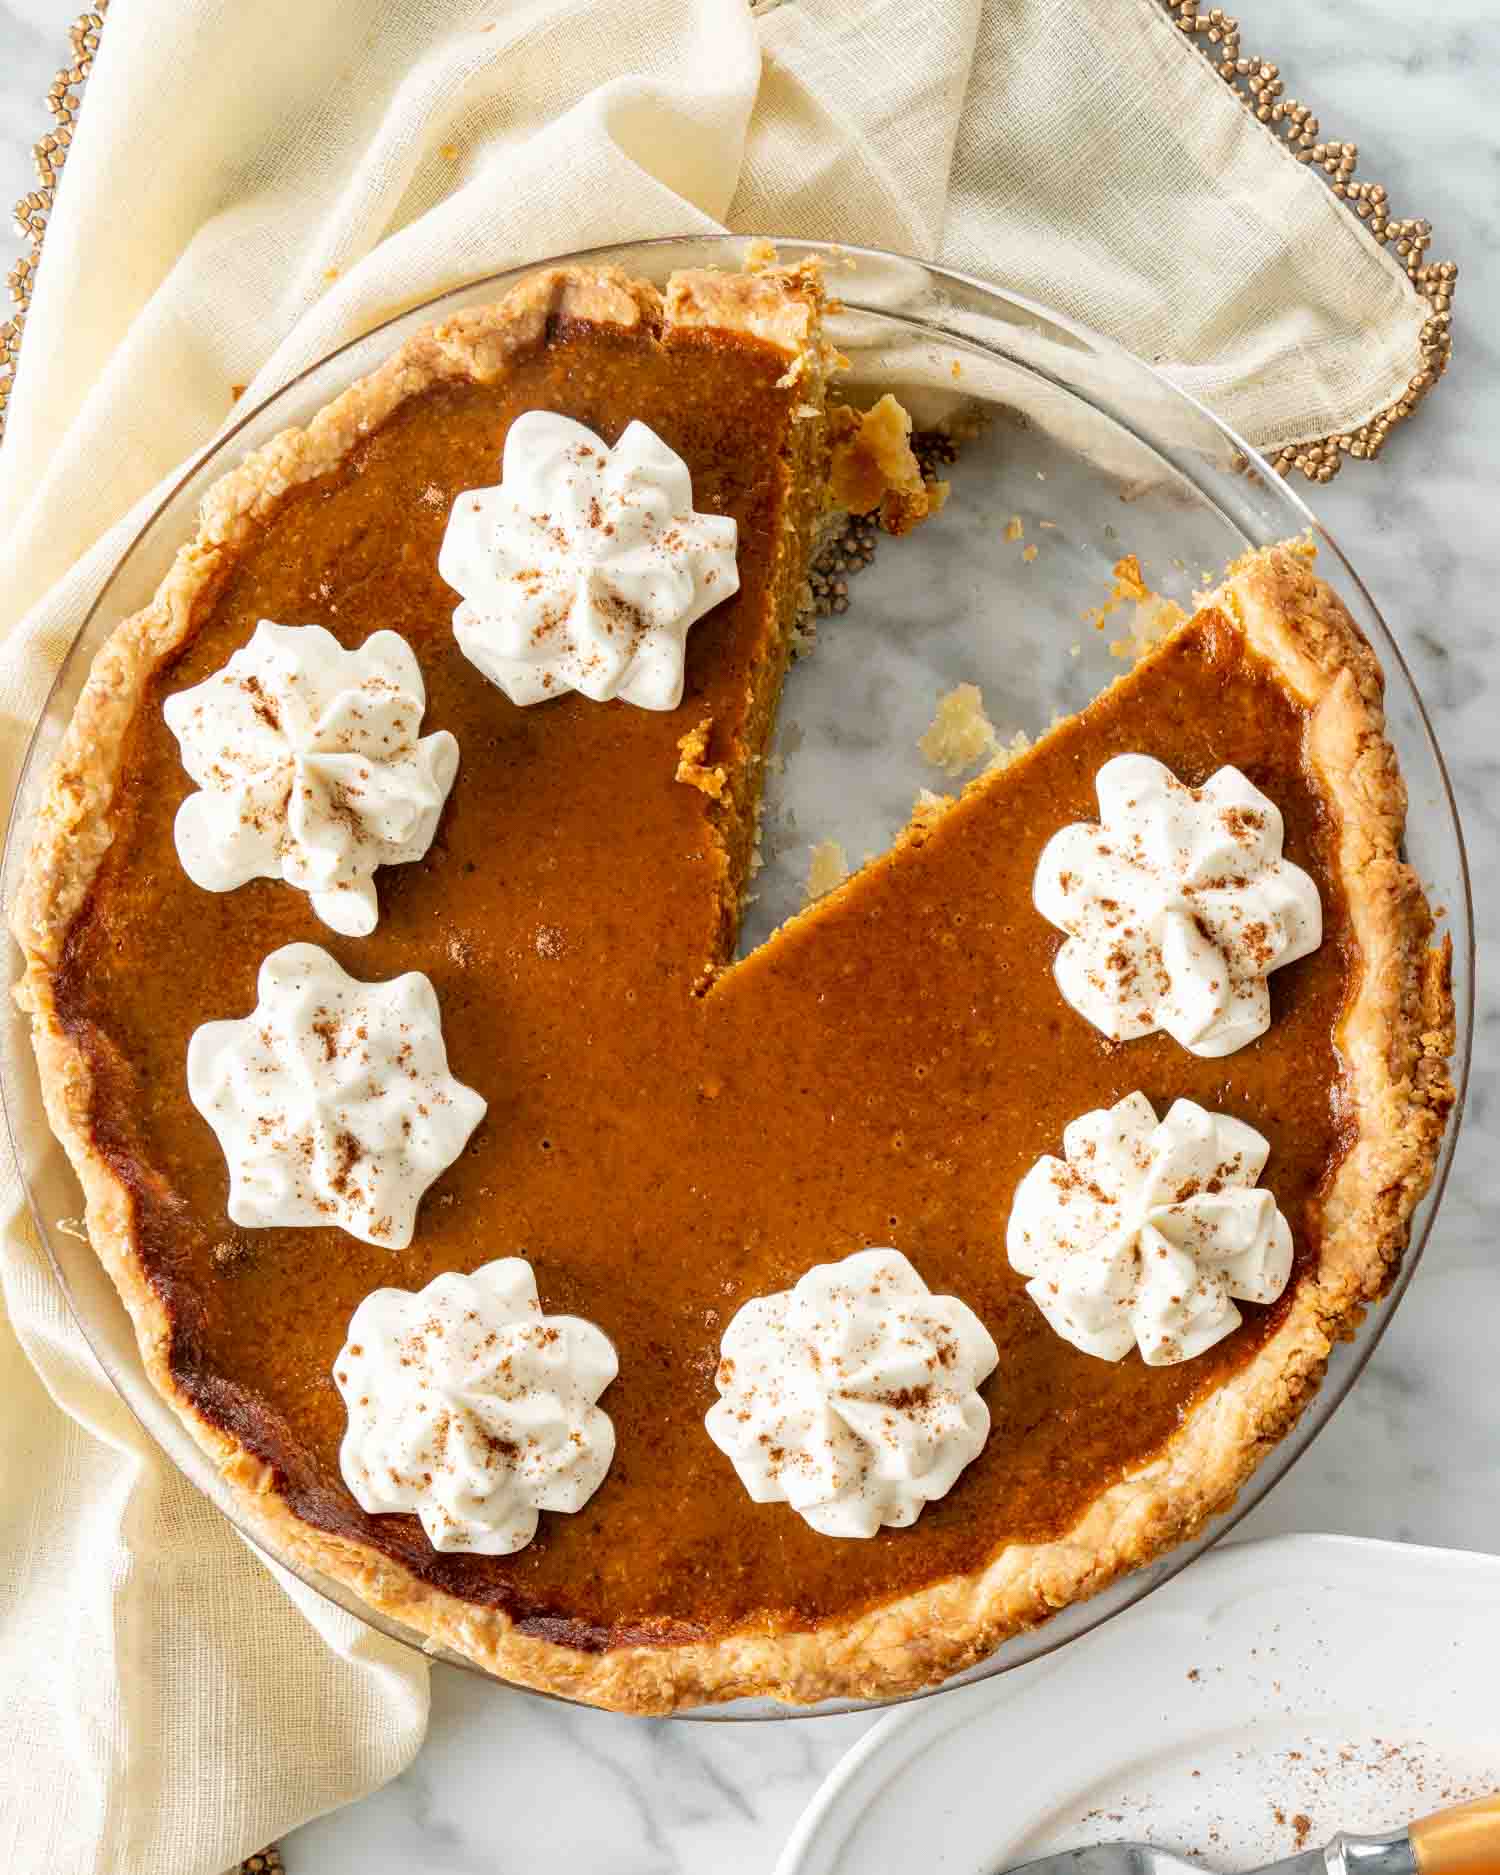
Cool And Serve
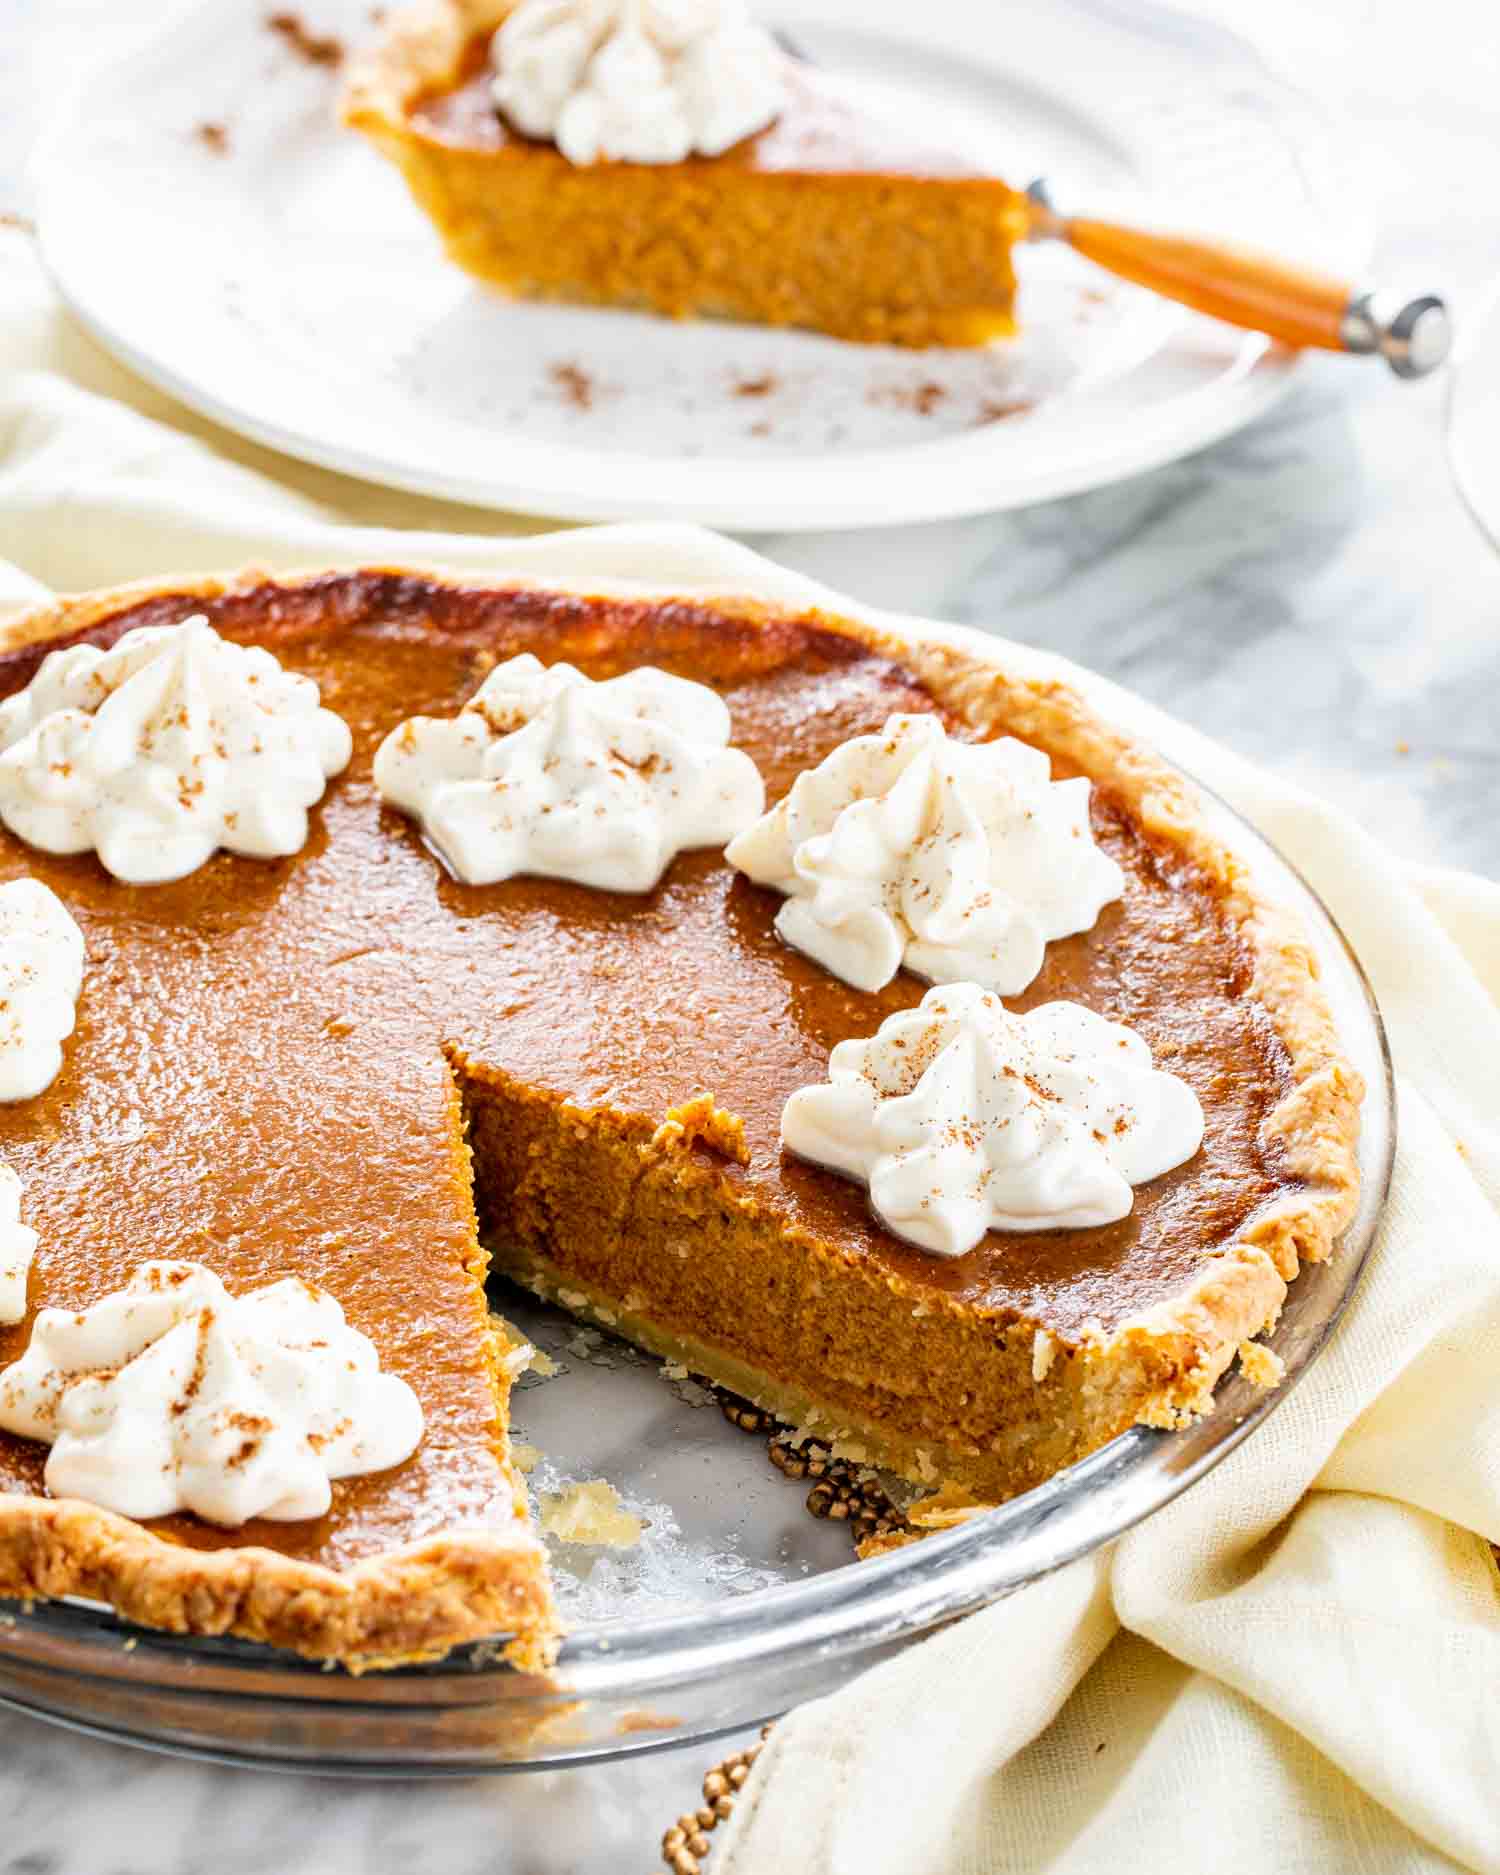
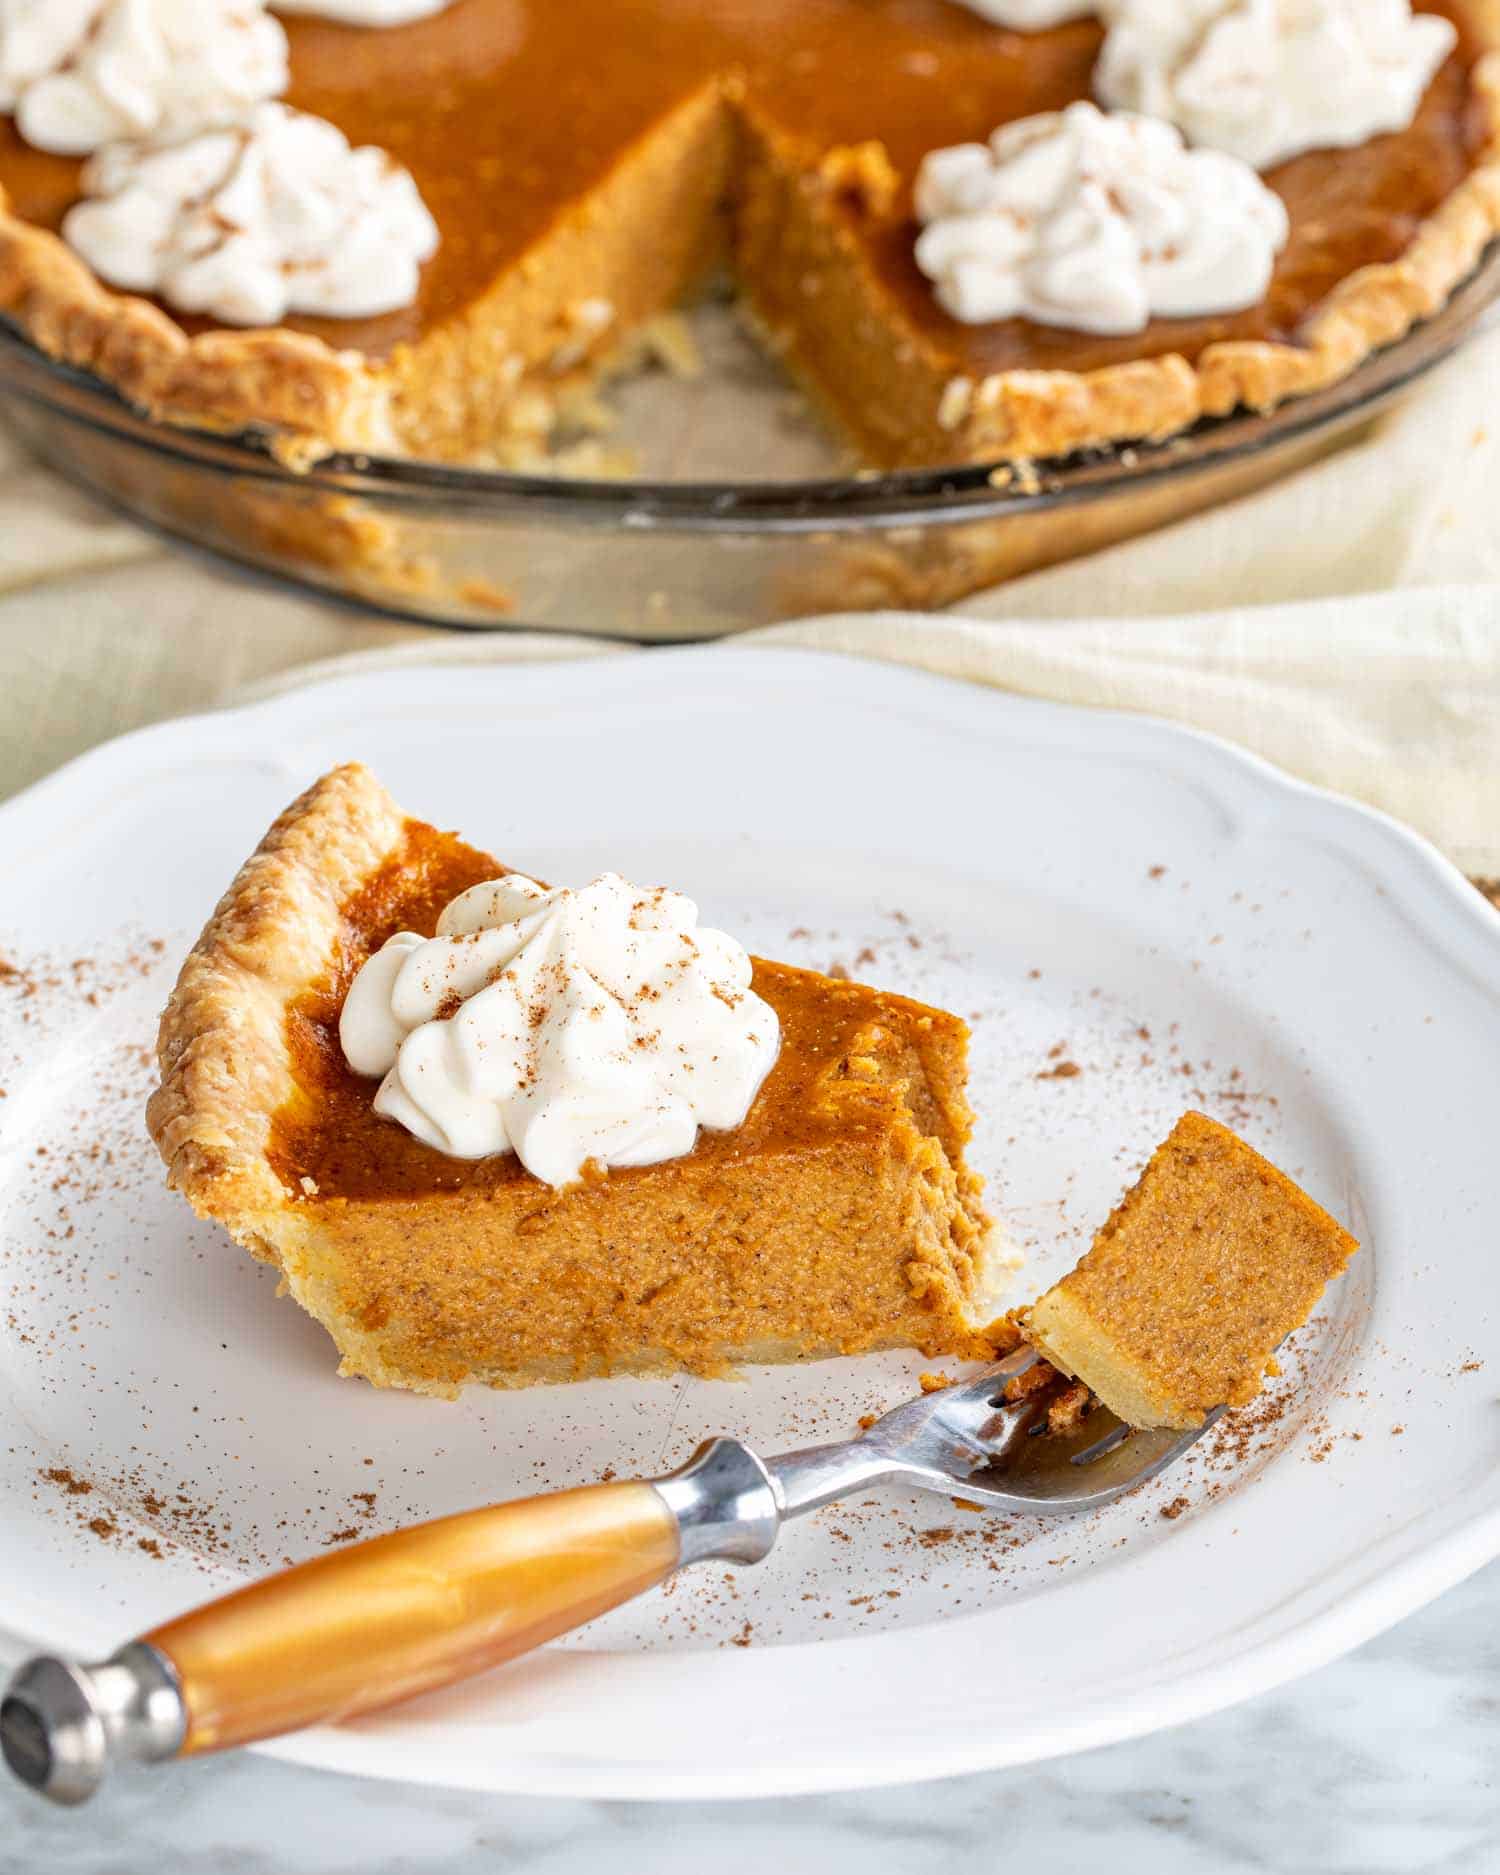
Before you can serve, you must allow the pie to cool completely so that the filling can set. It will fall apart if you don’t. Then slice the pie and enjoy it with lots of whipped cream!
How Do I Know When My Pumpkin Pie Is Done Baking?
Every oven is different so keep an eye on it once you start to reach that 30 minute mark after reducing your oven temperature. The pie should still have a bit of jiggle to it when removed from the oven! Overcooking will cause it to crack.
What Is Blind Baking?
Blind baking basically means baking your pie crust before filling it and baking the entire pie. This is necessary when making a pie with a custard filling like ours here as it prevents the crust from becoming soggy. Don’t forget to read the post on making the perfect pie crust and all about blind baking!
What Are Pie Weights?
These little weights prevent the pie crust from forming air bubbles and from puffing up. The crust will stay nestled nicely right against the pie plate and bake uniformly. You can buy ceramic or metal weights or just use plain old dried beans.
Expert Tips
- Chill The Dough. This is the secret to a flaky crust.
- Pre-bake your crust. This will prevent your crust from getting soggy.
- Don’t skip the brown sugar. It adds a little bit of caramel flavor to the pie.
- Use room temperature ingredients. It’s important to always use room temperature ingredients for the filling because they blend more evenly in batters. Cold ingredients can result in lumpy batter, a stodgy texture and require longer baking time.
- Cool the pie completely before slicing. After baking, you should allow the pie to cool completely at room temperature. You want to make sure you allow the pie to set properly. Cool for at least 2 hours on a wire rack before serving.
Leftover Pie
Pumpkin pies are great because they can easily be made a day or two ahead. You can bake it, cool it, then wrap it in plastic wrap and store it in the fridge until ready to serve.
Can I Freeze Pumpkin Pie?
Absolutely! It’ll last up to a month in the freezer. Just make sure you wrap it tightly with plastic wrap after it comes to room temperature. Wrap it with a few layers of plastic wrap and then a layer of aluminum foil.
To defrost, place the pie in the fridge overnight and let it defrost slowly.
More Must Try Pumpkin Recipes
- Pumpkin Delight
- Best Ever Pumpkin Roll
- Pumpkin Magic Cake
- Pumpkin Pie Bars
- The Best Pumpkin Bread
- Healthy Whole Wheat And Oats Pumpkin Pancakes
- Pumpkin Cheesecake Brownies
- The Best Pumpkin Pancakes
Before You Begin! If you make this, please leave a review and rating letting us know how you liked this recipe! This helps our business thrive & continue providing free recipes.

Classic Pumpkin Pie
Video
Ingredients
Pie Crust
- ½ recipe pie crust
Pumpkin Pie Filling
- ¼ cup granulated sugar
- ½ cup brown sugar (packed)
- 2 teaspoon pumpkin pie spice
- 1 teaspoon cinnamon
- ½ teaspoon salt
- 1 teaspoon lemon zest
- 2 eggs
- 1 egg yolk
- 12 ounce evaporated milk (1 can)
- 2 cups canned pumpkin
Before You Begin! If you make this, please leave a review and rating letting us know how you liked this recipe! This helps our business thrive & continue providing free recipes.
Instructions
- Make the pie crust according to this pie crust recipe. You can also use store bought pie crust.
- Preheat your oven to 425°F.
- In a large bowl combine the sugars, pumpkin pie spice, cinnamon and salt. Add the rest of the filling ingredients and mix well until well incorporated and smooth, using a mixer or whisk. Set aside.
- If using your own homemade pie crust, remove the dough from the refrigerator, and let it sit at room temperature for up to 10 minutes. This is required to soften the dough a bit, so that you can roll it out.
- Roll out the disc using a rolling pin. If your dough is sticking to the surface or to the rolling pin add a bit more flour as necessary. Roll it until it’s about 1/8 of an inch in thickness. Place the pie dough lightly into a pie plate. I usually roll it on the rolling pin and unroll it over the pie plate. (see video) Crimp the edge and cut off excess dough.
- Place a piece of parchment paper over the pie shell and fill it with pie weights. If you don't have pie weights, you can use dry beans. Place the pie shell into the oven and blind bake it for 15 minutes. Read more about blind baking here. Once done, remove the pie weights and the parchment paper from the pie shell.
- Pour the pumpkin mixture into the pie shell and bake at 425 for 15 minutes. Reduce temperature to 350 F degrees and bake for another 45 minutes, or until a knife inserted near the center comes out clean.
- Cool before serving. Top with whipped cream if preferred.
Notes
- Check out the recipe to make this easy pie crust with video and step by step instructions here.
- Chill The Dough. This is the secret to a flaky crust.
- Pre-bake your crust. This will prevent your crust from getting soggy.
- Don’t skip the brown sugar. It adds a little bit of caramel flavor to the pie.
- Use room temperature ingredients. It’s important to always use room temperature ingredients for the filling because they blend more evenly in batters. Cold ingredients can result in lumpy batter, a stodgy texture and require longer baking time.
- Cool the pie completely before slicing. After baking, you should allow the pie to cool completely at room temperature. You want to make sure you allow the pie to set properly. Cool for at least 2 hours on a wire rack before serving.
- Pumpkin pies will last 3 to 4 days stored in the fridge.
- To freeze, just make sure you wrap it tightly with plastic wrap after it comes to room temperature. Wrap it with a few layers of plastic wrap and then a layer of aluminum foil and store up to a month in the freezer.
- To defrost, place the pie in the fridge overnight and let it thaw slowly.
Nutrition Information
Notice: Nutrition is auto-calculated for your convenience. Where relevant, we recommend using your own nutrition calculations.
